• Happy National Garlic Day! 🧄🚫🧛🏼‍♂️

Experimental Plug for a mini-Merlin

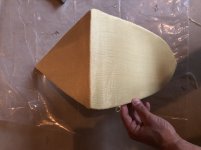
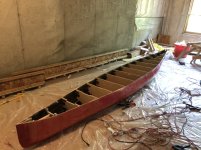
Here is an idea ! Why even have a gunnel ? Just wrap several layers of cloth on the shearline ! No Gunnels to worry about ! No rot !

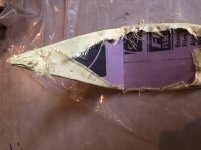
I remember seeing an old Racing hull, without gunnels ! The Shear strip was a wider strip, tapered to blend with the hull.

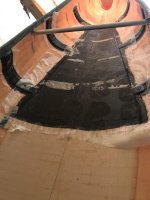
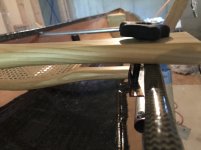
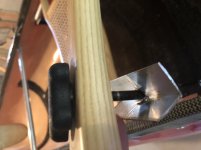
If the Shear strip was a hard wood ? Such as Ash ? No need for Screws, or gunnels ! It would be sealed by cloth and epoxy, part of the hull

I tried that one time too. It works fine on the water but got a little sketchy riding on the roof rack in a very strong side wind. You need thickness to gain real strength and stiffness. A 1/4" strip wrapped with fiberglass doesn't give you that. But I still think it's fine for certain applications like racing or other boats that won't see a hard/abused life.

I once bought an old canoe where the gunwales had been glued in place. They left it sit outside and they rotted off just the same. This was my first time working on canoes and I was a bit of a hack back then (before I'd built my house or any cabinets). I remember some pretty big chunks of fiberglass coming off with the gunwales. I'm sure I could have done a better job but at the time I was doing the best I could. I could replace 5 sets of screwed on gunwales.

I won't argue that gluing them on gives a better bond to the hull and keeps moisture out but I do think that if the canoe is left outside then they're still going to rot. And if you treat your canoe right and keep it inside then they won't rot, no matter which method you choose. So to me it's a moot point. Personally I'm sick and tired of gluing gunwales on and will screw them for a while until I get tired of that too.

I did a nice job rebuilding an OT Penobscot (including new gunwales) and decided to give it to friends for a wedding present. The previous owner had not taken care of his canoe and the gunwales rotted off. I was really glad OT had screwed them in place. Now for the last 4 years it's been sitting on the ground in my friends backyard and I'm really glad I screwed the new gunwales on too.

Alan
 
Today was the day, my brother and I did the layup on the Merlin. I sealed off the basement room in plastic and we had 2 fans going out the window. All the epoxy mixing took place by the window too. I’m pleasantly surprised I can’t smell it anywhere in the house except that little room.

A few notes of (maybe) interest for future builders and my future self:
- I forgot how LONG it takes to get the plug shrink wrapped with window plastic. I spent hours last night trying to get wrinkles out by myself, and my brother and I spent a few hours on it this morning. Luckily, my sister in law loaned us her heavy duty hair dryer. Definitely start this the night before!
- That surfacing veil chop strand mat sucks. Seemed fine on a small sample but is a PITA at scale. It just takes way too long to saturate despite how thin it is and you get clumps of fiberglass on your roller. I made the call early to trim it at about the waterline, so at least there’s something for the foam core to bond to. Given the partial it came out to, I might as well have gone with a 38” 2 oz woven glass or similar. At least my curiosity is satisfied and it will still serve the intended purpose.
- The leftover 9 oz Kevlar I had was actually a couple inches short. No big deal, I just made the stem pieces (5 oz aramid inside and out) a little thicker. My wife suggested I paint it red anyway for safety going solo in the Bwca, so the different shades of yellow won’t matter. Maybe the red paint won’t either lol.

I took some screenshots from a time lapse video I did but they’re apparently too big to upload. Here is the link to the video, and a picture of the day’s work. https://youtu.be/lI3DzElt6C4
 

Attachments

  • photo15750.jpg
    photo15750.jpg
    227.4 KB · Views: 2
Take a sniff of your cloths, you wore while glassing Mine smell like epoxy for days.

So it looks like overlapped seams, going from shearline to shearline ? Am I seeing that right ?

Did your cloth follow the tumblehome ? I had trouble, and had to coax it.
 
I had a T-shirt and old long sleeve shirt on under a cheap rainsuit. My t-shirt was drenched when we were done. That smells, but not of epoxy. The rain suit is probably stuck to itself in the corner.

I think what you’re seeing in that pic is the peel ply, which are cut into about 14” strips laid horizontally across the hull. The only overlapping fabric is at the stems which is a little darker fabric.

The tumblehome was fine, actually. Trimming the excess Kevlar made a big difference as there wasn’t any weight trying to drag it down/off. Light fiberglass and peel ply may have helped too. I did take your advice on shrink wrapping above the tumblehome to avoid creating a bridge. I put 2 rows of packaging tape on first over the uncovered area. My partall is that purple liquid and I didn’t want to screw up the drywall. It should release, just a question as to whether the tape comes with it.

Yes, It does look like Peel Ply.

Good the glass stuck to the tumblehome, Gravity can work for or against you. It was the only place that worried me on mine.

Actually tipping the mold, and glassing one side at a time worked in my case.

I have more faith in Partal now after using it on a Royalex hull. It cleaned up well. You shouldn't have any problems with release !

Thanks !
 
It has certainly been a minute since I’ve posted an update. With everything going on in life and the revolution beginning in Minneapolis that no one would have predicted would start here but Prince, I’ve been a bit occupied physically and mentally. Working on this build has been a good distraction, and a bit therapeutic.

I added 3 layers of 4 oz S-glass to the stems, using red pigment in the epoxy. Then I did the fill coats with red epoxy too. Clearly, this won’t be enough for a solid color, no pun intended. I’ll paint it at the end, but I’m hoping the inevitable scratches won’t show as badly.

After waffling on whether or not I wanted to save the plug and cut a stem open, I realized I needed the basement space for other projects and my love/hate relationship with the scraggly beast was leaning more towards hate. With a lot of unscrewing, I freed up the gunwale line to more accurately trim the excess fabric. I also marked the width measurements at each station with tape. So glad I did that. Then I gutted the plug with a good balance of tact and aggression. It all pretty much fit into the garbage can to my delight.

Weight: 13.5 lbs
 

Attachments

  • CDB8D26A-5DCD-400B-8DD4-0DE7BDE980AF.jpeg
    CDB8D26A-5DCD-400B-8DD4-0DE7BDE980AF.jpeg
    187.9 KB · Views: 3
  • 7FC7C504-C805-4E25-9EAC-C6FA49774DE3.jpeg
    7FC7C504-C805-4E25-9EAC-C6FA49774DE3.jpeg
    187.2 KB · Views: 2
  • 607B613E-EA94-4626-8532-E56A919F5567.jpeg
    607B613E-EA94-4626-8532-E56A919F5567.jpeg
    261.8 KB · Views: 2
  • 7DE77224-27BA-4A76-8D83-AB1E00EB1BC6.jpeg
    7DE77224-27BA-4A76-8D83-AB1E00EB1BC6.jpeg
    245 KB · Views: 3
  • A705191B-4D0C-4183-B608-0F126FB5EDE4.jpeg
    A705191B-4D0C-4183-B608-0F126FB5EDE4.jpeg
    277.9 KB · Views: 3
Click image for larger version  Name:	F3EF7200-A49A-493E-9836-250C2495B323.jpeg Views:	0 Size:	166.4 KB ID:	112598 Next step was the gunwales. I’m sure this is 75% of the reason you’re following this :)

To recap, I’m using 2 strips of 1/4” divinycell stapled at the top and strung through a carbon-Kevlar sleeve. It’s applied like a uni-wale where one side straddles each side of the hull. See an earlier post for a visual.

Short story: It worked!!!!

Complications: This foam has precut skits that make it sheet with 1 1/8” squares on a mesh. Great for the curves on a foam core, tricky when you want a smooth fair line, like in gunwales. I didn’t mention in the last post that before I took the shell off the plug, I shaped the gunwales into place and liberally stapled them together 15’ long and used plenty of painters tape to hold them together. After removal, more staples were added on the opposing side. Then you can take the painters tape off, you do not want to leave that inside a layup. Still a spaghetti noodle, but al dente. Then came the task of stringing the composite fabric tube along the length.

When it came time to lay it up, I spread epoxy along the hull where it was to be placed with a foam brush, and then spread epoxy just in the slit of the uniwale with a popsicle stick. Once you carefully apply the gunwale into place, you’ll have enough time to get the epoxy into the rest of the fabric. Again, peel ply helps hold it into place and ensures proper adhesion. I did one gunwale at a time and I think this works well because you really want to make sure the stems are adhered well and covered.

New weight: 17 lbs.

That’s only 3.5 lbs addition. They felt a little floppy which meant the whole hull felt floppy. I didn’t want to risk it, so I covered them with a layer of 6 oz E-glass. MUCH better now.

Are they perfect? Nope. That’s an impossible task with a hull that isn’t factory true, foam that has slits every 1 1/8” and are held together with staples, and being laid up by hand in my basement. But they turned out exactly as I had envisioned and probably weigh 5 lbs total.

I was estimating a 33 lb boat, but I’m afraid I’m coming in way too light. I decided not to make my own seat and yoke this time so maybe that will cover it (and save some time!)
 

Attachments

  • 623486EC-6B72-483C-BCA1-2D3F44B9B211.jpeg
    623486EC-6B72-483C-BCA1-2D3F44B9B211.jpeg
    216.5 KB · Views: 2
  • 08CD1E60-CAE1-4E6B-9A08-6A8CB7C4BE17.jpeg
    08CD1E60-CAE1-4E6B-9A08-6A8CB7C4BE17.jpeg
    149.4 KB · Views: 2
  • 230C9C7D-D8BF-4972-88B7-CED6236CD461.jpeg
    230C9C7D-D8BF-4972-88B7-CED6236CD461.jpeg
    229.9 KB · Views: 2
  • 6209AC1A-3267-47C0-8C70-96859E6332A8.jpeg
    6209AC1A-3267-47C0-8C70-96859E6332A8.jpeg
    247 KB · Views: 2
  • DB661002-AEE4-4F61-AF47-4D10457A921B.jpeg
    DB661002-AEE4-4F61-AF47-4D10457A921B.jpeg
    243.8 KB · Views: 2
Last edited:
A little tear fell from my eye, when I saw the plug in pieces, next to the hull. ! I'l try and get over it ! :rolleyes:

Just a point to ponder. My Black Pearl composite, 16', with wood trim, flotation chambers ( The only place I used foam ), and a 1/8" cedar insert, ended up weighing 36.5 #.

So far you are well under that.

Jim
 
I’ve been scrambling to get this done before we leave for our trip tomorrow and it is finally complete! I’ll post some detail on how it went and some learnings that may be helpful.

Picking up where we left off..
The next step was putting in the foam core. This is where that scrimmed/scored divinycell is really clutch as it can form to curved surfaces. The sheet was 32”x48” and it was cut at 2 angles to create equal sections that span 8 feet. I also installed ribs to provide more hull stiffness. I think it is really important to use epoxy to glue them down to ensure they don’t pop out under pressure when you slide over a rock.

I laid the foam face down so I have a smooth surface to lay the carbon fiber onto (or whatever material you use). After gluing down the foam, I laid small bags of sand over it for a complete bond. I used painters tape to hold down the vertical ribs. After it cured, I used a utility knife to slice the edges to a 45-ish angle, then sanded smooth. I went through many blades, as you really want a sharp edge to get through the foam cleanly. Don’t worry if it comes out choppy though, sanding will smooth it all out fine.

I cut the carbon fiber (6 oz intermediate modulus, twill weave) in the same manner as the foam as well as a 3.2 oz tightly woven fiberglass veil cloth and laid them up. Spraying a very light line of 3M 77 spray prevents major unraveling when you cut the fabric. I laid one side at a time, covering it in peel ply and again with the sandbags. Be careful with the sand this time, jamming them down/around can cause wrinkles in the finished product.

Next: Floatation chambers...
 

Attachments

  • 5D57B590-B2B6-48AC-8E1D-B056B2B080E1.jpeg
    5D57B590-B2B6-48AC-8E1D-B056B2B080E1.jpeg
    297.9 KB · Views: 1
  • 829B9B61-39ED-4C7B-A117-DCC90330347F.jpeg
    829B9B61-39ED-4C7B-A117-DCC90330347F.jpeg
    323.2 KB · Views: 1
  • 4AF4DEF2-F64E-46D1-A361-C85D7DF05613.jpeg
    4AF4DEF2-F64E-46D1-A361-C85D7DF05613.jpeg
    311.3 KB · Views: 1
  • 38E08229-7512-47B3-9C3F-EF45F6C2144B.jpeg
    38E08229-7512-47B3-9C3F-EF45F6C2144B.jpeg
    324.5 KB · Views: 1
  • 8EF43EC1-7597-423E-B2CA-798C1204E3D4.jpeg
    8EF43EC1-7597-423E-B2CA-798C1204E3D4.jpeg
    765 KB · Views: 1
One small benefit of building the plug from forms is that you already have pre-cut templates for your float tanks - the last station molds. This is the only pink foam on this hull. It still requires a little bit of sanding to fit, but it is pretty straightforward. I think Jim or someone has a good post that shows how you measure the length and then take width measurements every couple inches to achieve the right size. I did that for the top portion of the float tanks.

I tried a few methods and this is the best I’ve discovered so far for installing them. I’m sure it will evolve and others may have figured out superior techniques.
- Dry fit the vertical and horizontal pieces into place.
- Push some trim screws down through the two pieces to hold them together and tape the seam with packaging tape.
- Cut some fiberglass to fit on the inside of tank (non-taped side) and epoxy it down.
- Trim the fiberglass after cured and remove the tape on the other side.
- Wrap the dry exterior cloth tightly around the foam piece and staple it to the back.
- Epoxy the edges of the float tank and where it will be placed, and insert it
- Wet out the rest of the exterior cloth and a little extra around the seams. Done!

After it cured, I squeezed the hull where the float tank was and could hear a little air coming from somewhere. I decided to caulk the seams just to be safe and that seems to work! Long term, I might need to put in another epoxy seal but time was limited for now.
 

Attachments

  • DDB0101A-81B7-4AB9-9D21-B7C8900D65B1.jpeg
    DDB0101A-81B7-4AB9-9D21-B7C8900D65B1.jpeg
    195.4 KB · Views: 1
  • DD276154-81AE-474F-B92F-992DF77BDAFC.jpeg
    DD276154-81AE-474F-B92F-992DF77BDAFC.jpeg
    219.9 KB · Views: 1
  • 4FA7652B-019A-4386-B5A9-23BAB0F485BF.jpeg
    4FA7652B-019A-4386-B5A9-23BAB0F485BF.jpeg
    207.9 KB · Views: 1
  • 94F774D7-4474-438F-A7E2-5AA064A6CDBA.jpeg
    94F774D7-4474-438F-A7E2-5AA064A6CDBA.jpeg
    213.1 KB · Views: 1
  • 3535D18D-6390-45EF-86DC-26E3C8EAA986.jpeg
    3535D18D-6390-45EF-86DC-26E3C8EAA986.jpeg
    235.2 KB · Views: 1
Finishing touches: Hardware and paint

First, paint. I used red tinted epoxy for a fill coat which does not leave a visually acceptable solid color, but might make the inevitable scratches less drastic. I rolled a single coat of red rustoleum Marine topcoat paint which seems totally fine for now. I can always add a 2nd coat another time if needed.

I had to get creative with the hardware on this build. I have to admit, this was one of the most fun problem-solving parts of the build. With thin composite gunwales, the hanging of seats, thwarts, and factory clamp-on yokes are out of the equation.

Thwarts:
I had to glue, then screw some small L hangers under the gunwale line to create something for the thwarts to attach to (see picture).

Seats:
I wanted to install a sliding seat because I’m sure I’d need to adjust the trim when changing between tripping, day paddling, sitting, and kneeling. I bought a contoured ash seat from Northwest Canoe which is really nice for a decent price. Got some canoe straps and yoke from them too, great people! Anyway, I tediously measured out the precise placement for the angled aluminum sliding rests because I also put the ribs directly under those spots to provide as much weight support as possible. it gives me about 9.5” of clearance from the base of the hull.

The front angled aluminum is 1.5”, the back 1” due to the change in width of the hull at the different points. I totally spaced on this being an issue and got dang lucky the front placement width was exactly 1” wider than the back, meaning that last piece of 1.5” stock at Menards fit perfectly.

The other issue I ran into was that I needed to find a way to attach the seat to the plastic tube that slides along the aluminum poles. I left zero space between the wall of the hull and the aluminum tube so I needed to find a way to attach it through the seat.

I ended up drilling slits through the ends of the seats and slid some pipe clamps through them, and then around the black plastic tube. It looks like it will work! The seat is a little tough to slide, but I’ll take that over a super sliding row machine out in the wilderness.

Yoke:
Man, I tried so many different setups for this that I don’t want to go into. In the end, the simplest solution was the best. Using that same 1” aluminum angle stock, I drilled a hole in the center crease and put a bolt through the bottom. Magic.
 

Attachments

  • E08F51A6-024C-4806-BFD8-2F8177D3C0B3.jpeg
    E08F51A6-024C-4806-BFD8-2F8177D3C0B3.jpeg
    118.7 KB · Views: 4
  • E76FD47E-1A10-4CCE-ABF4-AC84D9D25A98.jpeg
    E76FD47E-1A10-4CCE-ABF4-AC84D9D25A98.jpeg
    172.8 KB · Views: 4
  • 52BC1ACA-B31E-47C9-9B98-9B239414D5CB.jpeg
    52BC1ACA-B31E-47C9-9B98-9B239414D5CB.jpeg
    170.5 KB · Views: 4
  • C341ABFC-DCB7-4289-A514-E5F8B9894B9A.jpeg
    C341ABFC-DCB7-4289-A514-E5F8B9894B9A.jpeg
    157 KB · Views: 4
  • C03D0339-D292-43A6-AD49-A827984570E7.jpeg
    C03D0339-D292-43A6-AD49-A827984570E7.jpeg
    175 KB · Views: 4
  • E5CE7EFC-704E-431E-A078-34E1EA50D0E0.jpeg
    E5CE7EFC-704E-431E-A078-34E1EA50D0E0.jpeg
    159.4 KB · Views: 4
  • 671716BD-9B5E-4FC2-B770-A44588215B00.jpeg
    671716BD-9B5E-4FC2-B770-A44588215B00.jpeg
    200.9 KB · Views: 4
  • 5B9921B1-7F89-4F30-8D17-78D59DD1F7BE.jpeg
    5B9921B1-7F89-4F30-8D17-78D59DD1F7BE.jpeg
    254.1 KB · Views: 4
  • 20A31CCB-D5D9-4B40-8F0F-96C20FCEAEE1.jpeg
    20A31CCB-D5D9-4B40-8F0F-96C20FCEAEE1.jpeg
    228.4 KB · Views: 4
  • 2FDA8D76-105D-4049-9D0B-BDD7EB45D772.jpeg
    2FDA8D76-105D-4049-9D0B-BDD7EB45D772.jpeg
    240.8 KB · Views: 4
I'm impressed Mike !

Your trip will be a true test. Many people take their canoe out for a day, and give it a glowing report. Some people are good enough paddlers to do that !

Taking a hull for a week, or longer tells you so much more ! That is when little things come to light.

Glad you are doing just that ! You probably won't see this until you get back ! So I'll send a Telepathic Message . " Have a Great Trip ! And Nice Job ! "

Jim
 
Back
Top