- Joined
- Jul 6, 2021
- Messages
- 643
- Reaction score
- 1,184
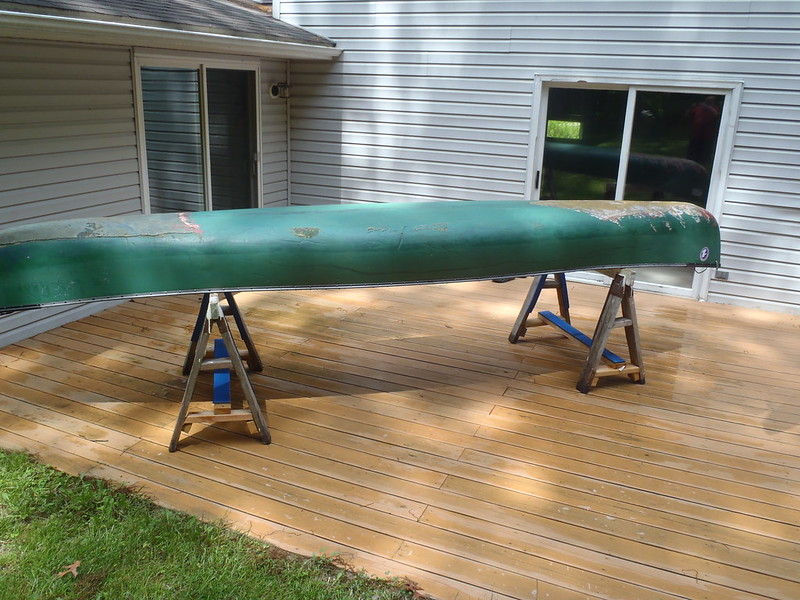
The Dreamboat is a flat bottomed Royalex tandem that I originally rebuilt years ago and gave to needed-a-boat Tom. Tom really needed his own canoe. First paddling trip with Tom in his wife’s Mohawk Rogue - high sided deep and well rockered for serious whitewater, with a Perception saddle – we were tidal marsh tripping and I saw a most peculiar sight.
There was the distinctive thump-boom-splash sound of a canoe capsizing when, suddenly, shooting skyward into view, above the tall waving Spartina grass, there briefly appeared the red Royalex bow of a Mohawk Rogue. A Rogue canoe, the other rogue was enjoying the pluff mud bottom of the Transquaking Marsh loop. Both were eventually recovered, the canoe none the worse for wear. Tom, IIRC, had lost one shoe to the marsh mud bottom, and considerable of his remaining dignity.
Not just witnessed by me, with the advance warning of the thump-boom-splash everyone else had time to turn and watch that canoe projectile. I haven’t seen a rocket launch from my canoe yet, still on my bucket list, and that was probably my only opportunity to witness such a flatwater canoe launch.
Tom called the Dreamboat “Das Uberbot” because it weighs as much as a German submarine. While it made a better marsh canoe than the WW Rogue it had some submarine qualities in other paddling uses; going over drops the bow had a tendency to take on a wee bit of water.
 EK_0023 by Mike McCrea, on Flickr
Methinks float bags would have been a good thing in the Uberbot on that Yellow Breeches trip.
The Uberbot, borrowing from ALSG’s esprit de escalier considerations, henceforth to be named “Yet Another Rebuild Rebuild”, or YARR for short
Yar: agile, quick, easily maneuvered, nimble
I expect the re-rebuild will possess none of those nimble qualities. Produced by Dreamboat Company in Indianapolis in 1984, YARR is 16’ 2” long, 14” deep and, originally, around 33” wide. “Around” because I drew the gunwales in a touch on the original rebuild, and it is now 31 ½” wide. Maybe an original Warsaw Rocket? Anyone know the “Rocket” dimensions?
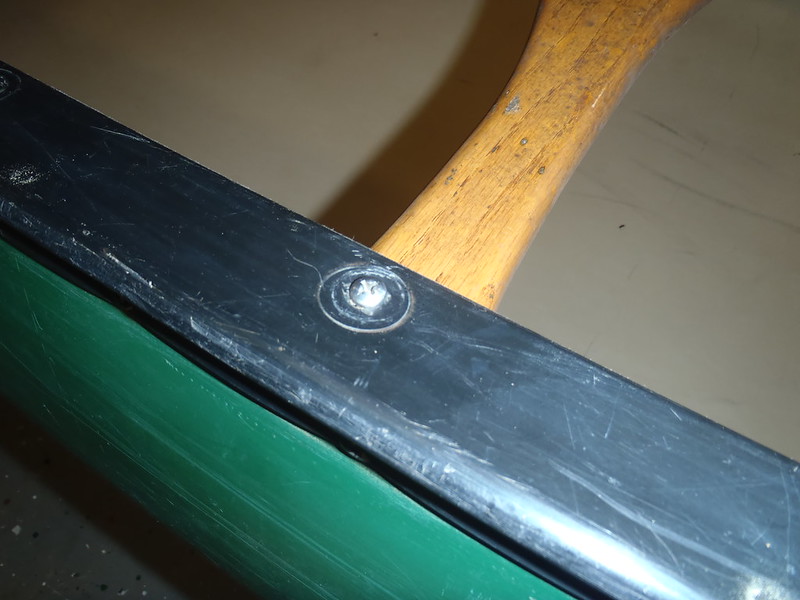
The original rebuild shows many early rebuild touches. New vinyl gunwales replacing rotted wood; doesn’t everyone install vinyl gunwales using 3” pop rivet spacing? What was I thinking? (WWIT)
 P5210028 by Mike McCrea, on Flickr
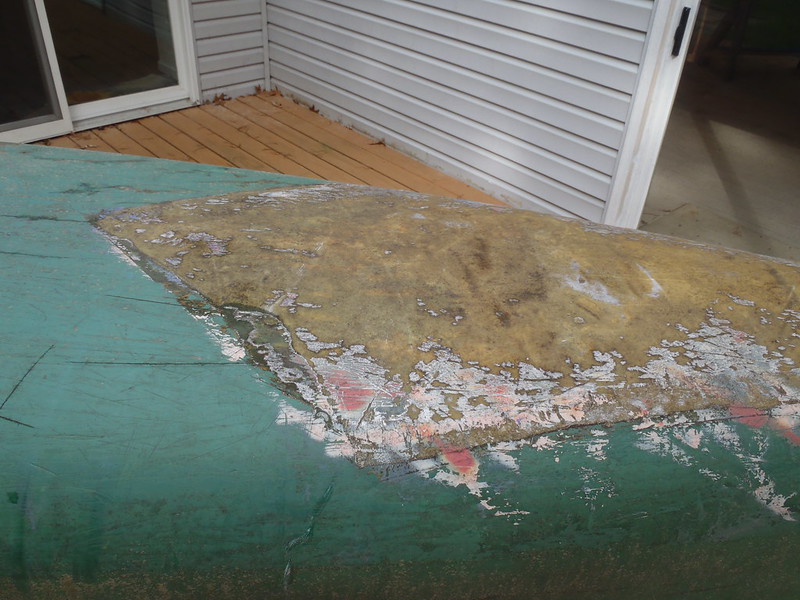
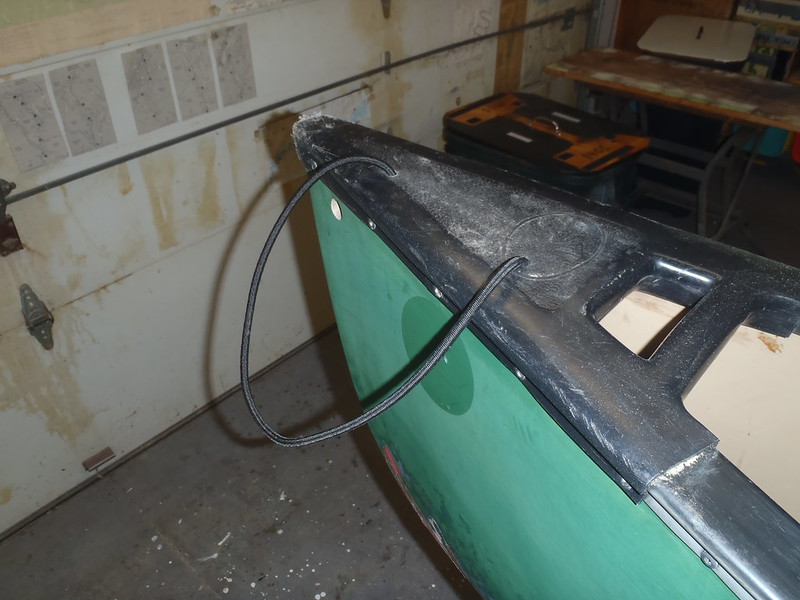
Both stems were badly worn over a large area, so massive 5 foot long x 2 foot wide kevlar felt skid plates. At the time I had never heard of Dynel, or peel ply, or even beveling down the abrupt edges of kevlar felt with a tongue depressor as the epoxy set up. The uncompressed and un-edge beveled kev felt stands tall still today. “Pretty work”, as my old mentor would mutter in semi-disgust.
 P5210015 by Mike McCrea, on Flickr
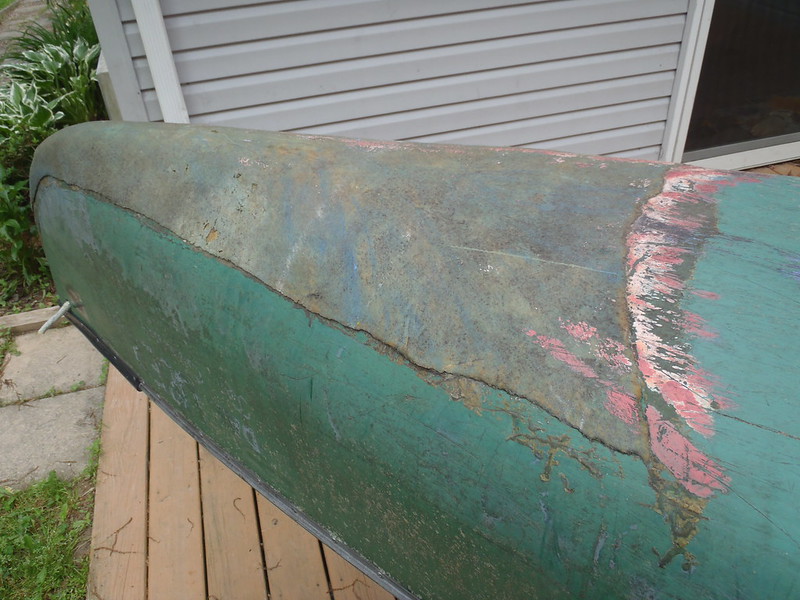
Tom’s artistic lettering of “Das Uber Bot” has faded to near illegibility, and I wish I could make out what the subtitle beneath reads; I should ask him, there is subtext there.
 P5210029 by Mike McCrea, on Flickr
Wilhelm, properly pronounced with a harsh lip-spittle V, is a great Undersea Bot captain’s name. Recipient of the Saturated Cross with Watercress Custers, responsible for multiple sinking’s.
 P5210016 by Mike McCrea, on Flickr
Mostly sinkings of himself. The Uber Bot, without Captain Vilhelm aboard, proved capable of running WW, high and dry, all on its own, and would often nose over next to me, sans Tom, like a faithful dog as I waited in some eddy below a drop.
I would praise it “Good boy, good boat”. Once, on a peculiar lining escape when Tom’s “Nots-no-K” let loose, I admittedly shouted “This is the best day ever!” as Uber Bot floated the run out to nuzzle empty alongside my canoe.
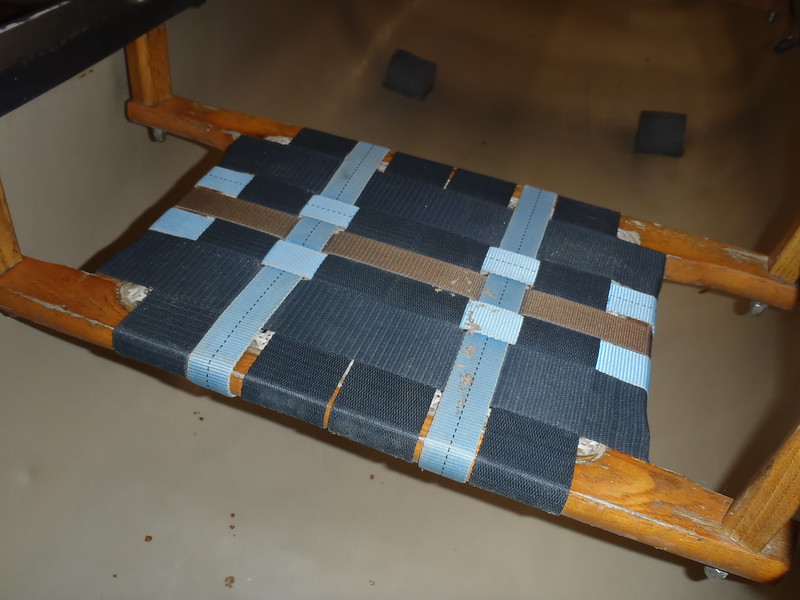
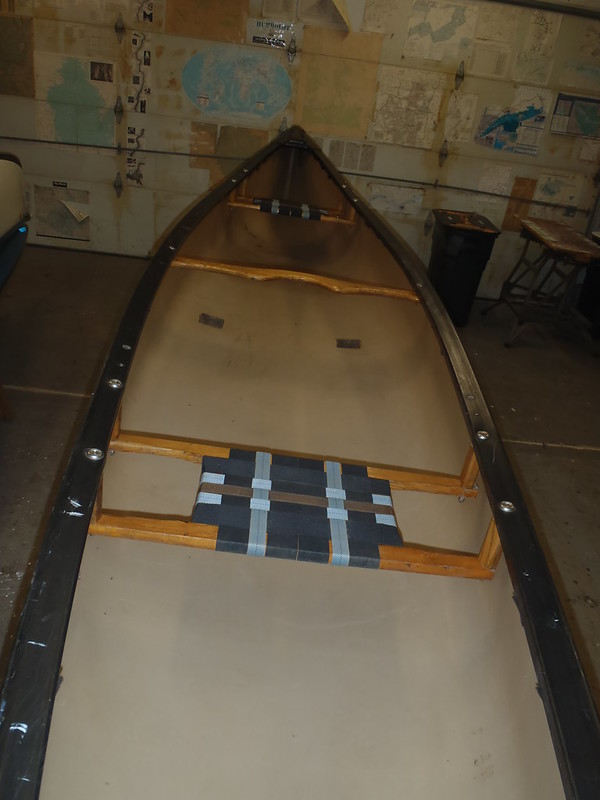
For all that crudity of repair my brightwork was, even then, reasonably well done, and is still solidly intact and refurbishable. Garishly webbed seats, as typical of the plaid madness era; the webbing is still solid and largely unfaded. The finished weight not presenting an issue with a YARR rebuild I’ll remove the dreaded peg drops and install truss or half truss seat hangers for some extra rigidity along the sheerline of a 38 year old RX hull.
 P5210024 by Mike McCrea, on Flickr
YARR currently has a (wing nutted) removable yoke and a kneeling thwart. No permanent knee cushioning, BYO kneeling pad, but I did thoughtfully include ankle blocks.
 P5210025 by Mike McCrea, on Flickr
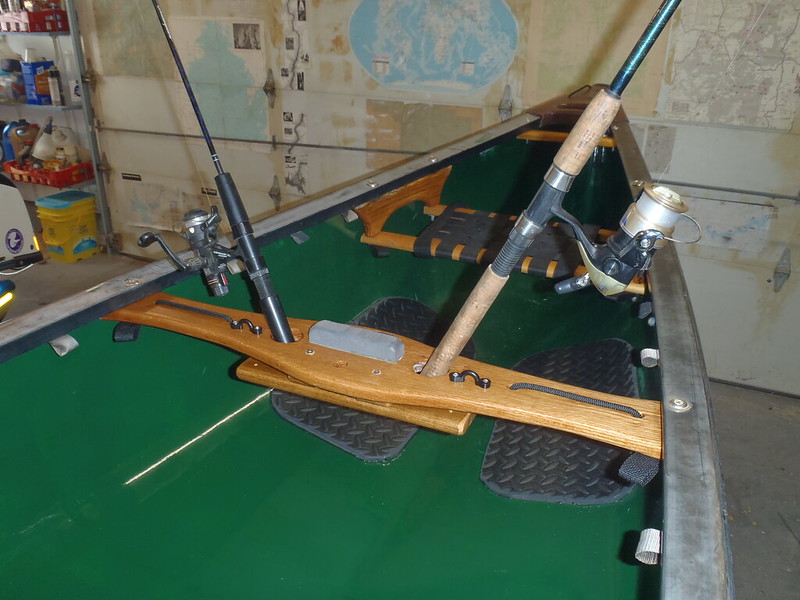
The kneeling thwart is coming out, and the yoke will be replaced with a custom rod holder yoke, as on OOSOBO.
 P2110010 by Mike McCrea, on Flickr
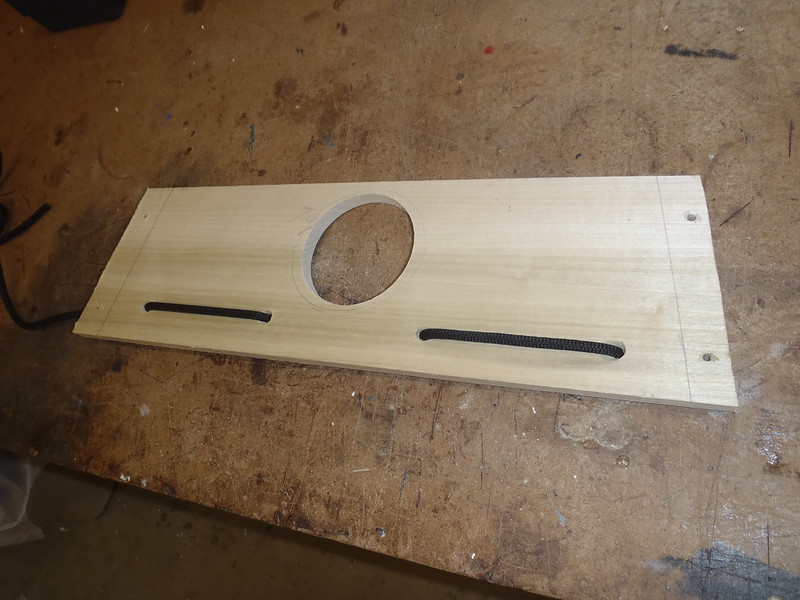
The too-seat-close front thwart needs to come out as well, so YARR can be solo paddled bow backwards, and may get a custom rod holder thwart within bow backwards arms reach as well. I have some rod holder improvement ideas in that regard as well, and may ask fisherman friend Eddie and likely YARR paddler for suggestions and opinions when it comes time to ponder custom angling outfitting. Year 2 with a fishing license, I still haven’t cast a line.
 P1070058 by Mike McCrea, on Flickr
YARR will definitely get a DIY aluminum L foot brace for the bow backwards position; again the same as OOSOBO.
 P1160010 by Mike McCrea, on Flickr
In fact, in replicating (or improving) OOSOBO’s reservoir fishing outfitting, I’ll probably replicate the distinct and decorative green hull, white stripe and diamond trim paint job as well. YARR, like OOSOBO is, or once was, green, and I’ll want another can of inexpensive green Rustoleum Topside to recoat the scrapes on the bottom of OOSOBO from slide-launching it this winter when it comes off the reservoir and back into the shop.
 P3190001 by Mike McCrea, on Flickr
Tom’s less artistic painting flourishes have also (thankfully) faded. There may have been some late in the day shop beers involved, but somehow, when the Uber Bot was finished, Tom was cajoled into graffito-ing the stems, using up near dead cans of old shop spray paint. FWIW the sliver spray paint lasted the longest, there are traces of blue left, and the red has vanished entirely
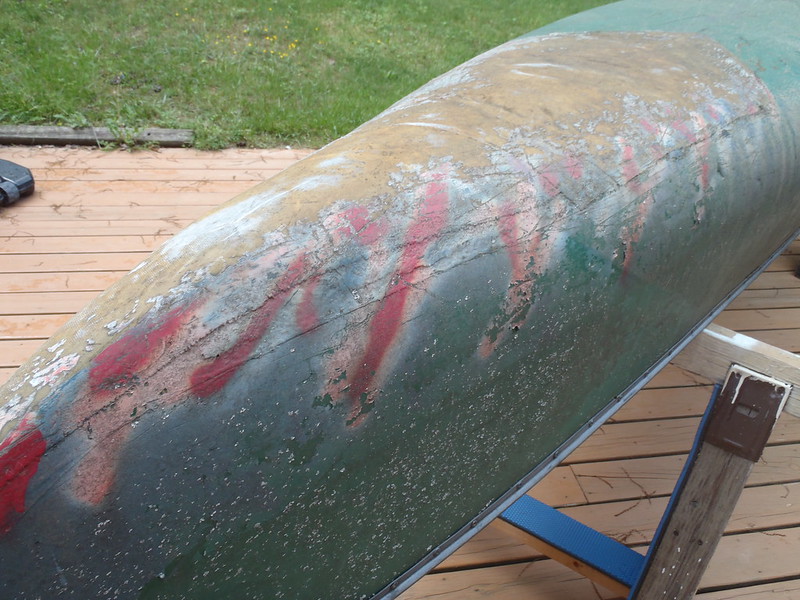
The worst of YARR’s needed repairs are from a trip it did last year, the first time it had seen water in a decade. Tom lent it to a novice couple, who paddled it on Mallows Bay. Mallows Bay is ship graveyard, a collection of 200+ steamship and other vessels.
https://dnr.maryland.gov/ccs/Pages/mallowsbay.aspx
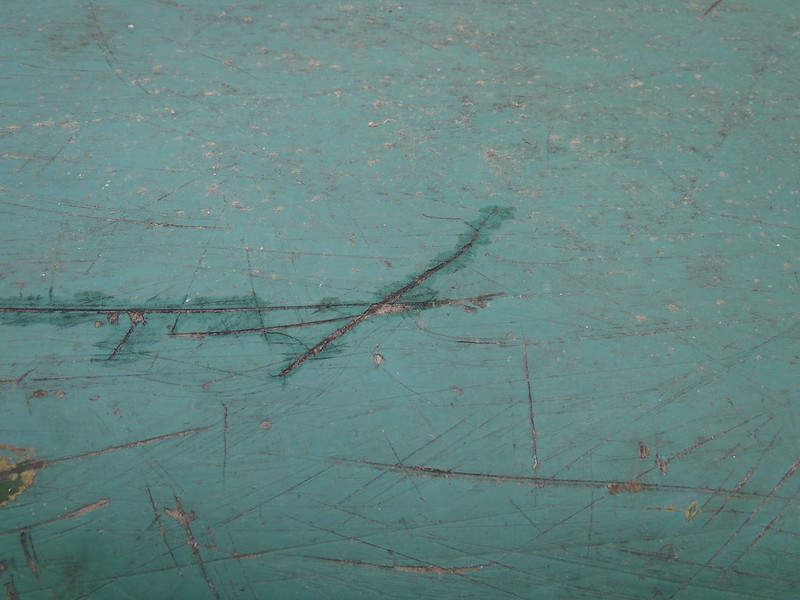
Mallows Bay is historic, and peculiar, and can be tidal shallow. If there are 200 “Ghostfleet” shipwrecks there are 100,000 barely submerged pieces of rusty bolts and sharp metal. I’ve long wanted to go there, but not in a plastic boat. Incautious novices, paddling amongst 100,000 tidal sharps in a plastic canoe; the bottom of YARR is now suffering from death by a thousand slices.
 P5210019 by Mike McCrea, on Flickr
 P5210018 by Mike McCrea, on Flickr
Easily fixed once YARR is clean and sanded. For now YARR can live on back deck near the hose. I need to give it a vigorous scrub with DougD’s magic mix of vinegar and Dawn. And after that it can continue to live on the deck until I have room in the shop; I need to RO sand the entire paint crusty hull bottom, and I’d rather make that colorful dust outside as well.
Once it comes into the shop it isn’t leaving for quite a while; I do need to have it done by March 1st, 2023. First thing, once in the shop, I’ll weigh it. I’m guess 86lbs. Maybe 85lbs post sanding.
And, of course, there is the Why Bother?
Next Spring YARR will get a reservoir permit, and be chained up (same padlock key) at Liberty Reservoir. The fishing at Liberty is better than at Prettyboy, the launch is closer than Prettyboy for most metro-area friends, and it would be nice to have a boat at water’s edge on both reservoirs.
https://dnr.maryland.gov/fisheries/pages/hotspots/liberty.aspx
I believe I can make YARR look and paddle agood as new with less than $100 in parts, pieces, epoxy, varnish and paint. And 100 very slow and enjoyable hours on the deck and in the shop. Mostly I really like the idea of having heavy, old-school vintage Royalex canoes, both green with identical broad white stripes and green accent diamonds, left at both reservoirs.
If nothing else I’m sure it would puzzle the reservoir cops; “Wait, didn’t I just see that canoe chained up this morning at Prettyboy?”
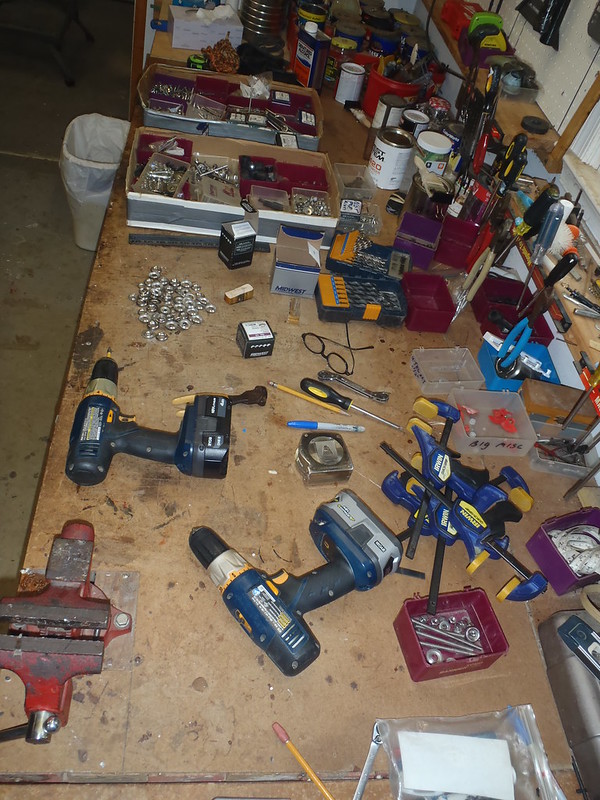
The only thing better, fishing or just reservoir exploring, would be a side motor mount for an electric motor. I’m not providing the motor, but I got the serious clamps with which to DIY a side motor mount.
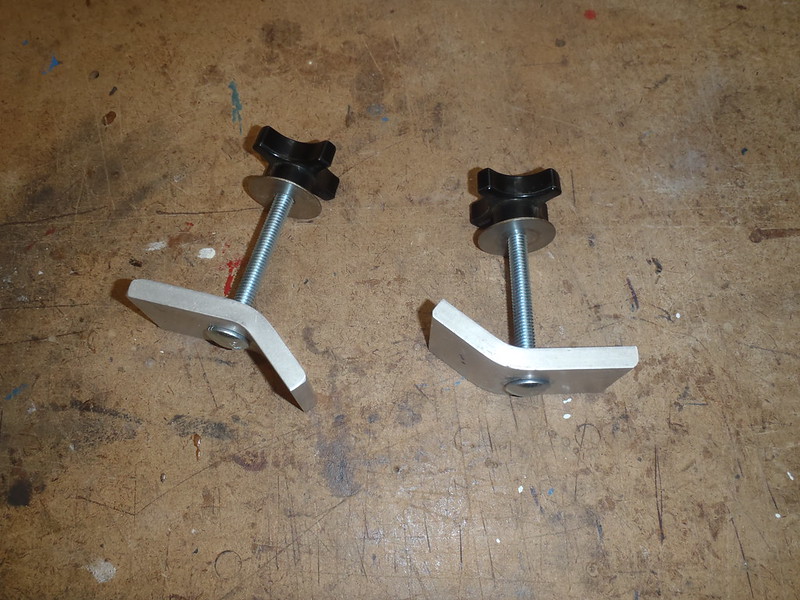 P5170006 by Mike McCrea, on Flickr
Of course now I wish I hadn’t given away the manufactured side motor mounts, plural, that came, and later left, with some used canoes. Long, multi-armed reservoirs like Prettyboy and Liberty would be a joy to sit and electric motor buzz about.
 P3100011 by Mike McCrea, on Flickr
Hell, I’ll sit in the back and acknowledge how fast, how far offshore, here-there-where instructions from a fisher-person bowman. With 80 some miles of shoreline there is a lot of reservoir edge I’ve never seen, and likely won’t without deep cycle assist.
There was the distinctive thump-boom-splash sound of a canoe capsizing when, suddenly, shooting skyward into view, above the tall waving Spartina grass, there briefly appeared the red Royalex bow of a Mohawk Rogue. A Rogue canoe, the other rogue was enjoying the pluff mud bottom of the Transquaking Marsh loop. Both were eventually recovered, the canoe none the worse for wear. Tom, IIRC, had lost one shoe to the marsh mud bottom, and considerable of his remaining dignity.
Not just witnessed by me, with the advance warning of the thump-boom-splash everyone else had time to turn and watch that canoe projectile. I haven’t seen a rocket launch from my canoe yet, still on my bucket list, and that was probably my only opportunity to witness such a flatwater canoe launch.
Tom called the Dreamboat “Das Uberbot” because it weighs as much as a German submarine. While it made a better marsh canoe than the WW Rogue it had some submarine qualities in other paddling uses; going over drops the bow had a tendency to take on a wee bit of water.
EK_0023 by Mike McCrea, on FlickrMethinks float bags would have been a good thing in the Uberbot on that Yellow Breeches trip.
The Uberbot, borrowing from ALSG’s esprit de escalier considerations, henceforth to be named “Yet Another Rebuild Rebuild”, or YARR for short
Yar: agile, quick, easily maneuvered, nimble
I expect the re-rebuild will possess none of those nimble qualities. Produced by Dreamboat Company in Indianapolis in 1984, YARR is 16’ 2” long, 14” deep and, originally, around 33” wide. “Around” because I drew the gunwales in a touch on the original rebuild, and it is now 31 ½” wide. Maybe an original Warsaw Rocket? Anyone know the “Rocket” dimensions?
The original rebuild shows many early rebuild touches. New vinyl gunwales replacing rotted wood; doesn’t everyone install vinyl gunwales using 3” pop rivet spacing? What was I thinking? (WWIT)
P5210028 by Mike McCrea, on FlickrBoth stems were badly worn over a large area, so massive 5 foot long x 2 foot wide kevlar felt skid plates. At the time I had never heard of Dynel, or peel ply, or even beveling down the abrupt edges of kevlar felt with a tongue depressor as the epoxy set up. The uncompressed and un-edge beveled kev felt stands tall still today. “Pretty work”, as my old mentor would mutter in semi-disgust.
P5210015 by Mike McCrea, on FlickrTom’s artistic lettering of “Das Uber Bot” has faded to near illegibility, and I wish I could make out what the subtitle beneath reads; I should ask him, there is subtext there.
P5210029 by Mike McCrea, on FlickrWilhelm, properly pronounced with a harsh lip-spittle V, is a great Undersea Bot captain’s name. Recipient of the Saturated Cross with Watercress Custers, responsible for multiple sinking’s.
P5210016 by Mike McCrea, on FlickrMostly sinkings of himself. The Uber Bot, without Captain Vilhelm aboard, proved capable of running WW, high and dry, all on its own, and would often nose over next to me, sans Tom, like a faithful dog as I waited in some eddy below a drop.
I would praise it “Good boy, good boat”. Once, on a peculiar lining escape when Tom’s “Nots-no-K” let loose, I admittedly shouted “This is the best day ever!” as Uber Bot floated the run out to nuzzle empty alongside my canoe.
For all that crudity of repair my brightwork was, even then, reasonably well done, and is still solidly intact and refurbishable. Garishly webbed seats, as typical of the plaid madness era; the webbing is still solid and largely unfaded. The finished weight not presenting an issue with a YARR rebuild I’ll remove the dreaded peg drops and install truss or half truss seat hangers for some extra rigidity along the sheerline of a 38 year old RX hull.
P5210024 by Mike McCrea, on FlickrYARR currently has a (wing nutted) removable yoke and a kneeling thwart. No permanent knee cushioning, BYO kneeling pad, but I did thoughtfully include ankle blocks.
P5210025 by Mike McCrea, on FlickrThe kneeling thwart is coming out, and the yoke will be replaced with a custom rod holder yoke, as on OOSOBO.
P2110010 by Mike McCrea, on FlickrThe too-seat-close front thwart needs to come out as well, so YARR can be solo paddled bow backwards, and may get a custom rod holder thwart within bow backwards arms reach as well. I have some rod holder improvement ideas in that regard as well, and may ask fisherman friend Eddie and likely YARR paddler for suggestions and opinions when it comes time to ponder custom angling outfitting. Year 2 with a fishing license, I still haven’t cast a line.
P1070058 by Mike McCrea, on FlickrYARR will definitely get a DIY aluminum L foot brace for the bow backwards position; again the same as OOSOBO.
P1160010 by Mike McCrea, on FlickrIn fact, in replicating (or improving) OOSOBO’s reservoir fishing outfitting, I’ll probably replicate the distinct and decorative green hull, white stripe and diamond trim paint job as well. YARR, like OOSOBO is, or once was, green, and I’ll want another can of inexpensive green Rustoleum Topside to recoat the scrapes on the bottom of OOSOBO from slide-launching it this winter when it comes off the reservoir and back into the shop.
P3190001 by Mike McCrea, on FlickrTom’s less artistic painting flourishes have also (thankfully) faded. There may have been some late in the day shop beers involved, but somehow, when the Uber Bot was finished, Tom was cajoled into graffito-ing the stems, using up near dead cans of old shop spray paint. FWIW the sliver spray paint lasted the longest, there are traces of blue left, and the red has vanished entirely
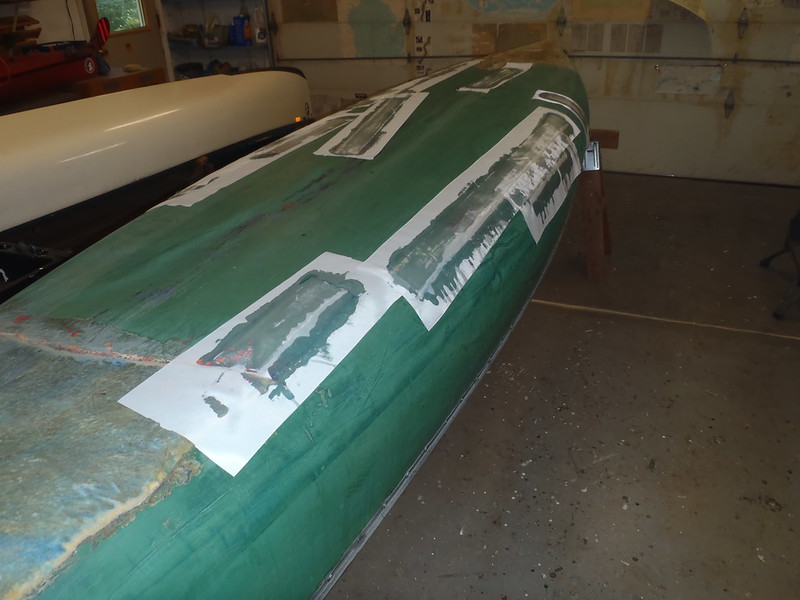
The worst of YARR’s needed repairs are from a trip it did last year, the first time it had seen water in a decade. Tom lent it to a novice couple, who paddled it on Mallows Bay. Mallows Bay is ship graveyard, a collection of 200+ steamship and other vessels.
https://dnr.maryland.gov/ccs/Pages/mallowsbay.aspx
Mallows Bay is historic, and peculiar, and can be tidal shallow. If there are 200 “Ghostfleet” shipwrecks there are 100,000 barely submerged pieces of rusty bolts and sharp metal. I’ve long wanted to go there, but not in a plastic boat. Incautious novices, paddling amongst 100,000 tidal sharps in a plastic canoe; the bottom of YARR is now suffering from death by a thousand slices.
P5210019 by Mike McCrea, on FlickrP5210018 by Mike McCrea, on FlickrEasily fixed once YARR is clean and sanded. For now YARR can live on back deck near the hose. I need to give it a vigorous scrub with DougD’s magic mix of vinegar and Dawn. And after that it can continue to live on the deck until I have room in the shop; I need to RO sand the entire paint crusty hull bottom, and I’d rather make that colorful dust outside as well.
Once it comes into the shop it isn’t leaving for quite a while; I do need to have it done by March 1st, 2023. First thing, once in the shop, I’ll weigh it. I’m guess 86lbs. Maybe 85lbs post sanding.
And, of course, there is the Why Bother?
Next Spring YARR will get a reservoir permit, and be chained up (same padlock key) at Liberty Reservoir. The fishing at Liberty is better than at Prettyboy, the launch is closer than Prettyboy for most metro-area friends, and it would be nice to have a boat at water’s edge on both reservoirs.
https://dnr.maryland.gov/fisheries/pages/hotspots/liberty.aspx
I believe I can make YARR look and paddle agood as new with less than $100 in parts, pieces, epoxy, varnish and paint. And 100 very slow and enjoyable hours on the deck and in the shop. Mostly I really like the idea of having heavy, old-school vintage Royalex canoes, both green with identical broad white stripes and green accent diamonds, left at both reservoirs.
If nothing else I’m sure it would puzzle the reservoir cops; “Wait, didn’t I just see that canoe chained up this morning at Prettyboy?”
The only thing better, fishing or just reservoir exploring, would be a side motor mount for an electric motor. I’m not providing the motor, but I got the serious clamps with which to DIY a side motor mount.
P5170006 by Mike McCrea, on FlickrOf course now I wish I hadn’t given away the manufactured side motor mounts, plural, that came, and later left, with some used canoes. Long, multi-armed reservoirs like Prettyboy and Liberty would be a joy to sit and electric motor buzz about.
P3100011 by Mike McCrea, on FlickrHell, I’ll sit in the back and acknowledge how fast, how far offshore, here-there-where instructions from a fisher-person bowman. With 80 some miles of shoreline there is a lot of reservoir edge I’ve never seen, and likely won’t without deep cycle assist.


 I’d only used bow/mid-ships/stern measurements to get an idea of what the shear line looked like and it looks like it was pure luck that that works out if the boat on the flat slab is the measuring datum.


 is a legally protected utterance belonging to the estate of Long John Silver. I anti-can't arrange for Dewey, Cheatem & Howe to defend you for $400 per hour.