• Happy Weed Appreciation Day! 🌱🌿🌻

DIY winter projects

Joined
Oct 11, 2020
Messages
200
Reaction score
119
Do you have any canoe camping related DIY equipment projects or repairs in progress or planned for the winter?

I often make or modify equipment. I have no identified equipment needs but I am considering making a backpack and a screen shelter.
 
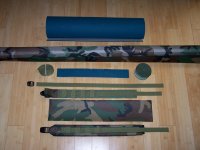
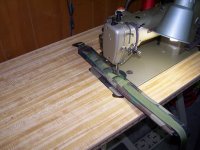
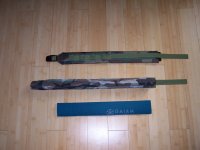
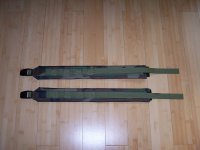
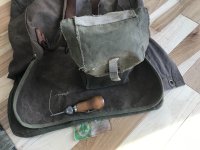
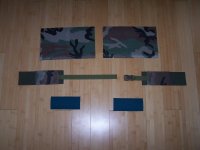
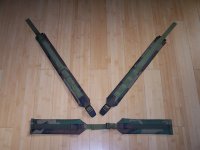
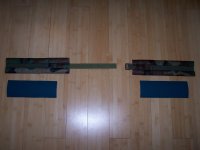
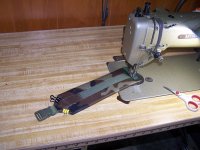
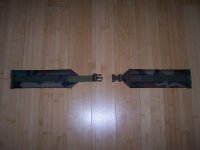
I don't know if I will complete it but I have enough fabric and hardware to make a backpack. I have no patterns just a general concept and some design features I want to incorporate. I am starting with the shoulder straps.
 

Attachments

  • 101_0068.JPG
    101_0068.JPG
    109.7 KB · Views: 18
  • 101_0075.JPG
    101_0075.JPG
    159.1 KB · Views: 17
  • 101_0077.JPG
    101_0077.JPG
    95.7 KB · Views: 16
  • 101_0076.JPG
    101_0076.JPG
    98.6 KB · Views: 13
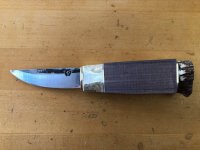
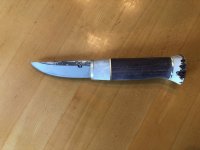
I’m getting back into knife making. I met someone at a boatbuilding open house this past December who was a knife maker. We were both digging through the off cut wood pile for exotics before they went into the wood stove. We both got some Purpleheart and Locust. I fell in love the the blade he showed me so for Christmas I bought myself a couple.
CEF127A2-8821-4B7B-9E79-3B8D63B2DC7E.jpegB71EB1CA-C9E4-4F4F-A007-FF81F34666E2.jpegB5D3D847-C86C-4E08-9652-A57A9176ED99.jpegE3843DFC-25B1-4537-BB76-5E050103D9FA.jpegFBD87CE2-FDB4-43BE-9E59-D54FB754E9E8.jpeg
This is the almost the end of rough shaping. A little more refinement, I think you can see the guide line then I knock down the corners. All this shaping is done on a belt sander/grinder, final shaping is with rasps, files and sandpaper.
Jim
 
Well after a bit of time on the belt sander/grinder it now looks like this. I decided to stop here for today so I didn’t screw it up. It feels very comfortable in the hand but I can see it still needs some work. I’ll fondle it for a couple days, rasp or sand a little bit here or there, I’m in no rush. In the meantime I can start working on the sheath liner or another blade that is already in the queue.
Jim
EEBF1AD4-293F-4165-B3FD-98D374AA875E.jpeg
 
Well after a bit of time on the belt sander/grinder it now looks like this. I decided to stop here for today so I didn’t screw it up. It feels very comfortable in the hand but I can see it still needs some work. I’ll fondle it for a couple days, rasp or sand a little bit here or there, I’m in no rush. In the meantime I can start working on the sheath liner or another blade that is already in the queue.
Jim
View attachment 129638
If you want to try using some Kydex for a sheath I can send you some, just let me know the size of the knife and what you think you'd need if want to go that route. I still have quite a bit left and don't have an immediate use for it.

dougd
 
As a every day user of traditional Scandinavian knives (Puukko & Leuku) I would hope and think that Boatman53 would make a traditional Scandinavian leather sheath for his beautiful crafted knife.
That’s just me of course, a died-in-the-wool Geezer, wearer of wool, user of canvas & cedar canoes and canvas & leather packs.
Wonderful knife Jim, looks like it will be great for most any task on a canoe trip or anywhere else.
 
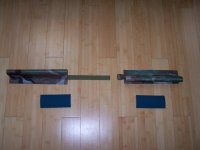
Finished shoulder and waist straps for a backpack. I may design and sew the side pouches next.
 

Attachments

  • 101_0081.JPG
    101_0081.JPG
    101.7 KB · Views: 4
  • 101_0083.JPG
    101_0083.JPG
    89.6 KB · Views: 5
  • 101_0088.JPG
    101_0088.JPG
    93.8 KB · Views: 5
  • 101_0089.JPG
    101_0089.JPG
    82 KB · Views: 2
  • 101_0090.JPG
    101_0090.JPG
    169.2 KB · Views: 2
  • 101_0091.JPG
    101_0091.JPG
    85 KB · Views: 2
  • 101_0085.JPG
    101_0085.JPG
    89.2 KB · Views: 2
Thanks for the offer of the Kydex Doug. I would like to try it someday but not for this style knife. I will be making a wooden sheath liner and stitched leather. I’m not totally happy with this knife handle (it still needs some shaping so there is hope) it’s biggest fault is the handle is too short for my hand. When I started shaping I decided on keeping a bigger swell at the butt and that shortened the grip area. I’ll probably end up selling it or giving it to a friend. I’m already working on the next one or two while I contemplate the handle.
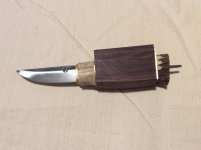
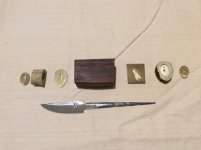
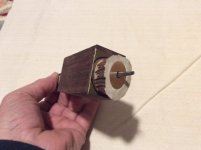
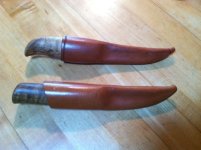
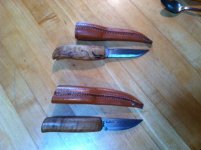
These are some earlier hidden tang all wood handles and sheaths that I did.

0DDEF889-D677-41E8-8181-F9098CBB6D53.jpeg5D104C3C-A1A1-4998-85CB-BBEB3179794E.jpeg
Jim
 
Thanks for the offer of the Kydex Doug. I would like to try it someday but not for this style knife. I will be making a wooden sheath liner and stitched leather. I’m not totally happy with this knife handle (it still needs some shaping so there is hope) it’s biggest fault is the handle is too short for my hand. When I started shaping I decided on keeping a bigger swell at the butt and that shortened the grip area. I’ll probably end up selling it or giving it to a friend. I’m already working on the next one or two while I contemplate the handle.
These are some earlier hidden tang all wood handles and sheaths that I did.

View attachment 129697View attachment 129698
Jim
OOh great work. I love a sami knife
 
madmike…… I would classify the beautiful crafted knives of Jim’s as Scandinavian in style. Sami knives have a large flared pommel and sheath are deeper, most usually incorporate reindeer antler in the lower part of the sheath with intricate scrimshawed carving.
I too, think Jim makes wonderful knives.
 
Thanks boreal and madmike. Yes Scandinavian or puukko. Maybe I should start a new thread for the next knife and go into more detail on the work involved.
Jim
 
I would enjoy watching how you build a knife. Always interesting to see how others do things. I have been fascinated by fixed blade knives since I was five, when found a Marbles type knife at a place where someone must have dressed out a whitetail deer. I fell in love with the first Finnish Puukko I bought. I have become a student of the Puukko and the sayings of Finns like, “A knifeless man is a lifeless man” or “All Puukko’s are knives, not all knives, are not Puukko’s”.
I cannot afford to buy high end Puukko’s so, over the years I have bought some Puukko blades from some of the best makers. I putz around at the kitchen table trying to make a couple Puukko’s each year, much to my wife’s disgust. Every time I make one that is better than the one I am currently using, I give my friends the old one. That works out pretty good, but I still hoard some cherished knives. One being a Marbles knife that Jim gave me. It needed a little TLC and a sheath, but it goes with my Marbles Safety Axe and Marbles Gamegetter combination gun. Nessmuk had his trifecta, I have mine.
 
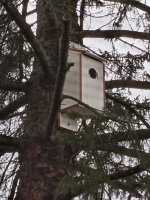
Used some old plywood cupboard doors to make a screech owl nesting box. Now I'm on owl watch.

nest box.jpg

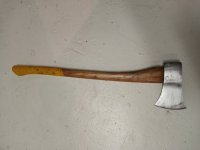
But before I put the tools away I refinished the old axe. The edge needed touching up too. No idea where those nicks came from? All ready now for the first trip of the season.

axe.jpg
 
Nice, I’ve been wanting to put up an owl nesting box for a while. I’ll make it this summer for sure. Last spring I put up a could bluebird boxes and we had two pair nesting. It was quite fun, and they have been hanging around all winter. In fact a male was going in and out of the two of them just last week. I hope you get some owls.
Nice looking axe too.
Jim
 
Thanks Jim. The axe is okay, nothing special really. I noticed when I sanded away the factory paint (originally there to prevent rusting) that the steel is not the best but with a tuned edge again it will resume it's old duties just fine. I kept the original hi-viz sand grippy end. Ugly yes but it works remarkably well. The hickory handle was easily refinished and remains in perfect condition. All in all I will use what I've got.
The nesting box is a small gamble. We had a pair of screech owls in that very spot a couple springtime's ago but I must've spooked them. I hope to attract a nesting pair again, this time to settle down and raise a brood.
ATB
 
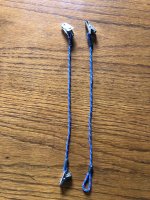
Getting ready for some sailing on Penobscot Bay and much more canoeing this year, realized I hadn’t seen my hat leash since we moved. The last one I bought, but not this year. I remembered the clip on the old leash was the same as the clip on my vendor badge.
.28F6AED0-27A5-477A-B392-AF53CA111D0E.jpeg
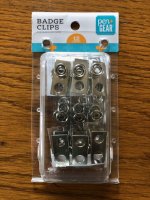
After a little sleuthing I found out you can buy a package of 12 badge clips from Walmart for a whopping $2.64.
846A1C35-79FB-4F3D-817F-5CFEAD79CF54.jpeg
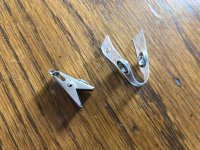
A little tug and lift and the plastic part pulls right off.
4D73A433-D635-486F-82AF-06DC81C18C50.jpeg
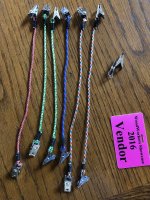
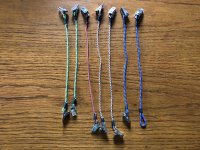
After a few minutes work/pleasure I had sewn and whipped the ends of some line through the hole in the clips. And now I had six new leashes.
1CE1BC66-4946-4B2B-9FC1-DE33ACDC4178.jpeg
And that odd clip I put it to use too by just making a loop in the one end to more or less attach it permanently to a baseball style hat that has the adjustment band.
77A0C3A0-C642-43DD-A87F-99BF3E19DB11.jpeg
B7687165-1DDE-4102-8604-9EC52E86A72F.jpeg
So for less than 50 cents apiece I now have seven new hat savers. Some to keep in the vehicles, some to give away to people that take me sailing. I might just make some more for the fun of it.
Jim
 
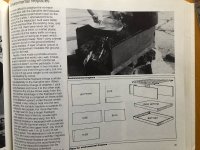
Another project that has been on the back burner for too long is an environmental fireplace. In Bill Masons book Song Of The Paddle he talks about this fireplace.
67869270-046C-4C65-B67F-43591EC84B66.jpeg
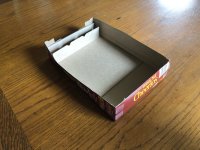
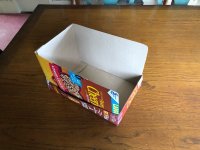
The book doesn’t give any dimensions but it looks rather large. And since he already did the sketching I could go right to CAD (cardboard aided design) to get an idea of sizes. For the model I didn’t fabricate the inner tray.
9E340A6B-732F-434F-82F0-D602E5E7B0B3.jpeg
BCD9899F-A5F8-4EBC-A92D-1E1D31F9E958.jpeg
The next step was to buy some steel. I bought two each of 12”x18” and 12”x24” 22 ga weldable steel. You don’t want galvanized because when the first fire is built it will give off toxic fumes.
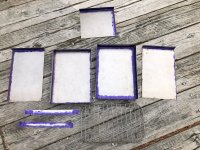
When I started to layout some of the pieces I decided to decrease the size and I got the whole fireplace out of just the two 12”x18” pieces.
Here are all the individual pieces.
21C89081-F6B5-4FCA-96AE-B1BA8DCE85A1.jpeg
Then everything nested together.
60F91F5F-00CC-450E-BDF8-898B1471BB06.jpeg
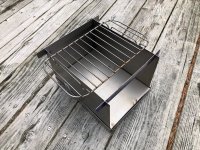
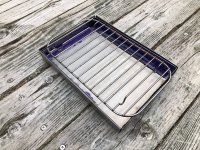
The grill (from a toaster oven I think) might not last in the heat but I’ll start with it. It will need to be cut down to nest also if it doesn’t destroy itself in the first couple of burns.
E81D795E-99EA-450D-911C-2D611E6B4F0F.jpeg
All set up.
1058C320-B5D4-4730-9A91-5B2FB4D062C9.jpeg
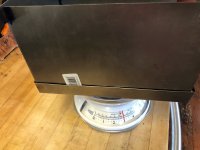
It weighs in at just 3 pounds.
F1195602-FACE-45A3-A149-FBF7D1FE88E7.jpeg
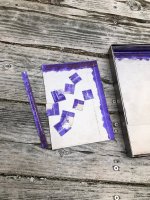
And this is what is left over from those two sheets.
8AA13473-3D71-415F-AD80-F3C37359B2DD.jpeg
It is roughly 7” x10” with 6” tall sides. If this size works well for me I will be making another one from some titanium that I have.
Too late to do a burn today but maybe tomorrow I’ll make some tea in the back yard.
Jim
 
Back
Top