• Happy Scream Day! 😱

Canoe Work Rack/Sling Thing

Joined
Sep 5, 2018
Messages
185
Reaction score
94
Location
MN
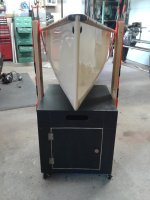
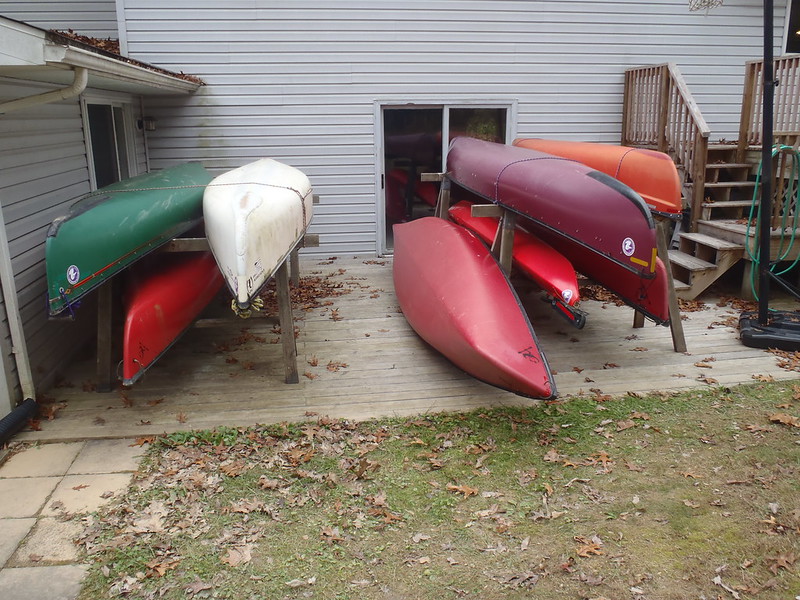
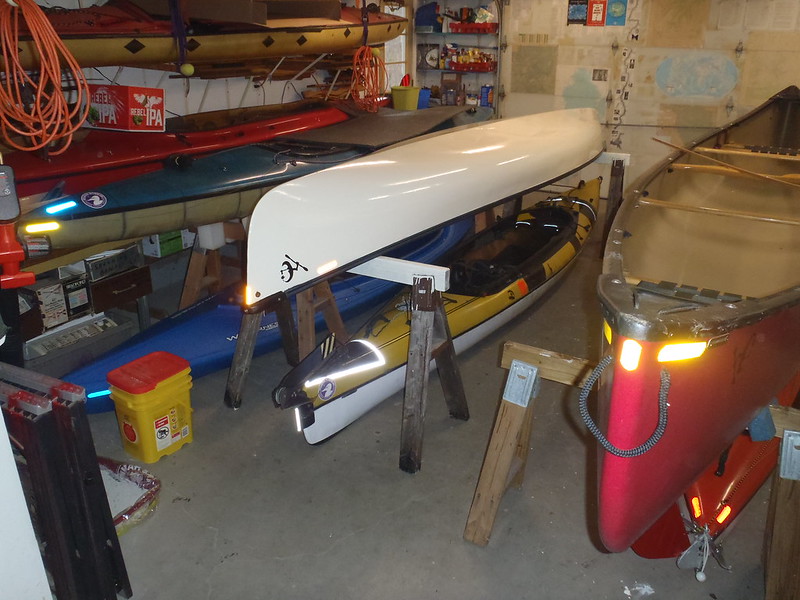
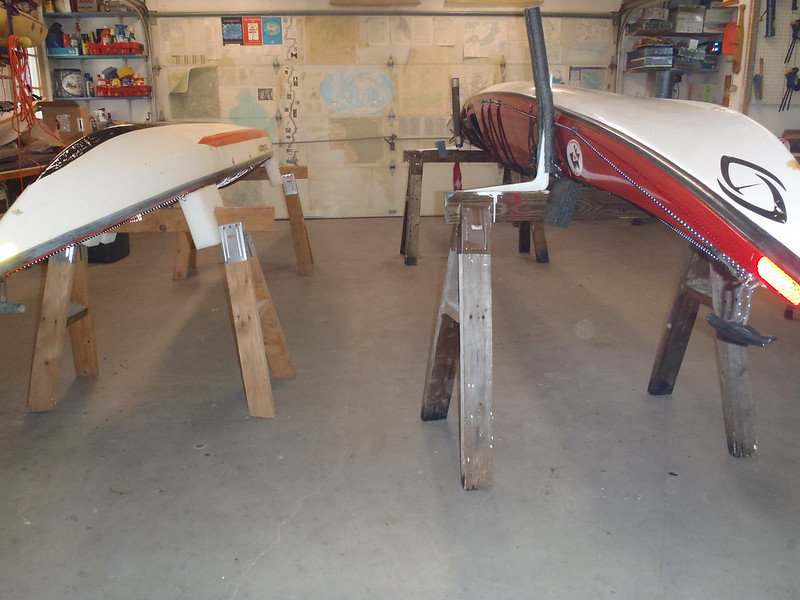
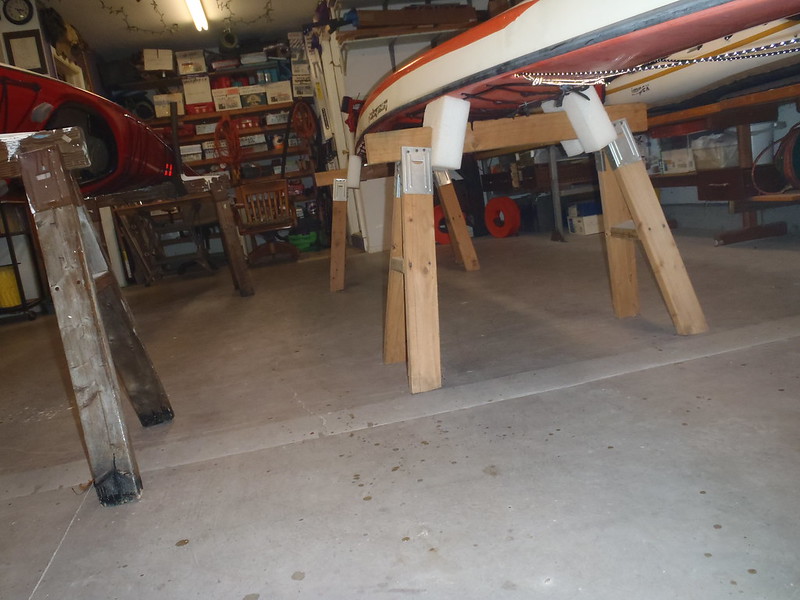
OK, I have no idea what these types of things are called for people in-the-know, nor have I searched for best practices with them so certain there are all sorts of far more ingenious designs than this frankenstein. However, in about an hour I had this pieced together and imagine it would support my canoe for at least a couple lifetimes. Hopefully someone gets a creative, mechanical spark from the photos. As I was building and even now as I look there are all sorts of enhancements that could/will be made...1) Casters on the bases 2) Eye hooks & tie downs instead of these straps & clamps 3) Adjustable crossbar to connect front base to back base to keep them square 4) etc 5) etc.
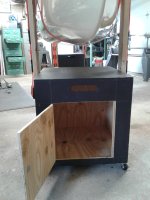
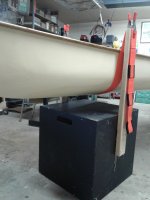
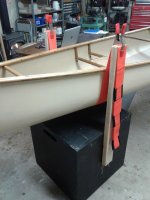
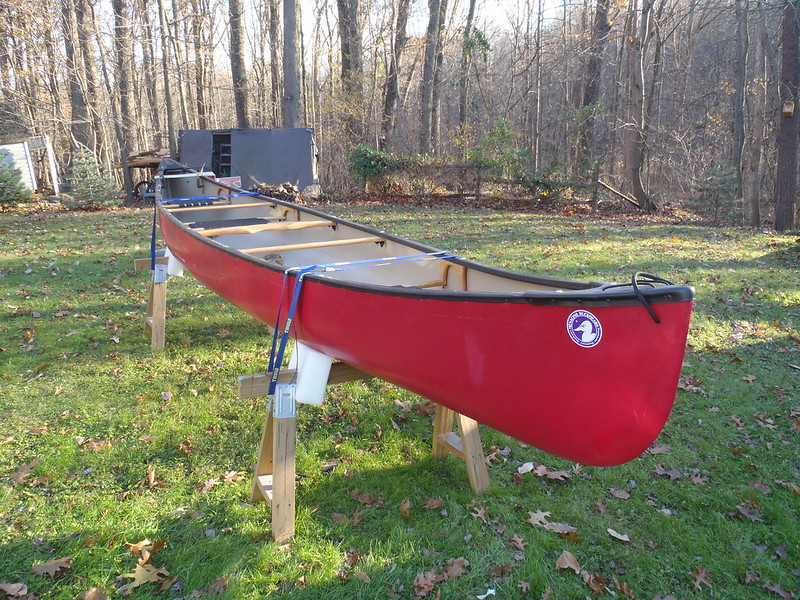
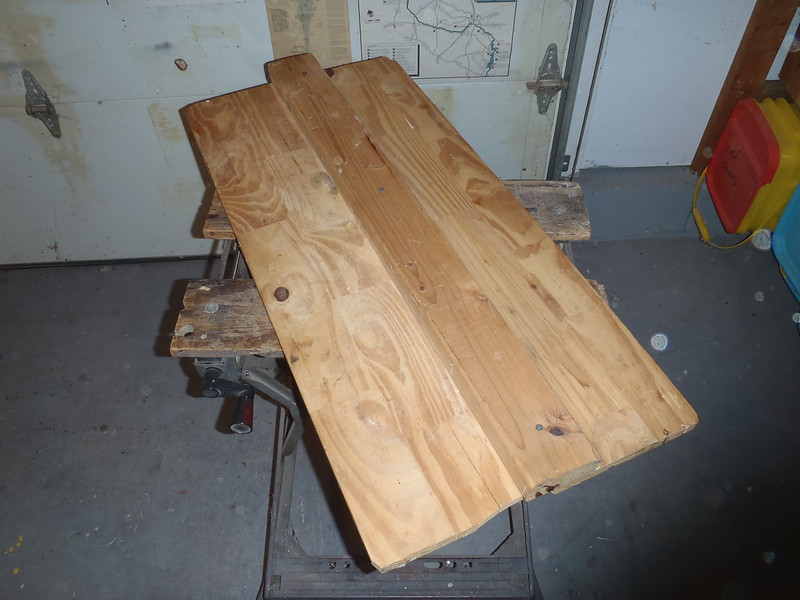
  • The black bases (obviously there are 2 of them) measured 2' square. Granted not everyone has 2' square plywood boxes lying around. I like the stability of them as well as the table surface they provide
  • The orange straps are cheap furniture moving straps. Wide and soft. They also have loops which could be used to secure instead of the clamps
  • Clamps are 2" and in the scientific load test I performed (pushing down on the strap while eating a sandwich) the 2x4s bent together under load while the straps held firm
  • All else should be pretty self-explanatory but if you have questions or concerns, lemeknow.
Was able to flip upside-down and adjust height with ease.
 

Attachments

  • photo10662.jpg
    photo10662.jpg
    271.8 KB · Views: 4
  • photo10663.jpg
    photo10663.jpg
    304.3 KB · Views: 4
In my shop, that seems to get smaller, every time I walk in the door, I need a way to store my stands when not in use !
I've made several sets of these Scissor Stands, and they work quite well.Folding makes it easy to store

IMG_1259_zpsdixqskxk.jpg

IMG_1259_zpsdixqskxk.jpg
 
Last edited:
Sometimes the simplest designs are the best and your solution appears to be just that. But....Why are talking 2x4s and plywood when your boats are staring at me? Stunning! I have not searched around the forum too much yet but imagine those are your builds? I'll check back tomorrow morning for more on this. Thanks Jim.
 

Attachments

  • INTLayY64pB9BoRfTfgwEDlGEMs_0cdjvyF0vaT3L-ncHlNRJcX2YNqd9FtqpyazcBef9H77rsD9lo9tkmv4Ci1VGUupr3FkYWm_
    557.4 KB · Views: 3
  • jfUAzHHu_6XqzK6mogG0LAd_Tgcg5cJgXtxcT84RjdMbS1HrrpR2ZMKBTPZR8k42oV3TZTVt5nEivq9aOwHwOeiLDSQYBLQJhbuz
    566.5 KB · Views: 0
For right side up work I use a pair of director's chairs and for upside down work I use a pair of plastic sawhorses.
 
Definitely works of art up there in the photos. Heck, I didn't even sand the 2x4s after I cut them as going more for the improvisational aesthetic. Can imagine directors chairs working perfectly.
 
For working on boats I am still a fan of sturdy sawhorses. I use scrap packing material ethafoam blocks with an angled 2x4 size notch cut out to stabilize right side up canoes or kayaks on the flat crossbar

PB280024 by Mike McCrea, on Flickr

If I need to work on the chines I use those same etha foam blocks and some padded L brackets to hold the hull steady. Those stabilizer blocks can be moved narrow to wide at any spread along the sawhorse crossbars, so work with every size and shape hull.

PB280030 by Mike McCrea, on Flickr

If I am really bulling around on a rightside up hull I use those same foam blocks and a couple of cam straps wrapped around the boat and horses. That puppy isn’t moving.

PB280034 by Mike McCrea, on Flickr

When working on a canoe gunwales down I put a couple clamps between the inwales and the sawhorse crossbar so the boat can’t move. I had some oopsies where a hull walked off the sawhorses while I was RO sanding. Having the canoe begin to jiggle off the far side of horses while holding an RO sander in one hand made for an awkward profanities uttered catch. Twice, I’m a slow learner.

Clamps underneath on the inwales is out of sight and out of the way of any work I might be doing. I have admittedly tried to pick up canoes still clamped to the horses, and did so for the umpteenth time yesterday. Better safe than sorry.

P4060737 by Mike McCrea, on Flickr

Different height and width sawhorses help. Most are 28” tall, which becomes a handy extra bench height when topped by a platform.

P6220932 by Mike McCrea, on Flickr

The handiest and most often used of those sawhorse platforms are a couple of 2’ x 8’ plywood tops, reinforced with battens (eh, Conk) underneath. They don’t take up too much shop space while in use, and are light enough (and un-unwieldy enough) I can carry them one handed through doorways without help. Set vertical against a wall they take up little storage space.

P5163650 by Mike McCrea, on Flickr

Serendipitously a single sheet of newspaper covers that 2’ width perfectly.

P5183653 by Mike McCrea, on Flickr

One set is 33” tall. That 5 inches of extra height makes a huge difference depending on the canoe and what I am working on where. Much easier if I can face my work with a good view at a comfortable stance.

Some of the sawhorses are 60+ inches tall, so I can work up inside a hull without becoming the Hunchback of canoe repair. The extra tall ones are also extra wide and I use them as spare canoe racks when I need extra storage room. Those big boy horses will accommodate three canoes, two on top and one up the middle on the lower crossbars. When working up inside the hull the second lower crossbar is a handy shelf on which to set tools or materials.

PB280036 by Mike McCrea, on Flickr

And I quite enjoy sitting on a wheeled shop chair and scooting around underneath, “Wheeeee!” back out and over to the bench instead of crawling around on my hands and knees. It’s the simple pleasures.

Yeah, I’m a sawhorse fan. We have six sets of wood horses (two overheight), and one set of the plastic folders. In the last couple months, with both house and boat projects ongoing, all of the regular height horses have been occupied. Other than easy storage I am not a fan of the folding plastic sawhorses, and I keep telling myself that I need to make one more set of sturdy wood ones.

Just like canoes, how many sets of sawhorses are needed? Just one more.
 
...Some of the sawhorses are 60+ inches tall, so I can work up inside a hull without becoming the Hunchback of canoe repair. The extra tall ones are also extra wide and I use them as spare canoe racks when I need extra storage room. Those big boy horses will accommodate three canoes, two on top and one up the middle on the lower crossbars. When working up inside the hull the second lower crossbar is a handy shelf on which to set tools or materials.
...
Those double decker sawhorses are the bomb! I'm a bit short of rack space on my main rack and was thinking I should expand, but a pair of those humdinger sawhorses would be just the thing, flexible boat storage and a work platform.

...
Just like canoes, how many sets of sawhorses are needed? Just one more.
Also like canoes, you think your fleet is complete, but then you see someone else's kit and think, "Gee, I could sure use one of those!".
 
Those double decker sawhorses are the bomb! I'm a bit short of rack space on my main rack and was thinking I should expand, but a pair of those humdinger sawhorses would be just the thing, flexible boat storage and a work platform.

Those double decker sawhorses actually started our purely as spare rack space. At one point I had 6 extra canoes on two sets of those out in the yard. My wife did not care for the appearance of that and said “You really should build an extension on the canoe rack”.

A few hours later the 4x4’s were set in concrete. I would have been faster but I needed to go get the concrete and 4x4’s.

I still use them for displaced hull storage when I have friends bringing boats by to work on, and when I need to move boats stored inside out to create Party Central in the shop. Three boats abreast work in the shop means evicting some of the tenants.

38250312844_9c87d48628_c.jpg
PB280031 by Mike McCrea, on Flickr

The bit about working up inside a hull at better height was a bonus, especially when working on the underside of cockpit decks on a kayak or decked canoe. When I need to get to the backside of a deck fitting wayyyy up inside a boat those tall boys are the only way to go, and the sideways bottom crossbar is a handy place to set tools and materials while under the boat.
(Actually if I have a lot of tools and materials needed at hand I roll a wheeled mini work platform under with me). (Don’t forget the headlamp).

I will occasionally try crawling under a boat when it is already resting on standard size horses, but it only takes me a few seconds to realize how freaking awkward and untenable that position becomes. Two minutes to bring in the tall boys and work comfortably, or an hour crouched over on my knees?

No brainer.

I have made a couple sets of those tall boys for friends, fully assembling them in the shop, numbering all of the pieces, taking them back apart and reassembling them in far flung locations. There is one in a lumber shed laden with at least 500 lbs of wood. My brother-in-law in Rhode Island wanted a set and I told him I’d come build him some.

When I showed up I didn’t mention that I had already built them and had brought them disassembled in the van, legs folded flat still attached to the brackets. I did tell him something like (credit WC Fields):

https://www.youtube.com/watch?v=1jaSoo9hPi4

I put them back together in minutes without his witness. He was dazzled by my speed and efficiency.

I go the simple route building sawhorses; heavy duty sawhorse brackets and 2x4’s. Add an extra fastener through each bracket and cut the 2x4 leg bottoms so they sit flat and level on the floor and those are already plenty sturdy.

One thing I do to all our sawhorses is add short stiffeners between the legs on each side /-\. That little brace makes those bracket constructed sawhorses much stiffer.

On the tall boy horses those betwixt legs braces and the 2[SUP]nd[/SUP] lower crossbar are a near necessity to prevent the tall towers from swaying side to side.

Um yeah, if you use them for canoe storage tie at least the top two boats to the crossbars.
 
Last edited:
Waste not want not sawhorses

I have an old set of pressure treated sawhorses that are impervious to sitting outside in the dirt rot. I use them as a receptacle for any leftover epoxy, varnish or urethane. The latest addition, the EZPoxy white paint from the roller and sleeve.

44941143114_5d5b178d5d_c.jpg
PA291309 by Mike McCrea, on Flickr

Even the butt ends of the legs (note the graphite powder leg bottoms) are impervious to sitting outside; they have many, many left over coats of epoxy or varnish left from brushes, rollers and pans. In the latest case EZPoxy paint from the roller sleeve and brush.

The drips and runs on the sawhorse brackets are from sloppy (wifely) painting; I don’t want my “good” shop sawhorses bespattered or soggy, so those are the defacto painter’s and boat washers set.

And a handy use for brushing on leftover whatever.
 
Last edited:
Movable Work Platforms

About those oh-so-handy 2 x 8 foot sawhorse platforms, in the last week I have used them inside the shop and inside the house (painting & laying new kitchen floor, yuck) and outdoors on the decks repeatedly. They are easy to take in and out through doorways one handed to make a temporary workbench anywhere.

P8073854 by Mike McCrea, on Flickr

One sheet of plywood, ripped in half for two 2x8 tabletops, with stiffening battens (eh Conk) on the underside.

PB081326 by Mike McCrea, on Flickr

I finally got around to a much needed improvement on those oft carried about (with one hand gripping the outer batten) platforms. At 2 feet wide I don’t even need to raise them off the floor, just hold them level, but what was missing was exactly where the center point was to one hand grasp and carry them.

Ah ha, marked center balance point, so when I grab the platform with one hand I’m not off kilter like a badly balanced yoke.

PB081324 by Mike McCrea, on Flickr

I had been meaning to do that for years. It took all of 60 seconds using a couple enamel paint pens. Seriously, years. Duh!

The other most favored adjunct shop platform is the Workmate top. Not the clamp-able top of the Workmake itself, but a scrap piece of wood, 16 x 36 inches with a length of 2x4 screwed in the center, clamped atop the Workmate as a longer, wider and hole-less work surface.

Used so frequently in that guise that I leave the platform clamped on. With the router or tabletop sanders and grinders I set that Workmate & clamped top outside and make me some dust.

PB081328 by Mike McCrea, on Flickr

[2/url][url=https://flic.kr/p/2a1txB7]PB081330 by Mike McCrea, on Flickr

The 2x4 on the bottom is offset an inch so the Workmate handles are still crank tighten accessible and I replace the platform top as needed when it becomes overly paint bespattered or oops cut with a saw.

I had replaced the crappy OEM Workmate top once already with decent hardwood, and then continued to begrime the replacement and oopsie cut into it. I’d rather have a larger sacrificial work surface platform and just clamp it in place when needed.

One last easily moved platform enhances my boatside manner. I took the wheeled base of an old defunct office chair, removed the trashed chair part and installed a small platform in its place. The wide five wheeled chair base makes it really stable. A most convenient place to set tools and materials near at hand and roll along beside me.

I wish I had used a height adjustable seat for that rolling table, but ya can’t have everything. Although I’m keeping an eye out for another trashed office chair; I have a design idea for an improved platform, and height adjustable would be the bomb.
 
Every time I see a Workmate it reminds me of the hours spent in the late 70's painting Matchbox & HotWheels cars down in the basement of my childhood home on one of these things. Wish I had some of those back before I destroyed them with layers of metallic colors as some are now worth a small fortune in original shape.

Anyway...Finally had time to continue this project so this weekend added 2" casters to the box bases. Now I can push the thing around the garage to make room for whatever projects are getting in the way of this most important one; which is generally the case.

I imagine for some tasks (sanding) the "Sling Thing" would be too wobbly as it currently stands however the plan is still to add a stringer that binds the two bases together which will add rigidity. Could also add another set of straps going over the top and cinch down to the bases.

It's getting there...Maybe a couple layers of metallic paint would help???
 
In looking at the Sling Thing early this morning the hidden function of the repurposed box bases became shockingly apparent. Kind of like when the sternman catches a wave tip with a tired forward stroke and showers cold water on your sunburned back. Serendipitously, the boxes are in fact...wait for it..."boxes". Boxes are to put stuff in. Hence...Me cut doors...Me put stuff in.

These photos should be case-in-point as to why I don't plan on building my own canoe any time soon. ;)

Seriously however: For those that do far more canoe work than I, I can imagine the box bases being stocked with tools, supplies, plans, paints, pints, beer, or the shop cat. The handles have been covered with screen to keep mice out with the added benefit of ventilation for paints or stinky wet gear.
 

Attachments

  • photo10704.jpg
    photo10704.jpg
    301.2 KB · Views: 0
  • photo10705.jpg
    photo10705.jpg
    306.5 KB · Views: 0
  • photo10706.jpg
    photo10706.jpg
    274.9 KB · Views: 0
  • photo10707.jpg
    photo10707.jpg
    348.5 KB · Views: 0
The drawback I see, is you can't visually see what is inside ! You would need to open the door.
I'm constantly looking for misplaced tools, or whatever ! Having to bend over just to see if the item I'm searching for is there, would not work for me, and my disarranged shop !
A good idea for others though !
NorthWest Canoe ie Dennis Davidson, made a set of stands similar to yours, using ropes,and notches to adjust the working height of the canoe. They looked handy, and he used them in his videos.

Nicely made stands !

Jim
 
I see your point on visibility. Having go-to tools stuck away in black boxes is less than efficient. 3/8" thermal-shaped acrylic for the next revision?? Kidding. Love the suggestion on ropes & notches. With the rest of this project taking shape the 2x4 uprights are looking marginal at best. Come April when those of us "up north" are borderline insane from the winter, I may just have to dust off the ShopSmith and it's 734 attachments and have a second go.

Are those NorthWest Canoe videos online?
 
I like that the top of the sling box is available to set tools and parts while working on a boat. Sawhorses are less handy in that regard, but I am working on a solution.

The extra tall sawhorses came in handy again. We are taking a tall tree down this weekend that has begun to lean precipitously towards cars in the driveway. If it comes down just a little wrong it could wipe out the canoe rack, so I needed to empty it.

32120427668_72bec24a2c_c.jpg
PB211374 by Mike McCrea, on Flickr

I need to rebuild that rack anyway; I cut it off at ground level 10 years ago, moved it, and then moved it back. It has never been quite the same.

Where to put the boats? Seven went on the extra tall horses,

32120428168_f6a93d98bc_c.jpg
PB211373 by Mike McCrea, on Flickr

And the rest got stuffed in the shop.

32120429188_0707c2b7f1_c.jpg
PB211371 by Mike McCrea, on Flickr

Nine boats in the shop, and I still have room to work around the 20 footer; I need to reinstall the third seat we took out a few year ago.
 
Last edited:
Back
Top