• Happy International Mermaid Day! 🧜🏼‍♀️

1984 Mad River Explorer back in the shop

G

Guest

Guest
If I am reading Mad River’s list of models/materials correctly 1984 was the first year for the “Explorer 16 RX”.

A Vermont-era RX canoe, with some seriously substantial Royalex. It has a memorable used-boat history; someone was looking for a bit of a do-everything used canoe. The RX Explorer came up for short money ($200) and I hurried to send them to the seller.

The potential buyer took a look and passed because one cane seat was busted out. OK then dummy, in that case it’s all mine. Other than the busted cane the canoe was in excellent condition. I no-dicker handing the guy four $50’s, and while I was racking it he started bringing out other throw-in freebies.

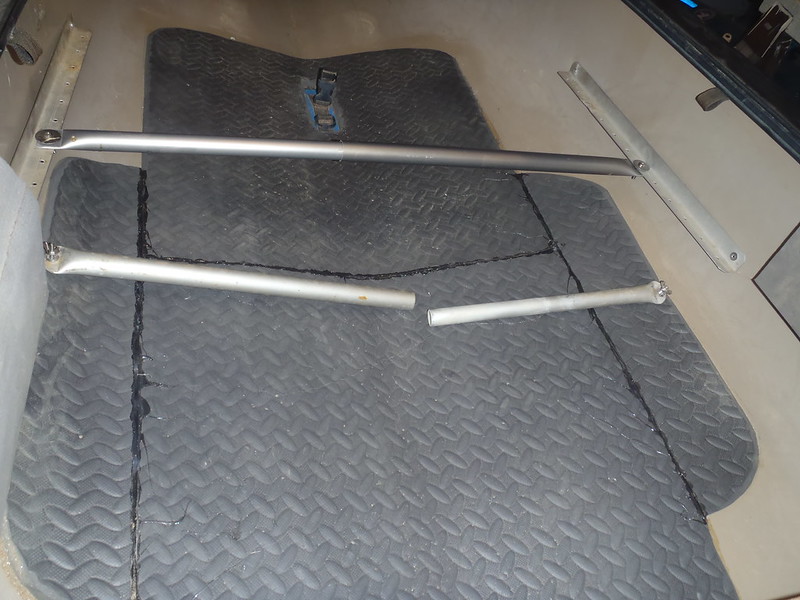
Two Voyageur paddles, two Clement paddles, a boat cart, a tee-bar for a receiver hitch, a side-motor mount, some decent PFD’s. I had started to tie on and drive away like I stole it, but changed my mind and took my time as he kept bringing freebies out.

Originally rebuilt as a center seat solo with kneeling thwart poling boat (with a hidden sail mount) for my older son’s proclivities it was soon displaced by lighter hulls. MRC speced it in Royalex at 72 lbs in the 1994 catalog, which was in later/lighter/less robust RX, and even center seat soloized it seemed every bit of that and then some.

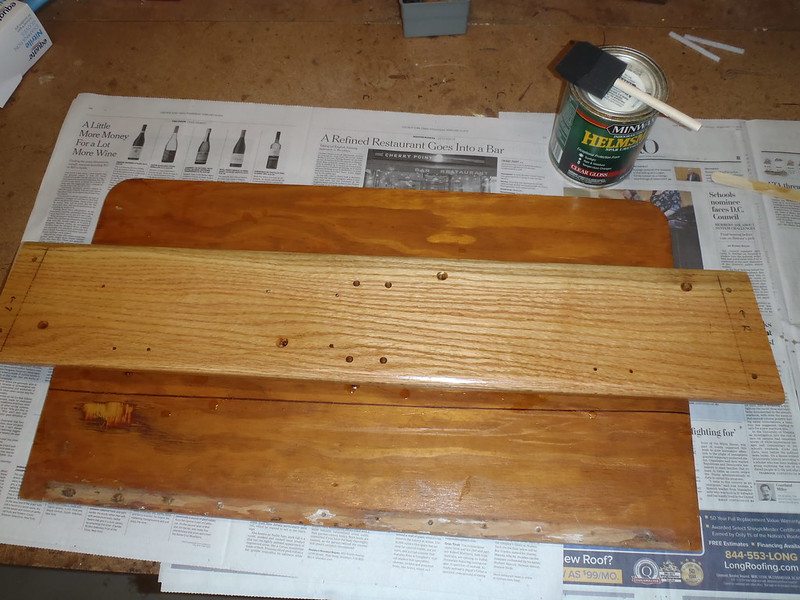
I brought it into the shop a couple of years ago and began stripping it down, losing the padded kneeling thwart and adding some exercise flooring to cover old minicel padding smutch residue left on the floor from two or three past outfittings.

Mid-way through that re-re-built a poling friend stopped by, and I sent him home with the (unfinished) RX Explorer. His then-current poling boat was a 3-seater, yoke and thwarted glass/kev Explorer I rebuilt years ago, and there was no room between seats and thwarts to move around. The yet unfinished RX Explorer had almost 5 feet of walk around room between the solo seat and front thwart with the kneeling thwart removed.

46223980175_4f43746ae3_c.jpg
P2100003 by Mike McCrea, on Flickr

The RX Explorer solo finally returned to the shop. And went up onto the racks; I had other canoes in the works.

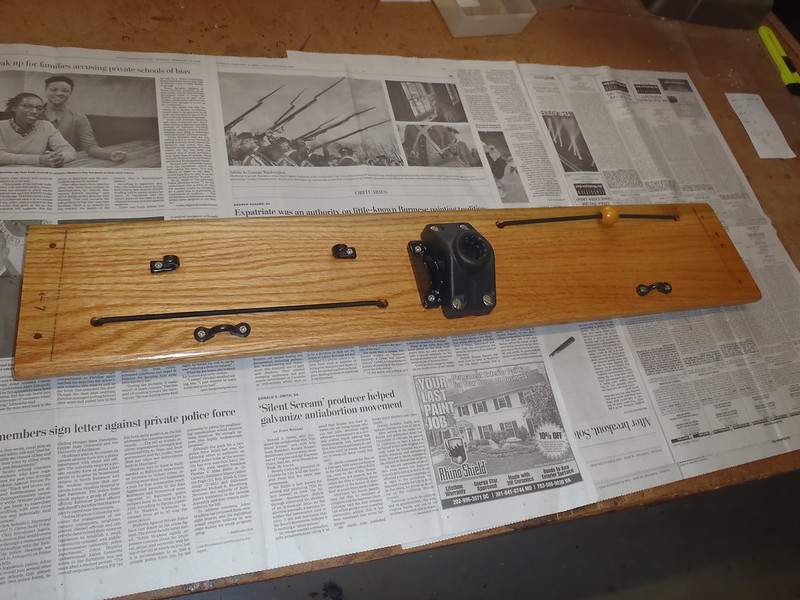
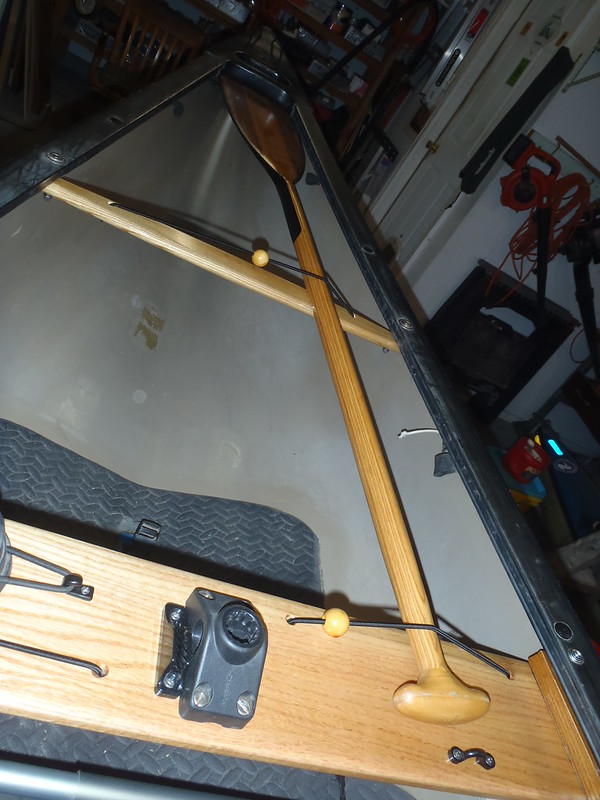
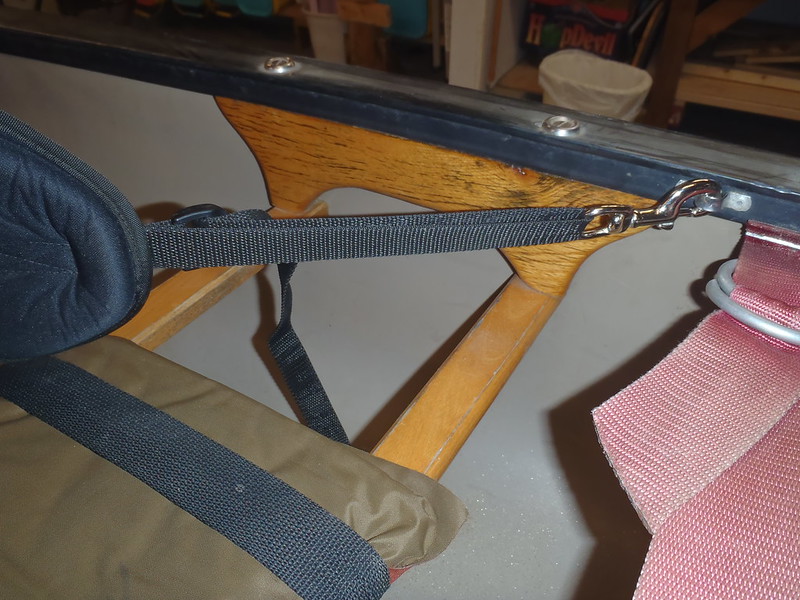
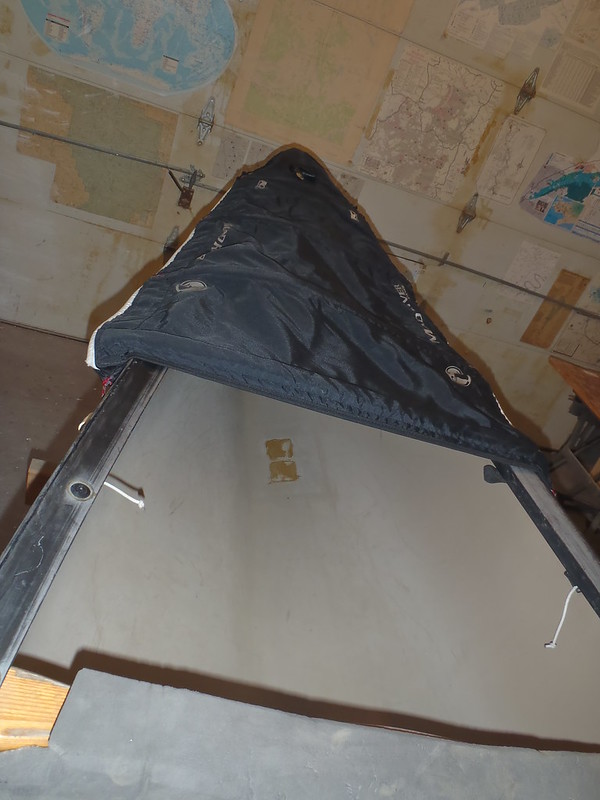
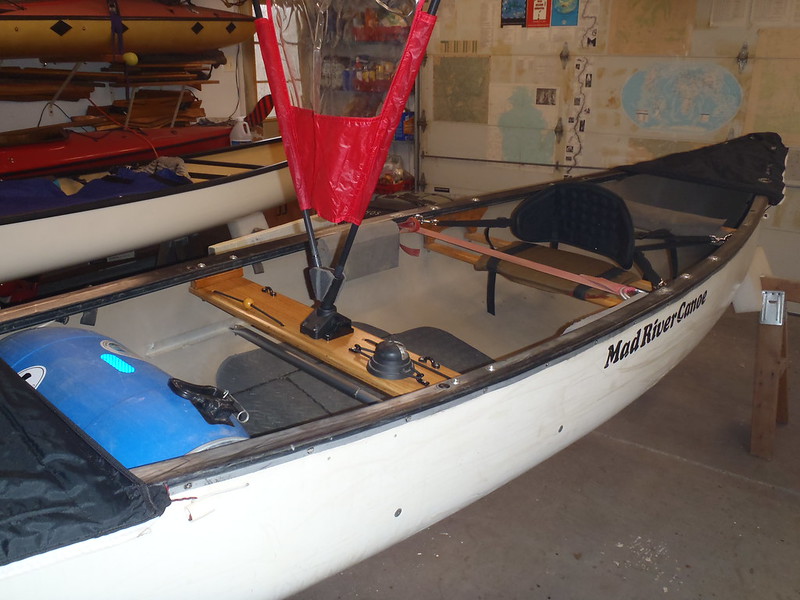
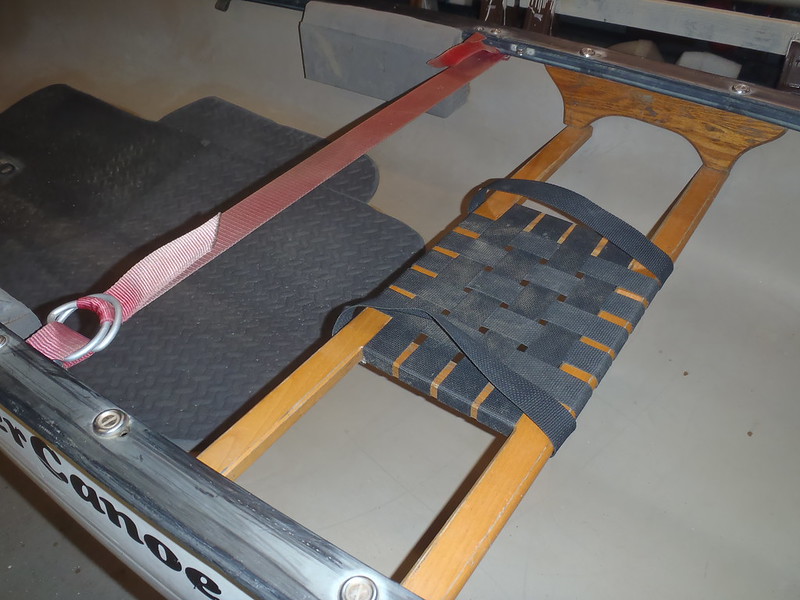
It finally came down for some finishing work. The Explorer is already a nicely appointed and decorated canoe. Strap yoke (note the double D-ring strap connection, proven to hold even a 70+ lb canoe) and truss hung seat with padding straps, knee bumpers, deck and thwart bungees.

46223976635_c7482bd18c_c.jpg
P2100009 by Mike McCrea, on Flickr

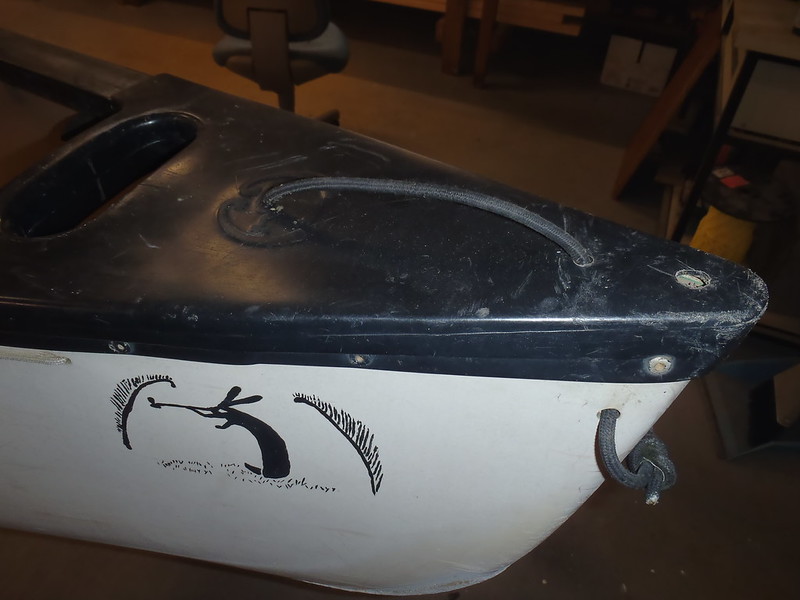
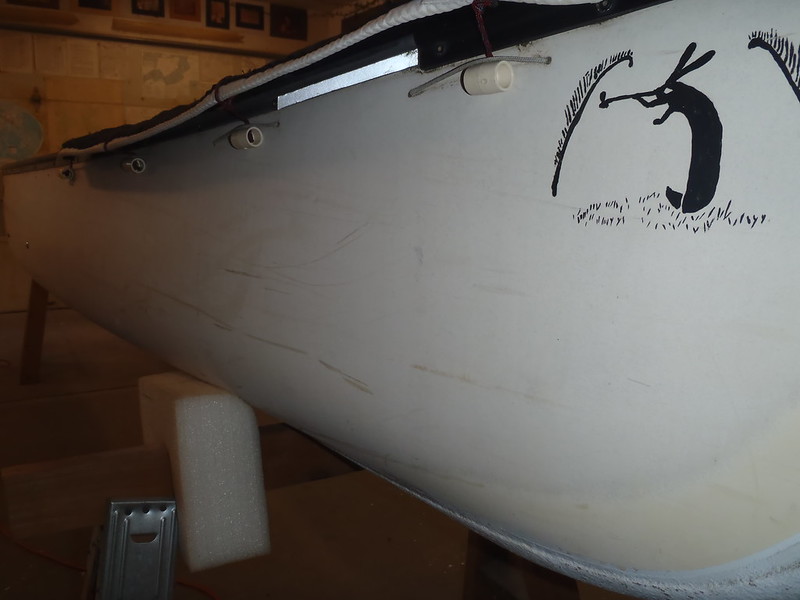
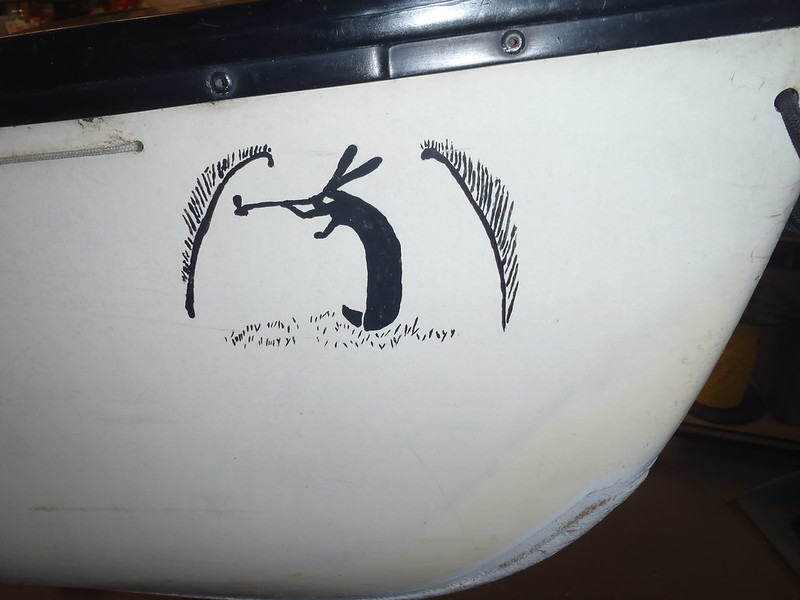
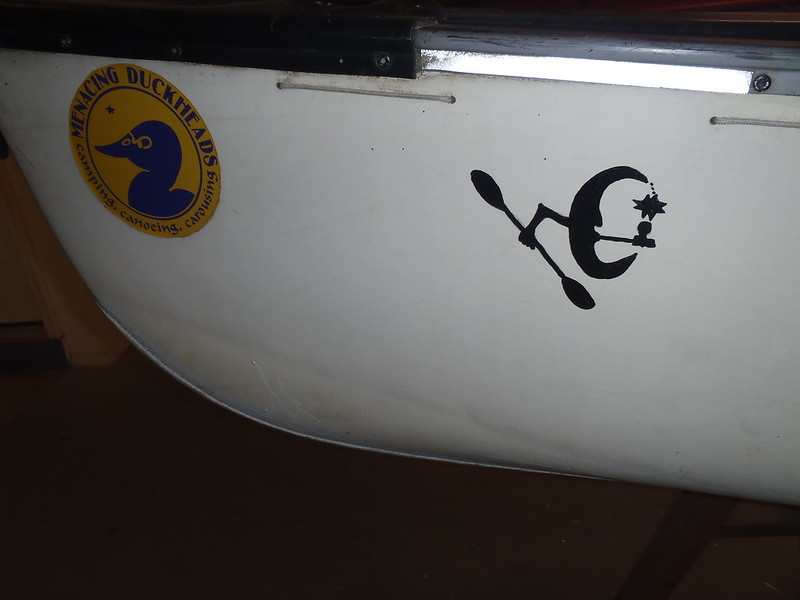
And some personalized stem decorations; a recreation of Chief Tomah Joseph’s original bunny in the ferns and usual Shop Gogetch.

46223978925_1c49711281_c.jpg
P2100005 by Mike McCrea, on Flickr

46223977765_d849bc2168_c.jpg
P2100007 by Mike McCrea, on Flickr

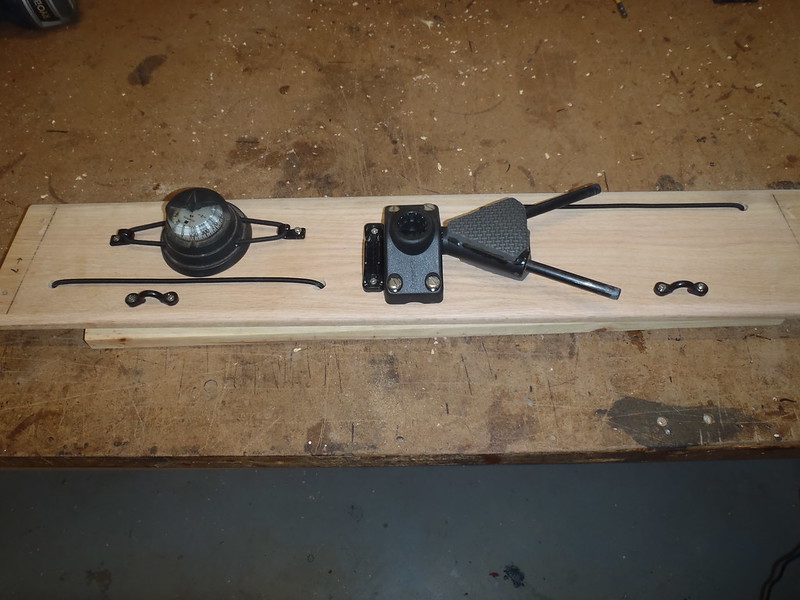
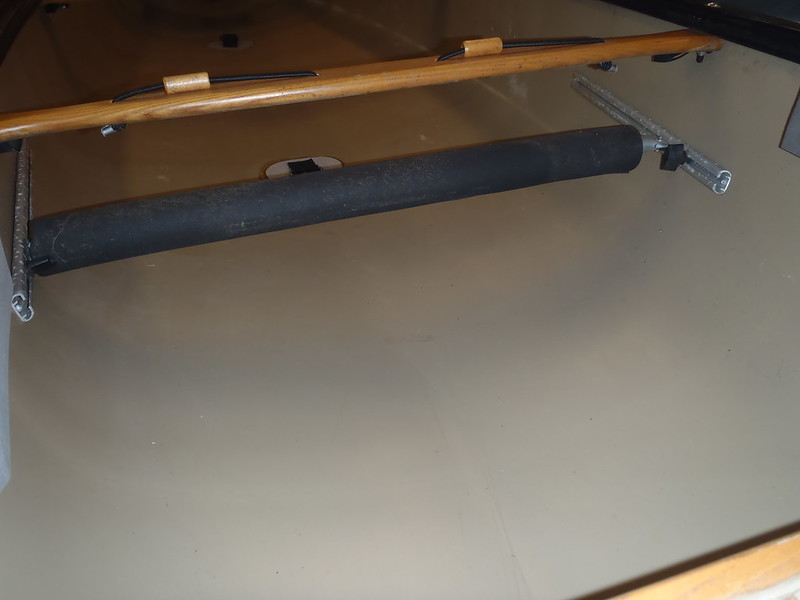
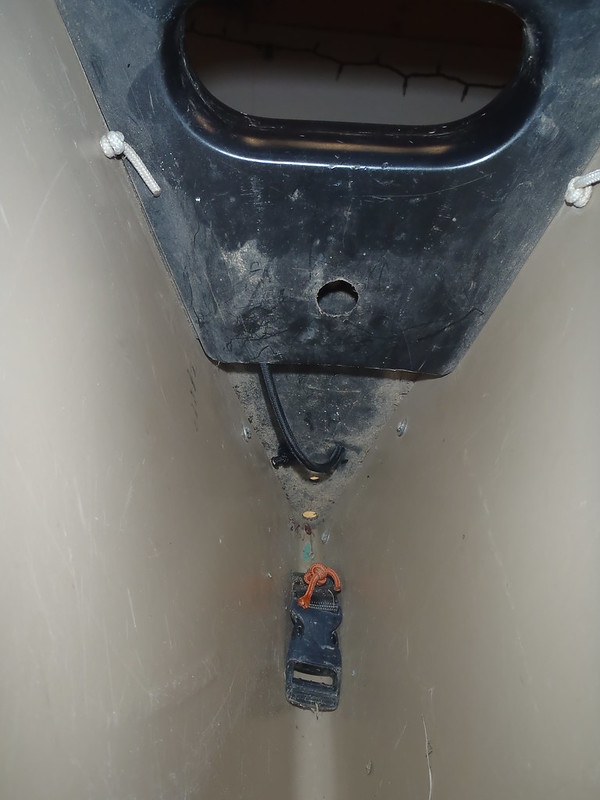
The bungee cord is on its last legs, and it needs an adjustable foot brace. And, eh, a solo seat utility sail thwart.

I have a bunch of easy outfitting work to do. Unfortunately first starting with hauling that (I’m guessing) 75 lb beast into the shop, realizing that it was too muddy/sandy inside and out to work on, hauling it back outside to wash in 40F weather and bringing it once again back inside. Seventy some effing pounds in and out and back in. Accent on the “back” in spinal connotation. But it’s a piece of mid-1980’s Royalex history, when men were men and carried absurdly heavy 16’ canoes.

Maybe 75 lbs on the unwashed carries; there must have been 5 lbs of sand, grit and gravel lodged in that canoe, some of which I needed to pick out with foreceps. Borrower friend never washed it. Actually, for the last year+ he kept it on his van between trips.

I wasn’t even done with the re-outfitting when he stopped by and it headed up the driveway on loan; the gaps between the pieces of exercise flooring hiding sundry old adhesive smutch were filled level with sand, mud and pebbles.

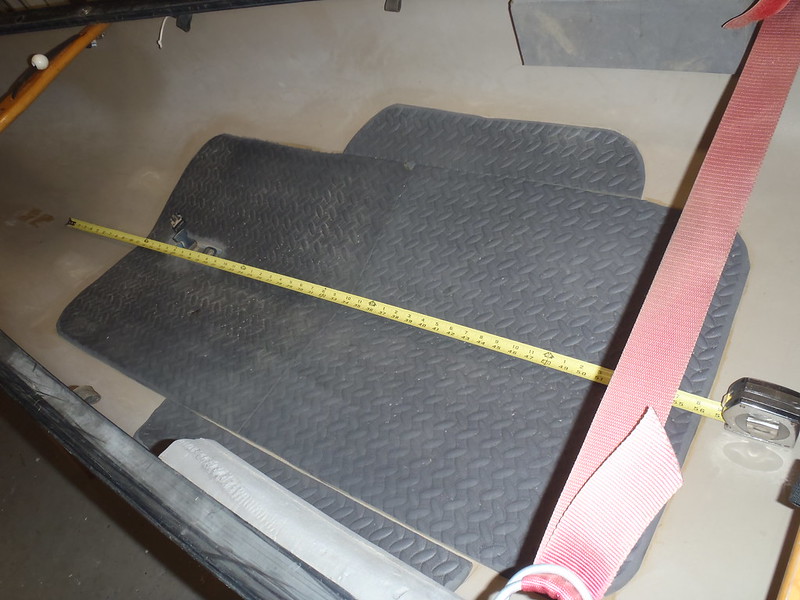
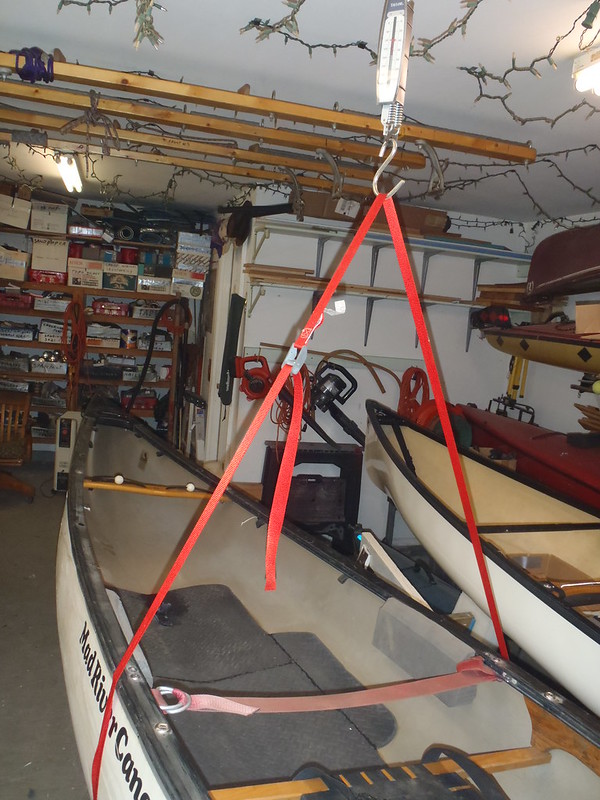
This time I remembered to weigh it before starting any other re-outfitting work. With one center seat on thick DIY truss drops, two thwarts, three pieces of minicel padding, four vinyl pad D-rings and no partridge in a pear tree it weights in right at. . . . .

47138228131_752d6e8c7b_c.jpg
P2140012 by Mike McCrea, on Flickr

. . . . . . 80 freaking Lbs.

It’s not gonna get any lighter, unless I chisel of the stupid 5 lbs kevlar felt skid plates the original owner installed and replace them with a layer of Dynel. And I am tempted to do just that.

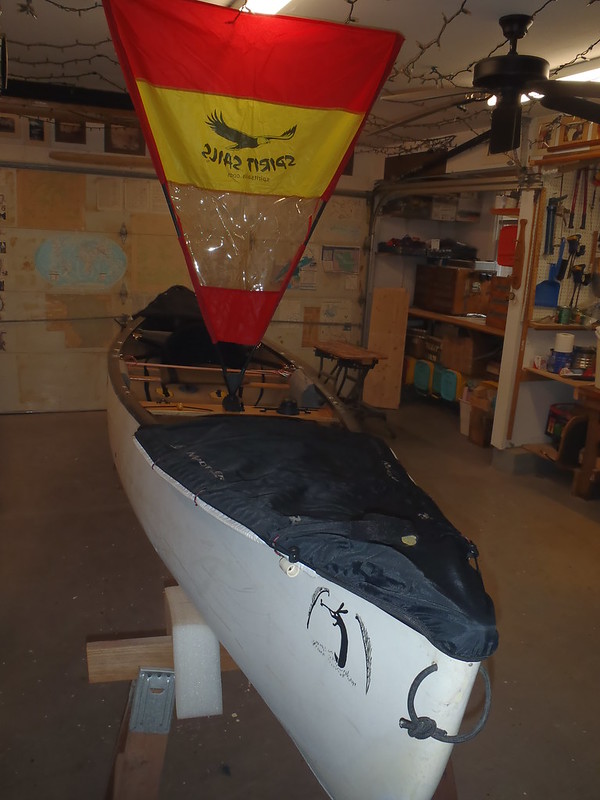
But first it needs a foot brace, and a utility sail thwart.
 
First things first, before I drill any new holes and create new wood debris and curlie cues of aluminum gunwale insert, fill those gaps in the exercise flooring foam with a bead of E-6000.

Time to put in a foot brace. I have an old-style Wenonah foot brace; the hole-drilled angle aluminum and foot brace bar with (eeesh) wing nuts. I always disliked adjusting those, twisting on wing nuts blind and upside down before accidentally dropping one in the muddy bilge. But I have one and might as well use it.

The telescoping bar from that Wenonah brace is too short to span the Explorer, but I have a bar that accommodates the span from a Bell canoe. The original owner busted out one Plexused foam and carbon rail (and cracked a foam rib) when he strapped the Bell diagonally to kayak J-cradles and forcefully cinched it down with cam straps. Yeah, don’t try that at home.

With the wider telescoping Bell bar and Wenonah rails it fits nicely. It’s a rare Bellnonah foot brace.

P2160021 by Mike McCrea, on Flickr

This is what happens when you combine a lightweight composite build, a canoe racked diagonally on J cradles, over-taut cam straps, Plexused rails and an idiot

P2160019 by Mike McCrea, on Flickr

Side note to the foot brace install, accent on the “side”. That was some dang thick 1984 Royalex, even 6” up on the sidewalls. The longest flange-head pop rivets I had barely made it through the hull sides and foot brace rails.

I begin to understand why the hull weighs 80 lbs. Perhaps, early on, MRC took beefy Royalex sheets, similar to those on the Uniroyal Endurall/Warsaw Rocket, and molded beastly heavy 1984 Explorers from them. I’d love to find a spec weight for the RX Explorer from a 1984 MRC catalog.

The foot brace install took minutes. Having installed dozens of them I knew how and where, and didn’t need a can of liquid courage before drilling holes near the waterline.

The next install will take longer. I really don’t want to add any more weight, but it’s a big boy tripping solo, and it really needs a utility thwart and sail mount; that’s a couple extra pounds I’m just not willing to live without.
 
I am getting well practiced at this utility/sail thwart construction. Scrap wood thwart template cut and checked for fit.

Er, checked for fit, and then cut again; the vinyl inwales are 1” deep. I pencil marked the template at the inwale edge so the taper would match. The cuts need to be made at that same angle, just an inch wider at each end to fit in under the inwales.

Ooops, didn’t mark actually mark an extra inch, but an inch less on each side. Cut the template that way and gee willikers, the utility thwart is way short and only fits in a Stretch Armstrong 40” away from the seat. Gawd bless the scrap wood template. Where’s that “Pay attention” shop sign?

Template corrected, 5 ½” wide thwart cut and pre-installed with machine screws for a test fit. Test fit approved, removed, edges run through the router, sanded (1” belt sanders with 120 and 220 on the rounded edges, RO sanders with 120 and 220, some hand sanding).

Sweet. Smooth and laid on the raised nail bed for the first coat of sealant. I even got the brushes, gloves, stir stick and spar urethane out.

P2200002 by Mike McCrea, on Flickr

Eh, getting a little ahead of yourself there Mikey, don’t you still need to drill all the holes for the base mount, bungee and pad eye/deck hook attachments?

Oh yeah, that stuff. Pay attention. At least I remembered to pencil mark left and right sides on all the custom brightwork pieces.

Back to the drill press to make some holes, and make more a little more sanding dust.

Much better, 20 holes, pre-drilled 1/64 larger than the hardware to accommodate some epoxy and urethane pipe-cleanered inside, with everything first test-fitted on bare wood.

P2200003 by Mike McCrea, on Flickr

Now I can move on to the sealant coats, held horizontal self-leveling on the raised nail bed.
 
OK, it can be tempting to get kinda stupid with seal coats and sanding. With the self-leveling nail bed, and two coats a day with Spar Urethane (if I start early and finish late), that utility thwart got a lot of seal coats. Hangers too; five coats on everything before I called it quits. Maybe six, whatever, that’s thick enough.

P2230006 by Mike McCrea, on Flickr

Same with anal sanding. Really, down to 600 grit as a finish sand? Sure, why not.

Why such anal attention I am not sure. I’m not grabbing an 80+ lb boat off the racks too dang often, but I might as well make it right as rain as a big-boy solo tripper while I can. That freaking 1984 Royalex is going strong after thirty five years, and it may last another 35.

I was down to four (almost) right sized machine screws. “Almost” right sized, those left a ½” hook-em shank end too long. Me no like that excessive shank protrusion, and one of those machine screws was slightly bent/wanked. The wonderful country hardware store (with the best ever selection of stainless hardware) had everything I needed.

Fearing for their business future I stocked up, including eight each of the missing incremental-length assortment of machine screws, a box of SS washers that fit 3/16” hardware, and a box of SS flat head screws that fit pad eyes and deck hooks. Somehow I ended up with hundreds of flat washers that just barely do not fit my standard 3/16” machine screws.

I did not, however, pick up a dang box of 3/16” split washers that fit my SS stash, so I found myself hunting and pecking through multiple shop boxes of stainless for those lock washers, seeing if that fit. Nope, nope, nope. . . .oh, there’s one! Now I just need to find three more.

That bit of time wasting hardware search for three cent pieces makes no sense.

Putting the sail mount, fittings and bungee back on is, at least, a no-guesswork joy with pre-dilled hole. I even remembered to put a spacer ball on the right side bungee. Only after I laced the bungee, but at least before I tied the last knot. That spacer ball has a future paddle-keep purpose.

P2240007 by Mike McCrea, on Flickr

That lacing omission with the bungee may have thrown me off my game. There followed a novel flaming bungee cord incident.

I knotted and cut the bungee at one end, flamed melted that end and blew it out before cooling and knotting.

Or thought I did; I was working with the other end of the bungee when I noticed that the shop was smelling excessively melted-plastic stinky. That was my first hint.

I hadn’t actually blown out the flame on the other end of the bungee. It had sprung back to flaming life was burning brightly down towards my fingers like a cannon fuse.

After that bungee episode I checked to make sure open cam cleat for the bow painter was facing in the correct toothy cleated-snug direction. Several times.

The utility thwart drops are simply unused and un-routered square ash gunwale stock, actually 7/8” square, and many years old. I had an 20 foot length of that ancient ash, but it had been too much of a PITA to drag free from storage to bother even getting out. When I finally dragged it free (I had to open the shop garage doors to finally work it free) I cut it in half.

It has been much handier ever since. That piece of ash gunwale stock is (approximately) 30 year old ash, maybe older, leftovers years ago from an old builder friend.

P2240009 by Mike McCrea, on Flickr

Not too shabby once installed and dressed.

P2240011 by Mike McCrea, on Flickr
 
Only a few things left to do. Starting with the thwarts. The stern thwart is padded, for a couple of odd reasons.

The kneeling thwart, once upon a time located where the utility thwart is now, was also padded, in part for comfort, but also for protection when falling-over-in-the- boat while trying to clumsily pole. My older son would sometimes take a muckle up break stretched out with his back across the padded stern thwart with his legs out atop the kneeling thwart

P2240014 by Mike McCrea, on Flickr

And that stern thwart minicel has indents for a pole (or paddle shaft).

P2240020 by Mike McCrea, on Flickr

I don’t really need that minicel foam function in the re-re-build, but there’s no need to replace the thwart, and that thwart fitted minicel shape with pole indents and notches for stern gear straps was tricky to make.

That one I’ll just take out, refinish the ends and reinstall. It has history, if little remaining function.

The front thwart though, that one needs to go. Originally drilled for an over/under/over run of bungee, that cord pattern was useless way up front out of reach. Plus it has five holes, and I only need two for what I have in mind.

The good news is that after I took that thwart out the butt ends, even 15 years after the original rebuild, were still sound and rock solid. Same with the padded stern thwart. However many coats I laid on those butt ends back in the day it worked in those most suspect of bacterial rot areas.

The semi-bad news, familiar to anyone who works on canoes, is that the Phillips heads on the machine screws were filled level with some tenacious black gunk. Maybe road jizz from asphalt and tires. I had to pick the screw heads clean with an Exacto knife before I could get a screwdriver seated.

In soloized guise those thwarts are installed though old tandem seat holes. The stern thwart is perfectly positioned, 16” back of seat frame, so day gear is easily accessible stored behind the seat. The bow thwart likewise; room for a trapped barrel between that thwart and the new utility thwart, room in front for a decent sized float bag or tapered canoe dry bag.

The location is fine, lessee what I have in the way of replacement thwarts.
 
That existing bow thwart of many holes needed to go.

40234999103_5791ff8c5b_c.jpg
P2240016 by Mike McCrea, on Flickr

Do I have a replacement thwart? Dozens. Yokes too.

33356248818_b3acce72e1_c.jpg
P2260036 by Mike McCrea, on Flickr

Some new, some used, some DIY’ed and as yet unsanded and unvarnished. Those DIY’s, despite already being cut to shape and routed, may never get finished, given the labor and sanding/vanishing time spent vs $14 for something already finished from Ed’s, ehhhh. . . . .

https://www.edscanoe.com/standardthwart.html

As a DIY from a plank that’s a couple hours cutting, routing, shaping and sanding, sanding, sanding, and then days of wait time between coats while varnishing. Even without the days of wait delay still in all a couple hours of not-very-interesting shop work. Good thing I’m not hourly, that’s less than $7 an hour if I actually buckle down on it. For a custom piece, yes, for a standard thwart, no way.

The existing bow thwart is only 23” long, I might as well reuse something already on the short side. The shortest thwart piece I had was perfect with an inch of angle cut off each end.

Cut to size and drilled. Two (not five!) holes for a single topside run of bungee cord. A little sanding to remove the old varnish and scrapes. Surprisingly little; I was amazed at how quickly the thin OEM varnish coat came off down to bare wood. I definitely resealed the butt ends of the old thwart on the initial rebuild, but didn’t recoat the rest.

I’d be curious to know how different canoe companies seal their brightwork, or buy their brightwork sealed. Many seem to skimp on their seal coats, not just on the butt ends, but overall.

Two holes for machine screws, two holes for a run of wider spaced bungee. Installed it looks much better, and my balls are in proper misalignment.

47231985941_1d91ff0432_c.jpg
P2260047 by Mike McCrea, on Flickr

The thwart bungees ball serve a purpose. It’s easier to quickly slide a paddle blade under a ball up front, and easier to pick up the ball on the utility thwart and pull it over a paddle grip.

46508475324_73169a1bd2_c.jpg
P2260049 by Mike McCrea, on Flickr
 
Nice. I like the bungee ball.

Different spacers on bungee work well for different things. The round balls are easy to side a paddle blade under, and easy to grasp when pulling the bungee, especially with cold fingers or gloved hands.

Drilled dowels or even a short piece of old wood gunwale stock work better for holding down flat stuff like maps and papers.

P4060714 by Mike McCrea, on Flickr

P3200673 by Mike McCrea, on Flickr

The hardest part is whittling a perfect sphere to make the ball style spacers.

https://www.michaels.com/laras-crafts-wood-balls/M10102812.html
 
I have what I would guess is a 1986 or 1987 Mad River Explorer. It has served me well for quite some time, an amazing canoe, passed down to me from my father. I have dared rocks to do their worst, and they come up empty.

I like the bungee handles. That is something I haven't seen before that might be worth implementing for me.
 
I like the bungee handles. That is something I haven't seen before that might be worth implementing for me.

Beyond serving as paddle keeps the bungees and balls are handiest for the things I tend to repeatedly put on and take off over the course of a day. Hat, gloves, sunglasses, etc.

Having the bungee cord slightly raised off the thwart makes it a lot easier to hook the earpiece of my sunglasses underneath.
 
There was again un-vacuumed drill debris in the hull, and the Explorer still needed a few new holes drilled.

The arrangement of deck plate bungee painter shows how long ago I did the original rebuild. I haven’t put single center line bungee cord on a deck plate in at least 10 years.

P2260028 by Mike McCrea, on Flickr

I always screw up taking the painter out from under the bungee on the wrong side, so it ends up wrapped stretchy underneath, which becomes disconcertingly sproongysproongy when pulling on the rline. That’s a rope nope.

For my snatch and grab purposes, bungee run in a vee, / \ down the expanse of a big vinyl deck plate, is more intuitive. A vee of bungee restrains the painter on each side. When needed snatch it from the middle without any directional pull-which-way thought needed.

It’s hard to put the painter away “wrong”, and with an over/under/over bungee pattern I can tighten up one end knot as needed when the bungee stretches, and have the diagonal run of bungee available under the deck plate.

It’s an 80+ lb Man Card Explorer and needs some serious painter lines under those bungees. Blue Water 5/16” rescue rope should do. Floating, hand kindly, high vis and 2200 lb tensile strength. I regret every piece of crap Home Depot rope I ever put on a canoe, however many (no doubt more than) hundreds of feet of junk rope that may have been. Buy once, cry once. I need some Bluewater 6.5mm rope for the decked boats.

P2260030 by Mike McCrea, on Flickr

The Man Card Explorer still needed an improved back band attachment. Simple sacroiliac comfort for an old man’s back. Surf-to-Summit back bands are simple to install. A pair of SS pad eyes up weight-bearing front snaps, a pair of nylon pad eyes for the back straps. The nylon ones are actually plenty strong; the Explorer already had stainless pad eyes installed up front. Drill four holes, pop rivet two nylon pad eyes for the back straps eyes, and my back at least can take it while seated, if not compressed under the yoke.

P2260041 by Mike McCrea, on Flickr

And a (semi-deflated to start off with, Sitz-bones-in-seat-contact) ThermaRest cushion, wrapped a bit around the front edge of the seat. With the nozzle on my dominate-hand back right, so I can reach back after an hour or two, open it up for a split second’s pffftt, and change pressure points on the seat.

P2260044 by Mike McCrea, on Flickr

Most comfortable seat in the house. The waterproof battery for the Magic Fingers massage chair function mounts under the seat.
 
Time to play dressup, and check some design fit.

The 45L barrel fits snug as a bug, with the D-ring on the floor accessible if I want to run a strap.

P2260051 by Mike McCrea, on Flickr

Without a strap I don’t want barrel free to roll. If only I had saved a box of leftover minicel wedges.

P2260054 by Mike McCrea, on Flickr

A couple coats of contact cement, a little heat gun action and some sandbag weights to hold the wedges pressed down, and presto, minicel barrel traps.

P2270064 by Mike McCrea, on Flickr

If I’m playing dressing up I might as well put on a skirt. Or raise my shields.

Mad River IQ system bow and stern spray shields. Those were first year IQ stuff; without the zipper later incorporated they were a huge PITA to sleeve on. But they are well made, each with four stays. 1984 was not a year for IQ accessories, and I retrofitted those partial covers on the Explorer years ago when I realized they were a no-go on any IQ boat.

P2260056 by Mike McCrea, on Flickr

Crudely retrofitted, held in place via short pieces of plastic pipe as toggles under lacing cord. Tres redneck, but it works very well and installs easily with just four toggles tucked under per side.

P2260059 by Mike McCrea, on Flickr

Stem floatation bags large or small fit as expected, and there are side release buckles affixed deep in the bow and a mate on the floor to run a quick webbing strap.

P2260035 by Mike McCrea, on Flickr

Getting the male side buckle into that stem vee female location can be a PITA. Best to use good, no stretch poly webbing and just leave the straps in place.

DIY tapered canoe stem bags fit nicely as well. crap be strapped Homie.

P2270071 by Mike McCrea, on Flickr

Not a bad looking canoe for 1984.

P2270066 by Mike McCrea, on Flickr

P2270069 by Mike McCrea, on Flickr

FWIW that Man Card Explorer was drawn in from 35” to 33” at center, and drawn in a bit at both thwarts. With the vee bottom, gawd awful giant kevlar felt skid plates and Vermont vintage Royalex the hull showed no change at the waterline or rocker, just a little skinnier at the sheerline.
 
Final weigh in with permanent installs. A hair over 84 lbs. The 4 lb weight gain is largely from the utility thwart and furnishings. Most of that from the wood itself, the thwart is (eeesh) ¾” oak, hence the many seal coats.

It could have been poplar, and thinner, and weighed half as much, but I used what I had on hand

Memaquay will have to carry it for me. Probably including from truck racks to water. Rooobbbbbb, why is the tent site you choose for me submerged in a rain puddle hollow?

It may be time to dedicate a portage cart to uber-boat use.
 
Back
Top