• Happy International Mermaid Day! 🧜🏼‍♀️

15' Willow updates

Thanks Bob. I tend to be pretty methodical in my work. That and my familiarity with hand tools both helped to plan ahead and avoid problems. I am fortunate to have a large work area in my barn so that helps as well. I was surprised that it took 26’ of clear span to rig the canvas stretching apparatus for my 15’ canoe. I needed the clearance at each end to be able to continually duck under the canvas clamps to switch sides during the fastening process.

I’m leaning toward Kirby’s Grayling Gray. I originally wanted to use their Gray Green, but photos of finished work in that color appear to be too pastel. I plan to order a quart of the Grayling Gray and try it… if I dislike it I’ll consider it an expensive primer! Backup color is Grand Banks Beige- also from Kirby’s.
 
I was surprised that it took 26’ of clear span to rig the canvas stretching apparatus for my 15’ canoe.

Good to know. My tiny wood shop is only 20’ long. I will have to rig up my contraption in the adjacent garage.

I’m sure either color will look fantastic. I am looking forward to seeing your project floating.

Bob
 
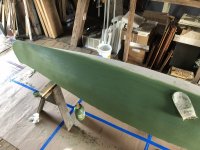
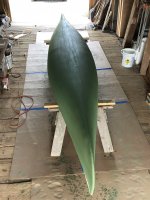
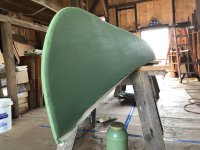
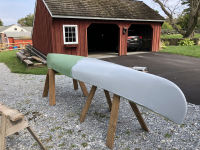
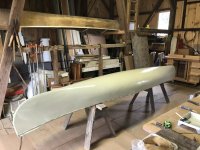
Progress! Last weekend I filled the canvas. My new acquaintance, Al Bratton at Woodstrip Watercraft, mixed traditional filler for me. Color doesn't really matter since the filled canvas will receive at least 2 primer and 2 finish coats, but I wasn't really prepared for the awful pea green color of the filler he made up!

Before:
UOBxQUHgT8mvtSrc+VrpuA.jpg

After:
tS8nwUZTQm6Yc9Ck9CejVQ.jpgLJiX7P1SQ0CxW%V8byVFyg.jpg5XlT3W+yQS+EYguNyr17yw.jpg

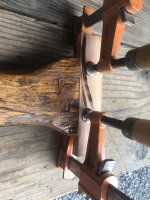
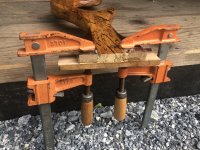
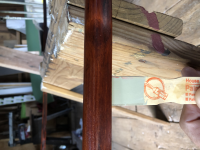
My arm is a little sore from the constant rubbing required to get a smooth, filled finish. And the enamel odor filling my barn is pretty strong. During the wait to cure (one month at least) I repaired my yoke; the end of which had lost the narrow band of end grain at the carriage bolts attaching it to the gunwale. I rabbeted a portion of the damaged end, and glued a new piece of cherry with the grain aligned at 90 degrees to the bolt stress. Cleaned up the excess and re-installed it... good as new, maybe better!
5KYLYjisSUCkiRwh4ODW%Q.jpgs+OfR%PeQyaR7w8LelBGTQ.jpg

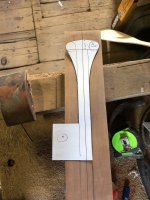
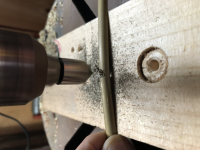
Lastly, just for fun I'm making another cherry paddle.
l9mzkV7aQlKmOj5UxhgYqw.jpg
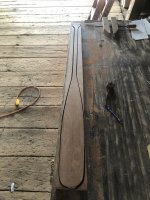
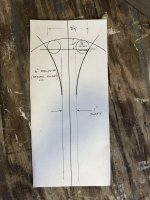
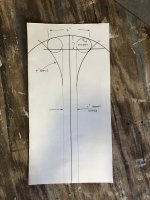
And, I toyed around with designing a grip using a little intellect rather than just tracing another paddle: note, using the packaging from a frozen pizza works well for the paper pattern!!
iOIy86ITT7uS26T1V%Gbhg.jpg2ooEjvH8RhuGm%G+iO9dHA.jpgkyfMAmiBSWe+GaTpP4nIXg.jpg
 
Enjoying the build !
I like how you came up with the grip profile. Dry wall bucket and 5/8" socket !
Neet !

Jim
 
Nice finish on the canvas, your stems look much better than any of the canoes I have done. They will look nice after paint and stem bands.
Looking good.
 
Jim: Thanks for your comment… I learned a long time ago when using curves in carpentry or furniture work that there are lots of circle radii available. The drywall bucket lid is one I use a lot, but paint cans, dinner plates, bowls, and glasses for smaller radii are perfect. It’s interesting to combine different radii to create a cyma curve with opposing radii (like the shape of the curved part of crown molding).

Robin: Thanks for the compliment! I was trying real hard to make it as neat as possible. My other canoe, re-canvassed by her original builder, has some rather unsightly canvas overlap under the edges of the outer wood stem. It bothers me so I tried hard to avoid that. It’s going to be hard to wait 4 weeks for curing until I can sand and paint!
 
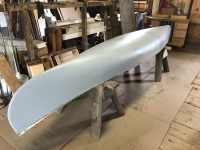
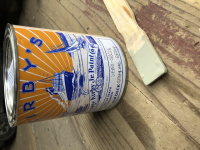
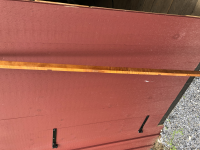
Brief update: My color paint arrived from Kirby's paints in New Bedford, MA. Grayling Gray is the color name. I couldn't resist opening the can and dipping a stirring stick in to make a sample. In this photo it's adjacent to the mahogany outwales to which I just gave the first coat of wiping varnish. My apologies... I can't seem to rotate the picture properly. It doesn't appear this way in my photos file. Just tilt your head to the left and you'll see the outwale and the sawhorse to which it's attached. In the background the filled canvas covering is quietly curing- two more weeks to go before primer goes on.

I thought the Grayling Gray would be a bit darker. It looks differently on the company's website https://kirbypaint.com/products/custom-color-grayling-gray-marine-topside-paint, but as I said if it's not right it will be an (albeit expensive) additional primer coat! Maybe a paint expert can advise me on how to add a bit of colorant to darken it a bit if necessary.

tempImagepNQ7zx.png
 
Progress report:

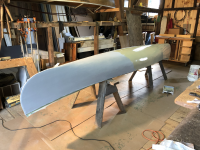
I've applied two coats of primer to the previously filled (green) and sanded canvas using Interlux alkyd enamel PreKote primer, with diligent sanding between coats; one coat of color so far, Kirby's Grayling Gray; drilled and countersunk the new brass stem bands; varnished the original mahogany outwales. Another round of 220 grit hand sanding to go and one more coat of color. tempImagetxzDlR.pngtempImagebQSZIG.pngtempImagejWnvfZ.pngtempImageO6ggah.pngtempImagen5a6R2.pngtempImageVGOWAJ.png
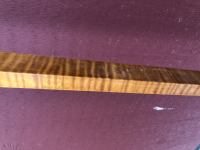
While watching the paint dry..... jus' kiddin'; I was pondering what I would do in a future restoration or build in which I would fabricate new outwales. I recently helped a friend who is a fine furniture maker downsize his shop due to semi-retirement. I was able to scavenge a lot of off-cuts of furniture wood; cherry, black walnut, tiger maple, walnut crotch slabs, etc. I was thinking that the long pieces of tiger maple I got would make some cool outwales in the future. The tiger maple slabs will make some interesting laminated paddle blanks along with a maple shaft glued to a thin black walnut spine on the centerline. This stuff is like a new addiction. This project hasn't even touched water yet and I'm already thinking of the next one... or two... or more projects!
tempImagelNEx7X.pngtempImageJZss1I.png

I'm excited. I'm getting close to paddling this lovely little canoe!

Note: My apologies, I just realized that uploading vertically oriented photos causes them to be rotated sideways. I'll try to avoid that in the future.
 
This stuff is like a new addiction. This project hasn't even touched water yet and I'm already thinking of the next one... or two... or more projects!
That's why I have 13 WC canoes. I could have used an intervention. Only way I was able to kick the habit...ran out of space.
 
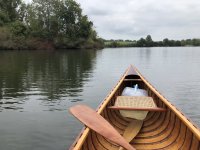
2nd coat of color is on. So, what do you do while the paint dries?…..

Go canoeing!

At the local lake, which used to be a tiny historic village specializing in water powered milling (grain, textiles) until the state dammed the lower end of the valley and made a state park & flood management impoundment.

6481893A-C18B-4A3F-968A-30EF2C4BBC76.jpegFB67C1CB-6E23-494C-A8FD-49C460DC9C0F.jpeg
 
stunning canoe and workmanship. I like your engineering style too, will have to start saving some of those frozen pizza crust cardboards, ya never know...
 
Patrick, your current w/c canoe clearly does not trim properly, so please consider selling it cheaply to me when your stunning gray Willow is finished and the current one becomes redundant. (Says he, double green with double jealousy.)
 
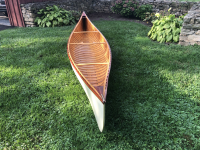
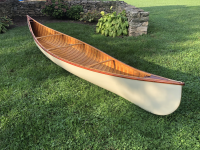
She's done! Well, for the most part anyway. I still have to determine the best seat location which is fundamentally impossible to be "best" for all purposes. So, for me, best will be the one that works ideally for tripping rather than the occasional evening paddle on my local lake. For that I will continue to add weight to the front of the boat to- as Glenn puts it "trim properly". The observant among you will notice that I haven't fully decided what to do with the outwale extension beyond the stem band. My original thought was to cut it back to the stem band and taper the ends.... but now I'm not so sure. I may keep 'em long for a bit. Maybe even wrap them with split Spruce root like a birch bark canoe; or, cap with a copper or brass cap like some of the Northwood Canoe Co. canoes. I'll have to, as my Vermont pal Steve says... "cogitate on it a bit, don't ya know". tempImagemVbriK.pngtempImage5QcflQ.pngtempImagezZihFs.png
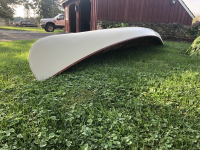
At the beginning of this process I anticipated making a sling style seat which could be adjusted to find that ideal seat location. I have since realized that this canoe is built too lightly to allow a sling seat which will pull the gunwales inward once weighted. These gunwales will flex inward too much with a sling seat.

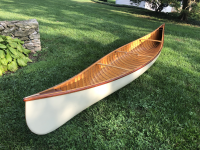
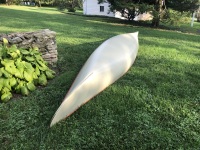
I really like the color, Kirby's Grayling Gray. It pays homage to the original Chestnut Gray which is fun, and it's something of a chameleon. The color changes significantly depending on the lighting. She's got quite a lot more green than these photos might suggest. She'll look great drawn up onshore and overturned at some remote campsite I think!

Glenn, I appreciate the thinly disguised compliment in your last post! However, deciding which canoe to 'give up' would be like asking which of my kids I like the most. They both have their qualities (and limitations) which would make that impossible. Oh yeah, the canoes do too!!

I would like to thank all of you who have read, responded to, and complimented my project. It's much appreciated. I especially want to thank Robin, who I only know of through this forum, but who has inspired me with his collection of Chestnut canoes, and more generally, with his appreciation for the wood/canvas canoes as something more than an 'object d'art'.

Here are a few pictures to enjoy. Now... where is this lovely canoe going to get wet first? I'm thinking a nice Adirondack pond would be appropriate!
tempImage6WnGZT.pngtempImageVPthmc.png
 
Nice job. Really good finish on the painting. The first one's the toughest. You'll find yourself looking for that "basket case" now to rehab.
 
Back
Top