• Happy Birthday, USA (1776)! 📜🪶1️⃣3️⃣ 🇺🇸🗽🎇

A Raven from Scratch

I have noticed that and I've wondered about it. I really enjoy building these and I'm hoping that at least some of the viewers are reading with intent to start a build of their own. If that is the case, they are, hopefully, aware that the members of this forum are extremely willing and able to help (and don't get terribly offended when we won't always agree with, or listen to, the advice given).

Regarding that, I've been re-reading Brian's explanation in post #140.- I'm wondering if I should be building the seats differently and I'm tempted to make a half dozen each way and break them except for one little issue: A fair test would include webbing the seats completely and that takes a few hours the way that I do it. (I guess I could wrap & staple webbing and even build them entirely from Aspen or Pine if the aim was to merely test the joint failure...)

Oh well, that's (maybe) for another day...

I rounded the edges of the seat frame by wrapping sandpaper around them and using it like a shoe shine rag. My understanding is that a radius is stronger than a sharp edge and, while I don't understand the physics of that (in all honesty, I've never bothered to try), I can just go along with the idea as it's more comfortable anyway.

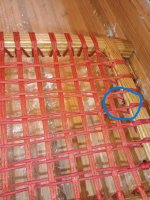
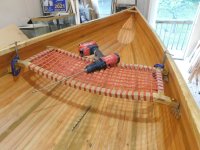
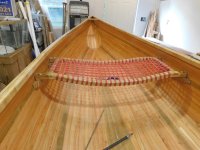
After that, I put small pencil marks every inch from center on all 4 pieces and varnished the frame. When dry, I started wrapping and weaving the current seat using 5/32 inch paracord (I found a roll of dark red and thought it would complement the colors of the Larch & Sassafras really well). Doing it this way eliminates drilling the seat frame but, as mentioned above, it takes hours.

View attachment 146824

It's also hard on the hands pulling that skinny cord tight but it does make for an attractive (IMO) and comfy seat.

Now: not to discourage any would-be builders but mistakes are made. I believe that all can be remedied but some take more work than others and, in keeping with my "learn from my mistakes" demeanor, I'll share my latest.

Over the course of the past 2 days, I've got a total of about 3 hours weaving this seat. I had a 100 foot roll of paracord and I didn't use anywhere near that on my Freedom seat. This one, however, has almost 3 times the seating area so, much to my dismay, 100 feet was insufficient the way that I'm webbing it.

View attachment 146825

My options, as I see them: find more red paracord and attempt to hide the knot on the bottom of the web where I won't sit on it (I think I can hide it under the spreader bar) or take it all apart, remark the seat frame with 1 1/4 or 1 1/2 inch spacing and see if 100 feet is sufficient to get coverage with that spacing (pretty sure that it will be).

As mistakes go, this one is relatively minor and the corrective action required is pretty straight forward: "You didn't do it right so try again". Taking it apart will probably take a couple of hours so I'll be searching for red paracord during my travels tomorrow.

RE: testing the seats

If your goal was to test the joint, I don't think you would need to do the webbing, I agree that for a full blown comparison, that would be the ideal ... but the thought here was that the joint construction itself causes a weakness. What isn't clear is whether that weakness is enough to cause failures or if it impacts total strength in any meaning way.

I suspect that could be determined just using a constructed joint, i.e. just one half the seat ... the long member, with 2 completed dado joints. That would simplify the test and reduce the work required to your scratch your curiosity ( and mine/ours)


Brian
 
That would simplify the test and reduce the work required to your scratch your curiosity ( and mine/ours)

I may do some testing this winter. I'm hoping to build one more solo (Alan sent me his Bloodvein II plans) and I suppose, having recently become a grandfather, I should put together a tandem at some point. I'm thinking 4 or 5 should be old enough to walk portage trails so I've got a little time.
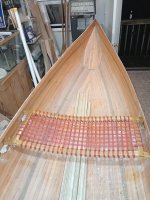
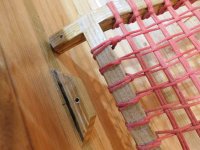
I found a 50 foot roll of 5/32 red paracord today (paid entirely too much for it but it was there). I had to tie the knot about a half dozen times before I got it to hide beneath the spreader bar after it was stretched tight.

IMG_20250521_205444654.jpg

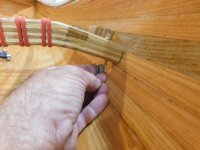
I finished weaving the rest, supported both ends on blocks & parked my posterior upon it. It held me & seemed comfy so I threw it in the boat. I'm very pleased with the color and even more happy that I didn't have to take it apart and start over.

IMG_20250521_205512988.jpg

I've got (as usual) too many irons in the fire but I'm thinking I may have this one on the water by Monday night. (I guess I'd better configure some roof rack options on the car soon)
 
Having met you, and not that I purposely noticed, but I can accurately say that your posterior is in no way adequately large enough to fill in that extremely generous seat. You could have saved paracord cash by moving the side rails in to a point that was more reflective of the bottom line, so to speak.
 
The seat is overly wide as an experiment or sorts. I'm figuring that, as I slide to the rails, the boat will automatically heel. I probably don't lean the hull enough on turns so the seat may force me to. 🤷‍♂️

If I were to build a seat for you, I could put one of the spreaders in the center and save real cash by only webbing one side. (It really IS excessive at almost 250 square inches of webbing)
 
...but I'm thinking I may have this one on the water by Monday night.
Wow.

Reality check: it's WAY past "Monday night" & I'm still not done. I have, however, been making some progress...

Since last check-in, I've glued & screwed the inner gunwales

(mixed up a small batch of epoxy, thickened it with sawdust [from the dreaded sanding of the inside], buttered the inner gunwales with it, & screwed them into place [after having countersunk some holes for the screws]. It is my opinion that a mechanical fastener plus the epoxy has superior strength to either individually and, since my boats are [hopefully] destined to transport me in wilderness settings, I want the most strength possible.DSCN1863.JPG

DSCN1864.JPG

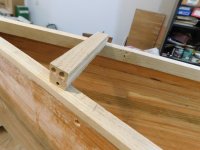
After that, I fitted 2 grab handles for the bow & stern plus one center thwart (plans call for another behind the seat but, since I'm not hanging the seat from the gunwales, I considered this one optional and went with just one 28 inches forward of the seat... the distance that I've determined that I need so that I can tie the paddles between seat & thwart and eliminate the need for a portage yoke).

I used the oscillating sander to match the compound angle of the inner gunwale (and moved forward or rearward if I missed) until I felt that I had tight fits, then put pencil marks on the support structures and the gunwales. These served to locate the handles as well as to indicate to exact placement and I then eyeballed and countersunk a 5/16" hole where I thought the screw would be centered in these supports and the center thwart. I then drilled through the hull and into the handles/thwart with an 1/8 inch drill.

DSCN1871.JPG

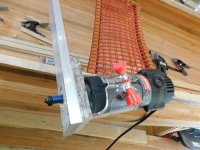
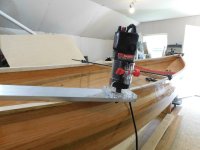
The inner gunwales were still proud of the hull at this point so they needed trimmed flush. I've refined my jig a little since the 1st build and I am now using a 1/2" x 3" x 48" piece of aluminum bar stock that has been drilled for the trim router and tapped so the base of the router can be attached to it without clamps and the screws remain flush.

DSCN1869.JPG

This set-up allows me to maintain contact with both sides of the hull so the router doesn't rock and the bearing on the router bit ensures that I can trim the gunwale right up to the hull. (note: I put 2 thicknesses of heat shrink tubing on the bearing [visible in the above picture] in hopes that I could trim a few thousands proud of the hull. The shrink tubing lasted about 5 minutes... oh well...)

DSCN1870.JPG

I watched the grain carefully this time so as to not catch & tear it out and I found that the Sassafras is far more forgiving than the Cherry was. I had one place where I caught the grain & it started to tear out but it was very minor.

I used the jigged trim router to cut the inner gunwales flush(ish) with the hull then used the long board sander to smooth the cuts, true them to the exterior of the hull and rough up the hull for good adhesion. I then used the 5/16 inch bit to cut slight recesses into the thwarts & inner gunwales figuring the thickened epoxy would fill these voids and provide a little more strength.

DSCN1874.JPG

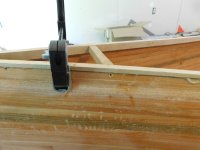
I then fit the outer gunwales, cutting them as I had the strips; using the hull as a guide for the shorter side and allowing the other side to run past

DSCN1872.JPG

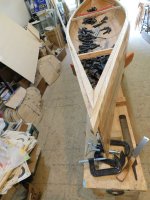
At that point, I mixed a double batch of epoxy (knowing that I usually have 45 minutes to work with it), mixed some sawdust in to thicken it, buttered the ends of the grab handles & thwart (and the inner gunwale where they'd make contact) and secured them with 1 3/4 inch exterior deck screws.

DSCN1875.JPG

At this point, I might need to mention that working times for epoxy are far different (at least in my boat shop) in the winter than they are in the summer. The Raka epoxy has proven to be very forgiving in the past and I figured that a double batch would probably be sufficient for support structures AND outer gunwales so I mixed up a lot. I found out that it was already starting to kick by the time I secured the grab handles and thwart so I wasted quite a bit of epoxy.

DSCN1880.JPG

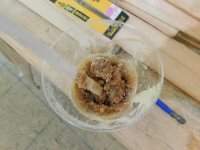
Next, I mixed up a 1/2 batch but, rather carelessly, threw a handful of sawdust in and wound up way too thick, thereby wasting another (small) batch of epoxy.

DSCN1876.JPG

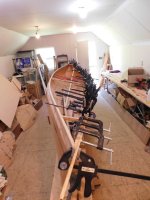
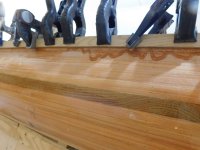
Finally, I got my head on straight and started mixing single batches and adding sawdust slowly until the mixture was somewhere between honey & creamy peanut butter. I then buttered the outer gunwales using the mixing stick like a butter knife and leaving the epoxy tapered slightly so that it was heaped up a bit in the middle. This ensured that I had a good squeeze out when the outer gunwales were clamped into place

DSCN1877.JPG

I then took my (gloved) finger along the bottom of the gunwale to remove most of the squeeze-out,

DSCN1878.JPG

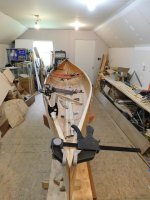
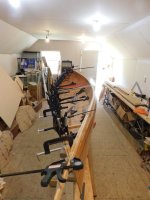
waited a couple of hours for the first side to set up (I need to buy more clamps lol) and repeated the process for the other side.

DSCN1879.JPG

(yes, in case you're curious; the clamps add enough weight that they pull the hull downward within the cradle)

And that's where I am tonite. I should be able to get over tomorrow and scrape away the squeezed-out epoxy, trim the over-run outer gunwale pieces and I might even get the seat drilled. Still hoping to paddle it over the weekend but we'll see...
 
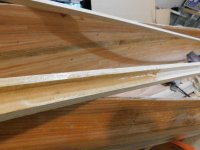
Went back over this afternoon, removed all of the clamps & scraped the excess epoxy where it squeezed out.

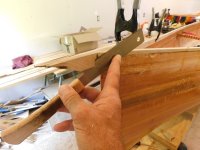
I then used the pull saw to cut off the outer gunwales where they had run past the ends (Personally, I think it looks better when the outer gunwales don't end before the boat does)

DSCN1881.JPG

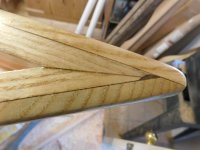
I don't, however, like the sharp points that threaten to impale me when wading rapids (worried way to much about that when I left the points sharp for my Steel River trip) so I blunted the end (arbitrarily) with the pull saw

DSCN1883.JPG

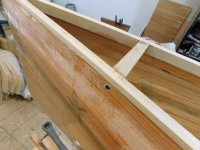
and used the rasp and then sandpaper to smooth & round the ends. I also sanded off the sharp edges of the gunwales, thwart, etc. removing my pencil marks (makes it harder to see where I missed my marks) and smoothing out the scarf joints.

The result is an aesthetically pleasing (to me), gunwale that provides adequate rigidity without excessive weight and is unlikely to skewer me it I slip while wading a rapid and fall upon it.

DSCN1884.JPG

Satisfied with that, I removed the seat and used the orbital sander and some 80 grit to scuff the inside for spar varnish. That went well until I caught an edge while roughing up the stern float tank and the sander quickly cut through the glass (remember, there are no fill coats inside; just a wet-out)

DSCN1885.JPG

The area wasn't large and a strip canoe will float without float tanks so I was tempted to pretend that I didn't see it but, in the end, I decided that, any canoe with float tanks should actually have the extra floatation of those tanks and I decided to cut a small strip of cloth (4 oz, I think, but it was a scrap so who really knows?), mixed up a half batch of epoxy and wetted out the patch with a paint brush (the one I intended to use for the spar varnish, actually... I think I've got more at home. Hope so as most local stores are closed for the 4th tomorrow...)

DSCN1886.JPG

After one final sanding on the trim, I swept up the sanding dust and I think I'm ready to spar varnish the gunwales & inside tomorrow (unless someone can definitively say that I should allow that float tank patch for cure a few days). The outside (IMO) can wait until I get the tie-dyed Merlin done as I can do them both outside at the same time and I doubt that a couple of paddles will destroy the Raven in the meantime.

DSCN1887.JPG
 
Back
Top