• Happy Marine Mammal Rescue Day! 🐳🐬🦭🦦

Repair of Royalex canoe

Joined
Nov 29, 2012
Messages
740
Reaction score
323
Location
southwest Indiana
There was a recent thread regarding repair of hull cracks. That happened to be on a composite boat, but questions sometimes arise on this and other forums regarding repair of Royalex hulls. I recently repaired an old Mad River ME Royalex hull that had obviously sustained damage in a pin under a prior owner. This involved removal of crappy Kevlar felt skid plates, repair of multiple hull cracks, application of interior Kevlar patches and a multi-layer concentric S fiberglass exterior patch, application of Dynel abrasion plates and a keel strip, and reoutfitting for whitewater use. I made a photo album for a friend on flickr which is available publicly if anyone is interested. The individual photos have captions explaining the process.

http://www.flickr.com/photos/42020723@N02/sets/72157657942924708
 
Ditto. That looks mean with the black accents. How bad does the Dynel fluff up with resin without peel ply or a vacuum bag? Is that just urban boat building legend? I was thinking of using Dynel for the skid plates on my upcoming skin on frame river canoe instead of Kevlar felt, using G flex instead of regular epoxy or more Hypalon. I have a vacuum pump either way, but I'm also lazy.
 
?!? What did they do to that thing? I thought one of the reasons that people like royalex is that they have seen a canoe pinned/folded, and that it just shrugged and walked away once free... Guess every material has some limit.
 
Dynel does tend to take up significantly more resin than a fiberglass layer of comparable thickness but an abrasion plate consisting of a single layer of 5 oz/sq yd Dynel is still considerably thinner than one of Kevlar felt material. Without application of peel ply the Dynel fibers fluff up a bit as they saturate so that the surface after wetting out is a bit rough. It is not all that difficult to smooth it out by wet sanding.

Peel ply will certainly allow one to achieve a smooth result quicker with less sanding. When I was working on this boat, temperatures were very hot and by the time I got the whole piece of Dynel wet out, the epoxy applied to the first part had already kicked, so it was too much bother to use peel ply. I imagine I could have applied it piecemeal but decided not to.

I have seen many wrapped Royalex boats and quite a few wrapped three layer polyethylene rotomolded ones as well. Contrary to what the manufacturers would have you believe, not one has ever popped back out without visible damage if there was significant indentation. There are always at a minimum visible creases in the material where the foam core has been crimpled. Furthermore, there can be cracks in the solid ABS strata that are covered by visibly intact vinyl material. The vinyl material is more elastic than the ABS and it seems it will sometimes stretch without breaking while the underlying ABS cracks. On this particular hull, quite a few of the ABS cracks were covered by normal looking vinyl.
 
Pete, great to see a near-dead boat brought back to useful and attractive life. Kudos

Peel ply will certainly allow one to achieve a smooth result quicker with less sanding. When I was working on this boat, temperatures were very hot and by the time I got the whole piece of Dynel wet out, the epoxy applied to the first part had already kicked, so it was too much bother to use peel ply. I imagine I could have applied it piecemeal but decided not to.

I have been very impressed with how using peel ply over Dynel compresses the Dynel so that it isn’t standing tall like (phrase I read and liked) “a resin saturated sweatshirt”. I’ve been taping around the Dynel, removing the tape once the resin has stopped dripping/running, and then laying the peel ply in place and smoothing it out. At that point the resin has begun to set up a little, to where it is not running or dripping but is still compressible tacky.

I learned a neat trick from DougD for taping around curves. Instead of trying to force the tape into a curve, or using many small pieces, he uses wide masking tape, sometimes two or more slightly lapped pieces, laid on so that the edges of the curved “box” are covered with tape overlapping inside the boxed area to be epoxied or painted.

The masking tape is transparent enough to see an outline of the area to be epoxied, or just lay the piece of Dynel on top and mark around that. Then just cut out the desired shape with a razor blade and remove the excess inner tape.

I used Doug’s razor blade trick to make the repair-hiding flames on the Klepper, which would otherwise have been impossible to tape out for painting.
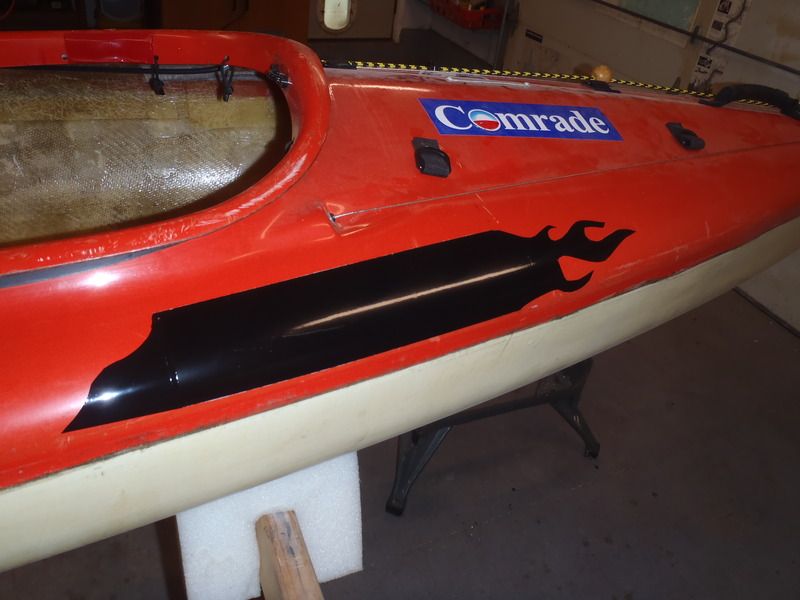


Doug used that method to add some accent to the black skid plates on his Optima, painting on a stylish black wave curve that ties the black seam trim and black skid plate together. Hard to describe how nice that looks on the stems of his boat, but the next black skid plate I install will get a similar treatment.

Hey doug, post a photo of that end design.
 
No Title

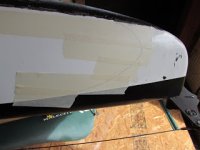
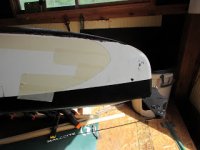
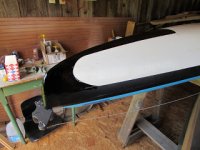
Here's pictures of how I painted the bow and stern of the Optima. Pretty simple once I discovered I could see my pencil line through the masking tape. I was worried it would bleed through the tape but it didn't. Another trick to remember! Two pics aren't show but if you click on 5 pictures showing you can see two more of it on the water.
 

Attachments

  • photo2946.JPG
    photo2946.JPG
    20.8 KB · Views: 0
  • photo2947.JPG
    photo2947.JPG
    23.6 KB · Views: 0
  • photo2948.JPG
    photo2948.JPG
    29.9 KB · Views: 0
  • photo2949.jpg
    photo2949.jpg
    99 KB · Views: 0
  • photo2950.jpg
    photo2950.jpg
    68.5 KB · Views: 0
Last edited:
Here's pictures of how I painted the bow and stern of the Optima. Pretty simple once I discovered I could see my pencil line through the masking tape. I was worried it would bleed through the tape but it didn't.

Doug, I do appreciate that razored-off tape trick and now have it in my bag of shop tricks.

But where are the photos of the original design, when you got too tricky for your own good and it came out looking like clenched butt cheeks or a giant penis?

HAHAHAHAHAHA…….
 
Actually can't find pics of that design but clearly recall the better half calling it a butt shaped thing while you compared it to other parts of a man's body. Clearly it was time to repaint!
 
Back
Top