• Happy Birthday, William Shakespeare (1564-1616)! 2️⃣🅱️, 🚫2️⃣🅱️

Project Boat – Mad River Independence

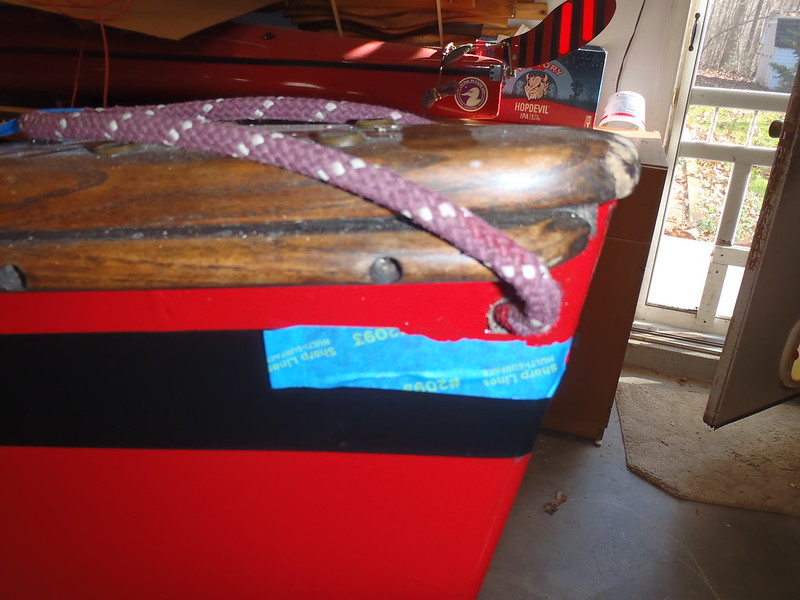
I had a little more EZ-Poxy painting to do, might as well touch up the teeny black stripe drips on the red stems.

PB130052 by Mike McCrea, on Flickr

Who would ever even notice? I would notice; I saw, still see, every flaw, miscue and blemish on every canoe I have ever rebuilt. I expect the other builders and rebuilders out there see the same. Little tape, couple seconds with a tiny paintbrush, much better. Like anyone would ever have noticed.

PB130055 by Mike McCrea, on Flickr

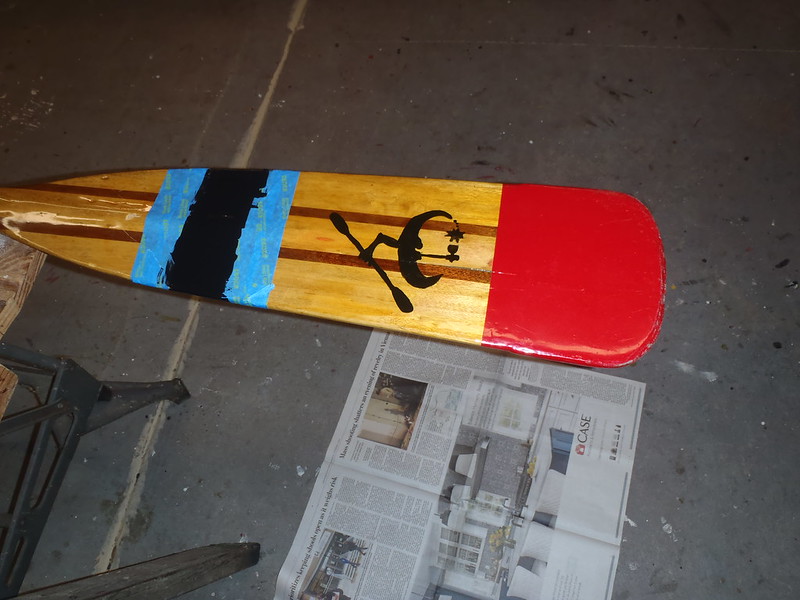
While I had the paint out I remembered something about a custom painted paddle to match the FreeFIRE. Why not, shop Gogetch and all.

PB130056 by Mike McCrea, on Flickr

It is one of those silly paddles that is missing one blade, but it would still make a good spare.

Before the brightwork went back on, while I had finish-washer-free inwales, I re-oiled the gunwales, using “Arkey” mix, named after the fellow who introduced it to me (he may actually have been “RK”).

PB140077 by Mike McCrea, on Flickr

Equal amounts of boiled linseed oil, turpentine and spar varnish, a little heavier on the turps for the first raw wood coat. That mix is a great use for the last dregs of spar varnish in a can. Or even a dried up hockey puck of spar varnish in a can. A few years ago I added a little more turps and linseed oil (and, what the heck, a splash of leftover Tung oil) to the can and dropped in a hockey puck of dried varnish.

That varnish puck had totally dissolved over time. A little light sanding, wipe on, let sit, wipe off. Inside all the inwale holes too. Oops, in that careful sanding I discovered a few very small places that the red EZ-Poxy had in fact seeped through the tape. A bit of acetone and 0000 steel wool took off the wee paint dribbles.

Once that dried sufficiently I could reinstall all of the now-walnut brightwork. Four or five different woods, there is a little color difference and a lot of difference in the stained grain.

PB140079 by Mike McCrea, on Flickr

The re-oiled gunwales look nice, now Arkay (RK) re-oiled and good for many years to come. Although, now with superior outfitting, the FreeFIRE will likely get used more often, and maybe I’ll swipe a little oil on the gunwales with more regularity.

Starting at the ends, installing the two standard thwarts first. Bar clamps again to draw the sheerline back to where it should be.

PB150006 by Mike McCrea, on Flickr

Then the combination foot brace/sail thwart. I needed to “dress” that thwart first; sail mount as before, but adding an over/under/over run of bungee, and a open cam cleat to hold the bowline in reach handy. Good quality ¼” woven sheath bungee, from Tom at Top Kayaker:

http://topkayaker.com/index.php?main_page=product_info&cPath=2_19&produc ts_id=403

Staying true to the red & black only color scheme I had spray painted the heads of the SS sail mount bolts and cam cleat screws.

PB150001 by Mike McCrea, on Flickr

PB150010 by Mike McCrea, on Flickr

I wanted a spacer ball on one side of that thwart bungee, but have no walnut stain on my balls, and wasn’t waiting around to stain and urethane one, so au natural it is. No deck compass for that foot brace/sail thwart as per usual; it wasn’t shaped to accommodate one, and the Missus or son would be kicking it with their feet.

In a completely anal move (no surprise there) I took the SS pad eyes off the edge of the deck plate ends and spray painted them, and the screw heads, black. I would have reinstalled black nylon pad eyes in their place, but the hole spacing was different. I’m not entirely certain what purpose they serve, but I put them there 20 years ago, and didn’t want to leave the screw holes open.

PB150016 by Mike McCrea, on Flickr

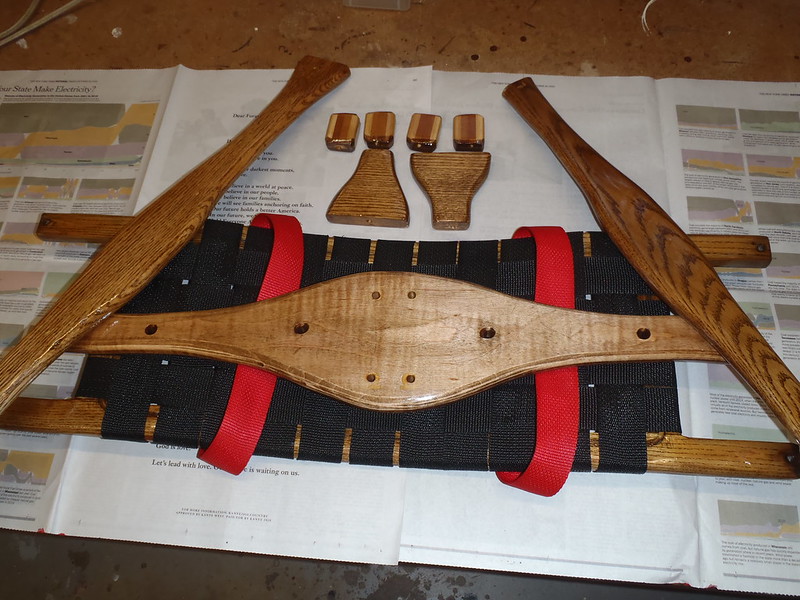
With the various thwarts holding the sheerline back in position the seat went in. Those wee rubber washers were a godsend to hold the four Conk seat drops in place. I really like the look of those Conk laminated seat drops.

PB150009 by Mike McCrea, on Flickr

dang but everything goes back in easy peezy when it has been test fitted first. Eh, I did start to install the ever so slightly canted seat drops incorrectly, but caught that error before any washers or nuts went on.

heck, I like the refreshed look of the whole canoe, even with five different shades of walnut (and one blond ball). Every piece of brightwork is well fitted and every machine screw has washers, Nylocks and cap washers.

PB150017 by Mike McCrea, on Flickr

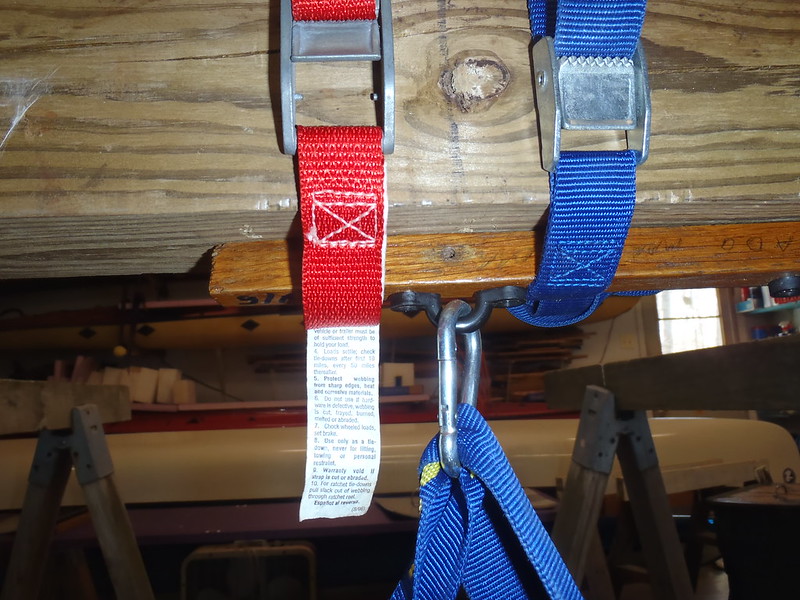
I didn’t use as many webbing loop tie downs as anticipated. No need for them on the short carry handles, no desire for them on the foot brace thwart or seat, where they might, possibly (never yet happened) snag a boot lace hook. On the standard thwarts only, so I have a couple dozen pre-made to put wherever I want on the Pathfinder. Maybe I’ll pop rivet them under the gunwales every six inches. BWAHAHAHA!
 
Beautiful, Mike. Well done. Thanks for the time to do such a thorough write-up.

Thanks Jim.

I am trying to amass, in one thread, as much of the refurbishment and outfitting stuff I have learned over the years by trial and error; like “Don’t put blond thwarts and seat in a canoe with walnut stained gunwales”, “Don’t drill thwart hole an inch away from gunwale screws” and - I’m still learning - “Remember to turn the dust collector on before sanding”.

But as well, something I have said before, taking the time to photograph and write up each step helps slow my shop roll, and I believe leads to me to make fewer mistakes. Slow is smooth, smooth is fast.

The photos help as well; it still amazes me how often I see some “Oh crap, how did I miss that?” in a posted photograph that I managed to overlook while standing inches from the canoe. Not sure why that happens, different perspective maybe.

I’m not finished yet. I have a couple of frou-frou comfort and efficiency outfitting touches still to go, at least one of them unnecessary, but it adds no weight and will look really sharp. Something I have done before but never written about or photographed (minicel, neoprene, contact cement and Melco tape)

I am, as usual, trying to work using only the parts, pieces and materials I have on hand in the shop; But I ran into an unanticipated shortage today and will need to order a bit of material for the finishing touch.

More tomorrow, back to work.
 
With the canoe back together I could turn to some fun stuff, my usual comfort and efficiency outfitting. Gotta have a back band with a foot brace. Surf-to-Summit Performance back band; we have four of them, one apiece, and every canoe is outfitted with pad eyes to simply snap them in place.

https://www.surftosummit.com/collections/back-bands/products/performance-back-band

I know from the weight bearing experiments that a nylon pad eye screwed into a single piece of wood gunwale will hold almost 300 pounds (I ran out of weights at that point).

https://www.canoetripping.net/forums/forum/general-paddling-discussions/diy/107260-canoe-outfitting-attachment-weight-bearing-experiment

No one leans back that hard on a low, oblique-supportive back band. Dual pad eyes for the rear straps atop the stern thwart fit fine, those straps/pad eyes are not bearing any weight, just holding the back band vertical so it doesn’t flop over.

PB160021 by Mike McCrea, on Flickr

I offset the holes a bit from the position of the stern thwart machine screws in the gunwale. That off-set doesn’t much matter with the short pad eye screws; if drilling all the way through close to the ends of that thwart for a bolt the off-set helps preclude splitting the wood along the grain.

Back swivel clip connections done I needed the same for two pad eyes for the more critical, somewhat weight bearing front strap connections. But not quite yet; I need to mark the approximate locations for minicel comfort “knee bumpers” first, to make sure those were not in the way of the pad eye connections. Might as well mark the locations for foot brace heel pads while I’m at it.

With the canoe on a thick foam pad on the shop floor I had another test sit. Plenty of room for the front strap pad eyes between the seat and the knee bumper locations. A ubiquitous yoga block, cut in half lengthwise, provides the needed distance from the inwales to comfortably brace my knees, a 22” spread with this canoe & seat height, right around my average for knee bumpers in other canoes, and I pencil marked the approximate locations for those minicel pieces.

The pad eyes for the swivel connections on the front snaps can go aft of those knee bumpers, on the edge of the inwale, not underneath. I have more gunwale depth with the pad eyes screwed in sideways, and it will be easier to connect the swivel snaps with the pad eyes mounted sideways.

So that the pad eyes are most securely seated, and not pulling against only the inwale, I used screws that went through the inwale, fiberglass sheerline edge and into the outwale. The weight bearing experiment was done with shorter screws, through only one piece of gunwale.

In that experiment, 294.5 lbs suspended on a pad eye with short screws through a single piece of gunwale before the pad eye began to suffer elongation failure.

P4100029 by Mike McCrea, on Flickr

A bit of pad eye placement cogitation and a bit of inwale file flattening on my beautifully re-oiled inwales, so the pad eyes seat flat on the (once) rounded inwale edge.

PB160026 by Mike McCrea, on Flickr

A swipe with walnut stain and a couple coats of Arkey mix on those flat filed spots and I screwed the front back band pad eyes in place and clipped on the seat.

PB160031 by Mike McCrea, on Flickr

All four pad eyes are nicely below the sheerline, so I can still slide the FreeFIRE on and off storage and vehicle racks.
 
It’s all well and good that I daintily painted all of the exposed stainless black, but the minicel drapes don’t match the carpet, and neither of those minicel colors is exactly black.

PB160034 by Mike McCrea, on Flickr

Although the two tone grey minicel knee bumpers and heel pads kinda sorta match the interior light grey/dark gray paint scheme, they could look better. And perform better; the heel pads especially get chewed up by water shoes and Muklucks, and could stand to be more abuse resistant. Plus I am trying to demonstrate as many outfitting tricks as I can in this thread.

I had a plan, one that has worked successfully on other minicel outfitting bits. 1/8” thick N1S neoprene, from Sweets. Here, just below minicel:

https://sweetcomposites.com/Minicel.html

And McNett Melco tape, also from Sweets on that same link, just below the neoprene.

Step 1: Cut the minicel to size. And / bevel the four sides of the heel pads, so there is less right angle L exposed to footy sheer forces

Step 2: Make templates for the neoprene cut-out shapes for the knee bumpers and heel pads.

PB160036 by Mike McCrea, on Flickr

PB160039 by Mike McCrea, on Flickr

Woah, those templates came out a little Germanic. Heil outfitting, and comfort.

Step 3: Cut out those Germanic shapes. Sharpie the “top” of each piece on the neoprene cut outs for aiming assistance. When later touching the contact cemented pieces together you get one instant stuck shot!

Step 4: Contact cement the minicel and the neoprene. It helps to pushpin the neoprene to a board lest it curl up as the contact cement dries, using long shank push pins so there is space to brush contact cement under the head of the pin.

PB170041 by Mike McCrea, on Flickr

Step 4a: Turn shop exhaust fan on. Huffing contact cement fumes is for the younger crowd. Had I known in advance I would have bought an 8oz can of specialty neoprene glue ($5.50, just below the Melco tape on the Sweets site)

Two coats on the neoprene and three on the minicel, cured to nearly dry, a little heat gun action to revitalize the contact cement, aim, press and hope for the best. As usual the first coat on the minicel had vanished dry by the time I did the first coat on the neoprene. Minicel be thirsty.

PB170043 by Mike McCrea, on Flickr

I’ll let those neoprene covers sit overnight for the contact cement to fully cure before trimming off the bits of excess on the corners and ironing Melco tape along the neoprene seams. Meanwhile I turned to (almost) the last pieces of permanent outfitting.

We have vinyl pad D-rings in every boat, open boats and decked canoes. Some boats have strategically placed multiples, for large or small float bags or gear. Two will do in the FreeFIRE and I turned to my favorites, Northwater’s, with nylon double D’s

https://northwater.com/collections/d-rings-anchor-rings/products/1-inch-double-d-ring-anchor

PB170045 by Mike McCrea, on Flickr

Placed below the bow and stern thwarts, pad perimeter taped so my contact cement doesn’t extend too far past the minicel, lightly sanded and alcohol cleaned, vinyl pad backs alcohol cleaned as well just to be contaminate safe, coat of G/flex on the backs of the pads, lay in place and cover with wax paper and sandbag weights.

PB170048 by Mike McCrea, on Flickr

Every half hour or so I removed the sand bag weights and wax paper, compressed any lifted spots with the ever handy hard roller and put the wax paper and weights back atop.

PB170050 by Mike McCrea, on Flickr
 
Last edited:
The neoprene covered minicel came out fairly well, some gaps on the angular corners of the /____\ heel pads, but those should cover ok with the Melco tape.

With the contact cement cured, it was time to iron the Melco tape on the neoprene seam edges. Per the Sweet catalog:

“Melco is ironed on rather than glued and must go on the nylon side. We have used an iron set on “silk” for 15 seconds to produce a very tough bond but we advise all users to test a small piece on scraps before starting a real job. The tape is black and ¾" [20 mm] in width”

I did a test iron with a piece of Melco tape on a scrap of neoprene cut from one of the templates, all irons are a bit different. 20 seconds on Rayon did better.

One thing I have learned while ironing the seat sealable fabric, 15 or 20 seconds is longer than you think when pressing a hot iron against some sealable surface; it pays to have a clock in visual range with an easy to watch second hand.

PB170053 by Mike McCrea, on Flickr

Some notes about using Melco tape. Melco will stick to itself if you want overlap. You can get Melco too hot for too long, or not hot enough for not long enough. Watch your iron settings; I inadvertently knocked mine down from Rayon to a bit under silk and it wasn’t doing bupkis. If you screw up the heat on a piece of Melco don’t even bother trying to reuse it, just cut a new piece and move on.

I went a little Melco crazy, with vertical pieces on the neoprene seamed corners, and using wrap around pieces in the other orientation. Once these pieces are contact cemented into the canoe ironing on more Melco would be a PITA.

Contact cement time again. The X’s on the bottom were reminder about which side I did not want to contact cement while doing the contact cement and neoprene work.

PB170055 by Mike McCrea, on Flickr

I stuck the heel pads in the marked locations and ran some painters tape around the perimeter to outline my sanding and contact cement area. Held the newly fashioned knee bumpers in place under the inwale and did the same. On the vertical edge knee bumper area I taped some paper below the bottom of the tape, just in case I got over exuberant drippy or sloppy. I know me.

The usual, 3 times coats on the minicel, two on the hull surface, heat gun and press.

And not just press, I had readied sandbag weights and wax paper covers for the heel pads, and some clamps and boards for the knee bumpers.

PB180057 by Mike McCrea, on Flickr

Tomorrow - maybe later today, it is still early - I will run a bead of E-6000 industrial adhesive sealant around the perimeter of the D-ring pads, heel pads and knee bumpers.

https://www.walmart.com/ip/Eclectic-E6000-Industrial-Adhesive-3-fl-oz-Clear-or-Transparent/44148643

I picked up a fresh tube of E-6000, which sadly does not come with the applicator nozzle, but I saved the old nozzles from tubes of Plumber’s Goop.

PB180059 by Mike McCrea, on Flickr

I am convinced, from past application and empirical evidence, that a little nozzle-applied bead of E-6000 adhesive sealant, around the hull-to-outfitting intersection of vinyl D-ring pads and minicel and etc, helps with longevity, preventing water and dirt infiltration.

Later that day it was; five-six hours on heat gunned and compressed contact cement should be enough and I bead sealed the perimeter of the D-ring pads and heel pads with E-6000. The knee bumpers can wait until I have the canoe again turned in its side for Gogetch and FreeFIRE painting, and that part has to wait for one of the next steps.

I do like the look with neoprene black heel pads and knee bumpers.

PB180062 by Mike McCrea, on Flickr

I have only few ounces of permanent outfitting yet to install, and needed to bring the giant 4’ x 8’ work table into the shop. Moving the FreeFIRE under the hanging weight scale I checked to see just how much weight I added with paint coats and new outfitting.

On the shop scale the Indy weighs 49 lbs with my oversized wood gunwales & deck plates and original-owner kevlar felt skid plates. Catalog speced at 45

50 lbs on the nose. How can that be? I weighed the FreeFIRE several times with the same result. I checked the accuracy of the scale by hanging first a 30lb barbell and then two 30lb barbells. Spot on.

Could I have removed as much weight sanding down old patches and crappy glass as I added back in with improved parts and outfitting? I’m gonna guess yes, but I’ll weigh it again after the last of the outfitting is done.
 
Great outfitting stuff, as usual. Lots of best practices and small tips based on experience. Like offsetting the pad eye on the thwart to minimize possible grain split. Having rear thwart 10" or so from seat to help with paddler weight, and back band attachments. Keeping vertical screws holes in wood gunwales spaced away from the horizontal holes. I will use the idea of using small rubber disks to hold the seat in place for fitment purposes.

I noticed you rat-tailed the hole in the gunwale before filling with Gflex, to remove the "Arkey" oil. When I plugged an existing vertical hole in a wood gunwale, I oiled it with Watco before filling with Gflex. I have never been sure whether leaving the wood dry for Gflex adhesion would have been better. Not much difference probably, but we are talking best practices.
 
Last edited:
Great outfitting stuff, as usual. Lots of best practices and small tips based on experience. Like offsetting the pad eye on the thwart to minimize possible grain split. Having rear thwart 10" or so from seat to help with paddler weight, and back band attachments. Keeping vertical screws holes in wood gunwales spaced away from the horizontal holes. I will use the idea of using small rubber disks to hold the seat in place for fitment purposes.


Thanks Dave. The little DIY rubber washers on the shank ends of machine screws really are a godsend for holding multiple things in place when working solo. I just leave them in place when I tighten everything up, and when I have taken things apart years later they are compressed paper thin. heck, they may even help with squeaky seats and thwarts, leastwise none of our boats squeak.

I am having a fine time with this rebuilt and outfitting, and came up with a “carry yoke” brainstorm today, or maybe brain fart, we shall see. Once the experimental carry yoke is finished I think I am done with the basic outfitting.

The next step will be to make DIY no-sewing spray covers, and I will start a separate thread for that task. Word of warning for our slow readers; that will likely run equally long and photo heavy. Making DIY spray covers in that manner is not terribly difficult, but there are a couple dozen niggling little steps that need to be done just so in specific order.

Again, taking the time to write up and photograph every step along the way is helpful to me; slow is smooth, smooth is fast.

I notices you rat-tailed the hole in the gunwale before filling with Gflex, to remove the "Arkey" oil. When I plugged an existing vertical hole in a wood gunwale, I oiled it with Watco before filling with Gflex. I have never been sure whether leaving the wood dry for Gflex adhesion would have been better. Not much difference probably, but we are talking best practices.

I am not sure either, perhaps someone with more wood & epoxy knowledge can answer that question. My can of “Arkey” oil has become quite the mystery mix over time. Not just the usual boiled linseed oil, pure gum turpentine and old varnish mixture, but a splash of leftover Tung oil and maybe some other stuff, I may has tossed some old GunwaleGuard, Watco dregs or whatever in that can.

I had no idea how well G/flex would do with those mystery oils coating the inside of the holes, and the rat tail file action to clean them out to bare wood took only a minute.
 
The balance point on the FreeFIRE, ascertained as usual when weighing the canoe hung from a single cam strap under the scale, is not far in front of the seat edge. I could carry the boat with the edge of the seat against my neck, but the canoe is 11 ¾’ deep, and with the short seat hangers and contour seat I would have 8” of clearance between my noggin and the hull.

Plus that is an uncomfortable way to carry a canoe. I had another experimental plan to use the front of the seat edge and the pad keeper straps, and further elevate & cushion that carry method.

I had contemplated installing a strap yoke in the FreeFIRE, but the sheerline edge between the knee bumpers and seat is already busy enough. I could make a clamp-on yoke, I have spare gunwale clamps, plenty of cut and routed raw ash yokes, even a finished yoke already stained walnut.

PB220092 by Mike McCrea, on Flickr

I am really not a fan of using clamp-on yokes, nor of remembering to bring them on trips and devising how to secure them in the canoe when not in use. But I do have some minicel, and that walnut yoke made an easy pattern for what I had in mind.

PB220095 by Mike McCrea, on Flickr

A 2” thick piece minicel cut to that yoke shape. Not bad, I needed notches, angled sideways and slanted forward a bit. For notching minicel a wood rasp makes for easy work.

PB220096 by Mike McCrea, on Flickr

With the notches I needed some additional height; a piece of 1” minicel added to the bottom.

PB220099 by Mike McCrea, on Flickr

Three coats of contact cement on both minicel pieces, nearly dry, heat gun, clamped together. A hint about contact cement and brushes – If you wrap the brush in wax paper and clamp a binder clip around it the bristles it will remain good to use for a day or two.

PB220101 by Mike McCrea, on Flickr

That minicel needs a bit of Dragonskin work to round off the right angle cut on the minicel for neck comfort. Sadly Dragonskin was discontinued some years ago, although there is some sheetrock shaping product that is similar. Not so sadly soon after it was discontinued DougD and I bought out the last of Blue Mountain outfitters supply, and I haven’t even opened one pack yet. Nanny nanny boo boo.

PB230117 by Mike McCrea, on Flickr

dang I love Dragonskin for shaping minicel, that took all of 60 second and if warranted I can go back and carve a little more. Maybe it is just my technique, but I have little success using a SurForm

PB230119 by Mike McCrea, on Flickr

If you haven’t yet guessed where I was going with this:

PB230121 by Mike McCrea, on Flickr

A test carry proved that minicel seat yoke adequate, but I would like the base to conform better to the contour seat, especially at the yoke “arms” or whatever the heck those projections on a yoke are called (Conk?).

The easiest way to accomplish that is not Dragonskin, but a belt sander. Very judicious and cautious use of a belt sander, take a little off, test fit, take a little more off, test fit. It’s dang hard to reattach minicel dust if you take too much off.

PB230123 by Mike McCrea, on Flickr

Looking good, custom contour seat fit, but now I can raise the “seat yoke” ™ up another ½”, and I had a plan for that. A scrap of exercise flooring. Not just because it was the perfect height; I figured the glossy embossed side will work well for the last step I had in mind. Back to the band saw, contact cement, heat gun and clamps.

PB230128 by Mike McCrea, on Flickr

Custom work.

PB230131 by Mike McCrea, on Flickr

I need to clean up some uneven edges on that 3-ply yoke with Dragonskin, but the embossed side gives me a more sealed minicel edge for. . . . .attaching Dual Lock. One piece on the embossed side of the minicel, one on the boat, perfect to secure the seat yoke to the boat when not in use. Dual Locked to the stern float tank, with the strap notch stuffed under the carry thwart.

PB230135 by Mike McCrea, on Flickr

PB230133 by Mike McCrea, on Flickr

Total weight for the seat yoke – 3.5oz. It works well and is comfortable enough for my rack to truck, truck to water and vise versa carries.

One last touch before turning to DIY no-sewing spray covers. I wanted some ID on the hull; it had a fading Sharpied or paint penned ID, but I painted over that, and it was unsightly sloppy in any case.

Shout out to paddler/golfer friend Willie for the recommendation; waterproof golf club labels. A top end driver costs as much as a decent used canoe and those have proven to be great, durable, waterproof labels.

Four lines of text on each 2” x 1” label, 20 labels per sheet. I opted for my name and E-mail address twice so I could cut them in half and get twice the ID bang for my buck

https://www.canoetripping.net/forums/forum/general-paddling-discussions/safety/32680-%C3%A2%E2%82%AC%E2%80%B9contact-info-on-paddles-and-gear

PB230126 by Mike McCrea, on Flickr

It’s not like the canoe isn’t now distinctive, and I have a record of all our boats and HIN’s, but having some ID on boats and gear is just a good lost-&-found idea. I stuck one in an obvious place, and one more hidden.

PB230129 by Mike McCrea, on Flickr

A few things I should have done differently:

Painted the fugly kevlar felt skid plates with red-tinted G/flex, or, better, painted them with G/flex, graphite powder and black pigment, and then taped them off before rolling the Fire Red EZ-Poxy.

Removed the carry handles, sanded them and stained them Walnut. Could still happen.

Made the hour roundtrip to the hardware store and purchased dark walnut stain. Too late now.

Used one kind of wood, or at least wood with similar grain structure for the new brightwork. Also too late now.

Installed shorter machine screws in the new seat drops. The cap nuts on the shank ends are now ½” below the bottom of the seat. Will happen; I probably have the correct size machine screws in the shop.

Bought heat sealable Packcloth instead of heat sealable Oxford cloth the last time I ordered from Seattle Fabrics. But that is another story, and another post.
 
Keeping vertical screws holes in wood gunwales spaced away from the horizontal holes.

Dave, as often happens I am reminded of a story.

I was at a canoe event attended by several high end composite canoe manufacturers. One of them had a beautiful new canoe on his trailer, a first-off build of a new design.

I wandered over to have a look at the canoe, and the owner/builder, a highly respected craftsman whom I had not previously met, was semi-aloof and not very conversational. As I was looking at the canoe, upside down on the trailer’s top crossbars, conveniently just over my head, I noticed a hole in the inwale, plugged with amber colored epoxy (G/flex I expect).

And there, barely a ½” from the epoxy plug was a gunwale screw. I didn’t want to be a nitpicker, and he was already seemingly a little gruff, but I pointed and said something like “Thwart hole too close to the gunwale screw eh?”

I didn’t know what to expect as a reaction. I was commenting on his pre-planning and craftsmanship. Suddenly he was all talkative and much friendlier; I had unwittingly established my bona fides. But only because the plugged hole was inches from my nose.

BTW, I know why the thwart hardware was too close to a gunwale screw hole on one side of the FreeFire. Yes, just one side.

When I made those gunwales I very carefully measured and marked the locations of the carry handles, thwarts and seat hangers, to avoid just such an intersection.

I measured out and marked evenly spaced holes, missing any brightwork connection, took the pieces over to the drill press and did all the countersinks. Perfect, all the countersinks - 48 in the inwales, 12 in the stem outwales – were drilled to miss any too close intersection with the brightwork hardware, but that effort was the result of a day’s worth of measuring, spacing and planning headaches.

Stained walnut, with multiple coats of Arkay oil, my brightwork location pencil marks had vanished, but no worries, I know I got it right, I had checked and re-checked enough dang times. Put one set of gunwales on, picked up the other set, walked around the canoe and put them on.

Soooooo, when I walked around the canoe carrying those wales what had been bow & stern on the one side became stern & bow on the other. And my oh-so-careful hole spacing was all verklempt out of sequence.

I don’t know how home stripper builders manage it all, especially those who have making several different model canoes, or designing their own. Not for me.
 
Just when you thought, after (word count) 12,000 words, that I was finally done with boatwork on this canoe my skilled-with-a-tiny-paintbrush son returned for Thanksgiving, in time to add the FreeFIRE and shop Gogetch.

PB240001 by Mike McCrea, on Flickr

Not really freehand, more paint-by-numbers. The shop Gogetch and FreeFIRE were printed on paper, old school carbon paper taped on the back, pencil outlined on the hull and carefully filled in between the lines, with the paper copy taped nearby for reference.

PB250011 by Mike McCrea, on Flickr

PB240003 by Mike McCrea, on Flickr

dang he is good, much better than his shaky handed old dad. His fill-in-the-blank painting is better than my trace-the-line carbon paper outline. He did remark that the Gogetch paddler became more muscular in the arm this time. Eh, I was feeling particularly masculine. We have that Gogetch on every boat we own, each one hand painted and each one slightly different.

PB240005 by Mike McCrea, on Flickr

Shop Gogetch on both sides of the bow, FreeFIRE on both sides of the stern. I anticipate, hope that, some canoe knowledgeable fellow paddler sees the FreeFIRE on the water, at a launch or on the truck racks, and just has to ask. We have other boats that elicit such questions, especially the tandem “European-styledecked touring hulls” converted to solo sailing trippers, and those are always fun conversations. For me anyway, my wife thinks otherwise, tapping her foot and giving me the well known Let’s get going look.


Yes, that is Cooper Black font, hand painted by son Cooper. My thanks to Glenn for the FreeFIRE naming suggestion; it works well with that fire red freebie canoe.

Not quite finished with flashiness yet. I wanted some High Intensity reflective tape on bow and stern. Again, we have some on every boat. Nice to shine a flashlight at the camp landing and see all of the boats flash back, nice for walking around the stern overhang of the canoe on the truck roof racks at night as well.

I had a single 12” long piece of that (discontinued) good quality reflective tape left in red, but three inches at each stem is enough, that stuff winks back bright as heck, but blends in so well that it can’t even be seen it without the flash.

Rounded tape ends, so it doesn’t peel at right angle cuts, well protected from scrap abuse on the red just below the outwale.

PB250009 by Mike McCrea, on Flickr

PB270019 by Mike McCrea, on Flickr

As is always the case I noticed some little details that still needed attention, unnoticed while standing inches from the canoe, but clearly visible in the photographs.

I missed a little red while rolling and tipping; the wee areas on the hull below the deck plates. No one would ever notice that. But I now would, and a little red EZ-Poxy touch up is in order there.

PB130055 by Mike McCrea, on Flickr

And, the FreeFIRE, having been indoor stored in the shop pre-dust extractor, despite having been most thoroughly scrubbed before the start of repairs, has a layer of dust coating every countersunk hole and gunwale/deck plate crevice.

PB210065 by Mike McCrea, on Flickr

Some still warmish day I need to hose blast and brush wash the FreeFIRE’s screwholes and crevices, and re-oil those wee areas. Maybe after I make the stern cover, and have taken the canoe out for a paddle.

BTW, stern cover news of the day. The order of red heat sealable Oxford cloth from Seattle Fabrics left Washington State on 11/29 and simply flew across the country. I suspect literally flew; it arrived at a distribution center near DC that same day, departed and arrived at my local post office 11/30 and is already Out for Delivery by 9:00pm.

dang shame I can’t use it tomorrow, but it was shipped folded, and I’ll need to put in on a roll and let it sit for a few days to take the creases out.
 
Please get that boat out paddling so we can learn about real world performance!

Whatever Chip wants, Chip gets. If you were perchance to run into Chip on an Assateague trip, when he suddenly requested a map, a beer, a bottle of Rum, a pack of smokes in a waterproof container, and a dwarf, Chip’s wishes shall be granted.

EK_0015 by Mike McCrea, on Flickr

Not sure about the requested dwarf, it accompanied Chip into the tent that night and was never quite the same.

Sunny and unseasonably warm today, mid-fifties. I may not get many more chances like that this winter, so off I went.

The FreeFIRE (nee Independence) is paddled most often by my wife or slender son. I have 100lbs on either of them, but know that MRC spec’ed the hull in the 1991 catalog with 6” freeboard capacity at 700lbs burden.

My friend Dave, who long coveted the Indy before acquiring his own, proved that capacity several times on Assateague trips.
EK_0010 by Mike McCrea, on Flickr

None the less I wasn’t loading 700lbs in it for a day trip. In fact I didn’t even load my usual overkill of day paddling gear, just a few paddles, a short pole, a sail and a canoe console with a water bottle. Perhaps I have finally achieved my go-light stage (not).

It was a gorgeous day, and the put-in had SOT fishermen launching and landing, picnickers and assorted onlookers. As I dressed the hull I fielded a number of questions from the curious. None were canoe-aholics and no one asked about the FreeFIRE moniker. It is a striking and unique canoe, and I am now convinced that conversation is just a matter of right time and right place.

I couldn’t resist a little homage to Dan Cooke for the cover inspiration, and selected the appropriate chapeau for the day’s journey.

PC110006 by Mike McCrea, on Flickr

The seat yoke works well enough for loading and unloading the canoe and short carries, but needs a bit more Dragonskin shaping for neck comfort.

PC110010 by Mike McCrea, on Flickr

(Hopefully not letting the feline out of the bag, but Conk has perfected yoke pad design, available soon from Hemlock Canoe)

I remembered what purpose the pad eyes on the ends of the deck plates served, fortunately before I left home, and brought a couple of thick hair tie scrunchies.

PC110011 by Mike McCrea, on Flickr

Loose lines underfoot are a no-no, and I didn’t want to drill those deck plates for bungee cord,

All dressed up and lightly loaded I put the FreeFire on my favorite portage cart. Partial covers with an open cockpit area are a boon with that cart strapping action.

PC110015 by Mike McCrea, on Flickr

One of the onlookers was curious about the foot brace/sail thwart, so I demoed the Spirit Sail before launching. It didn’t hurt that she was an attractive and friendly blond doing sketches of the lake, although I would have done that demo for one of the crusty old SOT fishermen had they asked. Seriously dudes, think trolling under sail.

Paddling the FreeFire I was quickly reminded that I hadn’t paddled a 28 ½” wide canoe in some time. Initially it felt a little tender, especially with zero gear burden, but the vee hull secondary stability is superb and I was quickly comfortable.

5 – 10mph breeze on an open lake was perfect for the Spirit Sail, and heading straight downwind was speedy pleasure; up at wind speed the hull became more stable speeding straight downwind. Turning a bit and angling the sail became less so, but this was with an empty canoe. With a tripper gear load and the missus/younger son the FreeFIRE should scoot along quite comfortably.

Some random outfitting notes. Everything is in the right place, knee bumpers, heel pads, etc, and works as expected. It is a very comfortable canoe.

PC110017 by Mike McCrea, on Flickr

The shorter-than-usual bow cover, just up to the foot brace/sail thwart, captured only half the paddle drips. Better than nothing, and with that shallow hull the toes of my Mukluks would have been pressed against the bow cover.

Zero wear and tear on the neoprene covered heel pads, even with stacked heel Mukluks. That had been an issue with naked minicel and aggressive tread boot heels.

Back at the launch I grabbed the bailer and did a spray cover attachment acid test. Dumping a bailer of water on the covers from on high, with both snaps and Dual Lock attached, proved the combined attachments safe and secure, nothing budged and the drip baffles did their job admirably.

Same acid test with just the snaps attached, Dual Lock unpressed together, the snapped covers held, but with snaps 25” apart, bowed significantly, even with zero stretch heat sealable fabric. Same test with just the Dual Lock fastened together, no snaps, held better than with just snaps.

A final note about snaps or Dual Lock. The FreeFIRE is a sturdy Vermont-era glass hull, but even so the fiberglass sides are a bit flexible when seating snap sockets to studs, and even when pressing the mushroom heads of the Dual Lock together.

I believe it would have helped had the snaps and Dual Lock been positioned higher and closer to the side-stiffening gunwales, but I wanted the attachments in the black side stripe.

On a really flexible, thin walled kevlar or carbon hull I would absolutely want the snaps or Dual Lock higher and closer to the outwales. Or use Northwater-ish loop and hook connections, which I still have grave reservations about on tight, branchy waters.

The FreeFIRE is back on its precious-space inside storage rack. On to the next canoe refurbishment tomorrow, turning a 14’ 10” Old Town Pathfinder into a dedicated solo pocket tripper, with supplemental fishing platform outfitting intentions.

Idle hands and all that.
 
Back
Top