• Happy (Ancient) May Day! 🎀💈💃🏼🧺💐🍴

Painter Bungee and winky sized deck caps?

I use the small bungees with the ball on them to secure the painters.
 
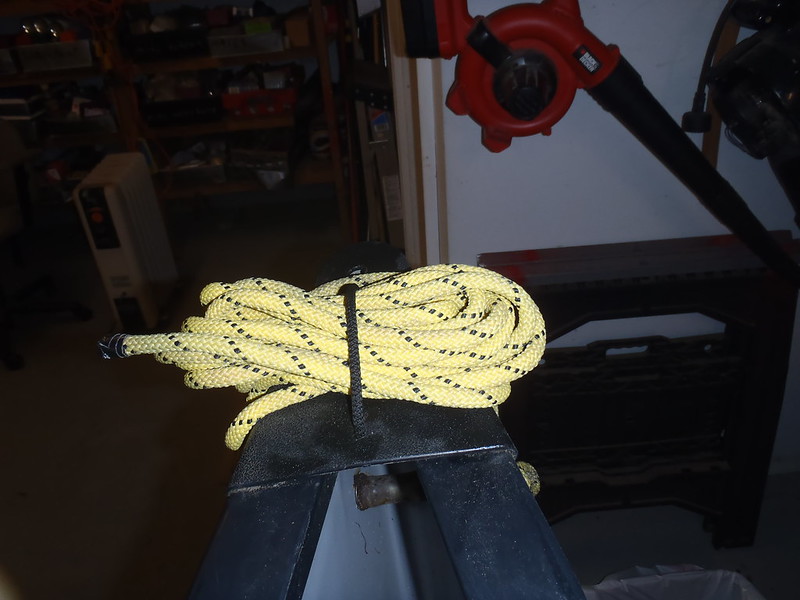
Danged winky little deck plates.

P1160413 by Mike McCrea, on Flickr

There is just not enough room there for what I want to accomplish in the way of bungee painter keepers, and I do not like the coil of rope standing tall and proud above the sheerline and deck plates. Thinner painter line would lessen that, but I like that 5 16 th BlueWater Rescue Rope, for strength, knot and hitch holding, and hand kindliness.

The Kevlar Malecite does not have float tanks, so no Bungee Dealee Bob and end tank D ring anchor. There is only a 6 inch gap between the end of the winky deck cap and the carry handles. The RX Wilderness likewise has no end tank, but is more spacious, with a 9 inch gap.

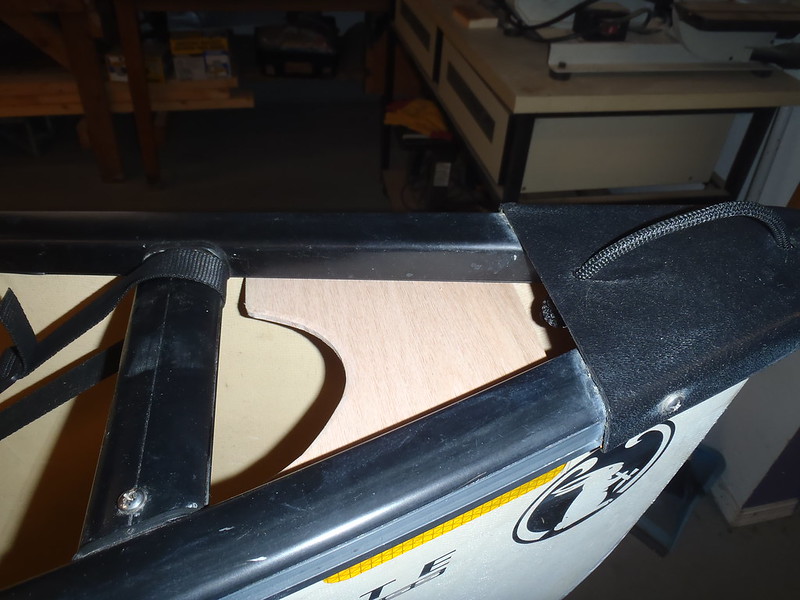
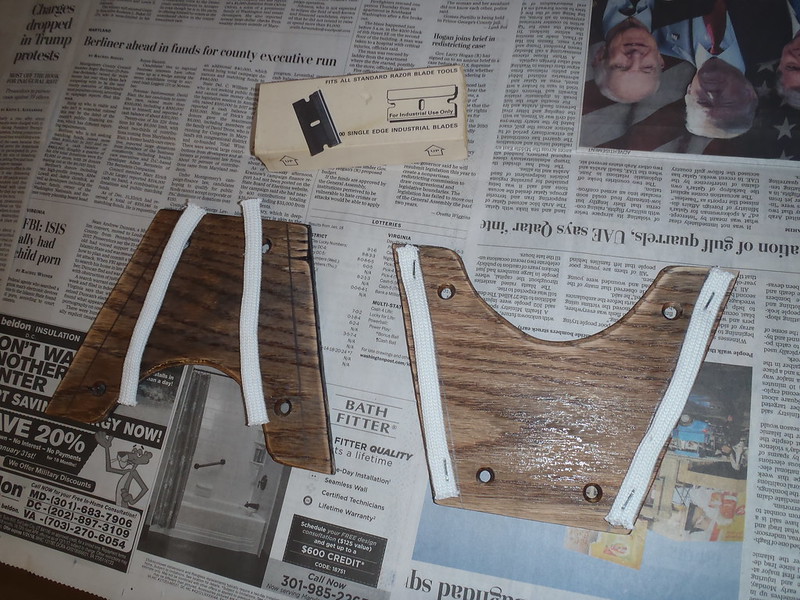
For an initial quick and dirty trial I cut some quarter inch thick hardwood to size and shape, as a deck cap extension.

P1170415 by Mike McCrea, on Flickr

P1170417 by Mike McCrea, on Flickr

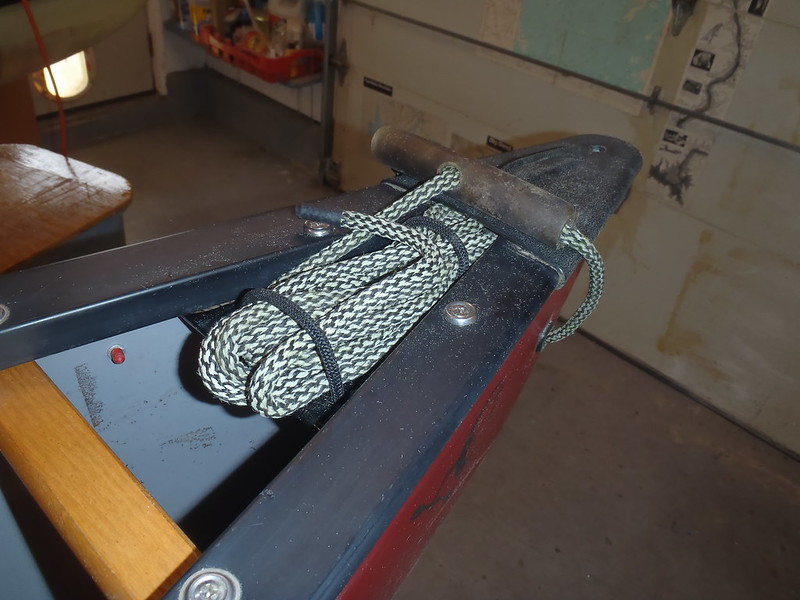
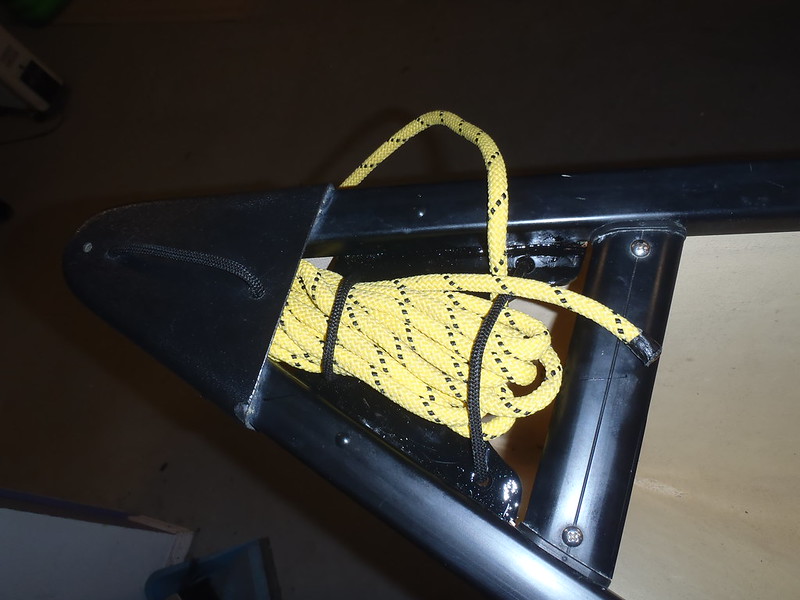
I like that the deck plate augmentation is recessed below the sheerline and deck plates, the painter line coil will rest lower when bungee secured.

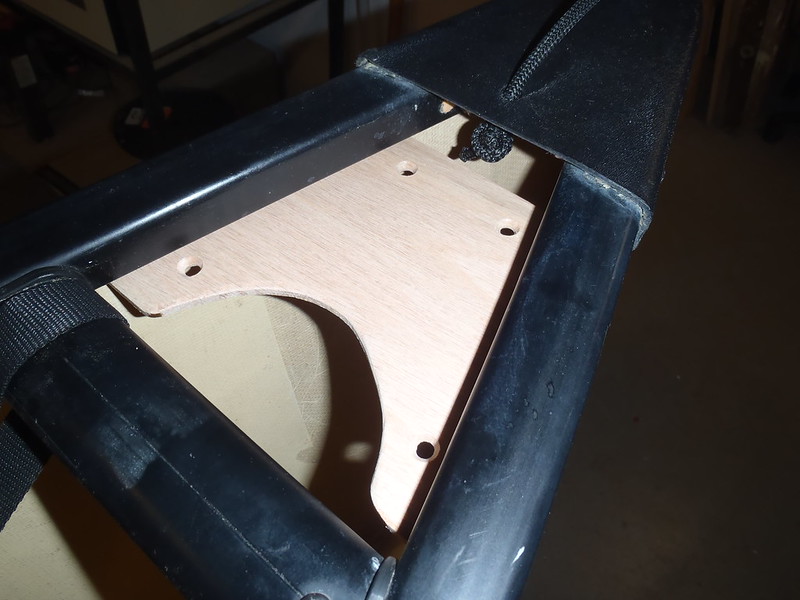
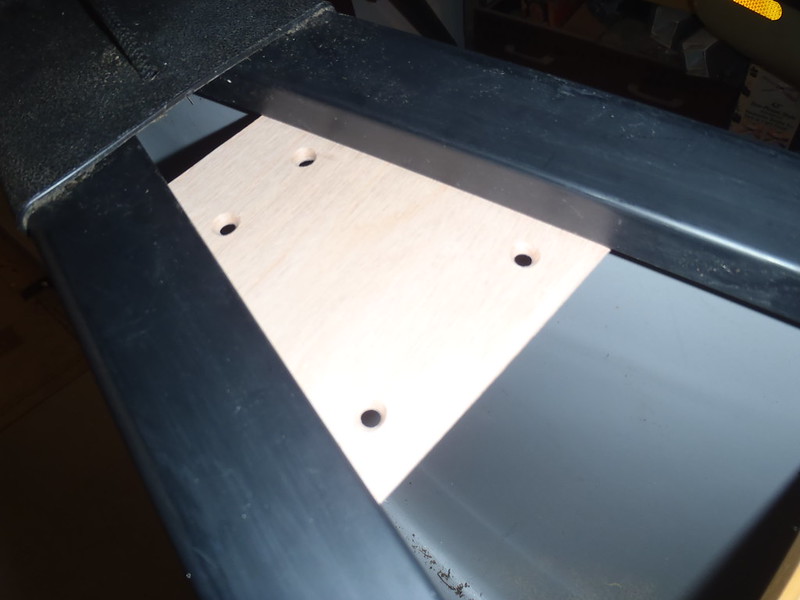
Holes drilled and chamfered for bungee cord.

P1170419 by Mike McCrea, on Flickr

P1170420 by Mike McCrea, on Flickr

Coat of epoxy, including inside the holes. What the heck, a dab of black pigment in the epoxy. Epoxy cured, sanded and cleaned, and a coat of black paint to make them match the deck plates and gunwales

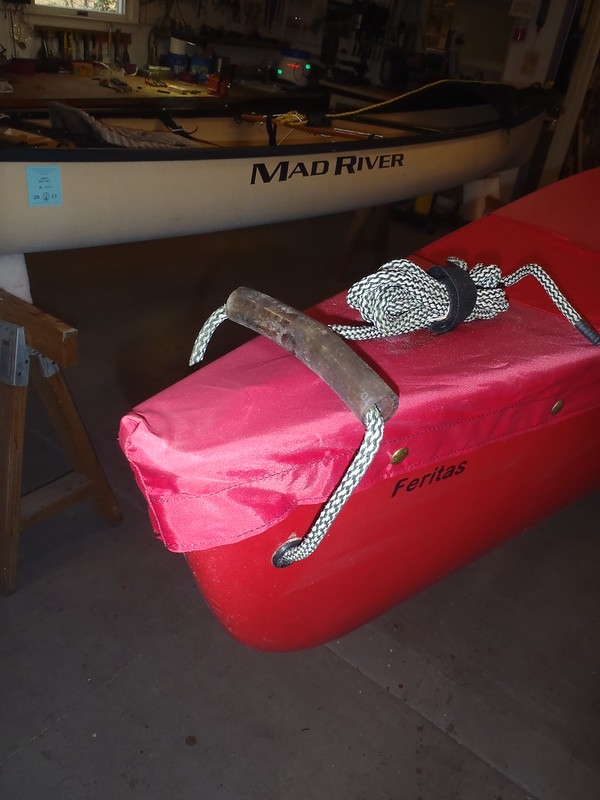
The deck plate extension on the Wilderness was a piece of cake. Two machine screw holes centered on the inwale and done. I was out of small flange washers and had to use SS cup washers, easily replaced.

P1200428 by Mike McCrea, on Flickr

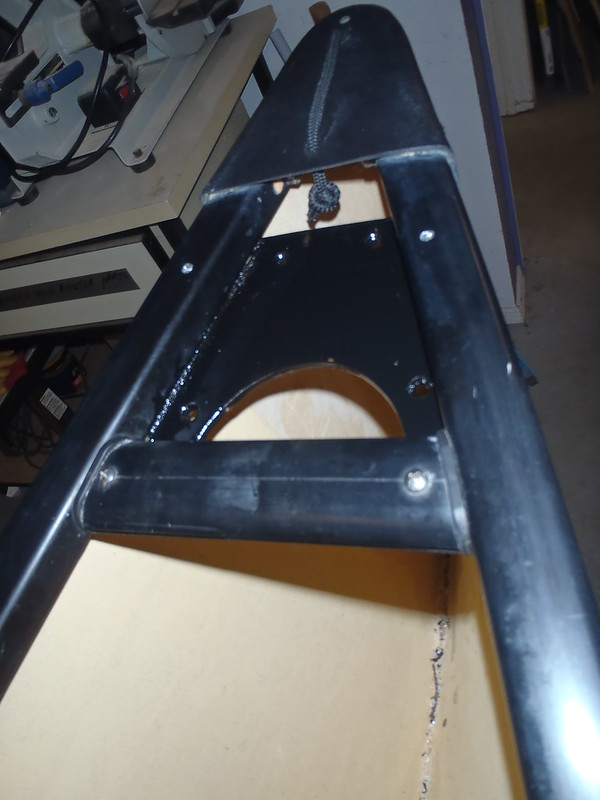
The Malecite was more of a challenge. That canoe has IQ1 aluminum gunwales. The inwale is very narrow, and oddly shaped on the bottom. Try as I might the screw holes in the wood deck plate extension were too close to the edge.

Nix the machine screws and on to a more time consuming solution. I cut and stapled a length of Dynel cord to the top side of the wood, and saturated it with Gflex. Clamped tight to the underside of the inwale and walk away Renee. I hope I like it, cause it is a permanent fixture now.

P1200425 by Mike McCrea, on Flickr

P1200429 by Mike McCrea, on Flickr

Before I installed them I weighed them, epoxy coated quarter inch hardwood with Z bungee and stainless hardware, 4 oz plus/minus on the small weight scale. A flat piece of carbon fiber as a recessed deck plate extension, screwed or pop riveted in from underneath, would weigh next to nothing.

P1220442 by Mike McCrea, on Flickr

P1220452 by Mike McCrea, on Flickr

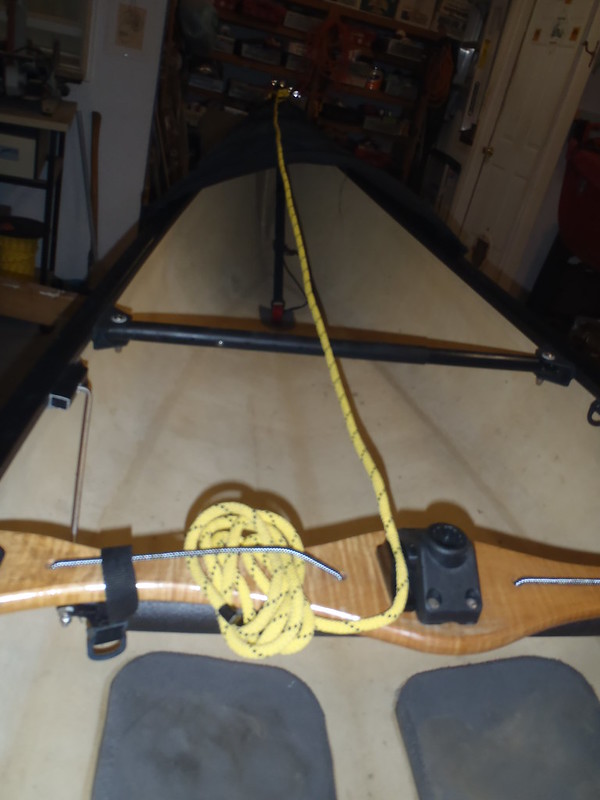
I like it. The painter line is securely held and recessed below the sheerline, aligned fore and aft. I still have the Z pattern, with a diagonal length of bungee under the deck plate extension.

P1220449 by Mike McCrea, on Flickr

Mark 1 of course. I can see room for improvement beyond nil weight carbon fiber plates screwed or pop riveted under the inwales and existing deck cap. As Glenn would say, This requires more thought.
 
That looks nice Mr McCrea. Have you given any thought to some sort of stretchy fabric glued under those dinky deck plates? Think of half a bag if you will. You could just stretch it down and stuff the painter in. Only one way in, one way out. Kinda load it like a throw bag.

Jason

ETA. Maybe some tight knit stretchy nylon mesh like on the front of some backpacks.
 
Last edited:
Have you given any thought to some sort of stretchy fabric glued under those dinky deck plates? Think of half a bag if you will. You could just stretch it down and stuff the painter in. Only one way in, one way out. Kinda load it like a throw bag.

Maybe some tight knit stretchy nylon mesh like on the front of some backpacks.

I had not thought about using some kind of stretchy fabric as an underdeck. That would eliminate the need for bungee cord. The easiest way to attach some stretchy fabric might be to attach the / \ edges to a narrow strip of board or carbon fiber, and then screw or pop rivet those strips to the bottom of the inwales. I would rather not glue something fabric in place since it might need more frequent replacement than epoxied wood or carbon fiber.

I made those deck plate extension experiments out of scrap 5 inch hardwood wood, with what I had in the shop and zero trips to the hardware store. For another ounce in wood width I could have extended them up under the existing deck plate almost all the way to the stem tip, still leaving a big gap up front for drainage.

That would provide both the open under inwale platform for the painter, and a deeper protected slot below the existing winky deck plate.

I only have one canoe left with too short for me deck plates, the Cronje, which has the most usable of the shortie deck caps, 8 inches long. The Cronje is set up for either bow backwards or tandem use, but a bowman might appreciate a longer open tray, with a recessed slot underneath stretching up 5 or 6 inches towards the bow.

The split level deck plate. Or drop that lower level down another inch, for a 2 inch deep slot.

Of course the Cronje has full spray covers. In the bow backward orientation I use only the stern, now bow, spray cover and in that guise an extended two story deck plate would be less useful.
 
Last edited:
While I had those two deck cap augmented canoes in the shop I did a tune up on both. The Malecite needed some seat work, and a single snap rivet on the end of bow deck plate helped hold the IQ spray shield in place.

Both the Wilderness and Malecite have partial spray covers of some sort. The Wilderness has my favorite Cooke Custom Sewing partials and the Malecite has an IQ system bow spray shield.

The bow spray shield on the Malecite was one of the better designed IQ accessories, although the covers needed to be near custom fitted to each model canoes specific stems. Fortunately the easy install side zip bow spray shield fits on the Malecite perfectly.

P1220456 by Mike McCrea, on Flickr

The Wilderness has my preferred covers, Cooke Custom Sewing partials. That open cockpit partial design, with raised rain and splash baffles, is perfect for my solo canoe uses, and I sometimes use only the bow cover portion, for wave splash, paddle drip and shaded storage purposes.

P1220457 by Mike McCrea, on Flickr

One of the issues with spray covers, even partials, there is not a lot of exposed gunwale edge to grab hold of when working your way forward to free the bow painter held 8 feet away, made worse when the waves are beating against the hull at some windswept landing.

Our spray covered canoes all have a utility sail thwart, including an open cam cleat that holds the bowline locked in place and near at hand. Instead of splashdashing forward to grab the painter with an uncontrolled boat I can grab the bow line while still seated, and the line is belt and suspender secured, jammed into an open cam cleat with the short excess coiled under the thwart bungee.

P1220461 by Mike McCrea, on Flickr

P1220464 by Mike McCrea, on Flickr

That weird tubing handle on the Wilderness is there because with a taut dry CCS cover is impossible to get the cover free of the stems. I can not get to the carry handle underneath without undoing half the snaps, and realized that I needed something more hand kindly than just rope to grab haul at the stems.

The painter line stem loops run through Tugeyes in the hull, with a bowline knot tied off and stuffed inside the tubing handle, and the stem loops still slide easily side to side

P1220468 by Mike McCrea, on Flickr

I made the same inline tubing handle for the painters on the CCS partials covered Penobscot Solo. The soloized Penobscot is my big load open tripping canoe, and that simple carry handle tubing has been a boon when tugging the boat up or over many occasions.
 
On my Coho, the decks are so small and thin that I couldn't see using deck bungees to hold the painter bundle. So I just run the painter back tot he carry thwart and stick the bundle under the thwart with one of those bungee ball things Turtle mentioned. That gives me a bigger target to grab (bonus!) but doesn't create any snagging problems. The drawback is that sometimes removing (or applying) the bungee ball involves a punishing rap on the knuckles if my fingers slip.

As far as side or center loading of the bundle.....as long as the bitter end trails out of the same side of the bungee as the lead, I have not had any problem with line playing out smoothly on any of my boats.

I do like what you came up with here though, Mike. Very clean and tidy solution. But that red canoe in the photo above....needs the bitter end to come out the front. ;)
 
Ya, like Steve said. if you fold the line back and forth on it self(app 5") and leave the loose end a little long to grab, it plays totally out with no snag instantly. Duck soup.
 
Back
Top