• Happy International Mermaid Day! 🧜🏼‍♀️

Optima Number 3

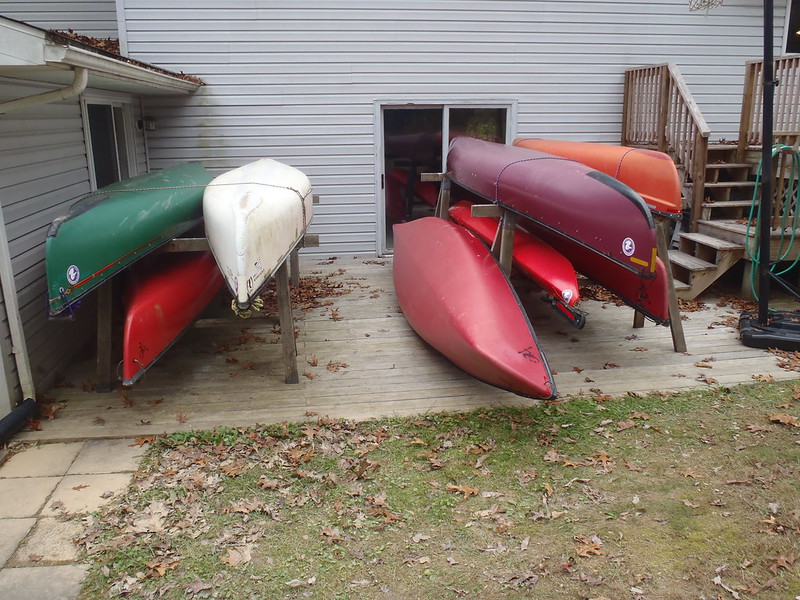
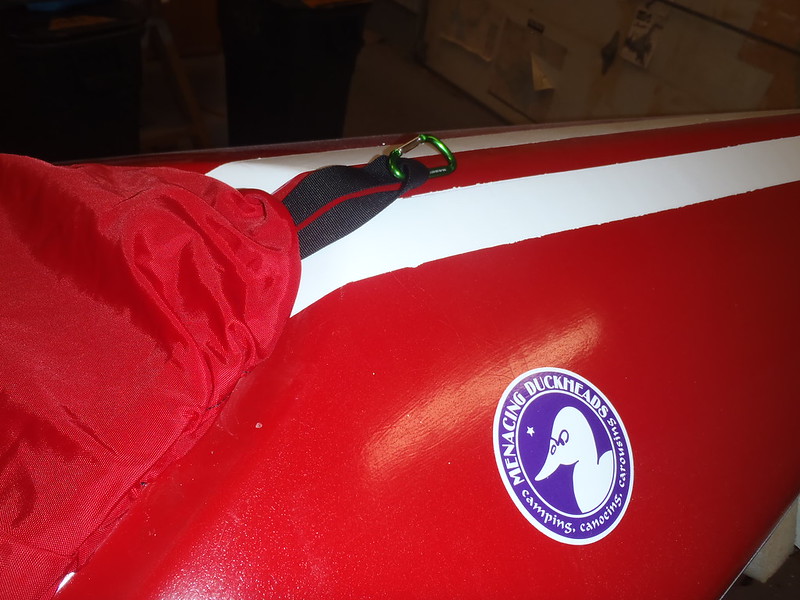
Moving Sexy Thang around without any carry handles has been a PITA. While I have preferred model strap-style handles those require climbing far into the decks to hold a nut while someone else turns the bolt. They are 2-person carry comfortable, but also a 2-person PITA to install, and the handles end up at an awkward leg banging hull width, far from the stems.

P9230013 by Mike McCrea, on Flickr

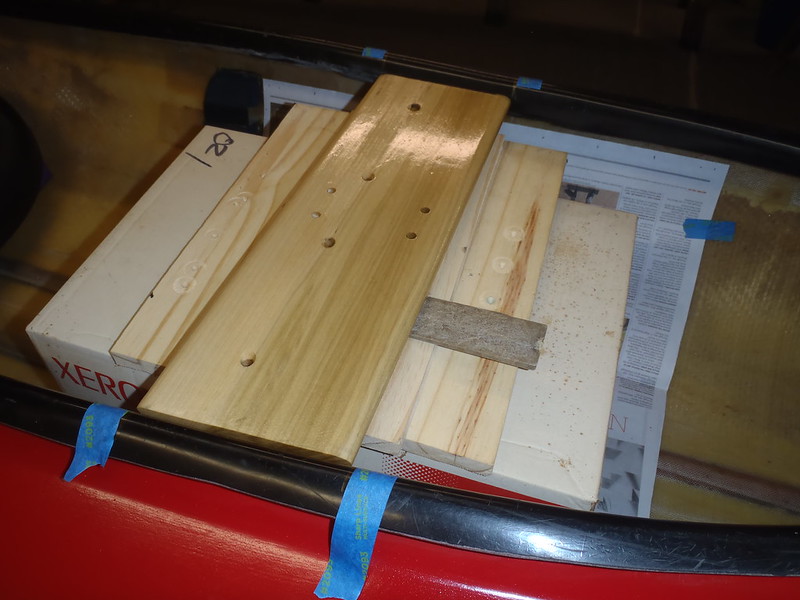
Plus I don’t actually have any of those left in stock, and I’m trying to do this outfitting with what I have on hand. Note: I recently heard the “I already had it on hand” explanation from a fellow boat tinkerer. Yeah, you and me both brother, but it isn’t like the magical Parts and Pieces Fairies left it in the shop for me one night; at some point I bought that stuff. We just tell ourselves that so rebuilds seem less expensive.

The toggle grips I thought I had, which still have not reappeared after repeated searches, were these.

https://topkayaker.com/index.php?main_page=product_info&cPath=2_134&products_id=700

Now $15 apiece? $30 for a pair of plastic carry handles? I think not. Probably just as well I can’t find where I stashed those; I had installed them on a decked boat conversion, found the hard plastic shape of the toggle uncomfortable in hand and slippery to grasp, and quickly replaced them.

I needed a kiss solution for DIY toggles handles, something I could use through the old rope holes at the far ends of either stem, and have come to like bicycle handlebar grips as grab handles on canoe bow loops, especially the grippy no-slip texture.

P9220002 by Mike McCrea, on Flickr

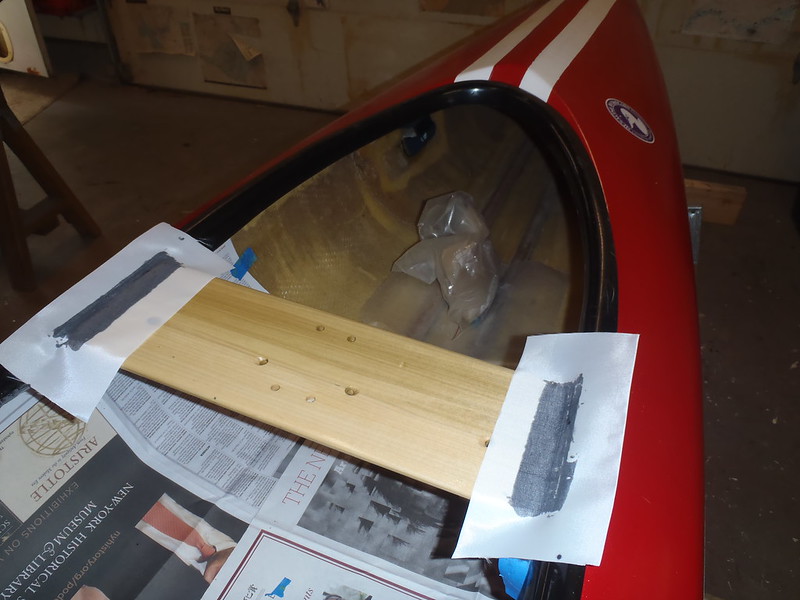
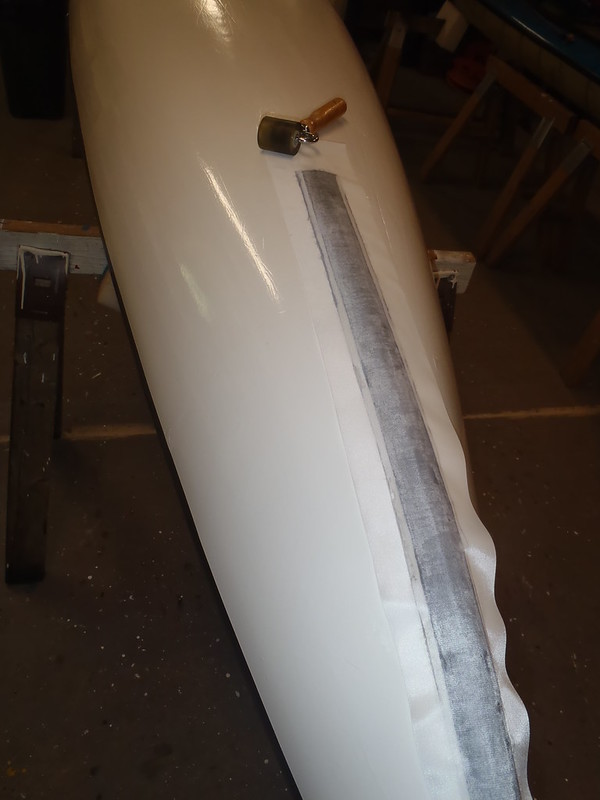
Cut the end flanges off the bike grips, cut a length of PVC pipe to sleeve inside as a stiffener; the PVC pipe was a perfect snug fit, tight enough that it needed some lubrication, drill a center hole through the handle grip and pipe for the rope.

P9230004 by Mike McCrea, on Flickr

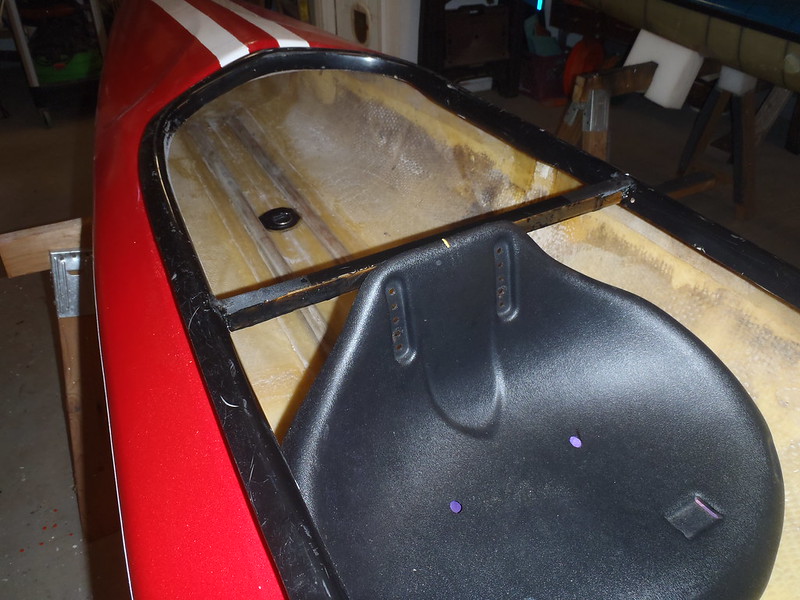
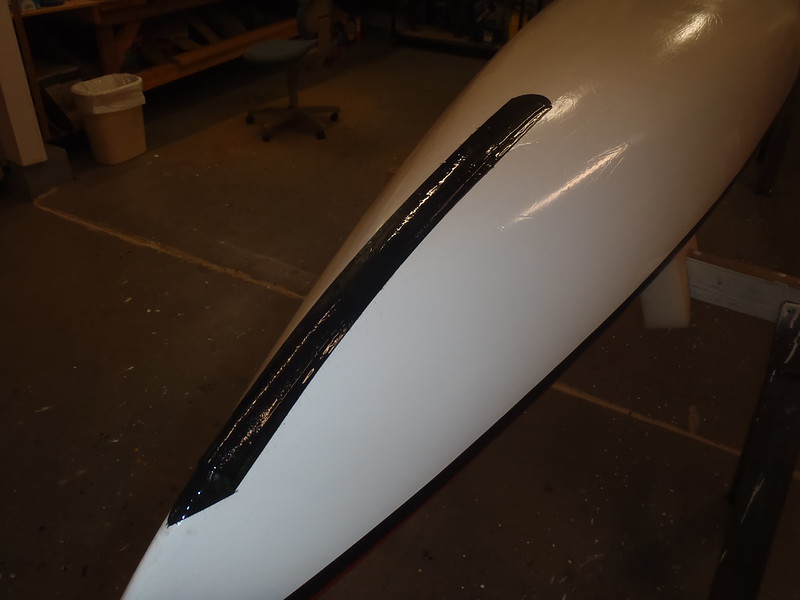
I pulled the interior end of the rope through the deck holes at the stems, all the way into the cockpit and ran that bitter end through a neoprene cushioned washer to help spread the load. Sexy Thang already had a glob of ‘70’s quintessential thickened resin there at the rope handle tip inside the deck.

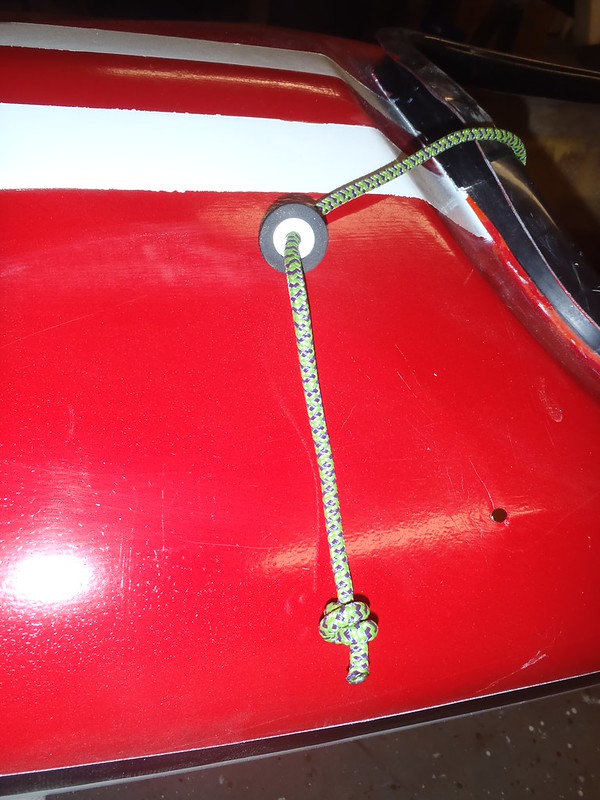
P9230005 by Mike McCrea, on Flickr

Tied a stopper knot, filled the washer base with E-6000 adhesive, pulled it tight to the inside stem and clamped it off while the E-6000 set up.

P9230008 by Mike McCrea, on Flickr

Once the adhesive on the neoprene washer set up I ran the end of the rope into the toggle handle, pulled a few inches out, tied another stopper knot and slid the knot inside the PVC pipe. It took some pushing and lubrication to force the stopper knots inside the handles, so everything should be held tightly in place.

Presto, DIY black, cushioned, no-slip toggle handles. Two bike grips (which I guess the Parts and Pieces Fairies left), two short lengths of PVC pipe, less than a foot of high quality rope on each, counting the stopper knots.

P9230011 by Mike McCrea, on Flickr

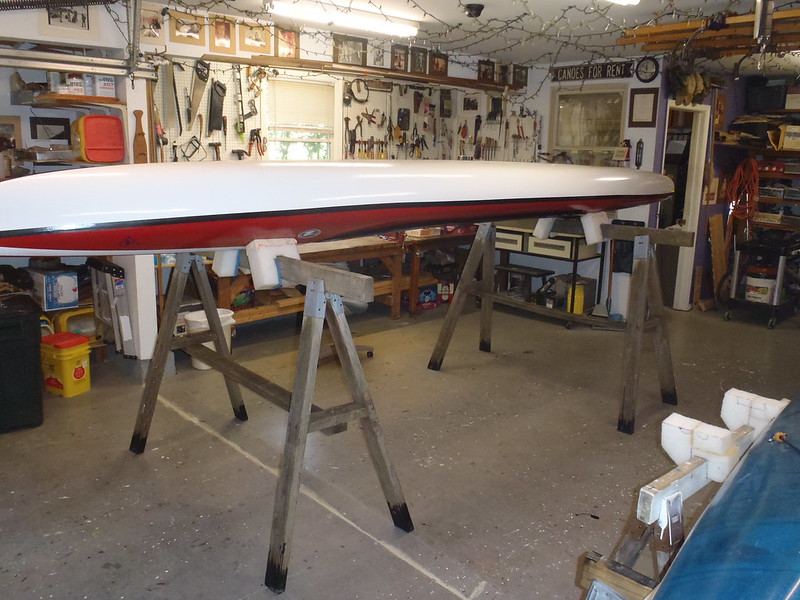
I made the stern carry toggle rope a bit longer, in hopes that once the rudder is attached it will still be usable. If I need to refashion the stern toggle for rudder clearance I can afford another short length of rope, but for now at least Sexy Thang is easier to two-person carry. Should be fine bow toggle in hand on a portage cart too.

I may have to consider doing an end-pour of floatation foam in the stems, even with the minicel pedestal and knee bumpers & heel pads to come there is not a lot of flotation in Sexy Thang. The interior stem ends have nothing but some globed resin pour at the tips, and now a strand of E-6000 dripping off the washers.

P9230010 by Mike McCrea, on Flickr

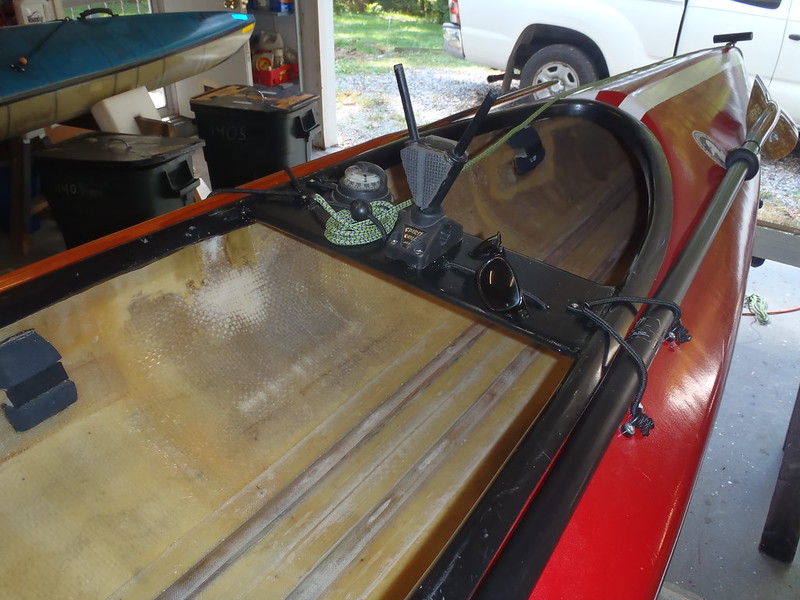
I will glue in D-rings to tie off DIYed decked canoe sized tapered dry bags or float bags for day paddling/sailing.

https://www.canoetripping.net/threads/more-tapered-dry-bags.98705/
 
Having removed all of the OEM stickers and MFG labels from Sexy Thang before painting a few new stickers and labels were needed to finish the declaration and decoration. The very last of the first generation Duckhead stickers, and a couple of golf club ID labels.

P9230015 by Mike McCrea, on Flickr

I still have a couple now-precious 2nd generation Duckhead stickers left, in a slightly different purple. There are a lot of Duckhead stickers on boats and vehicles, I had at least a gross made each time, and they been spotted far afield on friend’s boats, and on boats I sold.

I would have recognized Conk’s truck at an Adirondack landing without a Duckhead sticker, but it immediately caught my eye. And I do enjoy hearing tales of far flung boats being recognized, especially those I have sold to distant paddlers.

“And you will appreciate this; after our first time out with it, we were just tying the boat on the car when someone says “you must know Mike McCrea!”
Turns out that the guy parked next to us was also a canoeist and he recognized your stickers on the boat!”.


For sure, one on every boat that comes through the shop. Three left; I should probably get a new batch made.

P9230018 by Mike McCrea, on Flickr

The golf club ID’s labels were a paddler/golfer Will Derness idea (even a blind squirrel. . . ). Durable, waterproof 1” x 2” stickers, made for golf club shafts. A good driver is pricier than a good paddle, so high quality labels. Sheets of 20, with four lines of text on each sticker. Since I don’t use a cell phone, or answer the landline unless I recognize the number, I opted for my Name/E-mail/Name/E-mail.

Cut in half I had 40 ID labels. I ended up ordering a second 10-pack set; there is one on every paddle, barrel, Pelican box and other hard sided paddling item we own.

https://www.canoetripping.net/threads/contact-info-on-paddles-and-gear.32680/#post-65108

And two on (in) each boat; one obvious, one hidden.

P9230019 by Mike McCrea, on Flickr
 
Time for a multi-day outfitting task, making the utility thwart and glassing it in place.

Sexy Thang was not a light weight girl to start with, and I’m trying to keep the outfitting on a diet. No massive 7 ½” x ¾” oak utility thwart as in the FishFinder, stupidly used only because I had the board in the shop and wanted the extra width for some fishing gee gaws. Couldashouldawoulda used lighter/thinner wood.

5 ½” x ½” poplar this time, plenty of width for Sexy Thang’s thwart accoutrements. It has decently straight grain, and the utility thwart gets coated with epoxy before being glassed in place, and later painted, so I’m not worried about the toughness or longevity of poplar.

First step, get the board even-steven across the hull at 21” inches from the seat, far enough away that the sail battens are not in the way of a paddle stroke, near enough that the basemount and assorted gee gaws on the utility thwart are within easy lean forward reach. That distance, for me, can be a bit further away in an open canoe with a higher mounted seat, where the lean forward reach is easier.

There was a lot of measuring and re-measuring, tapping the uncut board back and forth 1/8” this way and that. In perfect position I taped the edges on the coaming to mark the spot.

P9230021 by Mike McCrea, on Flickr

I scribed the cut lines on the bottom of the board, cut the angles and did a test fit

P9230024 by Mike McCrea, on Flickr

It was a little tight, pushing out against the unsupported and flexible coaming edges. Better a teeny bit too long than a teeny bit too short, as always it needs a bit of curve sanded along the butt ends to best fit fully snug against the coaming. A couple minutes on the 1” belt sander, another couple minutes along the router table to round off the exposed right angle edges, a bit of RO and hand sanding and the utility thwart was ready for drilling.

The only drilled-through holes needed on the utility thwart will be four ¼” bolt holes for the sail base mount, and four holes for a lateral over-under-over run of bungee cord. Since I’ll be epoxying and later painting the thwart, including inside the holes, 19/64ths should do.

Here again it helps to have Opie alongside. I am happy with the layout of everything on Opie’s utility thwart; base mount, open cleat to hold the bowline near at hand, deck hooks for paddle keeps and compass restraint, etc. Need to touch up Opie’s black thwart paint while I’m at it.

P9230026 by Mike McCrea, on Flickr

I found the centerline of the board, positioned the base mount and drilled the bolt holes. The sail mount bolt holes need to be precise, drilled one at a time with a drill press, drop in a bolt through the basemount, drill the next hole, drop in another bolt, until all four bolts seat true.

The four bungee cord holes each got chamfered in the direction of cord pull, to lessen any stretchy edge wear and tear. I even finger sanded inside the chamfers, and compressed air blew out the (considerable) dust. Sexy Thang deserves my best efforts.

P9240027 by Mike McCrea, on Flickr

Last thing before the utility thwart is epoxy coated prior to installation, tracing the butt ends and cutting some narrow strips of Kevlar felt for tomorrow’s work. Dang but I do have a lifetime supply of kevlar felt, and this is the only rational purpose for that crap.

P9240030 by Mike McCrea, on Flickr

The only use I have from that kevlar felt is at the ends of glassed in thwarts, but that’s a job for tomorrow, after the epoxy coat on the utility thwart has dried to touch.

P9240031 by Mike McCrea, on Flickr
 
With a dry to the touch utility thwart I could proceed with the installation.

P9240032 by Mike McCrea, on Flickr

First I needed to construct a platform to hold the utility thwart perfectly in position. Done this before; a weighted box, a couple scrap boards, a couple shims and the thwart was perfectly held in place.

P9240034 by Mike McCrea, on Flickr

I will glass the utility thwart in place top and bottom, but I want it held firmly and precisely held in place before I start laying glass and epoxy. That otherwise useless kevlar felt? The skinny felt strips get attached to the butt ends of the utility thwart to fill in any minor gap in the coaming curves. A few brads assure the epoxied felt will stay in place when epoxy saturated and slipped betwixt the coaming edges.

P9240037 by Mike McCrea, on Flickr

Utility thwart ready for the first epoxy action, using G5 five-minute epoxy so that I don’t have to wait a day to lay glass across the thwart to coaming transition. G5 is not intended for high moisture areas, but the ends of the utility thwart will be encased in glass and resin, and I just need the thwart held immovable in place for epoxy, cloth and peel ply compression work.

P9240038 by Mike McCrea, on Flickr

Thwart quickly laid in place with some teensy adjustment, not a lot of working time with G5.

P9240040 by Mike McCrea, on Flickr

Five minutes later I could remove the platform with the utility thwart held firmly in place and lay some cloth across the top of the coaming and thwart edges.

Everything pre-cut, prepped and ready.

5” length of Dynel cord, used in the past to make a softened transition between thwart and coaming

5 ½” length of 1” glass tape

9” length of peel ply. Always want peel ply longer/wider than the cloth for a clean easy pull.

P9240042 by Mike McCrea, on Flickr

The Dynel cord was counter productive; I wetted and smushed the cord along the epoxied cowling edge before any tape went on and immediately took it off; the 2” glass tape alone made a soft nice transition to the coaming’s top edge. Since the utility thwart will eventually be painted black I used G/Flex 650 with black pigment

P9250047 by Mike McCrea, on Flickr

Tomorrow I can flip Sexy Thang upside down and do the same on the underside. Maybe some Dynel cord; there may be more of an L transition to deal with below decks, and certainly a lot more space under the coaming edge for glass tape.
 
While I waited for the G/flex to harden before pulling the peel ply I could turn to another bit of right side up work. I like tie down points, but Sexy Thang lacks attachment areas; vinyl pad D-rings just below the decks are a start. And I have some other ideas.

With the dual keelsons I didn’t want to have to use two D-rings at each end, the decks themselves help hold things cage-like in place, so small pad D-rings that fit between the keelsons will suffice, and even then I had to trim the edges to make them fit.

The usual D-ring practice, scuff and clean the pad areas on the hull, scuff and clean the back of the pads, G/flex the pad and lay it in place, cover with wax paper and a sandbag weight and babysit. Unlike epoxy or paint this is an instance where babysitting attention actually makes things better. Wait 30 minutes, take the sandbags off, push down on the pads, put the sandbags back on. And repeat every hour until the G/flex on the application brush is hard.

P9240045 by Mike McCrea, on Flickr

E-6000 beaded around the perimeter and those two D-rings are good to go.

One more upright task before I can flip Sexy Thang over to work on the bottom of the utility thwart and install D-rings on the underside of the decks. The minicel seat pedestal was rock solid in a test sit, and is not exposed to much in the way of sheer forces when simply sitting and gently paddling.

But, getting in and out, stroking hard into the wind or just leaning aft against that high rise seat back could put stress on the contact cemented pedestal attachments. A lot of these ‘70’s tandems suffer from too flexible coaming sides, especially after removing the stiffening seat braces. The wide utility thwart provides a lot of cockpit stiffening, but Opie also has a thwart aft, just behind where the curve of the back band fits.

P9260001 by Mike McCrea, on Flickr

With the utility thwart and stern thwart Opie became plenty stiff everywhere along the coaming, even in the lighter glass & nylon build. Stiff enough to no-worries roof rack it cockpit down, instead of transporting it upright using cradles and a storage cover for rain occlusion. Sexy Thang needed a slender thwart just behind the seat back like brother Opie, this time snugged against the high rise seat back.

In keeping with her outfitting diet I opted for a more slender stern thwart, a length of ¾” square ash gunwale stock. Ancient ash gunwale stock, thrown in with a truckload of oddities long ago when I bought a cheap used boat.

That square ash stock was once fully 20’ long, as were the two rabbeted lengths of ash gunwale that came with that truck load of freebies. Lots of stuff tied to the roof racks on the way home, including the two never married halves of an old glass 3.5m slalom boat. Gave most of it away, but have used that ¾ square ash for a lot of purposes over the years. Enough that the once 20’ length is now an easier to store and cut from six feet long.

P9260003 by Mike McCrea, on Flickr

A length of that vintage ash, square edges rounded over a touch, glassed in place and snugged against the back of the seat at coaming height would prevent any lean back stresses or sheer forces. Cut to shape, custom end sanded and epoxy coated as before, this time with black pigmented epoxy along the full length; that slender up-against-the-seat thwart will be tricky in places to cover with black paint, so a black base will help.

P9260004 by Mike McCrea, on Flickr

In selected that slender ¾ square ash I had a plan for the glass tape needed. 1” glass tape would be overhang ugly to deal with in that application, and cutting ¾” wide strips from glass cloth would be loose strand messy was heck, but I had a solution in mind. ¾’ glass tape, aka “Precious, my Precious”; a gift from an aerospace industry shop visitor who brought up a sleeve of a dozen rolls and said “Help yourself”.

P9260006 by Mike McCrea, on Flickr

That narrow S-glass tape has a much finer weave than the 1” E-glass or the like. Why the heck did I only take one roll? I have searched and searched and never seen that narrow S-glass tape again. Or anything sub-one-inch wide quite like it.

P9270008 by Mike McCrea, on Flickr

Slender seat back support glassed in place I could flip Sexy Thang over, install the paired D-rings under the decks and glass the bottoms of the thwarts.

For working up inside a decked boat cockpit nothing is as handy as 4’ tall sawhorses. I got stupid lazy and tried squeezing in under the tallest standard horses I have (32”). That unworkable attempt didn’t last long before I wised up and brought the mega horses into the shop.

P9270011 by Mike McCrea, on Flickr

Not just for working inside decked boats. We have two sets of those, handy when I need to store a bunch of boats off the main racks.

PB211373 by Mike McCrea, on Flickr

Oopsie of the day; I wanted a dab of black pigment mixed in the epoxy as before. The little toothpaste-ish tube of pigment is old, and the pigment is starting to solidify. As I was trying to squeeze a still liquid drop out the tube plugged up with pigment turned solid, so I squeezed harder. And harder still, ‘til the plug popped out, with an audible PTTT.

Followed by a flying 3 inch long black worm of viable pigment, enough to tint multiple pots of epoxy. Thankfully most of it zinged inches past my face and landed on the shop floor. Kinda hard to put the worm back in the tube.

Multiple oopsies; I should not have been wearing a (previously) unstained shirt, and I know from past clogged pigment tubes that poking a finishing nail in the nozzle clears the obstruction. Note to self, order more black pigment. And wear old clothes. And think man, think.

Two more D-rings, two pieces of 2” glass tape, two pieces of ¾” tape and the inside epoxy work will is done.
 
With the thwarts fully glassed in place and the under deck D-rings installed I had a week of epoxy cure wait time before lightly sanding and painting the brightwork pieces, although they will be painted black, not bright.

P9280012 by Mike McCrea, on Flickr

While Sexy Thang was upside down, and back on lower height sawhorses, I turned to another task. When I started rehabbing the Optima I wasn’t initially planning on going the whole 9 yards, and hadn’t foreseen a Sexy Thang, deserving of my best efforts.

Time to go the last four feet, as in 24” of Dynel sleeve skid plates at each stem. The stem wear area was minor and narrowly confined, and oddly more on the bow than the stern; bow on beach landing I suspect. No matter, in for a penny, in for longer skid plates both bow and stern.

Again in keeping with the diet I used 1 ½” lightweight Dynel sleeve and the usual methodology; tape & paper the area, lightly sand, lay a base coat of West 105/206 with black pigment, lay the Dynel sleeve, top coat of 105/2206 and pigment.

P9290014 by Mike McCrea, on Flickr

Allowing that topcoat to thoroughly saturated both layers on the Dynel sleeve wait a couple hours before pulling the tape/paper and compressing release treated peel ply overtop with the hard roller. God bless you Glen for finding peel ply in rolls. I’ve used release treated peel ply on every initial epoxy application on Sexy Thang; nothing but the easy snip-to-length peel ply rolls.

P9290016 by Mike McCrea, on Flickr

Next morning pull the peel ply, file down the abrupt Dynel sleeve ends, tape & paper and recoat, this time with G/flex, black pigment and graphite powder. More shapely taped this time, with a vee point and rounded end. No peel ply or roller this time, just smooth and dense black. Once you go 24 inches of smooth black you’ll never go back.

P9300017 by Mike McCrea, on Flickr

The Dynel sleeve skid plates are and abrasion resistant rugged and looking good. After the skid plate epoxy cures overnight I can flip Sexy Thang over again and do some sanding and painting on the top side.

PA010022 by Mike McCrea, on Flickr
 
The Dynel sleeve skid plates are 2-layer impact and abrasion resistant rugged and looking good. After the skid plate epoxy cures overnight I could flip Sexy Thang over again and do some sanding and painting on the top side.

PA010022 by Mike McCrea, on Flickr

Flipped upright the thwarts needed a bit of filing and sanding to smooth out the glass to coaming transitions and surface prep for painting.

PA010002 by Mike McCrea, on Flickr

File, file, file card, sander (also used a pad sander). First working on one side of the hull, then on the other. Rather than set the glass-dusty files, card and sanders inside the boat, the wheeled shop cart came to the rescue again. That cart may be the best mobile shop platform addition ever, even when I don’t need the shop vac & dust extractor on the bottom shelf.

PA010006 by Mike McCrea, on Flickr

Filed and sanded smoothed and ready to paint after some hull dust vacuuming, yup, there’s a cylonic dust extractor right there on cart’s bottom shelf.

Paint means taping the thwarts again. And, while I am taping, dammit, I want a second coat of white on the racing stripes. They look fine from 10 feet away, but up close there are single coat thin spots. One coat of any paint is rarely enough; a second coat of white EZ-Poxy with performance enhancer and they will shine.

Egads, more taping. A lot more taping, all of it in strategically-pulled sequence, with fold-over tabs. I remembered to fold all of the pull tabs on tape ends, and only put a couple tape pieces on in the wrong Pull A, then pull B order. And I can’t even blame the paint fumes yet.

PA010007 by Mike McCrea, on Flickr

PA010010 by Mike McCrea, on Flickr

If I had any black EZ-Poxy I would have used it over the epoxied thwarts, and later have top coated the black Dynel skid plates. But I don’t, so plain old black enamel will have to do. Two coats at least, including inside the holes. I can touch up Opie’s scraped and worn thwarts while I’m at it. Another coat or three of black on the thwarts and they’ll be done.

PA020011 by Mike McCrea, on Flickr

The re-coated white racing stripes? Oh heck yes, so much better with a 2nd coat of EZ-Poxy. That’ll do pig, that’ll do.

PA020015 by Mike McCrea, on Flickr

It took three coats of paint on the thwarts, and I’m not happy with the quality of the Gloss Enamel Black, not very dang glossy. Er, I mean, that more matte satin finish is meant to keep the sun from glaring off the utility thwart.
 
The utility thwart plainly needs to be painted yellow in honor of Batman's Utility Belt.

batman-utility-belthead.jpg
 
Well, the jet-boat shuttle guys on the Green did refer to my tripping canoe as “The Inspector Gadget” boat, but I think they were just jealous.

When my rudder & foot pedal guru Joel is here for some shop time I’m thinking of installing a removable rudder on that open canoe; it would be so much more fun to sail that boat hands free. I believe I have a suitable rudder that would work with pintle and gudgeons.
 
I keep saying “I’m done with taping and painting”. This time I really mean it, in part because I am eager to move on to more mechanical tasks.

It is all easy, but easiest stuff first. Dress the pre-drilled utility thwart with sail basemount, bungee, pad eyes, deck hooks for compass and paddle keeps, open cleat for the bow line. That basemount is simply a Scotty Rod base, and there are a dozen Scotty accessories that universal base will accept; rod holders and camera mounts and etc.

http://scotty.com/rod-holders-and-mounts/rod-mounts/

The most useful 25 cent outfitting item ever? Nylon pad eyes, and deck hooks come in a close second.

That 5 ½” wide thwart and, per ALSG, it has more stuff on it than Batman’s Utility Belt, but everything on that thwart serves a needed purpose, although I could have used a slightly wider board. All black (not Batman yellow), in keeping with Sexy Thang’s color scheme.

PA020019 by Mike McCrea, on Flickr

I mini-dressed the slender stern thwart. A couple pad eyes on the back of that thwart will provide two easy to access tie down points just behind the seat.

PA020023 by Mike McCrea, on Flickr

I have a lot of faith in the strength of pad eyes. Well Guest has faith, 300+ lbs of weight bearing faith.

https://www.canoetripping.net/threa...weight-bearing-experiment.107260/#post-107549

I don’t much like stuff on the bow decks, even small things throw spray in waves, and those ‘70’s Optimas have a nicely peaked and well drained foredeck. I will omit even Opie’s simple vee of bow bungee in favor of a completely clean front deck.

But the slightly flatter stern deck is available, and I’ve strapped down an oversized sleeping pad in a dry bag there on Opie. Or other things; decent place to strap down a few paddle scavenged found limbs to be sawn, or an otherwise awkward clam rake. Or 2-Gauge punt gun for an up- the-periscope shot down the stern tubes ;-)

https://www.google.com/search?q=pun...zLjEuNS0xLjAuMS4xmAEAoAEBsAEA&sclient=gws-wiz

Geeze, I will bet that there somewhere exists a venue where you can go to fire off floating punt guns at a spread of targets. If there isn’t there should be. Dammit, I wanna go!

Lots of history along the Chesapeake involving watermen, punt guns and ducks supplied to fancy restaurants far and wide. Same but more extreme for oysters; there is a reason Rte 413/Main street in Crisfield is 100 yards wide. There were once in and out train tracks, solely to facilitate hauling out freight cars of oysters. The oyster population once filtered the entire bay in a little over 3 days, and the water was Caribbean clear.

http://oystersforthebay.com/how-it-used-to-be/

Apologies, off on an ETOH and other influenced rant. At least I got to see the Chesapeake and tributaries in the 60’s and 70’s. What has been lost in my lifetime has been remarkable.

Back to happier outfitting tasks. Whatever might get stored on the back deck gets strapped down tight, not loosely held in place under bungees. I don’t trust bungee cord. I really don’t trust bungee cord when it has stretched out, and it is hard to keep an eye on something unseen on the back deck.

Ladder lock strapped down tight, so I need not worry about anything falling off, is a far better solution. Even in an improbable escape from the webbing straps I run a safety line to the boat as well; if anything did “fall off” it would drag noticeably at the stern. Belt & suspenders, especially when I cannot see my belt.

The pop rivet simple solution was two pair of strap grommets, with the option of using ladder locked straps across the back deck when needed. A single pop riveted strap grommet tested at 114 lbs fail strength. A case of canned beer weighs 20 lbs. I’m not hauling in five cases perched on the back deck, just sayin’

PA020025 by Mike McCrea, on Flickr

Anytime there is an attachment point on the top of the decks there is opportunity to pair an attachment point underneath. Simple mobius strip webbing loops below the two strap grommets closest to the cockpit will suffice. A single pop riveted webbing loop tested at 282 to 320 lbs strength. every 3/16” pop rivet has at least a #10 SS flat washer back up. Glad I long ago bought a box of 100; so much 3/16” hardware in boatwork that I need to buy another.

With five sturdy tie points above and below the edge of the decks I can easily make an end bag cage for float bags, don’t need a cage over top with the decks. Gear tie ins as well if I feel the need.

PA020026 by Mike McCrea, on Flickr
 
It was play day in the shop. I wanted to see how some of the decked canoe accessories fit. Well, I already know, I just wanted to see.

The Wilderness Pamilco 145 solo spray cover will fit a converted Optima with the right seat placement. I’m not much for paddling with a skirted cockpit, but I do like a storage cover for in-camp use, and the P145 storage cover fits the Optimas well enough. Good idea to try it on; I saw where I had forgotten two pads eyes, one at each end, for storage cover security.

PA030030 by Mike McCrea, on Flickr

PA030032 by Mike McCrea, on Flickr

That storage cover isn’t going anywhere even if it somehow implodes or blows off. And beyond those end captures a simple clip-clip at each end and that 79” long cockpit cover is a lot easier to rand in place under the coaming. I have a decent wingspan, but it’s not one hand holding either end six and a half feet distant. I can do without get this end on and then the other ends pops off frustrations.

PA040004 by Mike McCrea, on Flickr

For day paddling/sailing I want float bags bow and stern. Big float bags, trust me, you don’t want to empty that 2X bathtub volume with a bailer or pump. Decked canoe dimensioned floatation bags are available, if hard to find.

PA030035 by Mike McCrea, on Flickr

Those big arsed float bags occlude all of the empty space under the decks when day tripping.

PA030037 by Mike McCrea, on Flickr

An alternative to unicorn giant sized float bags is to pair sea kayak sized float floatation as split bags.

I know that the DIY’ed tapered dry bag will fit perfectly, it fits bro Opie and all of the other decked canoes, but, like the storage cover I may see something missing.

PA030038 by Mike McCrea, on Flickr

Packed with lightweight stuff - stuff sacked sleeping bag, fleece clothes, camp pillow and feathered boa - that tapered dry bag isn’t belaboring the stems with weight, and provides a lot of added storage capacity. And some empty space oopsie floatation.

PA030041 by Mike McCrea, on Flickr

After the last of the outfitting is done I need to eventually put Sexy Thang back on the tall sawhorses, climb inside and cover the exposed pop rivet mandrels with thread protectors or a dollop of hot glue to prevent puncturing floatation or dry bags.
 
Sexy Thang needed a little comfort foam. Knee bumpers, and heel pads for better no-slip boot grip, or for shallow sandy bottom summer barefoot paddling/wading. Yes, if I’m wading the boat across 3 inches of temperate sandy bottom bay waters I’ll be barefoot; can’t toe-feel clams when I wade with shoes on.

The embossed side of exercise flooring is boot heel durable, far more so than minicel, and I’d rather replace those pads in 10 years than patch where my heels have worn away at the hull bottom.

As a loaner boat those pads can be made a bit oversized to accommodate both Shortstuff and Stretch borrowers. 12” X 4”knee bumpers, comfy minicel, not exercise flooring. Some of that 4” width wraps under the cowling edge to allow for better bracing. Slightly oversized 8’ x 10” heel pads, positioned with a bilge drainage channel along the keelsons. Some little pieces of exercise flooring on the foot pedals can’t hurt with barefoot tootsie comfort or ball of foot grip.

PA020018 by Mike McCrea, on Flickr

Cut up, and speedily beveled with the 1” belt sander so there is less opportunity for sheer forces to peel at the pad edges, those scraps of exercise flooring and minicel were ready for contact cement work. Dragonskin is wonderful for more complex minicel shaping, curves and concavities, but for simple edge bevels that little tabletop belt sander beats all for fast and clean.

Pad placement on the hull meant more taping, so the contact cement coat on the hull isn’t too far outside the edges of the pads, and so I have a precise aiming box for insta-stuck attachment.

PA040006 by Mike McCrea, on Flickr

Benchtop stuff prepped and ready to go, time to lay some timed coats of contact cement. That’s a lot of foam to cover thrice; windows and door opened and exhaust fan running. I can retreat to my one-way fresh air office between coats. Well, not just fresh air, there are other office attractions.

PA040007 by Mike McCrea, on Flickr

The usual technique; three coats of contact cement on each minicel piece, the first two can be let dry, then first coat on the hull, third coat on the foam, both timed to equally tacky. The third coat on the foam takes a lot longer to dry to tacky than the first two, the hull area longer still. Heat gun both surfaces, press and pray for aimed alignment. Pull the perimeter tape, weight down or clamp and walk away.

PA040013 by Mike McCrea, on Flickr

PA040010 by Mike McCrea, on Flickr

Once the contact cement adhesion was firm everywhere I removed the clamps/weights, E-6000ed the accessible pad edges tops and sides, and can later flip Sexy Thang over again on the tall sawhorses and do more interior work.

If nothing else those assorted foam pads will add a touch more floatation to Sexy Thang.

PA050015 by Mike McCrea, on Flickr

In lieu of a never-done-it-before and don’t-have-any two part foam end pour I may eventually glue together some yoga blocks, carve them to fit the stem tip vee tapers and shove them glued in place at the very ends. Or just use float bags on day trips or tapered dry bags when gear laden.
 
Sexy Thang needed rudder, control lines and foot pedal considerations. I have two sets of old foot pedals on hand and, thanks to Jon Sairs and Keagriver, I now have two rudder candidates.

Jon Sairs is the gentleman who bought our solo converted Klepper Kamerad TS. The Kamerad was a very nice sailing canoe, the TS stood for tandem sailing. But it was heavy as heck, with woven roving, very thick gel coat and buttresses between the hull and deck, and at 15’ 6” lacked the volume for our usual tripper loads.

Sairs has a peculiar use for those Kamerads; he converts them into tandem, two-masted day sailing schooners, with Balogh sails, leeboards, outriggers, custom rudders, seats and other gee gaws. Truly a man after my custom outfitting heart. I wouldn’t want to have to assemble one at the launch, but it looks like highly specialized fun; kind of a modern take on old-timey canoe sailing regattas.

https://sailyourkayak.com/blog/

I actually bought Optima #3 with Jon in mind, but since his eye opening shop visit, discovering there are other ‘70’s decked hull schooner possibilities, he has bought an Optima, two Phoenix Vagabonds, and (new one to me) a Stardust. Sairs’ has a kayak sailor’s eye, and drooled a bit over the lines of the OT Sockeye/Sea Wimp. I kinda want to see what he could do converting an old Berrigan ;-)

Jon did not need the rudder that came with (but not on) our Kamerad; not OEM equipment, it needed gudgeons and pintle installed to work on the Kamerad when I rebuilt it. For the cost of shipping he mailed that oddball rudder back to me. Thanks Jon.

PA050017 by Mike McCrea, on Flickr

That gudgeon and long pintle pin has potential as a removable rudder on the soloized Penobscot; I yearn to be hands free when sailing that tripping canoe, even if I am holding a paddle as a comfort totem, but want the rudder and housing easily detachable, leaving just the gudgeons and foot pedals

Keagriver was kind enough to mail me a vintage Feathercraft rudder. Unlike later model Feathercraft stuff this one is old-school simple; no pulley wheels, just a single line, to be run through a closed cleat, that lifts the rudder blade out of the water and deploys via gravity. Very similar function to the Monarch and retrofitted rudders on the other two Optima conversions, my Opie and Doug’s Cadillac.

That KISS style rudder is preferable in some keep-it-simple ways, easier to field repair and, in keeping with Sexy Thang’s diet, is lighter weight than current pulley blade retracted Feathercraft rudders. It has a nylon block pintle hole sandwiched between the control arms, easily drilled out to fit the existing (well anchored) SS pintle on Sexy Thang.

PA050022 by Mike McCrea, on Flickr

But the nylon housing block and control arms on that Feathercraft are a bit taller than the existing pintle.

PA050018 by Mike McCrea, on Flickr

A little thinking about where to cut, and how, and I could safely do the minor surgery needed to test fit that rudder even without Joel’s supervision. Hoped I hadn’t ruined it, but I had retrofitting ideas and needed to see if they would work.

Some minor corrective surgery was needed to trim the bottom of the housing so it rested lower on the pintle. With the hole drilled to size and rudder seated the pintle is recessed almost ¼” deep in the nylon housing, and I need access to the split ring groove at the top of that pintle to secure the rudder. The easiest way to prep for that surgery is to disassemble the rudder and housing.

PA050020 by Mike McCrea, on Flickr

Yowza, those were some recalcitrant corroded machine screws holding those parts together. If I hit up the stainless steel purveyor I may replace them, but for re-assemble and testing purposes I soaked them vinegar. Easy to see where I needed to cut and file once the rudder housing was disassembled.

Courage, a hacksaw and some custom filing and, yippie, everything fits and works perfectly. The single rudder retraction line pulls the blade raised up at a 45, a bit more than shown in this photo. I’ll add a nylon fender washer underneath the housing, and a pad eye guide for the retraction line near the stern.

PA050027 by Mike McCrea, on Flickr


Gravity released the blade is plenty deep, and pivots easily with a full range of left-right motion. For sailing a gear loaded decked hull that Keagriver rudder is beneficially longer than those on some other decked canoes.

PA050030 by Mike McCrea, on Flickr

Keagriver, many thanks, that rudder is perfect on Sexy Thang. The eventual SS cables should not be rubbing on the deck, nor obtrusively sticking too far out, both issues with some conversions, and even with some manufactured decked canoes.

The OEM cables on the Phoenix Vagabond (the Rambler) were so disturbingly exposed outboard that, in fear of catching them on some too-close branches or brush, I needed to cross them over the stern. They still rub on the deck though, and confuse the heck out of anyone long accustomed to push right turn right foot pedal action.

One thing is still missing on that rudder. Specifically, missing on that rudder blade; some dress up. All of our rudders sport their Sunday best paint schemes and reflective tape.

PA060032 by Mike McCrea, on Flickr

PA060035 by Mike McCrea, on Flickr

PA060036 by Mike McCrea, on Flickr

That Plain Jane aluminum rudder needs. . . .Gee, I dunno . . . . .maybe some red in preparation for white racing stripes? Hope it don’t turn pink this time.

PA060039 by Mike McCrea, on Flickr

I likely won’t install the cables or foot pedals until rudder guru Joel arrives for some shop time. I could, but Joel is a wizard that that work, and I want him here as a Shortstuff foot pedal positioning model. As a Sexy Loaner Thang I’d like to provide decent accommodations for all.
 
“What performance differences do those significantly different rudder shapes make?”

Beats me, but I’ll hazard a few guesses as to the “why” of the different shapes.

The 70’s era “Tandem European-style touring kayaks” favored a shorter, wider blade. Some of those early hull designs had shallow sterns, much like the later Loon and Monarch; perhaps more width and less depth was viewed as a no-bottom-dragging advantage. Or perhaps those early blade shapes were copied from the traditional shapes that worked best on larger boats and ships. Don’t see many long skinny rudder blades on larger vessels.

P9230014 by Mike McCrea, on Flickr

PA050017 by Mike McCrea, on Flickr

Even the low-stern Monarch rudder has a touch of Dr. Seuss shaped short and fat. The oddly shaped top of the Monarch rudder blade allows it to pivot up and out at a 45 when the retraction Iine is pulled. Many of the ‘70’s decked tandems had no in-boat rudder retraction ability, the rudder could only be positioned up or down by hand; hop out, wade back to the stern, adjust the rudder, wade back and hop in.

Inexpedient at best. Stupid at worst, even those crude rudder blades can be made gravity deployable (and far more convenient) by simply reshaping the top of the blade, drilling a new pivot hole and adding a single retraction pull line.

I replicated the Monarch’s retractable rudder curves when retrofitting the old-school by-hand Optima and Kamerad rudder blades.

PA060036 by Mike McCrea, on Flickr

The Keagriver rudder uses that same single retraction cord gravity deployment as an OEM feature.
PA060036 by Mike McCrea, on Flickr

More modern rudder designs favor a longer, more slender blade, and a pulley mechanism that retracts the blade 270 degree to rest flat on the stern deck. But, many of those available used are solo sea kayak blade shapes, and a beamier decked tripping canoe, loaded with gear, needs more “bite” than those short slender solo sea kayak rudder blades.

Or at least can need more bite; the Sea Wimp rudder is not excessively long, or deep under the boat, but is very efficient with that peculiar hull shape. The OEM Old Town Sockeye rudder and controls were hilarious; plastic housing and square rudder with a hop out and tighten a wing nut to the blade hold up or down. And a continuous line of steering rope (no pedals) that ran from the control arms, up and back through pulleys far in the bow. The rudder was hand steered. That continuous hand control line was also common, and could be used by either bow or stern paddler, so there was that.

An ideal rudder, at least in a weight-conscious build, might be appropriately sized carbon fiber housing with a foil-shaped blade. A carbon Onno weighs “Under a pound”.

https://www.ebay.com/itm/123832788996

But I’m not dropping $400 on a carbon rudder. I’ll take the best of the used old school stuff I can get and make it work.

The heaviest housing and rudder blades mechanisms I have seen (and weighed) are massive Feathercrafts for tandem sea kayaks that weighed in at 2lbs, 10oz. The Keagriver rudder weighs 15oz. That’ll do.

Too much rudder blather. It must be the contact cement fumes.
 
Remember that guy who said he was done taping and painting? Don’t believe him.

I couldn’t resist a little touch-up work. Mostly for procrastinator reasons; I really needed to do office paperwork. NOOOO, anything but that! There were wee miss-tapes, paint creeps and white blobs along Sexy Thang’s racing stripes, and I had some red enamel paint.

PA060001 by Mike McCrea, on Flickr

Well, that took care of the worst of them. I could have gone full Seurat or van Gogh and pointillism dotted every speck. Suddenly, I’d rather do paperwork.

Paperwork done I flipped Sexy Thang over on the tall horses and got after some interior work again.

PA080014 by Mike McCrea, on Flickr

I’ve stopped counting how many times I’ve flipped Sexy Thang one way or another on various sawhorse stands, and I’m not done yet.

The exposed pop rivet mandrel heads needed protection. They are so short that trimmed to stubby size thread protectors, even epoxied in place, don’t stay attached very well or very long when stuffing gear under the decks, so an experiment was in order. I covered some with a blob of E-6000, and some with a blob of hot glue. The hot glue was far superior in maintaining a blob over the exposed mandrels, the E-6000 flowed out and away too easily. E-6000 for every exposed pop rivet end.

PA080016 by Mike McCrea, on Flickr

How the hot glue blobs stand up to gear shoved under the decks is yet to be seen.

There was one 46 year old piece of crumbly foam thigh brace left that I neglected to scrape out during the last upside down investigation. Hyperform added those foam thigh braces for both bow and stern, oh so comfy 1/8” thick. Combined with the horribly OEM uncomfortable seats, no thanks.

PA080018 by Mike McCrea, on Flickr

A couple other minor under-deck tasks and Sexy Thang went back upright, on lower horses, for inspection.
 
The Rudder Wizard was in the shop for a too brief visit. He brought me more rudders, and foot pedals. Lots of rudders and pedals. And toggle handles, back deck vee rudder rests, SS nuts and bolts and hardware, all stuff he salvaged from worn out plastic sea kayaks. Mr. Wizard wears out boats, or his clients do; to my everlasting joy and material experimentation I get to refurbish some of the better ones annually ;-)

He brought me big arsed rudders, and foot pedals with extra long (22”) slider rails. To quote Chief Brody, “We’re going to need a bigger boat”

PA080006 by Mike McCrea, on Flickr

I won’t need to go begging again for rudders or foot pedals for a long time. Maybe ever. Mr Wizard played with one of those big arsed Feathercraft rudders for a spell, took it apart, cogitated adapting it for Sexy Thang, and agreed that Keagriver’s already adapted rudder was, thanks again, perfect.

PA080008 by Mike McCrea, on Flickr

Not only that, but those tandem beefy Feathercraft rudders weigh 2lbs 10oz, and the Keagriver rudder is 15oz. Sexy Thang is still on a diet. Same decision with the too-be-installed foot pedals; my when-weight-doesn’t-matter preferred Yakima/Werner foot pedals weigh 15oz each, same as the gifted long-throw pedals. The Wilderness pedals weigh 9oz, every little bit (less) will help.

PA080009 by Mike McCrea, on Flickr

We didn’t get much further than inspections, investigations and making a list of needed materials, all of which I have. Mr. Wizard had driven 14 straight hours from Maine to Maryland, towing a camper trailer behind a van stuffed to the gills; literally open a door solid wall of gear Tetris packed. Tetris packed around a motorcycle strapped in the back of the van. Joel has too much stuff, and the rudder and foot pedal collection can be stored here ‘til he needs some back.

A friend too-seldom-seen; we spent most of the day just sitting and talking. Well, Joel brought me some Baxter Stowaway IPA and other Maine treats, which further enhanced a lackadaisical Hazy day in the shop.

PA080011 by Mike McCrea, on Flickr

Joel did have a test sit in Sexy Thang and confirmed what I sadly come to suspect; the seat height and cant angle need modification. Major modifaction.

He’ll be back. I’ll be ready.
 
Seat bummers. Major bummers, but rectifiable. Despite the best laid plans and best made jig, after some further test sit investigations, the minicel pedestal needs alteration. For starters it needs to be almost 2” higher for any hope of efficiently single blading. And it could use a bit more sternwards cant on the high rise seat back. The seat lost a lot of height and back angle when I carved down the sides of the pedestal to better accommodate the chine curves; the minicel base simply wasn’t deep enough to start with.

Building a custom curved and canted minicel pedestal is tricky business, and that attempt has come out and be redone. I sharpened a metal blade putty knife and slammed it repeatedly at the base of the foam. Utter futility; I even tried heating the putty blade on a torch. Nope, not happening.

With multiple coats of soaked in contact cement and heat gun action, that seat was well and truly stuck. Even the bead of cured E-6000 presented more than just a speed bump obstacle. If nothing else I am more ever convinced of the tenacity of my contact cement technique.

But the seat had to come out for modification; above all else, if the seat isn’t comfortable nothing else matters. A long, skinny flexible-blade keyhole saw made clean work of cutting out the pedestal, with only a little foam residue left to be removed where I couldn’t get the saw blade close enough.

PA090020 by Mike McCrea, on Flickr

The pedestal needed another layer of thicker scrap foam; not exactly scrap, a leftover square of 2” thick minicel, a gift from DougD when we marathon outfitted his Optima.

http://scooter-bangortoportland.blogspot.com/2015/05/1977-thermoform-optima-decked-canoe.html

Minicel saved for a rainy day? Have there been no rainy days since April of 2015? That must have been Precious 2” thick minicel. I really need to order some minicel for shop stock.

Pedestal modifications meant more band saw minicel work and more test fittings, interspersed with better custom carving of the minicel pedestal height and cant angle. I’m calling the resulting modifications perfection. Of course that’s for my height, girth and aching back issues.

Raised to single blading height and re-angled the edge of the high rise back now extends above the sheerline; can’t be helped with that tall IQ seat.

PA090022 by Mike McCrea, on Flickr

For foot room considerations the sail mount base on utility thwart also protrudes above the sheerline. The Optima is 12” deep at center. I could have recessed the utility thwart, but I wanted as much size 12 shoe and boot clearance as I can get underneath, not so much for feet angled \___/ on the pedals when seated; for getting in and out and shoving/retrieving gear from under the decks thwart clearance height matters.

PA090026 by Mike McCrea, on Flickr

The newly raised height is now single blade appropriate, and the cant angle is much better. And that lack of flotation, and nascent plan to add yoga-block stem plugs? I may yet add some stem flotation, but raising that seat platform happily used up a lot of scrap minicel chunks and added more foam floatation.

PA090025 by Mike McCrea, on Flickr

I had a scrap cut piece of 2” minicel that perfectly fit above the keelsons at the stern. I had a compartment idea.

PA090028 by Mike McCrea, on Flickr

I left the front open to create an accessible compartment under the front of the seat. Not a glove box, maybe a wet box. Might be a handy place to secure a sponge.
McCrea, on Flickr

The seat is now 6” high, near perfect height in a decked canoe of that depth with a 30” beam. I was NOT sawing that seat out again; there were test sits before I contact cemented it back in place a second time. I like it bunches better now height and angle wise, but the wide plastic seat pan doesn’t provide a lot of derriere grip. In for a penny, in for another RidgeRest, I have waffle padding needs beyond that slippery seat pan.

I didn’t care much for the appearance of the visible purple floral yoga block and grey minicel base, even before the sandwiched base got another layer, and while I had the seat still detached from the hull I could de-ugly the pedestal.

PA090027 by Mike McCrea, on Flickr

I had some neoprene, contact cement and Melco tape; that base would look a lot better in basic black.

Made a couple templates, cut out the neoprene, push pinned it down so it didn’t curl, contact cement work on the foam and neoprene, let cure and iron strips of Melco tape across the neoprene seams on to seal the deal.

https://www.seattlefabrics.com/Melco-Iron-On-Seam-Tape-78-Sold-by-the-Yard_p_510.html

PA090029 by Mike McCrea, on Flickr

The now black neoprene base looks 100% better than the purple and grey multi-layer sandwich. I may wrap the minicel knee bumpers with neoprene.

With the new cant angle the back of the seat edge moved forward 1 ½” when resting against the stern thwart. With most of the frou-frou floral print Dragonskinnned off it looks better. May have to neoprene cover those top triangles to complete the little black dress.

PA090030 by Mike McCrea, on Flickr

Sponge box

PA090033 by Mike McCrea, on Flickr
 
Given you have named this boat "Sexy Thang," I think you should have stayed with the pink/purple minicel color scheme.
 
I might have stayed with the purple if I had put some metal flake in the paint and glitter in the black epoxy skid plate.

Shouldn’t you be busy re-bending the Explorer’s new wood gunwales that your wife thoughtfully unbent while you were away?
 
Back
Top