• Happy National Garlic Day! 🧄🚫🧛🏼‍♂️

Pettit EZ-Poxy Topside Paint vs Rustoleum Topside Paint

G

Guest

Guest
Pettit EZ-Poxy, $40 - $42 a quart, is a “one part polyurethane, with silicon and advanced ultraviolet filters”. Rustoleum Topside, $15-$16 a quart, is an “oil-based modified alkyd with UV protection”. I don’t know enough about marine paint chemistry to address that.

I have painted a couple of boats or boat bottoms with EZ-Poxy and have been impressed with it. But I wanted to try the Rustoleum Topside for comparison, and had two white bottomed decked canoes in need of repainting.

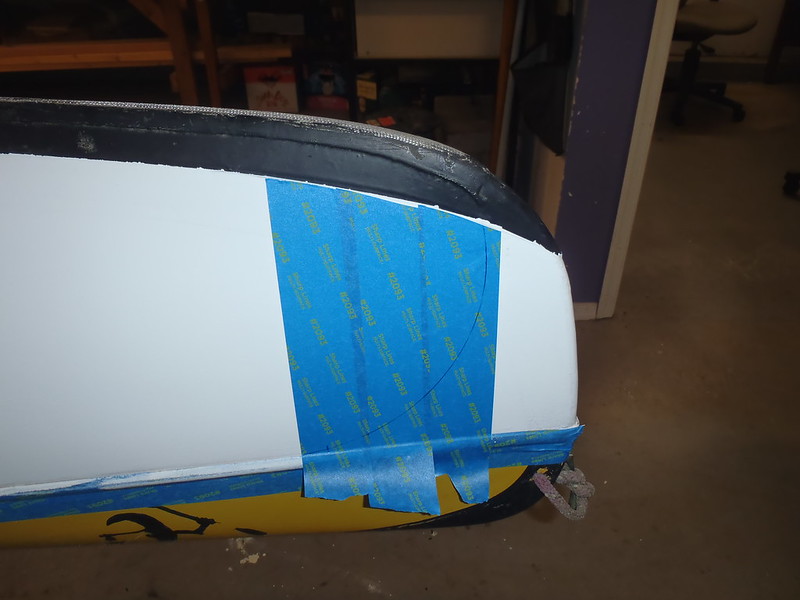
Those bottoms were originally painted with regular Rustoleum Enamel ($9 - $10 a quart). Those two boats see very few rocks, but are often in gentle contact with sandy bay bottoms and beaches. I don’t remember if I used multiple coats of Rustoleum Enamel, but the paint on the stems had very quickly worn through and worse, the paint had just as quickly become chalky dull from UV exposure in semi-shady outside storage.

For the time and effort spent sanding, washing and taping, rolling and tipping out, and more sanding between multiple paint coats, it is penny foolish to use cheap paint, and the extra $6 a quart for the Rustoleum topside seems easily justified. The question remains, is it worth spending an extra $25 a quart for EZ-Poxy?

Initial impressions after rolling and tipping the first coat of Rustoleum Topside. Both paints roll and tip and level equally well. The first coat of EZ-Poxy hides small scratches and color imperfections on the hull better, and additional coats of EZ-Poxy hide most everything.

The Rustoleum definitely has more VOC odor; I had a shop exhaust fan going but even so was a little stoned after rolling and tipping two hull bottoms, which only took 35 minutes. Hours of prep work, minutes of rolling and tipping. Dude, don’t bogart that Rustoleum.

Sanding the first coat, using 220 on a RO sander with an infer-face pad, the EZ-Poxy was, at least in memory, noticeably tougher; I cut through the first coat of Rustoleum Topside in a few places when I got incautious. I would prefer to wet sand paint coats outside near the hose, but it is nearly 100F and humid as heck out, and I have the shop AC unit running. Plus those are two heavy, woven roving/glass/thick gel coat hulls, and I don’t feel like hauling them in and out of the shop multiple times.

BTW, I don’t know what I don’t know. Or what I didn’t know. I didn’t know there was such a thing as foam interface pads for RO sanders ‘til Alan Gage suggested them. There are not that many flat areas on a hull bottom, and RO sanding along the chine curves with a hard RO surface was always a risky, oops cut-through again business.

The interface pad makes a huge difference; what would have taken me an hour to hand sand, wet or dry, took but a few minutes. And then a few minutes more, to look at the hull, especially along the chines, under some oblique angle light, spot the still shiny holidays and hit them again with the RO.

Hulls nicely dull sanded and tack clothed, I’m ready for the second coat. I’ll use some additional ventilation this time, and get stoned after I finish painting.
 
Before painting, worn at the stems just from sandy bottom contact. Stem of the Kamerad

P7020008 by Mike McCrea, on Flickr

That is a single layer of Dynel fabric on the Kamerad stem, almost imperceptibly thick. Looks like I should have made it a wee bit wider.

The stem of the Sockeye, with a sharper vee entry and exit, show similar paint wear, albeit in a narrower area. That skid plate is Twaron tape.

P7020010 by Mike McCrea, on Flickr

First coat of Rustoleum Topside on the Kamarad and Sockeye

P7030021 by Mike McCrea, on Flickr

P7030022 by Mike McCrea, on Flickr

I taped the black skid plate on the Sockeye and will refresh the paint with Black EZ-Poxy

First coat RO sanded with 220 using an inter-face pad.

P7040025 by Mike McCrea, on Flickr

P7040026 by Mike McCrea, on Flickr

I went back and hit the still shiny sanding holidays with the RO sander before rolling and tipping the second coat.

The second coat of EZ-Poxy has always used way less paint than the first. Not so much with the Rustoleum Topside. After second coating both hull bottoms I have about 1/8 of the can left, not nearly enough to third coat both bottoms, maybe not enough to fully roll and tip one bottom. Decisions, decisions; which boat gets a third coat?

And, as always, it is much more difficult to see where I started and stopped rolling and tipping. Even white-on-white the stop/start areas were much more apparent on the initial paint coat. Some oblique angle light inspection again revealed a few holidays to touch up with the second coat.

Freshly rolled & tipped second coat on the two hulls.

P7050029 by Mike McCrea, on Flickr

P7050032 by Mike McCrea, on Flickr
 
Second Coat Notes, while that paint coat cures in the shop for another day

Not stoned this time (eh, yet). I opened some additional windows and ran a second exhaust fan. That Rustoleum Topside is some powerful stuff.

I looked at the clock when I started, and when I finished rolling and tipping both boats. 30 minutes on the nose, and I was not rushing; it pays to do a little better job with each subsequent paint coat. Again, days of prep work, mere minutes of rolling and tipping.

The second coat of Rustoleum Topside hid the remaining still-showing-through discoloration and filled most of the minor scratches on both hulls. But, my estimation of having enough to paint each bottom thrice was way the heck off; I have but 1/8 of a can left, not enough I fear to roll and tip even one of the bottoms. I’m sure not RO sanding one hull and running out of paint.

That estimation was poorly conceived, calculating “I’m only paint the bottoms, down to the cockpit seam”. Those are two deep dish decked canoes; the Kamerad is 12 ¾” deep at the cockpit seam, the Sockeye is almost 15” deep at the seam, and they continue that depth throughout the stems. Much different from painting a half a canoe scum-line bottom on a boat.

I essentially painted the equivalent of a 16’ canoe four times, with a bit of touch up paint remaining. I do wish, while everything is still taped and need only be sanded, that I could add a third hides-all coat, but this will have to do.

Speaking of which, I need to find another 8oz can of almost used up stain, clean/rinse it with acetone and decant the last of the white Rustoleum for future touch ups. And label the lid. Maybe date the lid as well.

I don’t know about Rustoleum Topside, but EZ-Poxy seems to keep and store very well. I used up almost a full can of EZ-Poxy white (should be called “Blindingly Freaking White”) and decanted the scant remainder into a cleaned 8oz stain can. Yeah, whoopee, good save; I poured maybe ½ inch of paint in the can.

Opened and stirred a year later, even with several inches of headspace, the EZ-poxy was still good to go. Perhaps, in the interest of science, I should decent a half inch of the Rustoleum into a small can, date the lid and open it a year from now.

Science!

https://www.youtube.com/watch?v=V83JR2IoI8k

In the name of continuing pseudo shop science, and resisting my inclination to EZ-Poxy bias-confirmation, I prepped a piece of old Royalex (wish I had some scraps of old glass canoes as test beds), washed it and lightly scarred it with a church key to replicate hull scratches, and then thickly 2x coated it with the Rustoleum Topside.

I have some black EZ-Poxy topside (found on sale; seriously, wouldn’t a sailboat or motor boat with a black topside be hotter than heck on bare feet?), and plan to repaint the black skid plates on the Sockeye, and add a little Haida/Orca swirl flourish to the stems, to tie the skid plate color to the black seams. Lots of other damage repair covering black paint stripes and graphics on the decks of the Sockeye.

When I get to that stage I’ll paint a black EZ-Poxy test area on that Royalex, and later abuse both paint samples with some scraping and sanding abuse.
 
The 1971 Old Town Sockeye got a 3[SUP]rd[/SUP] coat of Rustoleum Topside. Just barely enough left in the can to squeeze out a third coat, but it looks much better. I think (at least) 3 paint coats is key.

A new “trick” that I used on the paint coats proved to be a time (walking back and forth) and effort saver, and one that helped keep my attention on what I was doing (rolling out short portions of a hull bottom before tipping out one side). Sometimes the simplest things make a big difference.

I had once watched shop partner Joel walk back and forth and back and forth across the shop, weaving his way around a crowd of boats, when the tools and materials were over there, and the roof racks he was assembling were on a distant bench. I did eventually suggest “Eh, Joel, it might be easier to move all your tools and pieces over to the other side where you are working”.

Eventually suggested”, I kinda sat and watched Joel and chuckled about it for a spell as he repeatedly navigated the shop boat maze from one end to the other.

In past boat painting I can say that I was at least a wee bit smarter than that; I staged a platform for the pan and roller at each end of the boat, and carried the pan/roller to the other end once I got to center hull, so at worst I only had to walk 8 feet back and forth.

Still a lot of time spent walking back and forth, doing one side of the boat at a time. Walk a mile in my shop shoes, and try not to drip paint in the Croc holes.

Smarter than that”. And still getting smarter. I have the wheeled dust extraction cart, on which the top platform is vacant of sanders.

I put the paint pan on that wheeled cart, and pulled the cart along with me as I rolled 18” lengths of the hull at a time from keel line to deck seam, which was all the roller would allow before re-loading with paint. Actually, in the broader center of the hulls, I had to reload the roller again just to get to the bottom of that 18” increment. Best not lose track of where you were while wandering over to the paint staging area.

With the cart I rolled a foot and a half, crept forward, rolled a foot and a half, crept forward, pulling the cart along as I went. I never took my right hand off the paint roller handle, or my left hand off the cart, and rarely took my gaze off the area I was rolling, other than to glance at the pan while refilling the roller.

That simple wheeled cart saved time and shoe leather and, moreover, helped keep me focused on where I started and stopped with the roller. That was white paint on white hull, kinda hard to see the stop/start even in good light, especially when laying down the second white-on-white coat.

I know it sounds minor silly, but the time savings, and walking distance reduction, and most critically the more constant, unwavering visual attention using a wheeled cart was hugely beneficial. I just slowly circumnavigated both hulls, never losing sight of where-was-I with the roller.

P7050028 by Mike McCrea, on Flickr

Really should have done that painting cart thing years ago, I expect it will be equally advantageous when rolling and tipping varnish coats, or anything else.

My wheeled dust collection cart now has some paint drips and flecks on the top deck. Don’t care, so does the shop floor; many of those drips and spatters have Sharpied arrows and inscriptions dedicated to the sloppy shop visitor culprit. “Tom”, “Tom again”, “Yup, still Tom”.
 
Five episodes of tipping out those two hulls, after 20 previous episodes of tipping out other paint and varnish work, and I finally figured out why I am most comfortable tipping out boats always walking along in the same direction. By which I mean tipping out a 3” wide section stem to stem, walk 16’ back to where I started and tip another 3” wide section, walk back and again and again and again. Seems horribly inefficient.

I am right handed, and far from ambidextrous. I realized that I habitually walk slowing backwards alongside the hull when tipping out, watching the foam brush in my right hand for even tip out lines as I gently drag it along the rolled paint. I can see and feel the brush, and see and feel the tip out brush strokes as I go.

I tried doing this with my left hand, walking backwards in the other direction. OK, that’s a left handed non dexterous clumsy nope. I need to feel the touch, and I don’t have that sensitivity left handed, even when I can see what I’m doing.

I tried holding walking forwards from the opposite stem where I had just finished tipping out, still holding the brush in my right hand; tipping out behind me. Eh, I can’t see what the heck I’m doing, and those were some sloppy, wavering tip out lines.

Think I’ll just keep tipping out end-to-end, always in the same right handed walking backwards direction.

The third coat on the Sockeye was needed, and came out very well. Once it dries I can pull the painter’s tape off the black skid plates and re-paint those with more durable black EZ-Poxy. The only use I have for that black EZ-poxy is over skid plates with graphite powder, so that quart should last a long, long time.
 
Both boat bottoms were originally painted using white Rustoleum spray paint, not even a rolled and tipped can of cheap enamel. And the Kamerad essentially got a single coat at that.

I recieved an e-mail from Bark-Eater (and hope my reply went through), who has acquired a Klepper Kamerad to retrofit, and in reading the Klepper Kamerad rebuild thread found this:

White paint on white bottom won’t show scratches as badly. I had a full and half can of spray white enamel Rust-oleum, an easy to find and color match product. And a can of white spray primer. Another can of primer and I should be able to cover the white bottom up to the seam line.


And, of frugal course, I had barely enough primer, and not quite enough white spray paint. I sprayed the cans to exhaustion but the bottom remains splotchy glossy/flat, and could really use more white enamel. Which means buying another can of white spray and waiting another 48 hours to top coat. If I wasn’t in cheap mode I’d have bought another can of white while I was at it.


Part of me wants to say “Screw it, it’ll pass the 30 foot test and I’m not going to see the bottom while I’m paddling it”. But one more can of white spray enamel should serve to gloss the entire bottom.
Second can of white enamel sprayed. Much better and well worth another $4 and 2 day wait.

So, yup, I used 2 ½ cans of spray enamel on the Kamerad bottom, essentially for a single full coverage coat. And likely spray painted the Sockeye as well, although I may have later sprayed a second coat of white on the Sockeye; I don’t have a 20 year old rebuild thread to review for that boat.

And, while it looked better when freshly painted, it wasn’t worth another $4; the single coat of spray paint went to chalky heck in UV exposure. Enamel spray paint on boat bottoms? Never again!

Not even that cheap considering it takes three cans of spray paint to single coat a hull bottom, and a quart can rolled and tipped will lay down at least three coats. And the third coat always seems the charm.

There is that remembrance value to writing project posts, if only for future review of exactly what you did, how you did it and what you used years ago.

I expect some of the serious builders here keep copious shop notes for future reference. Or have a helluva memory.

Time to hit the black skid plates with black EZ-Poxy. I’m going to try a DougD trick to better tie the black skid plates to the black cockpit seam, and to some black accents on the deck stems.

Yah, I know what you mean, it just don't feel the same left handed.

Fortunately my right hand doesn’t get tired when tipping out. It may help that the roller handle is only eight inches long, and of more slender ergonomic grasp.
 
EZ-Poxy black skid plates, and DougD accent swirl

I taped a half circle on the bow and stern for a black accent swirl, to tie the black skid plates to the black cockpit trim.

In process, I laid down a swath of painter’s tape covering the swirl area and traced a half circle swirl on the tape (no template, maybe next time; I use a flexible plastic plate).

P7080007 by Mike McCrea, on Flickr

Razored the half circle line and pulled the excess painter’s tape bow and stern.

P7080008 by Mike McCrea, on Flickr

P7080009 by Mike McCrea, on Flickr

It doesn’t seem enough surface to merit a foam roller, but I know I am far more clumsily sloppy with a any brush, so I taped and papered the stems drip and spatter proof. And set the acetone on the bench with some rags.

P7090011 by Mike McCrea, on Flickr

P7090012 by Mike McCrea, on Flickr

And, in another shop-DUH moment, realized that I am a lot better with a bristle brush. I can tip out with a foam brush, but I can’t load and spread paint with one for crap. But I’m still sloppy, even with a bristle brush.

P7090022 by Mike McCrea, on Flickr

Two coats of EZ-Poxy is plenty, even the single coat completely covered the white. But while the hull is taped, a second coat can’t hurt.

220 sanded and tack clothed.

P7100038 by Mike McCrea, on Flickr

While I was painting two coats of black EZ-Poxy on the skid plates and accent swirls I laid down a second coat of black EZ-Poxy on the RX test panel alongside the two coats of white Rustoleum Topside. I can do some rudimentary test abrasion on those samples in a few days, and then set the test panel out in full sun for a year or two and see how the different topside paints fair in prolonged UV exposure.

To be a true comparison I painted another piece of Royalex with regular (white) oil-based Rustoleum enamel from a can, and an adjacent test area with Rustoleum (black) spray “Gloss protective enamel”

P7100047 by Mike McCrea, on Flickr

The funnest part is the tape and paper pulling is the reveal. Did any paint creep under the cheap painter’s tape edges?

P7110048 by Mike McCrea, on Flickr

P7110049 by Mike McCrea, on Flickr

Not too shabby. I had some creep under the cheap painter’s tape, nothing I can’t touch up. And the near L intersection between the black skid plates and black swirl needs to be rounded off less angularly. Also not a touch up problem.

How do those accent swirls look with the hull right side up? I knew there was a bunch of black spray paint to be touched up on the decks and cockpit coming

P7110050 by Mike McCrea, on Flickr

P7110051 by Mike McCrea, on Flickr
 
Back
Top