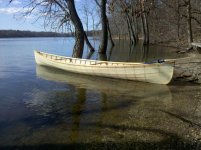
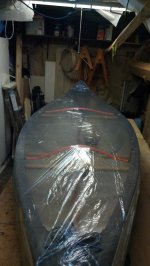
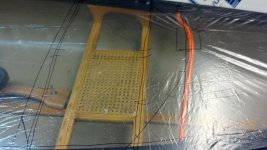
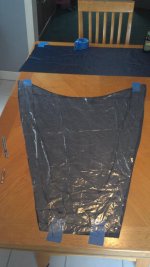
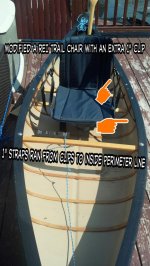
Well, I purchased an Old Town Pack canoe from a lady on Craigslist last fall for $250. When I drove out to Connecticut the boat was in decent shape. It did need some work though. The seat was full of drill holes, hangars were removed and PVC pipe added, dents in the hull up on the stem (looked like it was flipped upside down in a pick up truck bed and ratchet strapped in denting the stem on both sides), and some rub through on the keel from dragging on shore.
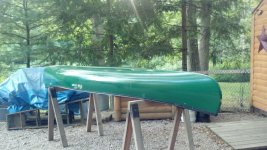
I knew what to do about the seat, the dents, and the worn out keel and did so (kevlar skids, and Gflex epoxy along with new seat and thwart)

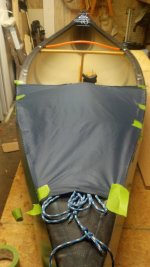
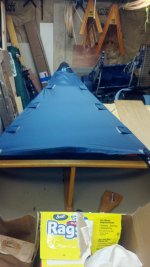
I also fashioned a spray cover bow and stern


what I didn't know what do do was stop the oil canning that so many complain about with this little craft.
I searched the web for ever trying to find ideas on what to do about it and found pretty much one option. I can't remember where so no credit can be given and I can't find it again anywhere but I do know it was on a fishing website. That option was to take a hardwood dowel and run it the length of the canoe, add a couple extra thwarts, and brace the dowel down from said thwarts. I didn't want to add too much weight so I only braced from the seat and one thwart. Didn't work. Not enough support for my 220lbs plus gear.

So I was standing in my shed in the yard drinking a Magic Hat#9 when it hit me! Steam in some oak ribs, 8 might do it and only add roughly 3 pounds!

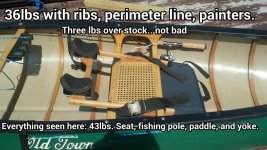
I broke out the measuring tape and started cutting roughly 3/16" ribs from a plank of white oak I had lying around and unpacked my DIY steam box made from gorrilla tape, a piece of 12" long 2" PVC, coleman stove, old pot, and a box fashioned from 1/2" styrofoam board insulation. I steamed up 8 ribs and jammed them in.
After they set up for a couple days I put a saturation coat of Systems Three epoxy on the ribs (left over from a Pygmy kayak kit build I did a couple years ago) then sanded the bottoms after it cured.
On to the boat. 100grit sandpaper where I marked out the rib locations, clean with acetone, the pass a torch flame over the areas to be glued. (I read that this changes the chemical make-up allowing for better adhesion)

Then I applied GFlex epoxy from West Marine onto the canoe and stuck the ribs back in.
After the epoxy set up I went back a couple days later and used more GFlex which was thickened to what I would say was a plummers putty thickness and filled in the gaps along the sides.

I still have some flex in the hull, which is probably good for bouncing off rocks and such but the oil canning is pretty much non-existant!
Hope this helps somebody out there who couldn't find any info
Jason
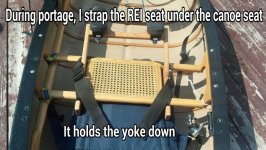
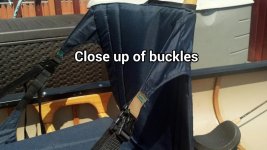
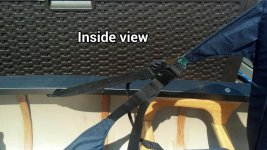
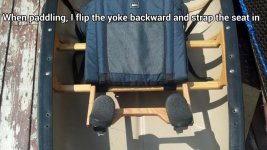
I also threw together some yoke pads and working on a solo yoke system based on what I saw here:
http://www.paddlinglight.com/articles/solo-canoe-yoke-plans/


Here is a link to picasa with some photos, I guess I should have taken more.
https://plus.google.com/u/0/photos?tab=wq#photos/100023791921464470737/albums/5860004465237170209
Sorry the pics are so BIG! I'm half a moron trying to figure out how to simply add them, not to mention how to shrink them!!
Any advice?

I knew what to do about the seat, the dents, and the worn out keel and did so (kevlar skids, and Gflex epoxy along with new seat and thwart)
I also fashioned a spray cover bow and stern
what I didn't know what do do was stop the oil canning that so many complain about with this little craft.
I searched the web for ever trying to find ideas on what to do about it and found pretty much one option. I can't remember where so no credit can be given and I can't find it again anywhere but I do know it was on a fishing website. That option was to take a hardwood dowel and run it the length of the canoe, add a couple extra thwarts, and brace the dowel down from said thwarts. I didn't want to add too much weight so I only braced from the seat and one thwart. Didn't work. Not enough support for my 220lbs plus gear.
So I was standing in my shed in the yard drinking a Magic Hat#9 when it hit me! Steam in some oak ribs, 8 might do it and only add roughly 3 pounds!
I broke out the measuring tape and started cutting roughly 3/16" ribs from a plank of white oak I had lying around and unpacked my DIY steam box made from gorrilla tape, a piece of 12" long 2" PVC, coleman stove, old pot, and a box fashioned from 1/2" styrofoam board insulation. I steamed up 8 ribs and jammed them in.
After they set up for a couple days I put a saturation coat of Systems Three epoxy on the ribs (left over from a Pygmy kayak kit build I did a couple years ago) then sanded the bottoms after it cured.
On to the boat. 100grit sandpaper where I marked out the rib locations, clean with acetone, the pass a torch flame over the areas to be glued. (I read that this changes the chemical make-up allowing for better adhesion)
Then I applied GFlex epoxy from West Marine onto the canoe and stuck the ribs back in.
After the epoxy set up I went back a couple days later and used more GFlex which was thickened to what I would say was a plummers putty thickness and filled in the gaps along the sides.
I still have some flex in the hull, which is probably good for bouncing off rocks and such but the oil canning is pretty much non-existant!
Hope this helps somebody out there who couldn't find any info
Jason
I also threw together some yoke pads and working on a solo yoke system based on what I saw here:
http://www.paddlinglight.com/articles/solo-canoe-yoke-plans/
Here is a link to picasa with some photos, I guess I should have taken more.
https://plus.google.com/u/0/photos?tab=wq#photos/100023791921464470737/albums/5860004465237170209
Sorry the pics are so BIG! I'm half a moron trying to figure out how to simply add them, not to mention how to shrink them!!
Any advice?
Last edited:


