• Happy National Apple Pie Day! 🍎🥧😋

My first cedar strip canoe build -- 17' Kooteny (was Micmac)

Hi wingnut,

Beautifully done! I'm glad you joined in on the thread - no need to apologize.

I made more progress this weekend and now have most of the formers mounted on the strong back. I'll post more pictures once they are all mounted and aligned.

Bernjo
 
20170114_190012_1484676988710_resized_1485369012963_resized.jpg 20170114_190123_1484676987100_resized_1485369012611_resized.jpg 20170114_134634_1484676990608_resized_1485369013194_resized.jpg Progress this week. I'm currently struggling to come up with a system to cut scarf joints that I'm happy with. Wishing I'd bought longer boards to start with.

Bernard
 
Last edited:
Hi Bernard

Your form spacing puzzles me ! Most plans call for your last form to be attached to the stem form, to support the stem form. Otherwise it will move back and forth.

Jim
 
Last edited:
image_5915.jpg image_5916.jpg Thanks for your observations Jim Dodd and Stripperguy. I actually started out setting up the stem forms adjacent to the end forms , but later noticed that the plans specified a distance from the centerline. I just went out to the shed and double checked the overall length and am confident that the stems are located correctly. I was also concerned about the rigidity so added braces yesterday. Does this look like it will work or do you think I should also add triangular gussets?

I also put on my first strip!
 
Last edited:
I scarfed the strips together on my current build and for the most part they came out looking good. I went to the trouble of actually wetting the strip at the cut area to see its color and find another strip that matched before joining them together. When I glued them together I used a piece of scrap clamped to the bead side and another on the cove side seperated by waxed paper to line them up. I'm sure it was overkill but the strips bent like they were one piece and looked good with the long scarf joint. For scarfing the strips I made a simple jig that was made up of roughly a 1x6 or 8 with a piece screwed on top for my fence and a piece screwed on the bottom to slide in the groove on the table saw table. Worked very well for a lot of repeatable angle cuts.
 
Curious, who designed your Kootenay ?

I would definitely add support to the stem forms ! As Stripperguy points out a triangular support should work !

Your tapering looks good, except at the top, I would add a slight taper there as well.
The Kootenay stem forms can get stuck, because of the recurve. You have used plastic tape, and that's the best that I have found, but I'd be tempted to add another layer, or two ! Over the years, I've had to pry a few stem forms out. Scary to say the least ! But plastic tape seems a lot better.

You've got a great start !

A few pics.

IMG_0731_zpsysuzrnr8.jpg


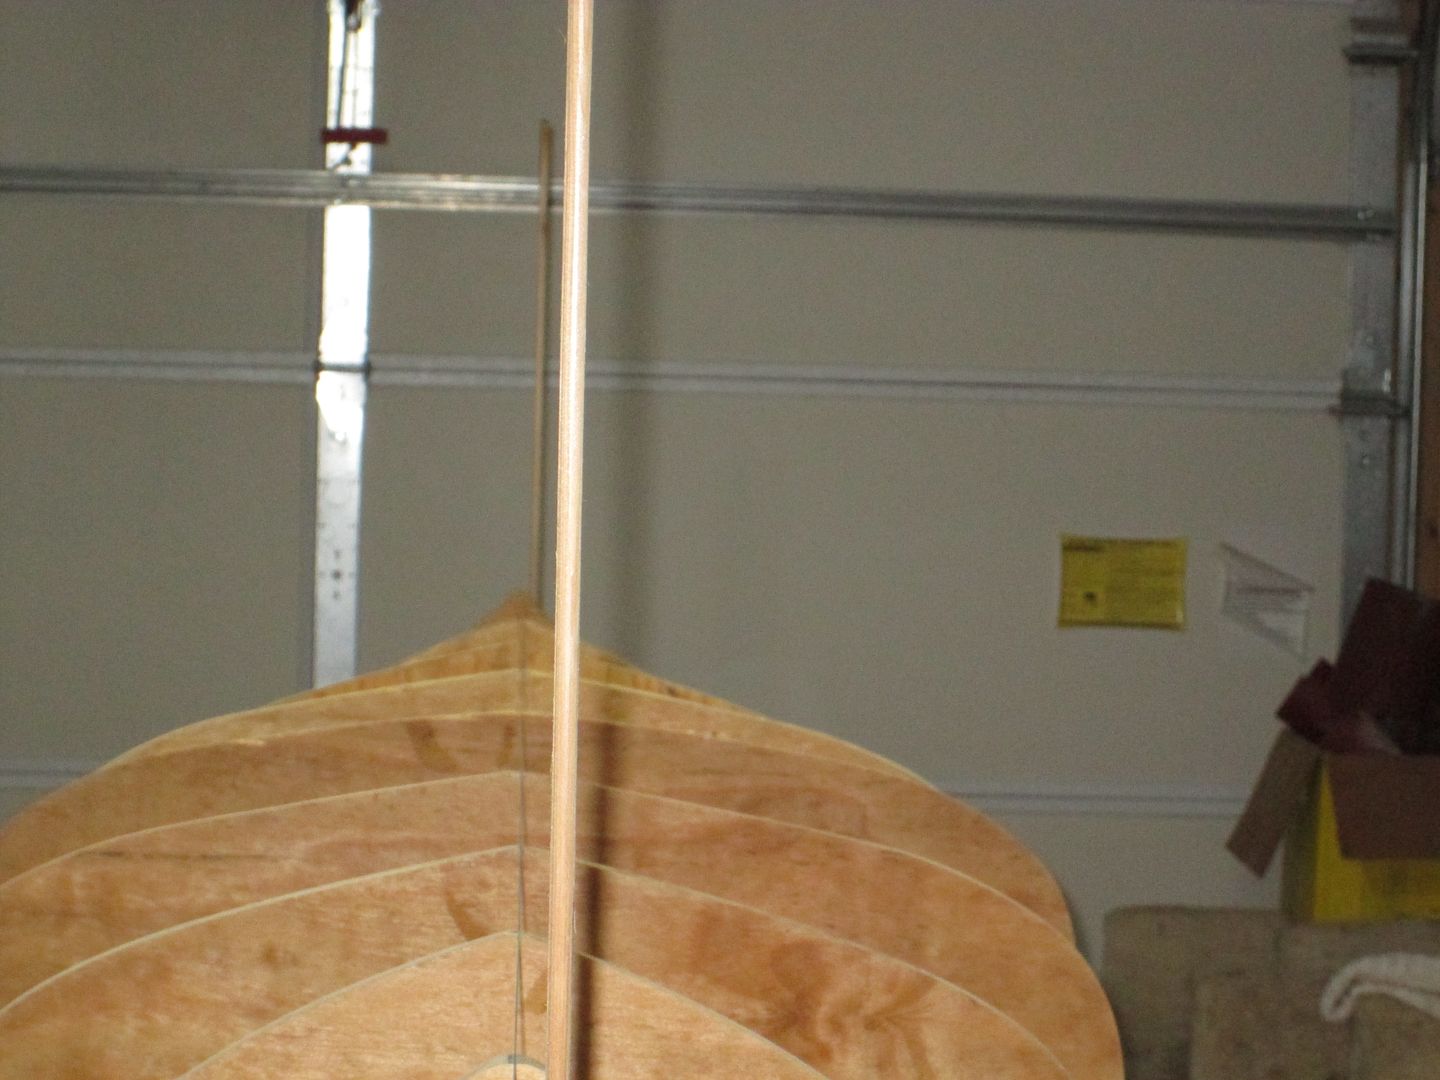
Sight strips stapled to the stem forms to check alignment while building. I leave these on, until i'm about half way up the side, or until they start getting in the way.

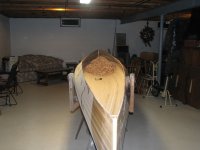
How I butt join my strips right on the hull. A 2" spring clamp allows you enough room to slip the next strip in. The bead and coves hold everything in place, and you just keep on stripping.
IMG_0571_zpsfseifcra.jpg


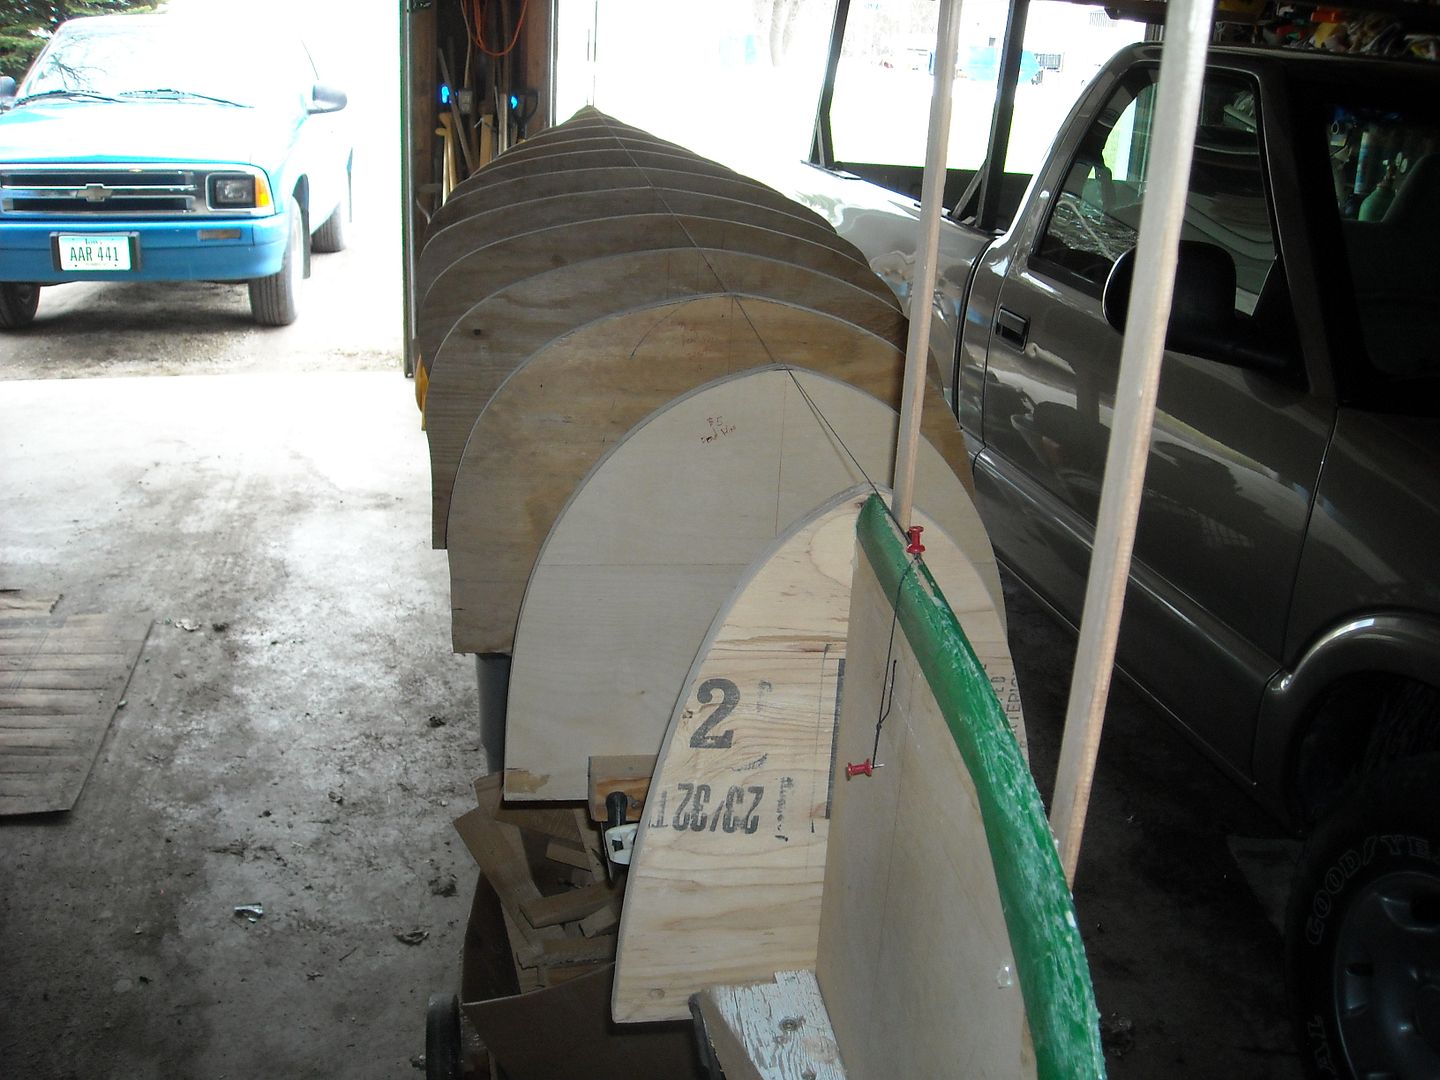
This pic shows the taper on the stem form. In this case it's a little too much, at the top, but ! it worked. You just want to bevel it enough so the strip has a flat place to lay on. A fairing stick, or scrap strip laid on the forms will tell you how much taper you need.

DSCN0079_zpsxguckvl8.jpg


Hope this helps !

Jim
 
Curious, who designed your Kootenay ?
It was designed by Bruce Kunz
Kooteny title box.jpg

Here is the set up that I am finally happy with for scarfing the strips. I had built this scarfing jig for a previous project to make stringers. I got the idea from Dave Gentry's website. I was having a problem getting a nice cut with the thinner strip stock because of vibration, so I added some support opposite the blade on my table saw and a backer board in addition to the plunge clamps.
scarfing fixture.jpg

Here are some pictures of where I am currently at on the build:

20170125_211623_1485401220214_resized.jpg 20170125_211644_1485401222076_resized.jpg
 
Last edited:
Your making good progress. I like the way you blended the lighter colored strips in. I think it was Jim that said those Kootenay stems tend to stick in the hull and I remember having to take the stem forms out after I had the boat off the forms. Just thinking you want to leave yourself access to unscrew the stem molds from the strong back.
 
Getting ready for football this weekend...and I am not talking about the Super Bowl! 20170201_214758_1486142768563_resized.jpg 20170201_215125_1486142770682_resized.jpg

Question for the more experienced builders: when I started laying strips, I was carefully wiping away glue squeeze out with a wet rag, but stopped when I read in one of my books that this made it more difficult to sand off later because I was spreading the diluted glue and pressing it into the grain of the wood. What has been the experience of others on the forum?
 
First off your hull looks Great ! Nice straight lines with your staples !

The glue on the outside is a breeze to remove, compared to the inside ! The inside is tough to scrape, but better to scrape the excess than sand it.

I helped a first time builder, that I had cut, bead and coved strips for. Got him started stripping, and as I was leaving, I left him with this advise. "Be Minimal with your glue"

I came back, about a week later to help with the starting the football. There was NO glue on the outside. I was shocked ! I said where's the glue. He said "You said be Minimal !" He saved himself SOO much sanding time !

Any small gaps will get filled with epoxy, and make the best bond.

You can build that hull, if you beaded and coved the strips, with as little as 8 or 10 oz of glue.

Looking Good !

Jim
 
Last edited:
Just jumping into this thread ... wiping the glue isn't bad, but it is easier to just wait an hour till it has thoroughly skinned, but is still soft. At that point just pull out your scraper, run it long the joint and it will just curl right off, with no mess. Wiping does leave a bit of smear, but if you do it right that will just sand off easily.

I use Titebond for most of my stripping and I find it dries much harder than the cedar, so if you try and sand it after it hardens (think beads/runs), the cedar sands faster and it is not so easy to do a good job. If you try and scrape the glue beads/runs after it hardens, it can take chunks of cedar with it when it comes off.

Whether you wipe the wet glue or wait till it skins and scrape that, removing the glue before it gets hard will likely always be the best bet (IMO).

Earlier in the thread you were talking about skarfing the strips, because you used shorter lengths ... my last build was with NWC which is usually only available in 16' lengths, and I was building a 17' boat. I couldn't face that many skarf joints ( and they would need to be staggered) and I hate trying to make precision joints with lumber that small. I figured if I didn't want to skarf strips, then maybe skarfing the source boards was a better option. I used a 4:1 ratio (this isn't a structural joint, no need to get crazy on the ratio) and made a total of 4 joints ( I did use epoxy) on my 2x8s .... once I had my longer (19'-20') source boards the rest was pretty straight forward ... I even tinted the thickened epoxy with cedar dust to make the joints pop a bit, as a feature, of course that is a matter of personal taste, but working at the source level for skarfing has a lot of advantages as there are lots of strips made exactly the same way, which opens options for book matching, patchwork designs ... I intend to go this route again in the future, it provides a much simpler solution and a lot of design options.

Just a few thoughts

Brian
 
I don't wipe off the excess glue. And wiping the excess with a wet rag would tend to send the glue deeper into the wood around the joint, making for more difficult sanding. Once the glue is dry, (and the staples are removed) it's a simple matter to pop off the glue with a scraper or hand plane. On the inside, a curved scraper works great, and is much easier than sanding.

BTW, your build looks great so far. Are you going to keep all of the strips parallel on each side? Ending up with a beautiful elongated "eye" pattern on the bottom?
 
I wouldn't worry about the glue at all. You'll do so much scrapping and sanding fairing the hull that the glue blobs will be a distant memory. I'm probably too late but I picked up a little trick following someone else's build. They layed two strips together down the center so each side of the football met at the two strips somewhat disguising the mismatch that happens when the strips from each side don't match when they come together. Here's a pic of all the scrapings from the inside of my 16 foot solo
IMG_3250.JPG
 
No Title

I wouldn't worry about the glue at all. You'll do so much scrapping and sanding fairing the hull that the glue blobs will be a distant memory. I'm probably too late but I picked up a little trick following someone else's build. They layed two strips together down the center so each side of the football met at the two strips somewhat disguising the mismatch that happens when the strips from each side don't match when they come together. Here's a pic of all the scrapings from the inside of my 16 foot solo
 

Attachments

  • photo6045.jpg
    photo6045.jpg
    241 KB · Views: 0
Wingnut
Wouldn't your method require fitting strips on both sides ? I'll call it the "Bear Mountain Method" where by it only requires the fitting of one side, about a dozen strips.
I've fit strips several ways, including Herringbone, and found the BMM the fastest, and easiest.

That's a lot of shavings ! Did you bead and cove your strips ?


Jim
 
Last edited:
It does require fitting both sides. It could very well be the Bear mountain method, I read about it from another builders post. I used it on the solo in the pic but there's so much dust you can't see it. On this boat the football strips didn't line up very well and I'm glad I had the two strips space seperation. I did bead and cove the strips but I learned on my first boat I'd rather scrape than sand. After scrapping It sanded down smooth just going over it once with 80 then 120 grit.
 
Hull looks great Wingnut ! But that's still a lot of shavings ! :eek:

Jim
 
I wouldn't worry about the glue at all. You'll do so much scrapping and sanding fairing the hull that the glue blobs will be a distant memory. I'm probably too late but I picked up a little trick following someone else's build. They layed two strips together down the center so each side of the football met at the two strips somewhat disguising the mismatch that happens when the strips from each side don't match when they come together. Here's a pic of all the scrapings from the inside of my 16 foot solo

Hopefully you have an other way out for that canoe than the small window above it.....
 
That does shock some people to see a boat in the basement but It's no problem. While I'm loading up the woodstove and getting it up to temperature I would scrape it smooth and at the same time letting the epoxy cure where its warm.
 
Back
Top