- Joined
- Jun 22, 2017
- Messages
- 1,329
- Reaction score
- 3,519
After all the discussion on FartherWest's boat and thwarts I would really appreciate any ideas and advice on best way to repair the holes in the wood gunnels on my Merlin II.
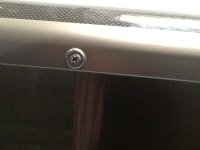
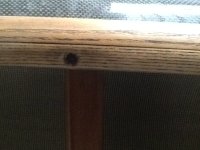
I attached a pic of the machine screw heads that attach the seat to the gunnels. You may not be able to see the head of he machine screw because it has been slowly burrowing in for 18 years. If I try to back the screw out it looks like it will try to split the gunnel a little bit...the screws will not back out cleanly. I was thinking that maybe I should use some sort of countersink bit to open up the hole diameter a bit. What do you guys think about best way to get these machine screws out without chewing up the gunnels? Then what do you think I should do to refill the holes in the gunnels so they are solid again so I can redrill and rehang the seat and maybe the thwarts too? I'd like to keep everything in the original positions.
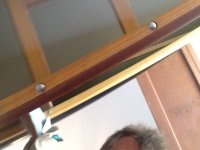
I will definitely use finish washers as shown on the pic of my Yellowstone solo. The new Northstar canoes now use finish washers on their boats with wooden gunnels (as Bell should have done!).
I attached a pic of the machine screw heads that attach the seat to the gunnels. You may not be able to see the head of he machine screw because it has been slowly burrowing in for 18 years. If I try to back the screw out it looks like it will try to split the gunnel a little bit...the screws will not back out cleanly. I was thinking that maybe I should use some sort of countersink bit to open up the hole diameter a bit. What do you guys think about best way to get these machine screws out without chewing up the gunnels? Then what do you think I should do to refill the holes in the gunnels so they are solid again so I can redrill and rehang the seat and maybe the thwarts too? I'd like to keep everything in the original positions.
I will definitely use finish washers as shown on the pic of my Yellowstone solo. The new Northstar canoes now use finish washers on their boats with wooden gunnels (as Bell should have done!).