• Happy Weed Appreciation Day! 🌱🌿🌻

Wenonah Solitude repair and renovation

Joined
Feb 27, 2023
Messages
11
Reaction score
3
Location
Atlanta Georgia
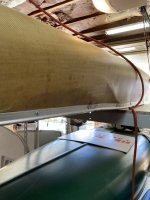
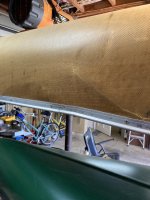
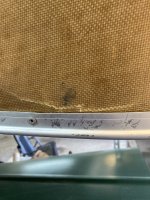
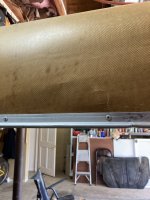
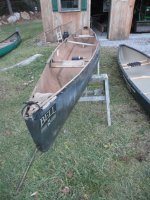
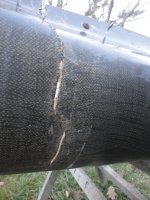
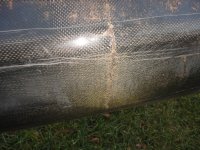
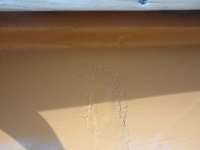
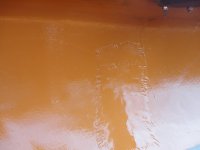
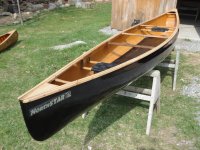
I bought a damaged Wenonah Solitude and I'm planning to repair the damage and refinish the surface. I'll post some pictures of the damage when I get a few minutes. Overall, the hull is UV expesed so its chalky and dry. Both of the aluminum gunnels are bent and cracked. Some of the ribs are cracked. There is a half moon shaped "dent" in the side of the boat that is about 6" by 24" by 1/2" deep. There are no broken fibers at any of the cracks. It sounds like a lot but its all pretty simple damage. I only paid $350 for it and I wanted a light boat but not enough to pay $2500 for one.

Here's my current plan. Its definitely subject to change based on suggestions here. Please give me some constructive suggestions on what may not be a good idea.

1) order new gunnels from Wenonah - already did that, picked them up yesterday - a 400+ mile trip -"free shipping"
2) remove old gunnels and let hull pop back to shape. I think that it will.
3) If the sheer line doesn't have a fair curve when the gunnels are removed I'll cut some temporary wood strips to make it so
4) lightly sand the hull with maybe 120 grit sandpaper - not sure about that
5) repair the damage (hull and ribs) with one layer of 4 oz S-glass and Raka - UV inhibited epoxy (I know that Wenonah uses polyester but its nasty stuff)
I'll probably put two layers of s=glass on the ribs. I really havent decided for sure on epoxy vs polyester. I repaired a fiberglass camper recently with polyester and it was not a great experience since one 2 oz setup of polyester just flashed on me for no particular reason. It made an ugly mess.
6) refinish the entire canoe with an epoxy or polyester top coat. I plan to tint the topcoat gold to even out the aged and mottled look.
7) install the new gunnels - I'll probably make a masonite template of the hole layout using the old holes in the hull as a template somewhere along the way.

Additional items: I splurged and bought black anodized gunnels because they look better to me. I will probably paint the thwarts to match. I will probably add kevlar skid plates. Also, the previous owner put in an incredibly ugly PVC bass boat seat. Its gotta go. I'm working out some options in my head. Wenonah told me that I COULD hang a traditional seat with their seat bracket but they didn't highly recommend it due to the tumblehome on the solitude and the light hull. They aren't selling tractor seats currently due to supply chain problems - other parts of the seat track are missing too. Anyhow I'll think of something but any seat suggestions are appreciated.
 
Last edited:
It looks like it will be very nice when you are done.

I would not sand anything other than the repairs and resin you apply to fair them. Kevlar gets fuzzy when sanded. I personally would only make localized repairs with fiberglass cloth and epoxy.

I am sure more experienced folks will chime in. Good luck!
 
Litetrek, I'm not a hull repair expert but did want to welcome you to site membership! Feel free to ask any questions and to post messages, photos and videos in our many forums. Please read Welcome to CanoeTripping and Site Rules! Also, please add your location to your profile, which will cause it to show under your avatar, as this is a geographic sport. We look forward to your participation in our canoe community.
 
That looks like a nice boat, and I'm sure it will be great when you're done with it.

I'm curious about the desire to reuse the holes. I've read a couple manufacturers guidelines for installing new gunwales and I don't remember seeing that. I do remember others from this forum doing similar things to preserve the holes.

My perception has been that the pressure of the gunwales being pulled together accounts for a lot of the mechanical bond, and the rivets less of it.

Perhaps someone with more experience than me can speak to why preserve in the original holes is important.
 
It is just as easy to reuse the holes as to drill new ones in my opinion. Most manufactures tell you to drill new ones which would make the process harder it seems. A video I watched instructed people to run a drill bit right thru the center of the rivet to remove it. This would oversize the hole and reusing it would be a mistake since rivets need to completely fill the hole to work properly. If you're careful you can drill off only the head of the rivet and then use a punch to push the remaining rivet shaft out of the hole. This would preserve the hole diameter allowing you to reuse the hole with the same size rivet. I've done it before and it works but it requires a little more effort.

Making a template from the existing holes is as easy as cutting a 1 or 2 inch strip of masonite, clamping it to the shear and drilling thru the existing holes in the hull to transfer the pattern to the masonite strip. I think by doing this you can easily use some bolts to hold the gunnel on temporarily while you pop rivet it .... That said, I've never done it on a canoe and I only have one set of gunnels that I waited 18 months for. It is basically how aircraft sheet metal repairs are done though and they always fit perfectly. Drilling new holes would work too. The only down side I can see is figuring out a way to clamp on the gunnels while you move down the boat since they have to be positioned vertically in the correct position to fit right. By making a strip template the vertical positioning can be done for you if you plan the strip dimensions right
 
Last edited:
Many years ago I replaced aluminum gunwales on a Wenonah fiberglass boat. I redrilled all holes. I think the advantage there is that the holes in the fiberglass are the correct size and tight with the pop-rivet. Trying to use the original holes in the fiberglass is going to enlarge the fg holes a bit as you drill the aluminum, resulting in immediate or eventual slop. I don't remember what I did 40 years ago, but it'd be easy to secure the gunwales to the boat with strips of duct tape perpendicular to the gunwale--apply one end, and pull tight and stick the other end, going down the whole gunwale if necessary. You could purposefully offset the first hole on the gunwale to avoid hitting the original fg hole to avoid the slop mentioned.

I'm sure others on this board have their pet ways.
I'm interested to hear how others have done the gunwale replacement. I don't think it will be that easy no matter how its done and I'm not really stuck on reusing the holes. It is possible and pretty easy to remove a rivet without increasing the hole size. You drill just the head off and then use a drift punch to push the remaining shaft thru. The hull of my kevlar canoe is pretty floppy (not stiff). Using straps or duct tape as a "clamp" may not work.
 
I'm interested to hear how others have done the gunwale replacement. I don't think it will be that easy no matter how its done and I'm not really stuck on reusing the holes. It is possible and pretty easy to remove a rivet without increasing the hole size. You drill just the head off and then use a drift punch to push the remaining shaft thru. The hull of my kevlar canoe is pretty floppy (not stiff). Using straps or duct tape as a "clamp" may not work.
Like Mason said, I think after you try transferring the first couple of holes you will see that the thickness of the kevlar is insufficient to provide guidance to the drill bit and you will end up with sloppy holes. Plenty of space between the old holes to redrill and no one will ever know they are there but you. The odds of pre-drilling all the holes, even from a template, and having everything line up perfectly is pretty risky. On a side note, this restoration may run into a good bit of money, so I can help by taking that Pack off your hands!
 
I have drilled out some rivets and as mentioned above you will no doubt round out the holes a little when that rivet moves around on the end of the drill bit. I just drill new holes for the gunnels, but I have never replaced aluminum gunnels, I have always used ash no matter what the canoe had on before.
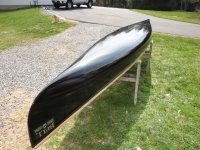
I painted this canoe with Interlux Polyurethane. GFlex and fiberglass fixed the cracks, and those robust gunnels held it together nicely.
I paid $45 for the hull, and sold it for the $750 asking price in one day. The repairs are ugly inside but the outside looked great, my thinking was I would never get the inside looking perfect, there would always be signs of repairs so just fix it fast and sell it cheap. The buyer was thrilled to get a Northstar at that price.
Good luck with your canoe.

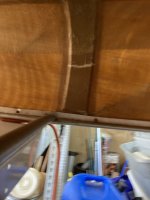
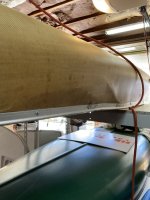
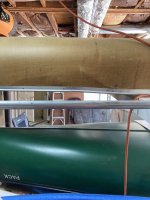
DSC01487.JPGDSC01490.JPGDSC01491.JPGDSC01875.JPGDSC01877 (1).JPGDSC01869.JPGDSC01871 (1).JPG
 
Maybe I misunderstood, but do you plan to cover the entire hull with a new layer of glass?
I would only do localized patches as needed, blend carefully since the kevlar an fuzz endlessly.
That rib looks compromised, you may need to carefully remove the failed part of the rib and splice in another piece of Divinycell, then laminate with some glass.
And rather than bother with a skim of pigmented resin, a good marine paint will be much easier to apply, and weigh much less
 
Regarding seat suggestions: Grass River Boatworks has a carbon bucket seat assembly that is very similar to Wenonah's, but the price jumped from $200 to $315 this year. Or, Placid Boatworks has a fixed bucket seat in three heights for $200 that I have epoxied in other hulls. Also, there were two models of the Solitude; older models had a gunnel width of 27.5 inches, newer models were a narrow 23 inches, which produced a steep sidewall angle or tumblehome much like the Advantage. I had a newer (2001) Solitude with the narrow gunnels and couldn't imagine trying to mount a conventional seat. Wenonah may have been thinking about that one in your conversation. Hard to tell from the pics, but yours looks like an older model and you might be able to get away with the Wenonah style seat mounted to two angles riveted to the sides.
 
If I may! I repaired a kevlar Wenonah several months ago. Had similar issues though not as much hull damage and I was able to reuse the aluminum gunnel . As mentioned I would only repair the part of hull that is damaged. I lightly sanded only and 120 grit is fine, taped area off and applied one layer of kevlar and two layers of e glass in ascending concentric patches and covered that last layer with peel ply! I just use the laminate resin as I did not have epoxy on hand . I cut some kevlar strips and sandwiched the hull at the gunnel line along the damaged rail area and covered patched rail area with peel ply and then made new holes when I re-attached the aluminum. I only use high quality helix 3/16" bits for gunnels . Hope this helps some as I am still teaching myself repair techniques.
 
One other thing, the hull may not snap back into it's original shape and you may have to figure something out to get back to your original hull shape in that area. Several ways of doing it if one thinks it through.
 
Like Mason said, I think after you try transferring the first couple of holes you will see that the thickness of the kevlar is insufficient to provide guidance to the drill bit and you will end up with sloppy holes. Plenty of space between the old holes to redrill and no one will ever know they are there but you. The odds of pre-drilling all the holes, even from a template, and having everything line up perfectly is pretty risky. On a side note, this restoration may run into a good bit of money, so I can help by taking that Pack off your hands!
I drove about 500 miles round trip to get that old town pack after shopping 6 years for it. When I got it home my wife claimed it. Fair? Not at all. The wenonah was a relatively inexpensive but LIGHT WEIGHT substitute for me so we can both go out together.
 
Maybe I misunderstood, but do you plan to cover the entire hull with a new layer of glass?
I would only do localized patches as needed, blend carefully since the kevlar an fuzz endlessly.
That rib looks compromised, you may need to carefully remove the failed part of the rib and splice in another piece of Divinycell, then laminate with some glass.
And rather than bother with a skim of pigmented resin, a good marine paint will be much easier to apply, and weigh much less
Thanks. I'm only planning localized patches - the smaller that will do the job the better. I will inspect the one rib closely and decide what to do with it. I bought this boat and stored it for 18 months while I waited for the gunnels. I haven't really scrutinized the damage - just a once over. I lived in Troy for 4 years 1978-81. Nice place out in the woods there. Not so much for Troy. Maybe its better now.
 
I took the aluminium gunwales of a souris river boat one time. It had been in a car accident and was banged up quite a bit more than your canoe. I wouldn't say the hull snapped back to shape after the gunwales were removed, but it did make a floppy canoe shape, as opposed to a bent hull.

I was surprised how easily the gunwales came off, drilling out the rivets was fairly painless. However, due to the stress of the bent gunwales, several of the rivet holes were already enlarged, even before I drilled out the rivets. I put wooden gunwales on it, used all new holes. I can't really see the benefit of using the old ones.
 
Troy hmmm…where to start?
Most areas are best avoided, day or night. Gang activity, daily shootings, homicides, drug trade, overdoses, and in the safer areas, too much traffic.
I only pass through there on my way to ski lift served In Vermont or back country ski in Petersburg.
 
Thanks. I'm only planning localized patches - the smaller that will do the job the better. I will inspect the one rib closely and decide what to do with it. I bought this boat and stored it for 18 months while I waited for the gunnels. I haven't really scrutinized the damage - just a once over. I lived in Troy for 4 years 1978-81. Nice place out in the woods there. Not so much for Troy. Maybe its better now.
I actually studied composites in engineering school (RPI and Georgia Tech). However, I know more about the technical aspects and very little about the practical aspects. The idea of an epoxy top coat was more to seal the kevlar which is UV damaged and pretty "dry". A top coat of epoxy will help structurally but I don't know how much since very little of it will get absorbed into the existing layup. I figured that I would tint the epoxy while I was at it to even out the color. I plan to use S-glass for the patches. It is nearly as strong as kevlar, is easier to wet out and becomes almost invisble when cured. S-glass is a little heavier than kevlar but for a patch we're talking grams.

Your comment about paint is an option I really hadn't considered. It would definitely lower the cost and would look better if I could find something that matched (or could be tinted) the kevlar color. A top coat of epoxy on an old kevlar canoe is a pretty common approach to renovate one. But if only makes it look shiny again and doesn't reinforce the kevlar fabric a bit I would go with the paint instead. Maybe you or someone else who knows about it or has done an epoxy top coat can educate me on it.

I bought this canoe so I could get a super light canoe for cheap. So, dumping a lot of money into it is not part of the plan. The paint would keep the cost down and it would look better. I'm planning to make the seat. I got some suggestions for seats which I appreciated but they all involve a good bit of money.
 
Huh, depending on when you attended RPI, you may have heard of Mohawk Innovative technology, Inc.
I’m one of the founders of MITI and we occasionally collaborate with RPI on various projects.
Sounds like you have the right education and experience, refurbishing that kevlar hull should be simple for you.
As far as seats, a small amount of wood and webbing or lacing and you can make your own seats inexpensively.
Many threads showing seat builds here, with a wide variety of styles.
 
Back
Top