• Happy Weed Appreciation Day! 🌱🌿🌻

Making DIY Dry Bags

G

Guest

Guest
It has been a while since I made any DIY dry bags using Seattle Fabrics heat-sealable fabric. I have had a couple yards of tough 400 denier heat sealable packcloth waiting in the wings for several months for a DIY dry bag need.

https://www.seattlefabrics.com/Heat-Sealable-Nylons_c_80.html

While the new Inspector Gadget ALPS chairs still fit in their OEM carry bags they do not fit in our existing DIY chair dry bags. Those full sized folding camp chairs, being both heavy and rigid, fit best in the bottom of the canoe. In the bilge water. I want a dry chair when I get to camp. And, as important, I want a dry chair when I get up the next morning. Stuck under the tarp may get wet in windblown rain, stuck in the vestibule takes up valuable space.

I want a long linear dry bag that easily accommodates the chair. Easily is key, most of our folding camp chairs are a strugglesnug fit going into their OEM carry bags. If the chair slides easily into a custom sized dry bag I am more likely to put it away for the night, and do not even need the too-snug carry bags.

Hmmm, what do I remember about making DIY dry bags?

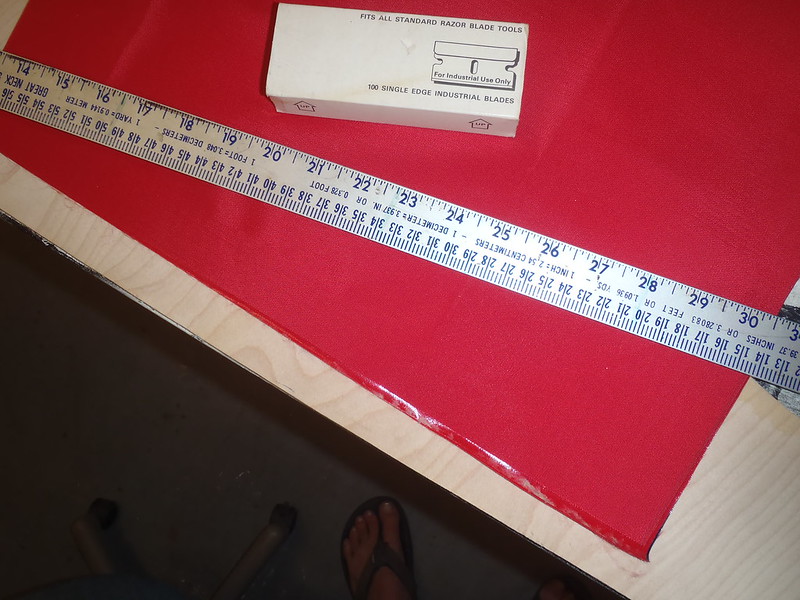
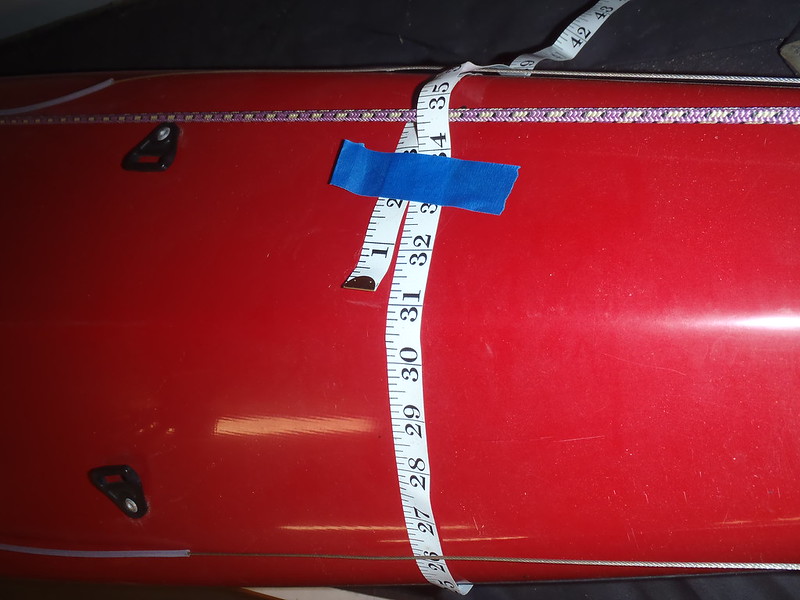
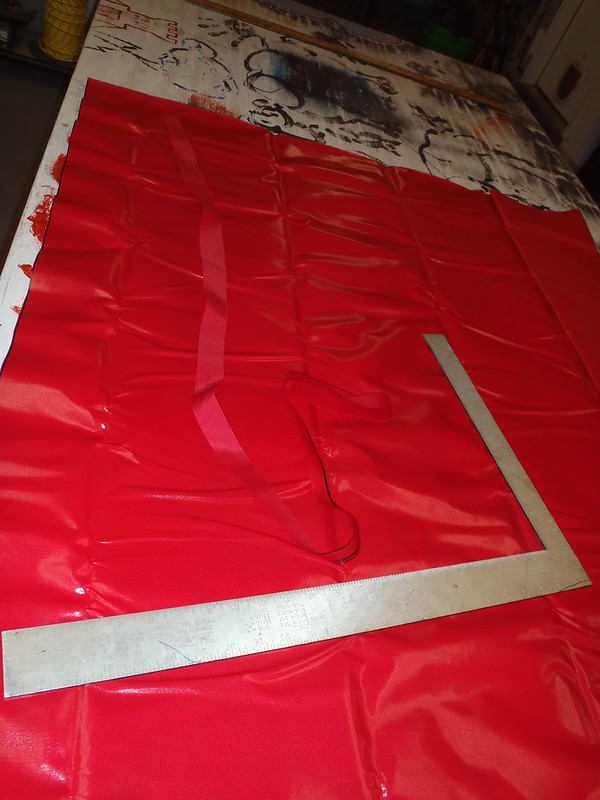
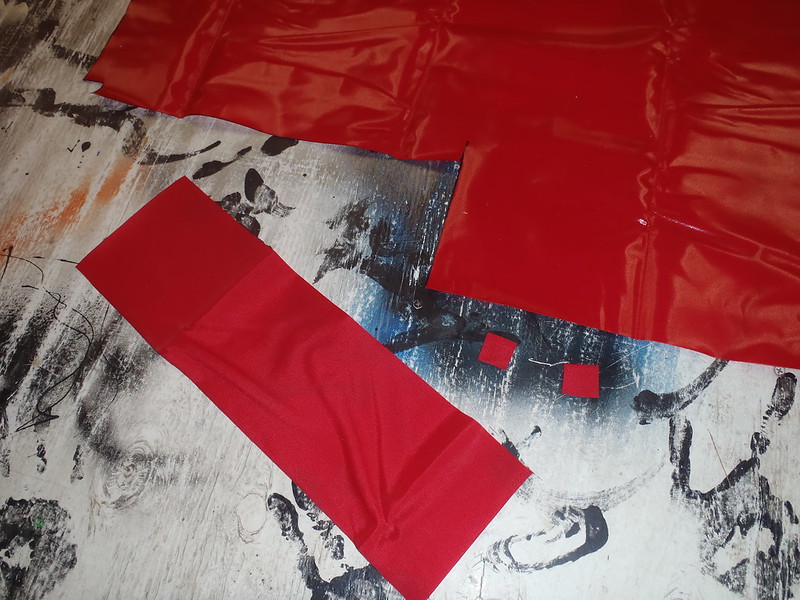
Step 1. Square up the end of the cut Seattle Fabrics made. That fabric cuts clean and easy with scissors, and because of the heat sealable coating has zero frays.

P7291041 by Mike McCrea, on Flickr

The strip cut off from straightening the edge is handy for test ironing. Using 4 inch long pieces of that scrap folded over with different ironing times showed that pieces with a wee 1 inch square ironed for 5 and 10 seconds could be pulled apart, but at 15 seconds or longer it was nearly impossible to pull the heat seam apart, and the Oxford and Packcloth varieties do not begin to show any scorch until 60 seconds. Twenty to thirty seconds is plenty of iron time for the heat seams.

P7291042 by Mike McCrea, on Flickr

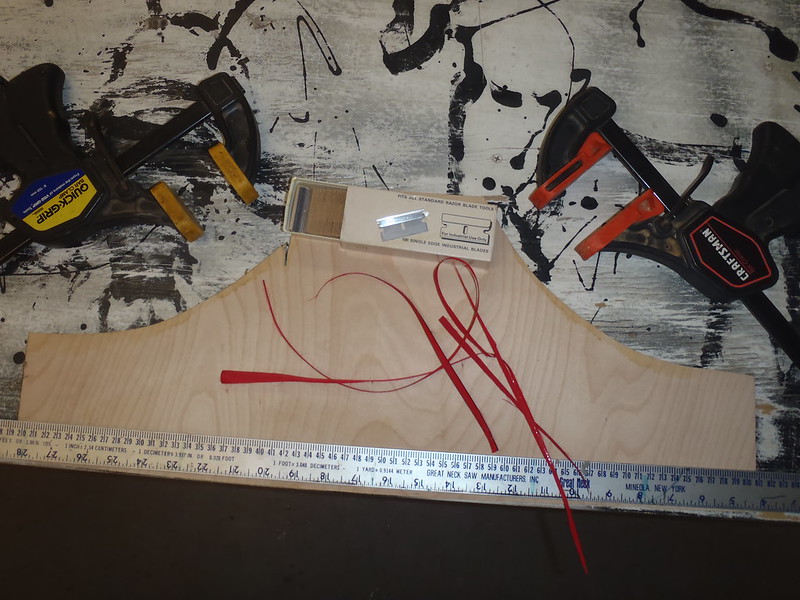
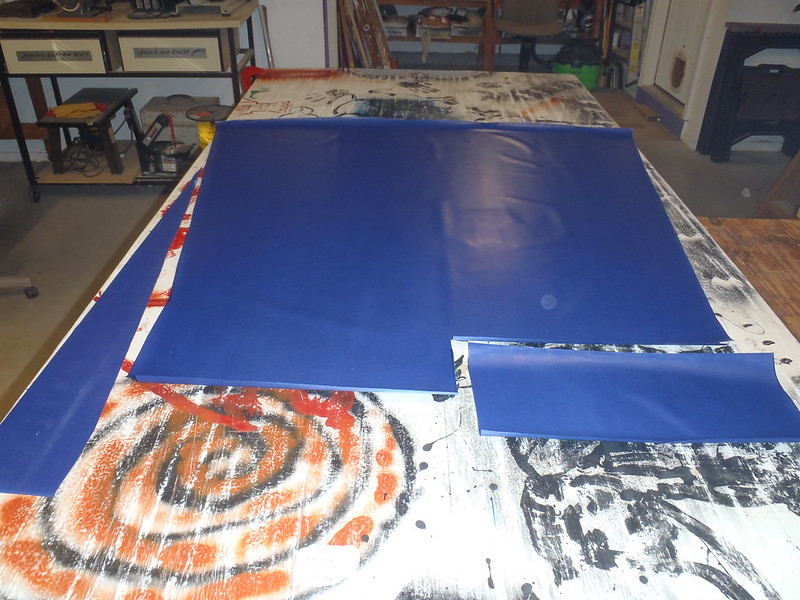
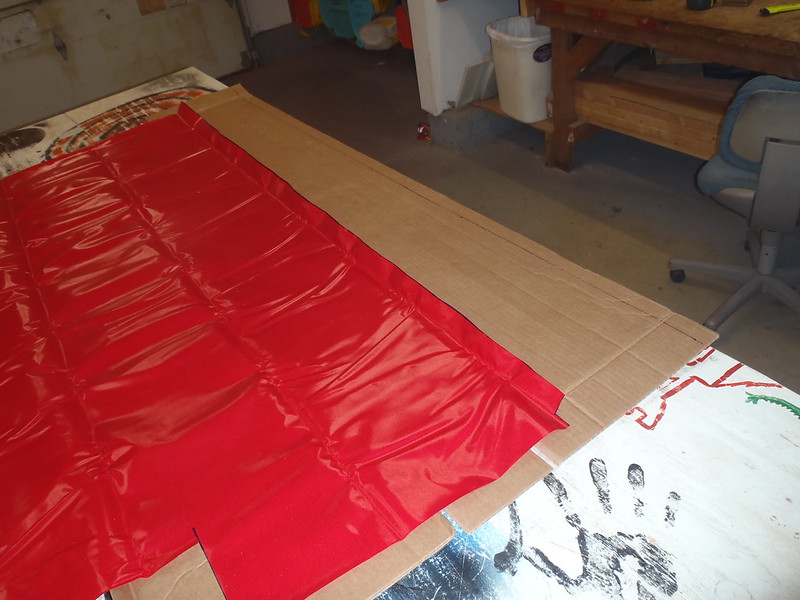
Step 2. Make a template. I have the templates from past DIY dry bags for sleeping pads, guitars, banjos and chairs, including the template from our narrower chair bags. The ALPS chair bags need to be 3 or 4 inches wider in circumference than the existing chair bags. I can extrapolate that design from the existing template. To be on the safe side and assure easy chair entry and girth fit I went 5 inches wider, better a little loose than a little tight.

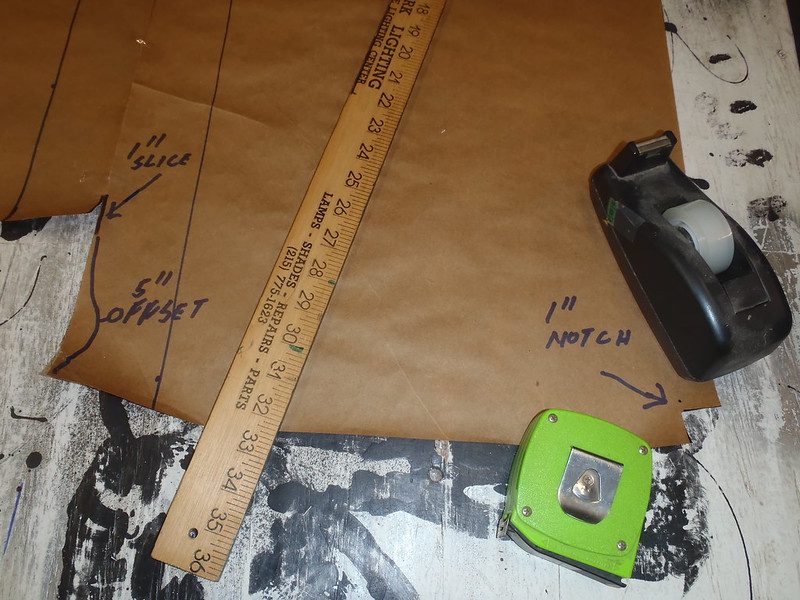
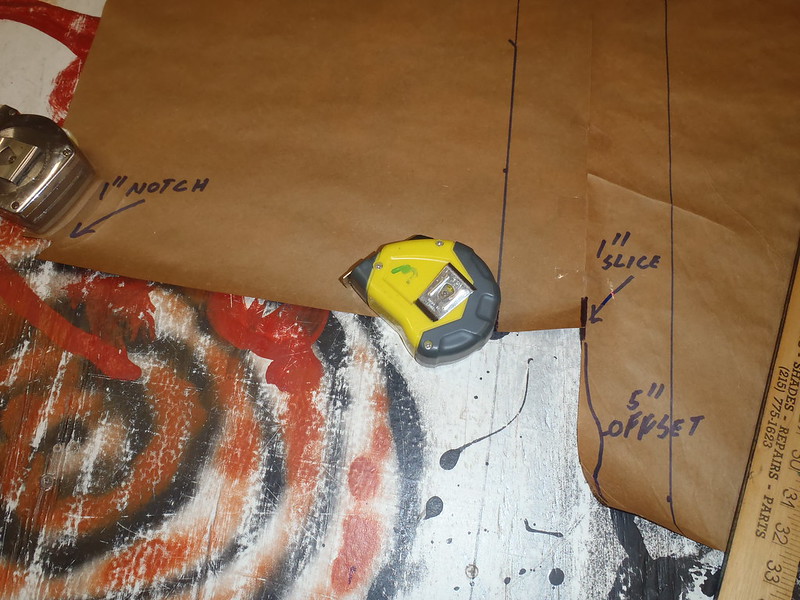
Cylindrical bags are easier than shaped instrument bags or tapered bags, but the open end cuts require a specific pattern. This instructional from Chuck Holst is helpful, although I use a slightly different pattern to eliminate any sewing.

http://www.paddlewise.com/topics/boatequip/drybag.pdf

In a (confusing to read) nutshell that top pattern incorporates a 1 inch notch cut from each outside corner, a 1 inch long slice up the middle and a 4 or 5 inch offset to provide material length for the webbing strap closure (1 inch of webbing on both sides equals 2 inches, 1 inch ironed together equals another 2 inches of overlap, and for that top webbing fold over I may use 1.5 inches of fabric ironed together). Confused yet? Call it 5 inches of fold over fabric total on the longer side.

P7291045 by Mike McCrea, on Flickr

P7291046 by Mike McCrea, on Flickr

That all makes much more sense when you get to ironing and see how the heat sealable inner sides of the fabric meet.

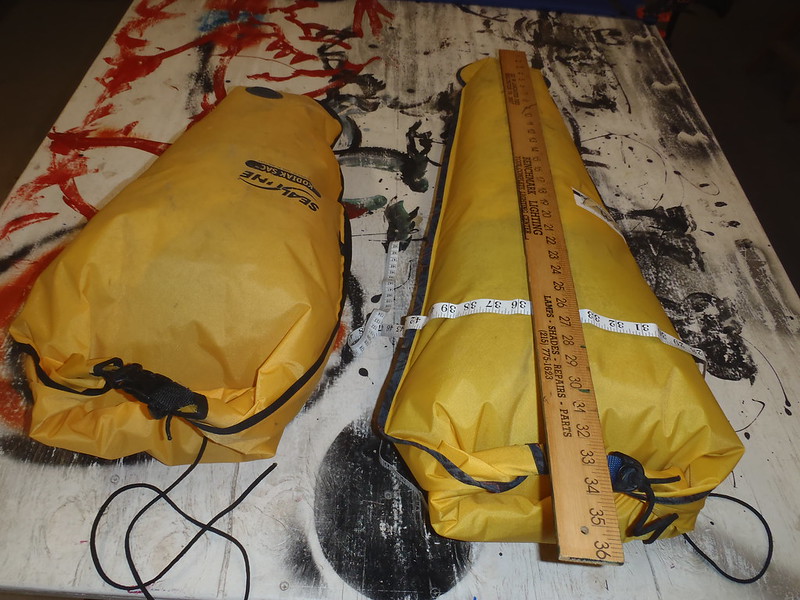
Template traced and cut out. The folded ALPS chairs are 38 inches tall. Add 5 inches for the webbing fold over top pattern, and another 8 inches or so for multiple fold overs at the dry bag end and I am up to 51 inches.

The heat sealable fabric is 58 inches wide; screw it, I have no use for a 7 inch scrap of heat sealable fabric, so I cut material full width. I can use the extra length to stuff in a hammock or some emergency beers. Plus I like the scant material wastage.

P7291048 by Mike McCrea, on Flickr

Time to break out the iron and some Golidlocks action. For pressing the iron onto the heat sealable material the wood table surface is too hard. An ironing board is too soft. A long piece of cardboard atop the table is jussst right.

P7291049 by Mike McCrea, on Flickr

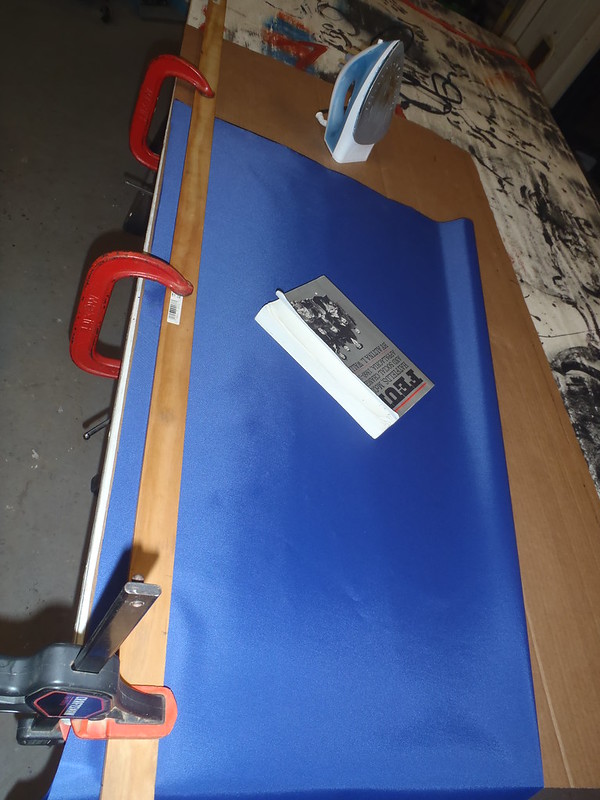
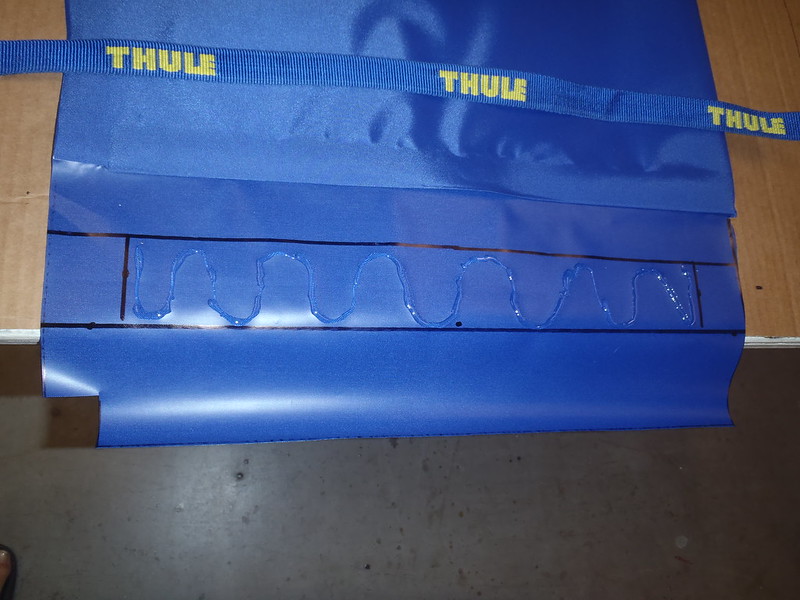
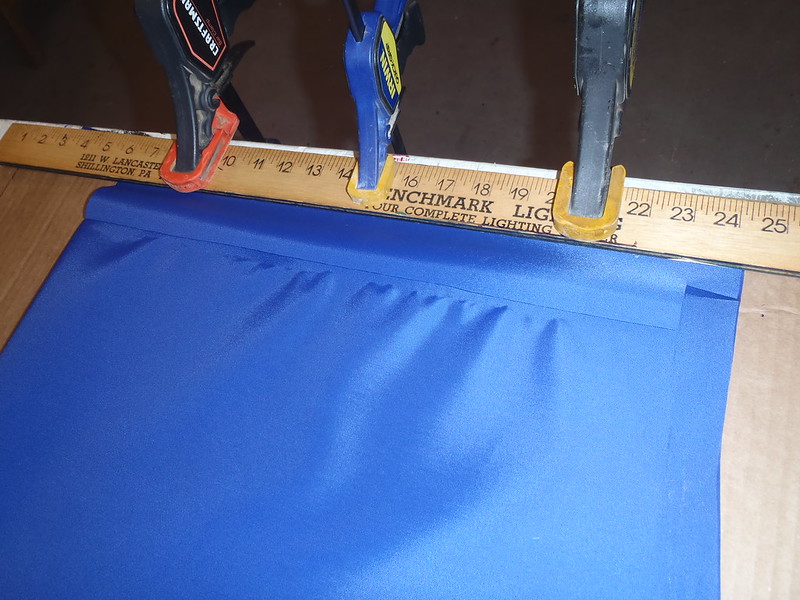
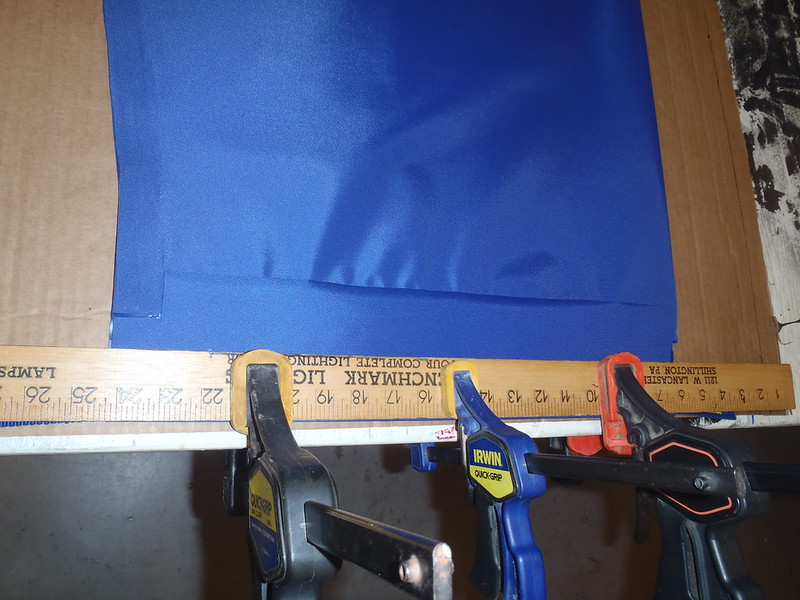
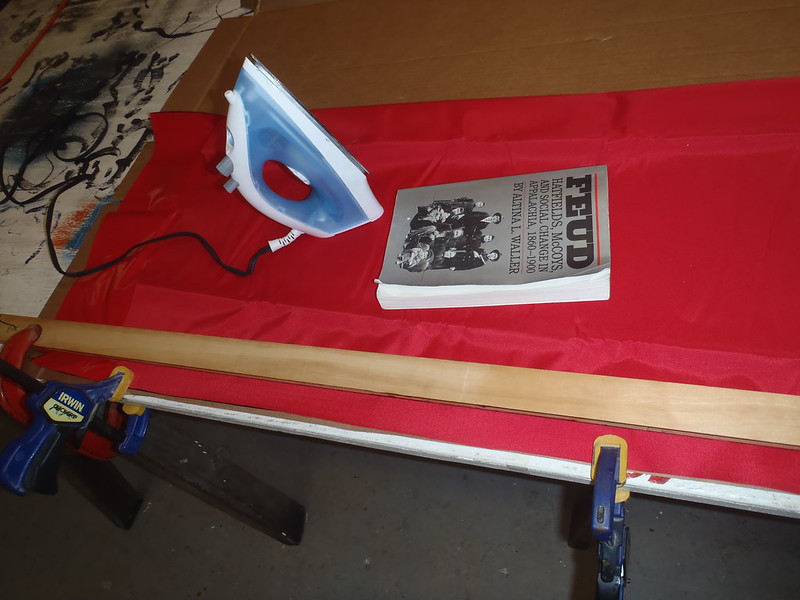
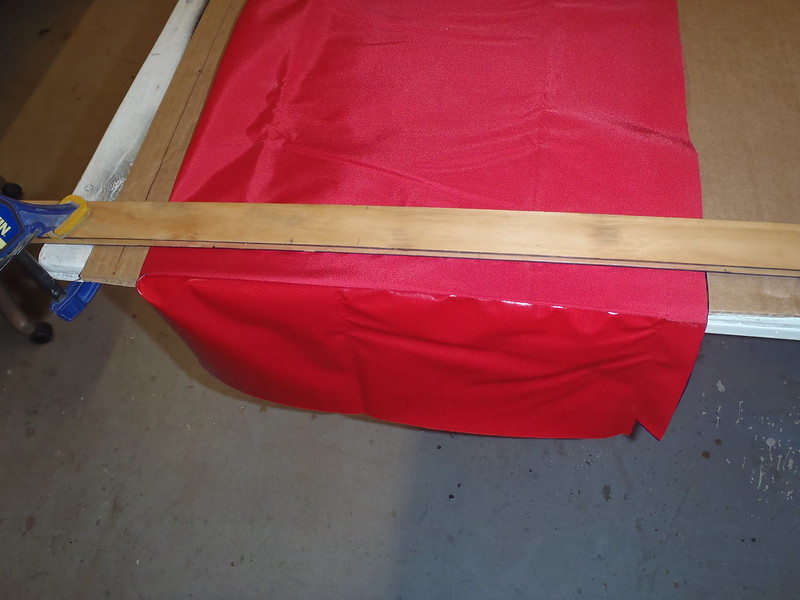
Heat sealable fabric folded over and clamped in place, with an ironing fence for an even 1 inch heat sealed seam.

P7301052 by Mike McCrea, on Flickr

Ironing is a one hand job. I could occupy my left hand with a beer, but better to have a paperback book or thick magazine to press the hot fabric together behind the iron. Not sure if that matters or not, but it does not hurt.

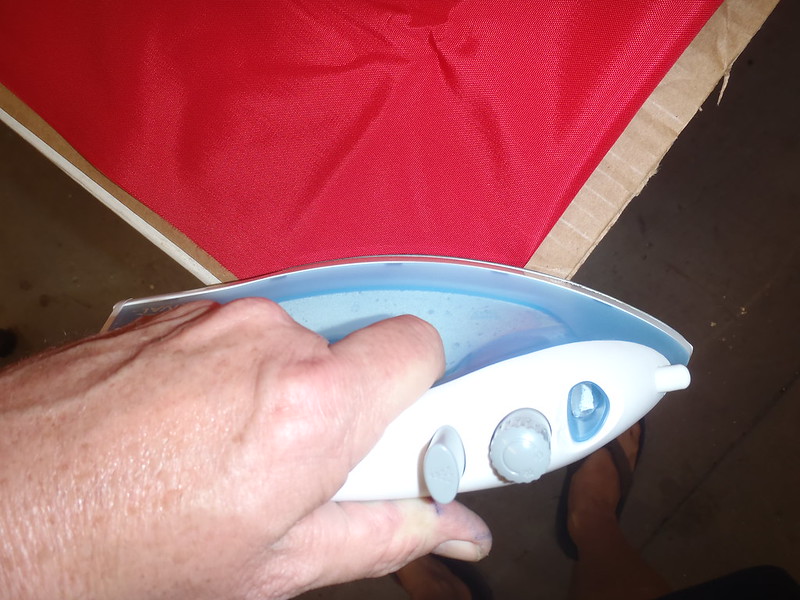
Ironing the side and bottom heat sealed seams is actually the easiest part of making DIY dry bags. 30 seconds +/- on each area of heat sealable fabric.

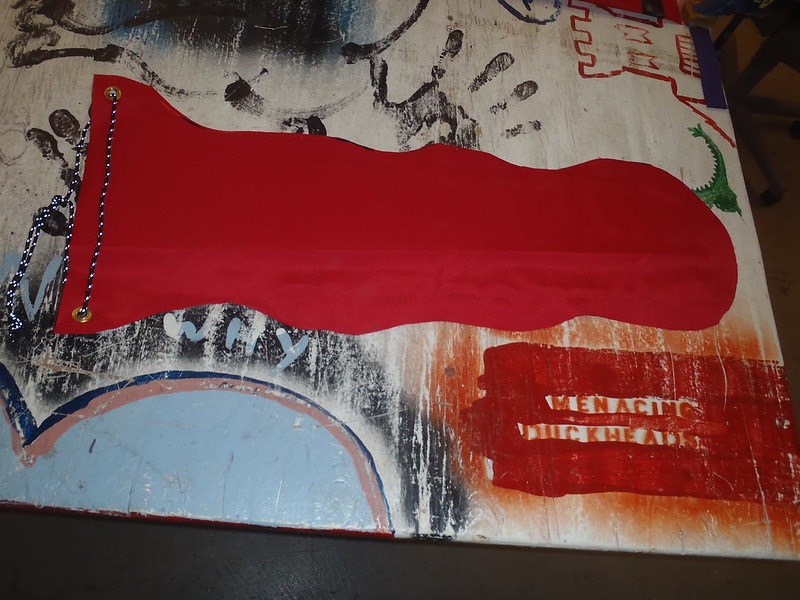
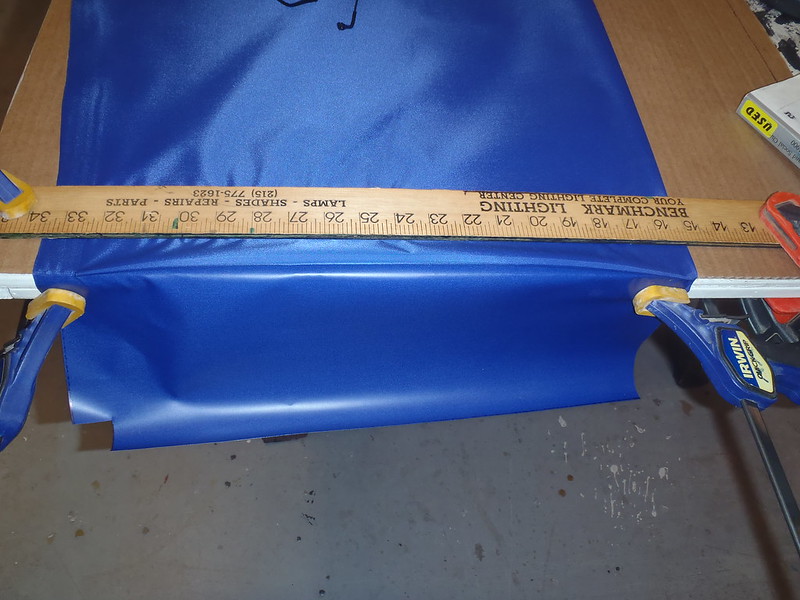
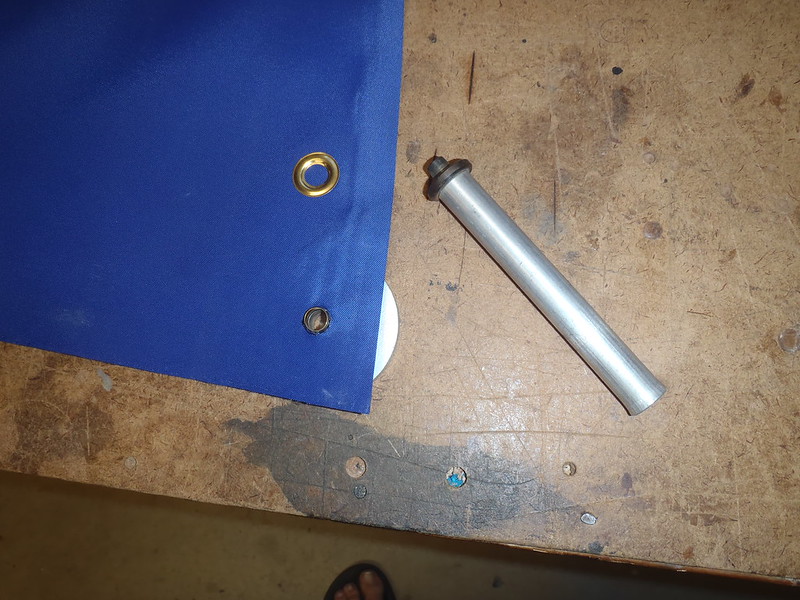
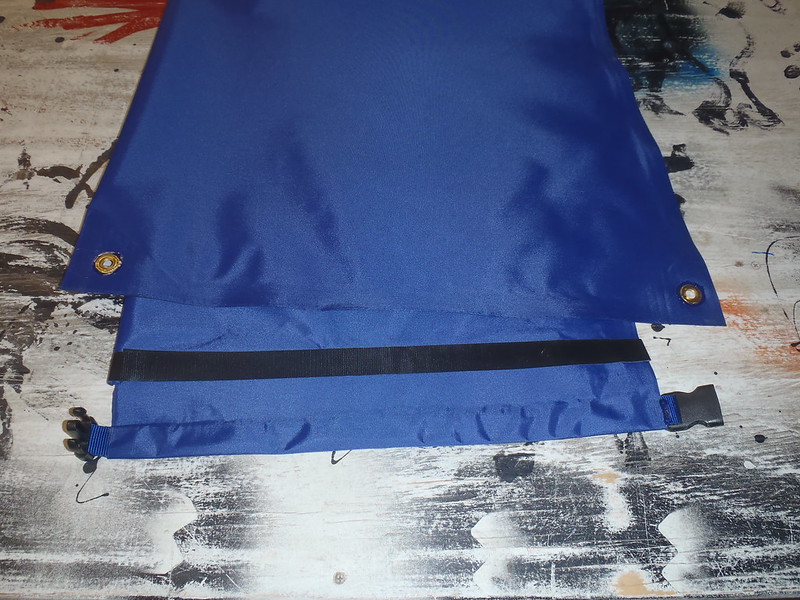
With the long side ironed together I was please to discover that my template was truly square and the bottom seam met evenly. Since I had some extra dry bag length I dog eared the bottom corners for future grommet installation. The dry bag roll over and buckles make for a convenient tie down at the open end, but the bottom can use a couple grommets, and the dog ear seams add strength to the bottom.

P7301055 by Mike McCrea, on Flickr

Now it gets a little trickier, and harder to describe. The short half of the top offset folds inside the bag and onto itself, and is ironed heat sealable to heat sealable sides together.

P7301056 by Mike McCrea, on Flickr

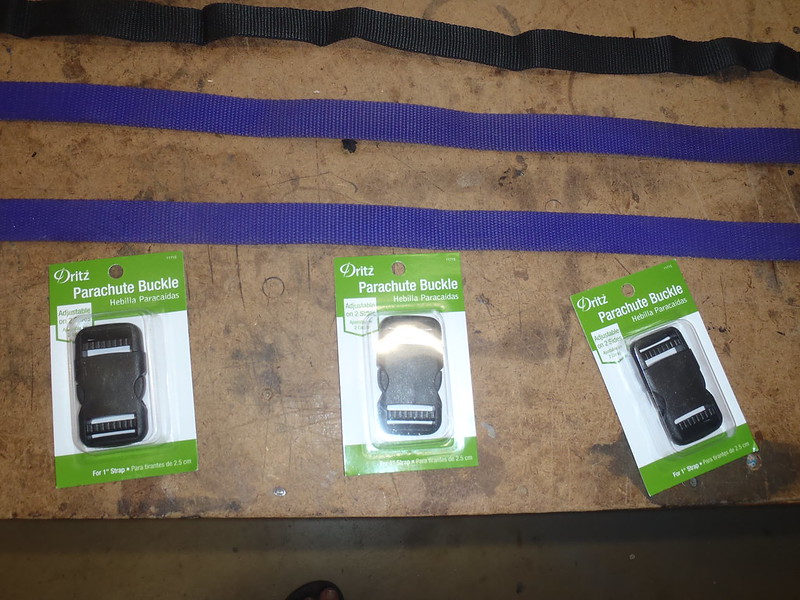
And, finally, it gets really tricky. I need a length of 1 inch webbing that spans the long edge of the offset, plus a couple or three inches on each side. Call it 26 inches in length for this bag. Never thought I would see the day, but I am running short on quality 1 inch webbing.

P7301059 by Mike McCrea, on Flickr

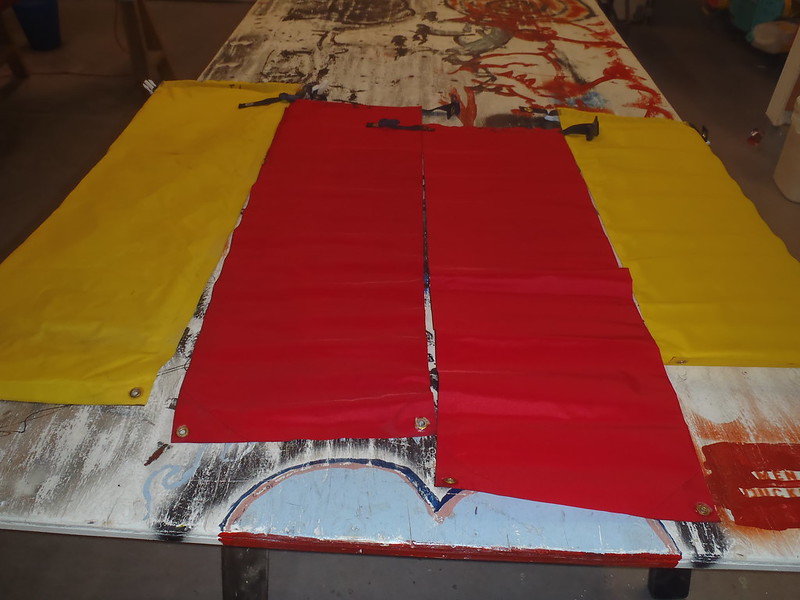
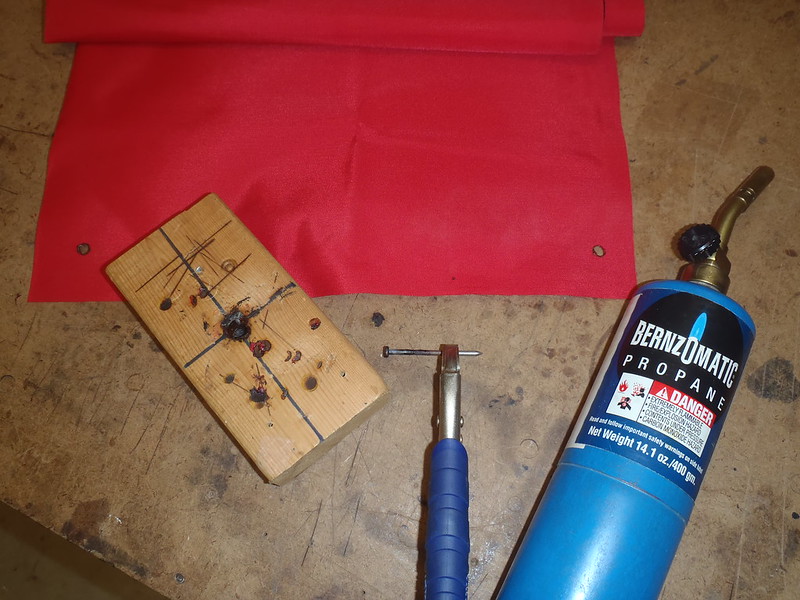
(Yes, three pieces of webbing hot putty knife cut; with a template made I am not doing all this just to make a single DIY dry bag. And three Dritz double-ladder lock buckles, to eliminate sewing a webbing end)

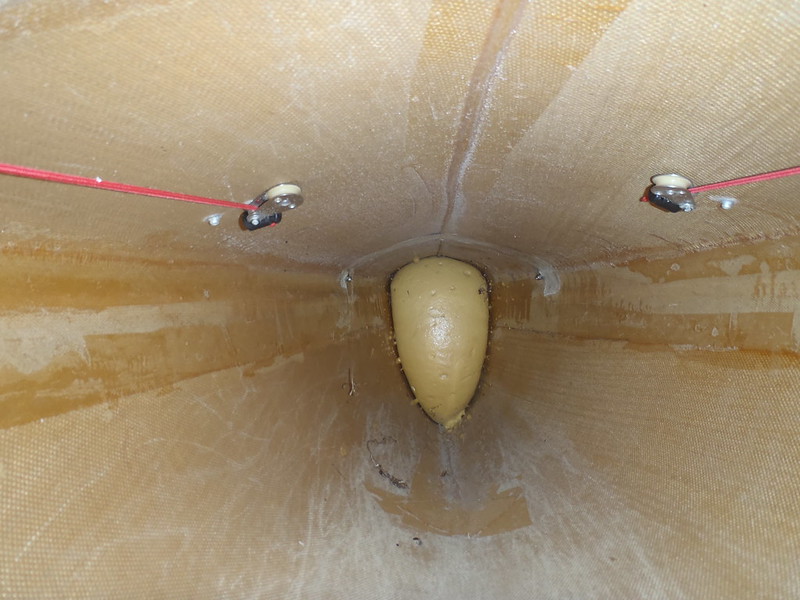
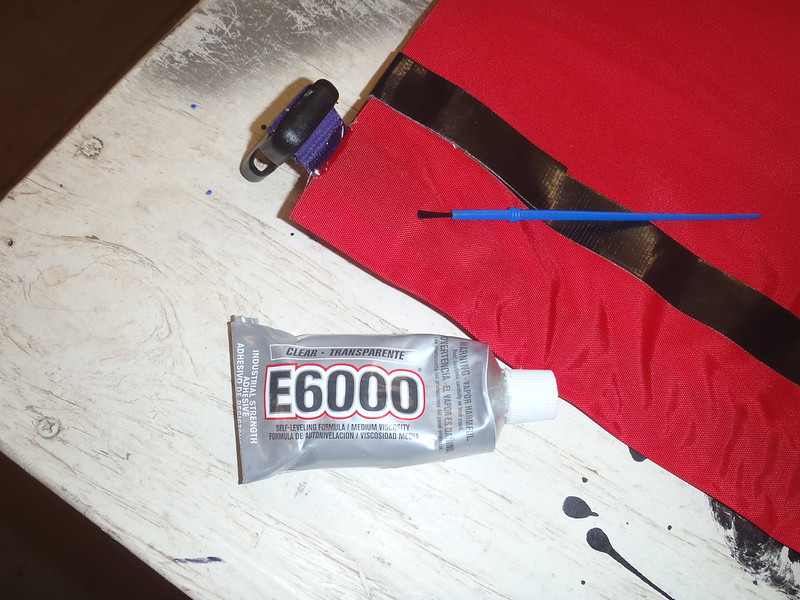
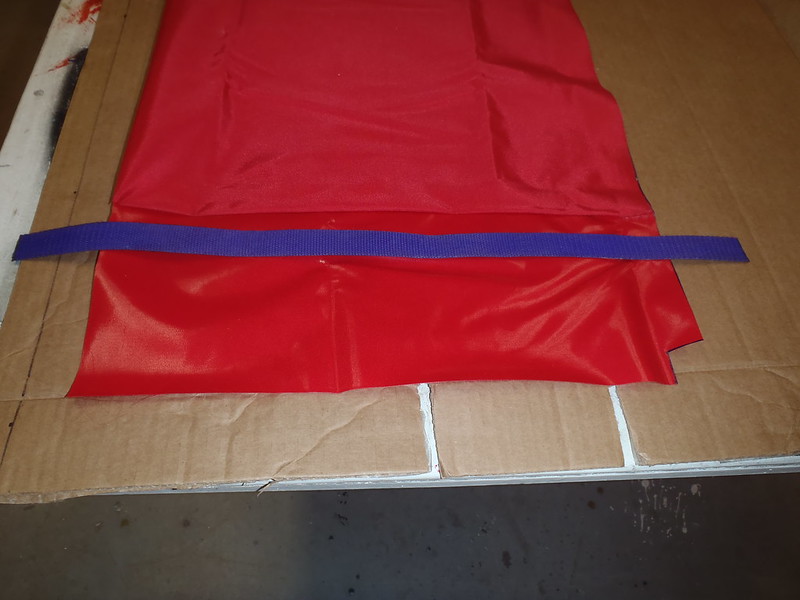
The webbing strap gets tucked in place and the long offset end gets folded over and stuck up into the bag, heat sealable to heat sealable (hence the need for the notch on the corner), and ironed together.

P7301060 by Mike McCrea, on Flickr

P7301063 by Mike McCrea, on Flickr

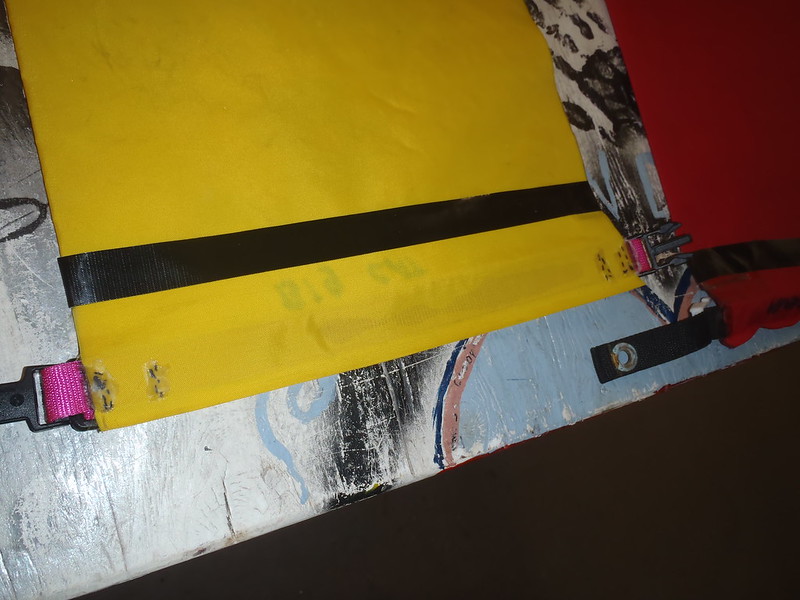
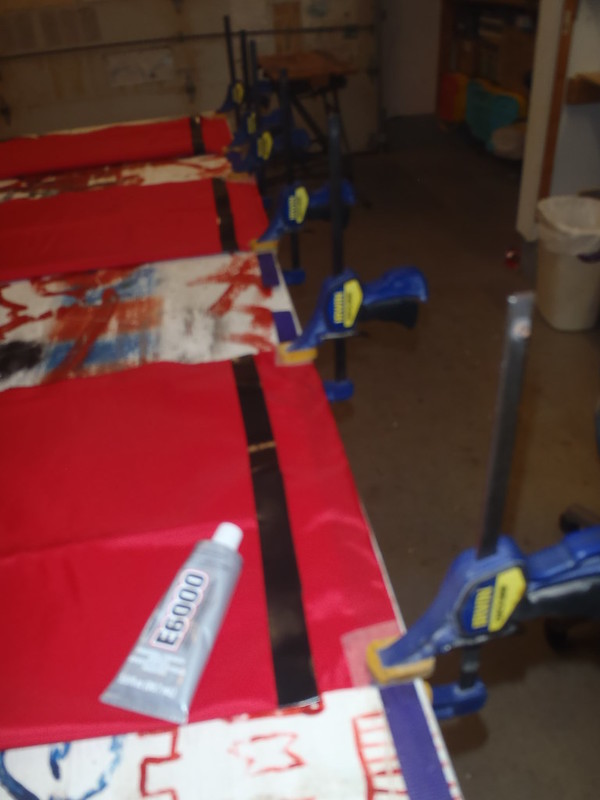
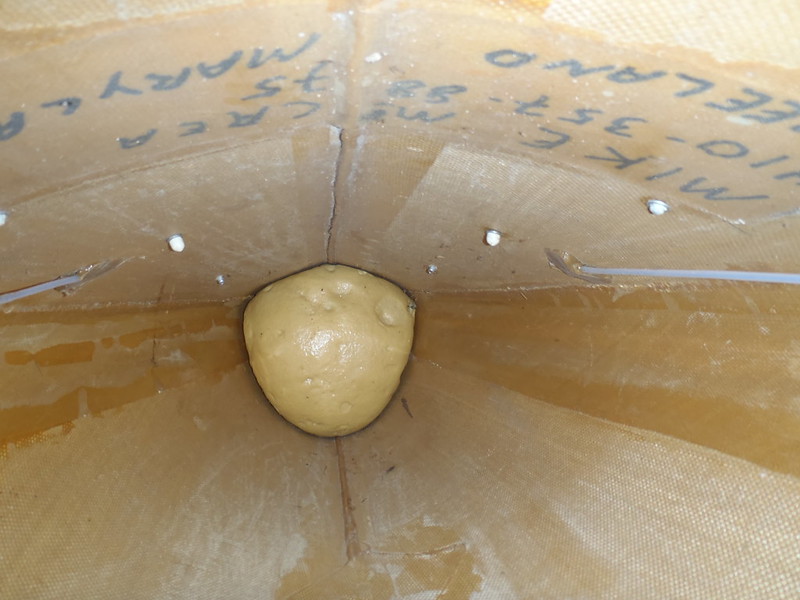
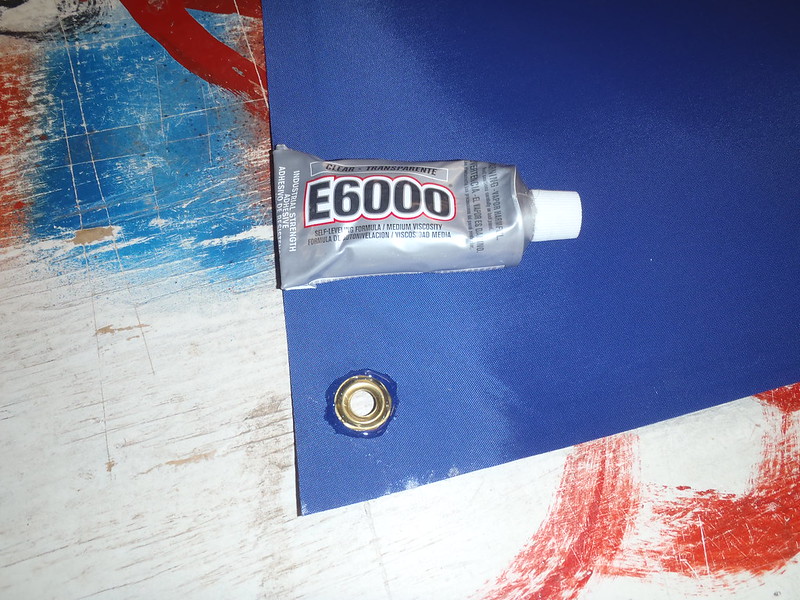
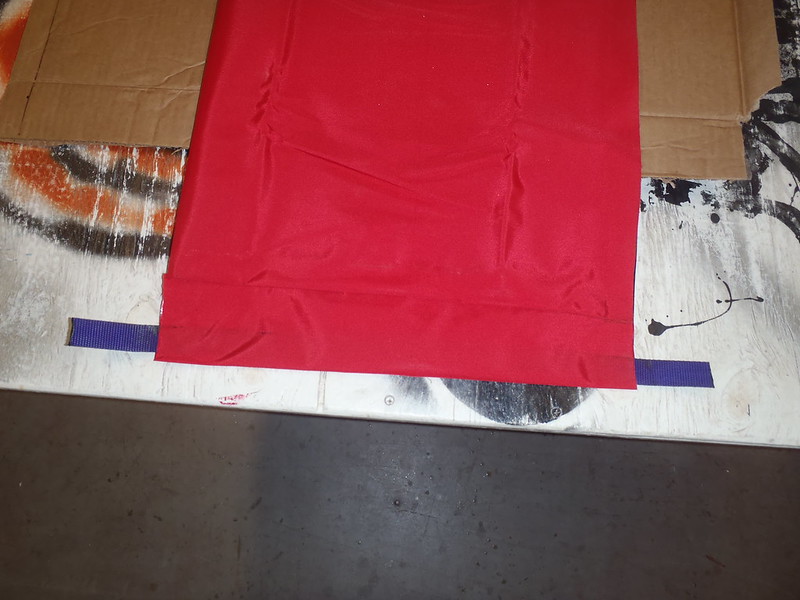
Since I cannot resist some experimental methodology I tried a couple new techniques on this dry bag. I put a smear of Goop adhesive on both inner flap sides, where the fabric wraps around the webbing, to hold and capture the webbing in the fabric sleeve.

Experiment #2, the only tear/failure point I have found on chair bags is at the top corners that lack double strength fabric. I tore one bag at that unreinforced edge, stuffing in a too tight chair (repaired with Tenacious tape). A perimeter wrap of 1 inch Gorilla tape should serve to beef up that open end edge all the way around, and should prevent any chair stuffing fabric rips.

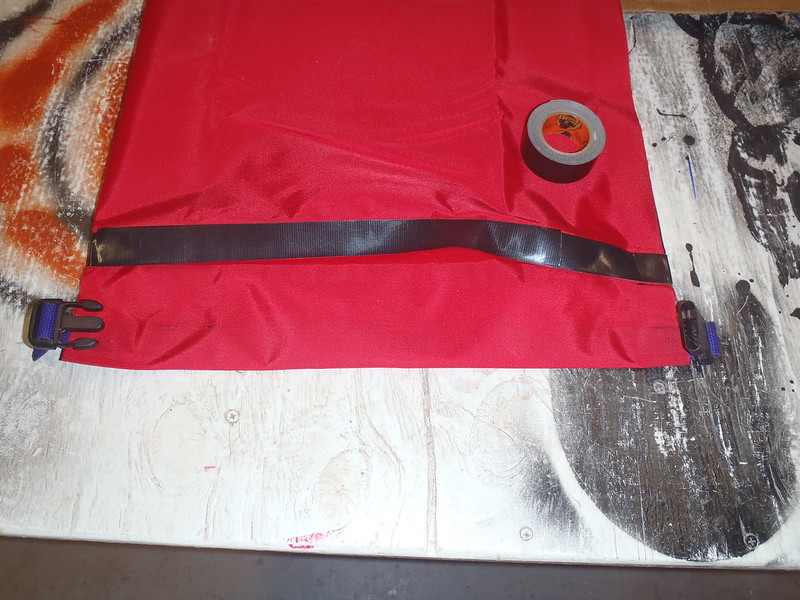
P7301065 by Mike McCrea, on Flickr

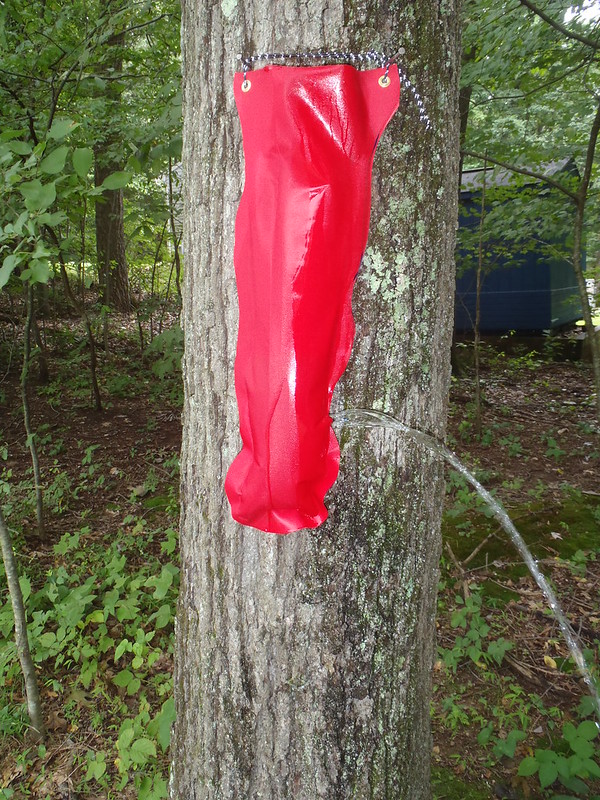
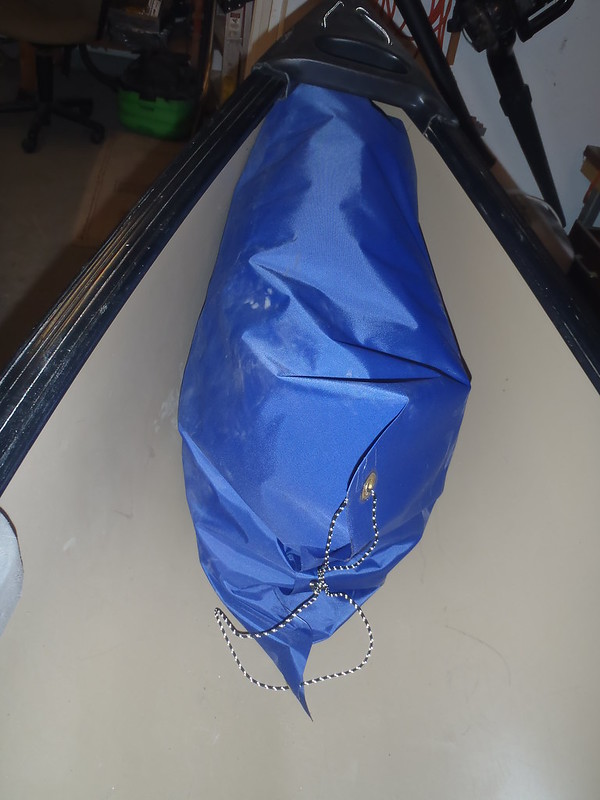
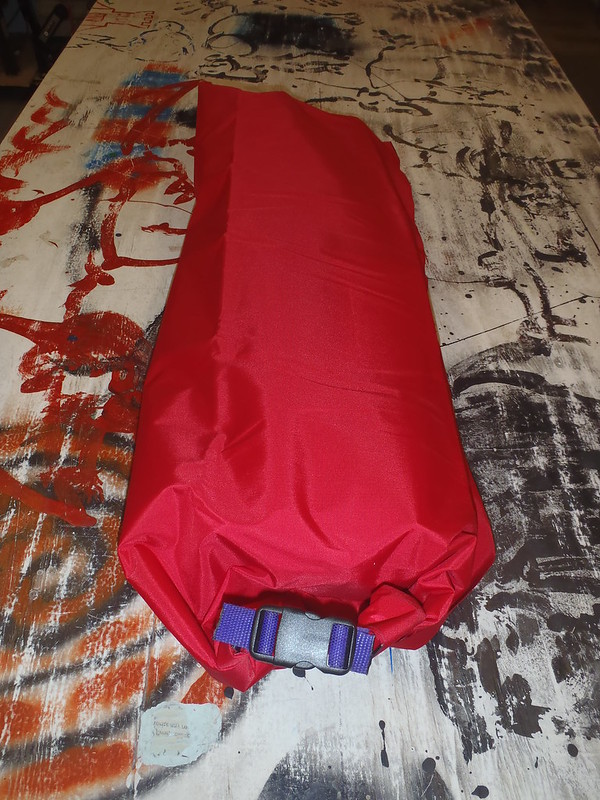
Finally, the moment of truth, is the extra 5 inches of girth I allowed enough to easily accommodate an ALPS Leisure Chair. I really do not want to have to make another wider template. Time for a can of liquid courage and a test fit. Fingers crossed and another big gulp of Hop Devil.

P7301066 by Mike McCrea, on Flickr

P7301068 by Mike McCrea, on Flickr

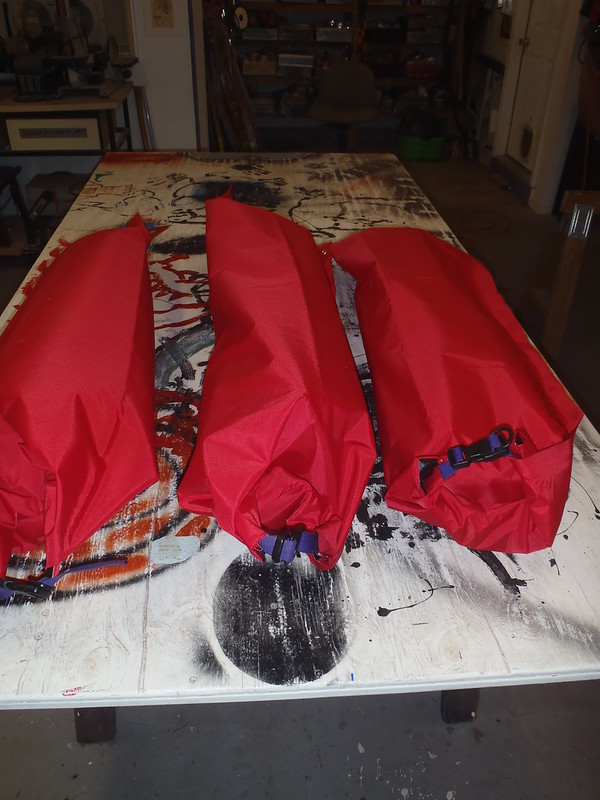
Freaking A, and Freaking Yay!. The ALPS chair fits perfectly. Without the pesky struggle of fitting that chair into the too snug OEM carry bag. The naked chair, with high back extension stuck between the legs, slides into that DIY dry bag easily and I do not need to carry the too-snug OEM bag.

There is enough room in the chair bag for the sunbrella.

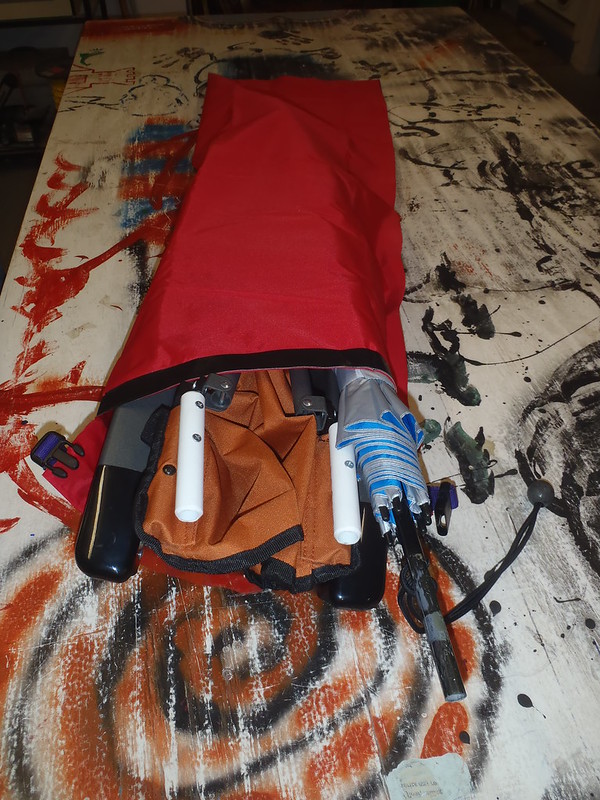
P7301070 by Mike McCrea, on Flickr

Now that I know those dimensions work it is time to make a couple more.
 
Oh man that is amazing. (But I'm gonna need to go over all these instructions again to understand all that cutting and folding.)
Another great result from the McCrea workshop.
 
Oh man that is amazing. (But I'm gonna need to go over all these instructions again to understand all that cutting and folding.)

It is difficult to comprehend that peculiar top cut via a written description. This really is a case where a photo is worth a thousand words.

Joel and I made a bunch of different dry bags years ago and before we started we spent hours reading and rereading Chuck Holsts instructions and asking each other What the heck does this part mean? After making the first bag the written descriptions became crystal clear.

That two day spree of making custom dry bags was posted on Solo Tripping, with photos on Community Webshots. Double Ooops.

After considerable discussion and deliberation, thinking we had somewhat of a handle on it, we took a plunge into the unknown and made a dry bag for one of the big Thermarests, thinking that if it came out too short or two narrow it could be used for a smaller sleeping pad.

Despite our comprehension misgivings that first bag came out perfect, and is still in use today.

Not being a gram weenie I have never used the lighter weight nylon ripstop or taffeta. The Oxford cloth and Packcloth have proven very durable over time, even for things strapped to sea kayak decks or crushed under a Glamping load in the canoe.

Cylindrical things like chair bags and sleeping pad bags are pretty simple to make. Tapered bags, to fit in the stem of a kayak or decked canoe, are not much harder; just end the taper shape short of the bag opening and make the last 5 inches of fold over, center slice and notches parallel <=, as on a simple cylindrical bag. That end part gets rolled closed and is better left rectangular.

We did screw up the first instrument bag we made, but fortunately it turned out to fit a smaller guitar, and we quickly understood where we screwed up dimensionally. Even those most complex of template shapes became clear after we made the first one.

Those DIY dry bags have two distinct advantages.

One, custom size and shape. I do not think that manufactured dry bags exist for something like that big ALPS chair. I could stick the chair in a 115L dry bag, with some clothes or other gear stuffed alongside, but I would rather have a separate bag just for that chair and its muddy/sandy feet.

For dry storage use in camp before bedtime, especially if I have had a few, that custom dry bag is handy, providing the chair slides easily into the bag before I stumblebum off to the tent. Those ALPS chairs are mighty dang sung in their OEM carry bags, and are kind of a PITA to put away there, unwaterproofed, in the wobbly dark.

Two, cost. Thermarest (once) made dry bags for sleeping pads. Their large or XL bags were the size equivalent of the Seattle Fabrics dry bags we made, and were pricey in those L or XL dimensions. Made, was; I think those sleeping pad dry bags have been discontinued.

http://www.moontrail.com/thermarest-waterproof-stuff-sack-lrg.php

Tapered dry bags for stem use are even pricier, and with custom dimensions the taper can be made to fit the stems perfectly, and at whatever length desired. We have a couple of Sealline tapered bags; made from much flimsier material, far from a perfect stem fit in any of our boats, and wallet hurtful.

https://www.rei.com/product/114730/sealline-bulkhead-tapered-dry-bag-20-liters

Musical instrument dry bags are even pricier, if you can find one that fits properly.

Joe Sacher has a good tutorial on making heat sealable guitar bags. His prose is clear and the photos helpful, even for making simpler DIY dry bags. Worth a read if you are pondering DIY dry bags.

http://www.joesacher.com/blog/2007/12/01/creating-a-dry-bag/

NOTE on Joes blog post instructions and photos: Using double ladder lock buckles and Goop gluing the webbing in place eliminates all sewing.

We initially ordered two yards of heat sealable fabric as a DIY experiment, which was enough for several sleeping pad and instrument bags, five or six custom dry bags in total. And a wallet made from the scrap (Joel, still uses it).

I quickly ordered another couple yards, for more sleeping pads, camp chairs and a couple tapered bags. And surprisingly managed to make them without Joels help. Joel and I, thinking and talking it out it in tandem, constitute almost one fully functioning brain. That I could manage it solo is a testament to how easy DIY dry bags are to make.

The red Packcloth is my third order of heat sealable from Seattle Fabrics. Three yards this time, and I will not have a lot left over after making 3 XXL ALPS chair bags, each of which required the largest piece of fabric I have used so far, a 44 x full width 58 inch piece of heat sealable cloth for each. Even at $25 a bag it is still worth it to sit-on-my-arse me for an always dry camp chair.

I now think of that heat sealable fabric as Shop Stock, something to keep on hand for the next time I need to make a custom dry bag.

I have said this before, on this forum, but, as convincingly as I can:
IT. . . . IS. . . .NOT. . . .THAT. . . .HARD. . . .TO. . . .DO

A 58 inch wide yard of Oxford cloth or Pack Cloth is $20ish. When you first experience that A ha, now I understand! Moment, as the mysteriously notched top folds fit together, and then discover how easy it is to make custom DIY dry bags, you will run through a 36 x 58 inch piece toot sweet making additional custom dry bags.

Just buy 2 yards to start with, you will use it.
 
Mike McCea -- when you made your guitar dry bags, did you try to size them for just the guitar or did you make allowance for the guitar case? When I got back from my last trip, I was thinking how nice it would be to bring along one of my guitars and how impractical that would be due to risk of damage. I hadn't thought about a guitar-sized dry bag and was thinking that I'd buy an inexpensive travel guitar. But every travel guitar I've ever tried has been a disappointment. Then I thought the cheapest solution would to buy a beater guitar off craigslist (there are always guitars available in the $50-100 range) and not worry about it getting wet or holed. But with a hard shell cased guitar and a dry bag to fit it all, bringing a decent guitar on a trip would be viable.
 
Mike McCea -- when you made your guitar dry bags, did you try to size them for just the guitar or did you make allowance for the guitar case?

We made dry bags for a Martin Backpacker guitar, a Little Plucky banjo and IIRC, a mandolin. Only the Backpacker had a case, and that case was semi-stupid in design and function. The Backpacker case was a soft case and not water proof, so zero protection there. It was a simple rectangle, so awkwardly larger than the instrument within. And, mostly, the case weighed as much as the guitar, which for something with the moniker Backpacker was ridiculous.

Joel carries one of those dry bagged instruments strapped to his backpack when hiking or strapped to the deck when kayaking. Actually he now has a carbon fiber mandolin, for which we have yet to make a dry bag, maybe this fall when my heat sealable fabric supply has been replenished.

You could always make a DIY dry bag to accommodate a hard case for a more valuable instrument, or buy a beater guitar off Craigslist and just store in a custom dry bag for paddling trips. Or make a custom case with some minicel foam in the inside for protection against knocks and bumps.
 
DIY Dry Bag Work, day 2 chair bags

As is always the case I learned new things. Or remembered old methodologies.

Starting with, check your ironing work. Allow each seam to cool and try pushing it apart from the inside. I stuck my hands inside the first XXL chair bag and pushed against the seams all the way along as a test.

Oops, I must have gone a little fast with the iron in one place, the heat sealed edges started to come apart in an uneven hem. Back on the ironing table, another more attentive pass with the iron and all was well. Almost well; I checked the seam strength again and went back over one tiny area a third time with the iron.

A more accomplished dry bag making friend suggested another finished bag test. One that should have been occurred to me. Dump some water in the DIY dry bag and see if/where the heat sealed seams leak. He also suggested using E-600 as the webbing adhesive. Thanks Dan, I am always happy to try another glue.

https://www.lowes.com/pd/E6000-CLR/...MIn7jC1MvM3AIVCR6GCh0H2wOUEAQYAiABEgJ4z_D_BwE

Seriously, check every seam for strength after ironing; better to find out now and spend another 30 seconds of spot ironing than to find a slowly separating seam in the field and try to repair it with a hot rock.

Lighter colors are easier to work with. The fabric will darken slightly after sufficient ironing time. It is easiest to discern that slight darkening, which disappears once cooled, with yellow. Red is not bad. For that third ironing pass on the recalcitrant area I waited until the red Packcloth had visibly darkened under the iron (even that iron disappeared)

I have only used yellow, red and royal blue heat sealable fabrics. Seattle fabrics alternate colors of blaze orange or nickel grey would likely show the ironing scorch. White would as well but would get awfully grungy awfully fast. Black might not show the ironed scorch, and/or become an oven.

Pressing a paperback or magazine is, in fact, beyond optional; the couple little areas on chair bag #1 that were not evenly heat sealed along the 1 inch seam were where I did not use the paperback press, for the dummkopf reason that I had set the book out of reach on the far end of the table. Having walked it well out of my way along with the hot iron I continued to overlook the paperback press, but I got smart enough to walk 8 feet and retrieve it before continuing with the iron.

It is best to start with ironing the longest seam clamped evenly across its length, for two reasons.

1. If things are a little off square it is easier to trim the shorter bottom edge flush.
2. Checking the heat sealed seams by pushing the fabric apart from the inside is easier done from either end before the bottom edge has been sealed. That long side seam on the XXL chair bags is 52 inches long. My arms, reaching up inside the bag to test the seam strength, are not.

It is a PITA to remove the ironing fence to check, but always, always check the strength of the heat sealed seams. The more attentively ironed chair bag #2 had two tiny areas where the side seam separated away from an even 1 inch heat sealed hem.

If those heat sealed seams are going to start to pull free it will be from the inside out, and having a straight, even hem line, without any weak spots, provides overall strength.

Those not-quite-perfect areas were easily marked and re-ironed. And re-checked. By the time I got to bag #3 my ironing time and technique was dang near flawless.

Like many things it was much easier to make several dry bags at once. The first XXL chair bag took me most of an afternoon; much of that effort was calculating the dimensions and making a (fingers crossed) template. With a practice chair under my belt and the template available making two identical XXL chair bags took but a couple hours. With some beer breaks, and some silly crap made from the too small scrap fabric when I got shop playful.

Tomorrow, grommets installed on the bottom dog eared corners and a water-in-bag leak test. On all of our DIY dry bags.

Three days to make three custom dry bags. Gawd I am slow.
 
thanks for another great diy thread Mike, this may be the nudge I need to get busy on my spray skirt...
 
DIY Chair Bags, Day 3 Puttering & Fini

I like the 1 inch Gorilla tape reinforcement along the open edge of the chair bags. Sleeping pads and soft stuff such are unlikely to catch an edge and tear at the top, but chairs with edges and protrusions are a different story. Liked it enough that I added that reinforcing strip to our other chair bags, which after years of use and abuse are holding up find (with a patch or two).

If you do poke a hole in a heat sealable dry bag duct tape sticks fine to the outside, but when you get it home just turn it inside out and iron a scrap piece of heat sealable patch on the inside.

P8011078 by Mike McCrea, on Flickr

Note the crude stitching (covered with Aquaseal) holding the webbing ends in the heat seal fabric sleeve, visible proof of how sucky I sew. The heat sealable fabric itself does not adhere to the webbing, it only sticks when ironed heat sealable side to heat sealable side together. While the bead of Goop I laid in place does serve to hold the webbing in place along the length of the sleeve it as not quite tenacious enough at the higher stress sleeve openings.

It finally occurs to me that many manufactured dry bags have two stiffening band that at the fold over. I might give that a shot, but I am outa 1 inch Gorilla tape. And kinda want to see how the Gorilla tape does baking in the sun first.

P8021111 by Mike McCrea, on Flickr

Per suggestion I picked up some E-6000. A little smear on both sides of the webbing at the open sleeve end, wax paper wrap and some clampage. (Note: 24 hours later that E-6000 has firmly glued the open ends of the sleeves to the webbing. Also, serendipity, the thread on the E-6000 screw cap are the same size as the Goop, so I can use the applicator nozzle from that glue).

P8011081 by Mike McCrea, on Flickr

If need be I can chuck a couple crude stitches at the sleeve ends as done before, but the E-6000 has such a firm grip I doubt that will be necessary.

While I was waiting for that the E-6000 to cure I got out some of the dry bags we made years ago for inspection and did the suggested the water test. I did not water test at the roll up ends; with a quart of water in the bag I know most roll up dry bags will test leak through the roll up from hydrostatic pressure on the inside.

It seems we did some sturdy ironing work back in the day, not a drop from any the heat sealed seams. Thanks Dan, good test. Methinks it helps to have both a book/magazine presser-downer man following along behind the iron man. Oh Joel. . . .

The four custom Therma-rest pad dry bags were all still sound, dry and unpatched, even Daddys oft used and abused XL version for the giant Luxurymap pad.

P8021096 by Mike McCrea, on Flickr

The tapered bags were made, by material necessity, as split bag tapers; I did not have enough leftover material at the time to make one full sized custom bag. They do fit stuffed side by side in the stems of the decked canoes (tie on a piece of cord onto the D-rings so you can pull them out).

P8021099 by Mike McCrea, on Flickr

Some true custom fit DIY tapered bags are in my future when I have more fabric. BTW, there is a lot more waste fabric when making tapers and instrument bags, simple cylinders can often be cut out in Tetris fashion from a 58 inch wide bolt of heat sealable fabric, leaving little scrap.

Time to trim the imperfect edges of the new chair bags. Not too shabby on the square; a little off on the bottom here, a bit off on the side there.

P8021091 by Mike McCrea, on Flickr

All razored off. Total uneven cut offs from 3 large bags.

P8021095 by Mike McCrea, on Flickr

That little bit of quick edge clean up is well worth the effort. Provided you have a box of single edge razor blades in your shop. Which everyone should.

On to grommets and D-rings. Having grommets at dog eared bottom corner is handy. Yall have seen this action before; nail head sized for the grommet center heated on a torch, crosshair aiming block for a clean melt through and sealed edge hole in the fabric, pound in the grommet. (Note to self: those were the last 6 of my quarter inch ID grommets. Buy more)

P8021101 by Mike McCrea, on Flickr

P8021103 by Mike McCrea, on Flickr

I put grommets in the ends of the webbing straps on some bags, and added a simpler nylon D-ring to the webbing on others. Seating grommets in webbing is hard pounding work; screw that noise (and it is noisy) I used D-rings on the new chair bags. Last of the shop stock 1 inch nylon D rings, need more of those as well.

P8021105 by Mike McCrea, on Flickr

P8021109 by Mike McCrea, on Flickr

Those are three big arsed comfy camp chair bags. Worth the effort for a dry place to sit.

Doug D mentioned that he could use a dry bag for his new ALPS chair. I tried my best with what little material I had left over, but it was late in the day, and I had had a few beers. It came out kind of odd.

P8021086 by Mike McCrea, on Flickr

Uh oh, it leaks a bit. Kinda like Doug.

P8021088 by Mike McCrea, on Flickr

Doug, you will be happy to know I have fixed your leak, and have your new bag boxed up and ready to go, along with some scrap heat sealable fabric for you to play with. I have even printed a label for the box.
 
Iron Cleaning

Jeeze Louise, I just spent time cleaning the bottom of an iron. Whatever happened to the He-Man I once was?

Equal parts white vinegar and salt, microwaved for 30 seconds and rubbed across the bottom of the iron. Almost as clean and shiny as new.

Necessary because that iron got knocked over after last use on the crowded bench. Onto a thin plastic bag. It was already kinda smeary on the bottom from exposed heat seal side miscues, and from Sharpie dots in areas that needed another pass with the iron

It needed to be cleaned because the wifes household iron died, and she has been using the shop iron for her clothes. Cleaning of the melted plastic and Sharpie smudges dodged a large caliber bullet.

With more heat sealable fabric on the way I really need a better iron. That big-box $6 cheapo is tiny, and has ( ) curved edges, which are not that handy for ironing a straight even hem line.

Jeeze Freaking Louise, now I am concerned with hem lines, and am shopping for a specialty iron with a straight edge side.

Has anyone seen my Man Card?
 
BWAHAHA.

Tracking shows Dougs dry bag package is out for delivery. One of the three ALPS chair dry bags I made, always intended for Dougs use, was enclosed, along with the peculiar Salvador Dali waterbag and some test fabric. And, as always, a large font faux company shipping label was taped to the back side of the box.

It is all fun and games until such a package arrives on the day when Dougs grandkids are visiting.

I have visions of Dougs 10YO grandson bringing him a package from the mail lady and asking Grandpa, what does the label on this package mean?
 
It's okay Mr Mcrea, we've all had to do it at some point!


ETA: I just finished doing the dishes if it makes you feel any better, next I am cutting off my daughters tights and hemming them into summer shorts as they have been outgrown!
 

Attachments

  • photo10106.gif
    photo10106.gif
    4.5 KB · Views: 0
Last edited:
DIY Tapered Dry Bag for Decked Canoes

Some true custom fit DIY tapered bags are in my future when I have more fabric.

When became now. I needed a bunch more heat sealable fabric, and an offer of $8 a yard plus shipping for Packcloth (vs the usual $21.50 a yard) was too good to pass up. The color available was Duckhead Purple, which works for me.

E-mail or PM me for the source of that remaindered $8 a (58 inch wide) running yard of purple packcloth. It will come folded, which is not a wrinkle issue with heat sealable fabric in Packcloth weight, especially if you cut it to shape and then roll it up briefly.

Next up, an experimentally tapered stem bag for the Monarch. The Monarch has floatation plugs at the stems. On internal measurement, quite different sized float plugs, 13 inches long in the bow, 21 inches long in the shallower stern.

P8071119 by Mike McCrea, on Flickr

P8071120 by Mike McCrea, on Flickr

Marking the end of the floatation plugs on the hull and running a cloth tape run around the boat at that narrowest point gives me, yoikes, wider than I would have thought even at the narrow end.

P8071121 by Mike McCrea, on Flickr

I will spare you all of the finicky custom fit measurements. Essentially:
32 inch in circumference at the narrower stems, + 2 inches of heat seal overlap (one inch on either side) = 34 inches
47 inch wider circumference at the other end, + 2 inches of heat seal overlap = 49 inches
33 inch long bag, + 1 inch of heat sealed end, + 5 inches of tucked in webbing flap, + 5 inches of roll over = 44 inches

Measuring around the Monarchs shallower stern deck, with the much longer float plug, surprisingly gives me the same dimensions within 1 inch in circumference. Close enough that I am only making one experimental template.

Time to make a template to those dimensions. Do not forget to leave last 10 inches or so of the top flap and rollover end cut straight, not angled. I marked the template with fully angled sides at first, almost effed up part of the template design.

Correctly shaped template

P8091125 by Mike McCrea, on Flickr

Looking at the start of that \_/ template, before cutting out the flaps and notches, the wide end of the taper bag seems awfully big for a roll over opening. Even the narrower end on that DIY decked canoe taper is as wide as on manufactured < tapered bags for kayaks, and is wider than the top of a Baja 30L bag.

I have no trouble stuffing things in those bags, and nothing says the roll over closure has to be at the wide end of the taper. As an experiment I cut the template with the fold overs and notches on the narrower 32 inch circumference end. I stuff light gear in those taper bags, so as to keep the stems of the boat unencumbered. That opening should be plenty of aperture to stick in shirts and pants, fleece, wool socks, capilene, a down vest and a pair of Gore-tex trail runners at the wide end

This first decked canoe tapered bag is a bit of a crapshoot. How well will it fit the Monarch? Might it fit in the other decked canoes? If I do not like the fit under the decks, or the narrower end opening, it will be easy enough to revise the template for the next bags. I now have 10 yards of fabric; there will be more custom tapered bags, Joel needs some kayak hatch sized tapers, and a mandolin bag. I might even try a custom canoe end storage bag.

Looking to reduce cut out waste I tried different template orientations laid atop the heat sealable fabric. Arrayed \_/ along the yards fabric length had the least wastage (and I can make some mini dry bag from the rectangular piece), and leaves the taper angle I need for the next bag already cut on the fabric to eliminate the long narrow vee waste.

P8091130 by Mike McCrea, on Flickr

Back to slaving away over a hot iron.

P8091133 by Mike McCrea, on Flickr

I was more attentive to timing 30+ minimum seconds of ironing on each portion of the heat sealed seam this time; it is easy to go too fast, and difficult to wait too long. Up to 60 seconds of hot (linen setting) ironing is not too much with Packcloth. The purple fabric did not show the heat sealed scorch as with the lighter colors, but after sufficient ironing got slightly glossy.

Not too shabby, and with practiced technique I am getting better all the time. I dog eared the wide end corners for grommet installation. These beyond-arms-length tapers will need a piece of cord tied on to extract them from the far reaches of the stems in the decked canoes.

The weird angle-to-square end flaps required trickier ironing fence positioning than with a simple cylinder, but still doable. Short flap (1 inch flap with tuck under corner notch) folded under and ready to iron.

P8101136 by Mike McCrea, on Flickr

Long flap with webbing ready to go. E6000 adhesive on both sides, except an inch or so at each sleeve end*

P8101138 by Mike McCrea, on Flickr

*OK, I screwed up at the very end on the chair bags; the bitter end of that webbing should be passed through the ladder locks on a buckle and then stuck back inside the end of the fabric sleeve. Just like on a manufactured dry bag, or the previous bags I made, with no loose webbing end left hanging free. I fixed that on my two chair bags, Doug will need to fix it on his.

I still do not have a replenished shop supply of high quality 1 inch webbing. I do have a several Thule cam straps that are wayyyyy too long for the rare occasions I use them. Cut to length, marked for webbing trapping sleeve fold over (leaving the ends unglued), Plumbers Goop nozzle for E6000 application.

Webbing sleeve E6000 glued and clamped in place. That glue job can sit clamped for a beer to two, and then I will iron the longer side flap and corner notch in place before attaching the buckles and gluing in the ends of the webbing into the open end of the sleeve. Beer break!

P8101141 by Mike McCrea, on Flickr

Beverages or not, I hate the waiting game. But I know better than to rush it.

Buckles tucked in place on the webbing, E6000 glued and everything reclamped for an overnight wait.
 
With the E6000 firmly glued into the webbing sleeve I ironed the long flap in place. The top closure of the bag is (nearly) done. The webbing is under the yardstick.

P8101140 by Mike McCrea, on Flickr

Gorilla tape reinforcement around the open end and dog eared grommets seated on the closed end.

P8101144 by Mike McCrea, on Flickr

P8111153 by Mike McCrea, on Flickr

Since those grommets are destined for some pull cord stress I painted a bead of E6000 around the grommet-to-cloth perimeter edge to reinforce and soften that transition.

P8101146 by Mike McCrea, on Flickr

As always, mistakes were made. I decided to throw a couple of stitches through the end of the webbing sleeve, as done with previous DIY dry bags. Broke or bent the first two needles I tried to force through. OK, I will just put the stitching through just the webbing, not the Packcloth fabric sleeve. Broke/bent two more needles trying to go through just the thick poly webbing and called it quits.

That thick 1 inch Thule strap webbing I used is heck to poke any needle through. Future bags could get thinner webbing, which has easily more easily sewable in the past. Since that Thule strap webbing proved unsewable (at least by me) I painted a transition bead of E6000 along the edges of the webbing sleeves and called it good. Could get, that glued webbing seems so well adhered, and eliminated any detested sewing need, that I will do the same on future bags.

P8101149 by Mike McCrea, on Flickr

Almost good, the bag needs a pull cord to retrieve it from the far up under the decks. I did not want to pull at just a single corner grommet, so a loop between grommets. Found a use for some of that black reflective line.

Done, time for a test fit. Actually two test fits. Er, eventually many test fits.

First what fits inside that bag clothes and gear wise? Those custom decked canoe bags are considerably larger volume than a 20L Sealline taper.

Our existing (earlier Sealline models) tapered bags, too narrow for the high and wide decked canoe stems, are 24 inches long x 35 inch widest point circumference (short squatty version) when rolled closed, and 33 inches long x 34 wide (long skinny version).

P8111151 by Mike McCrea, on Flickr

The DIY decked canoe bag, equally stuffed, came out 33 inches long x 44 inches at the widest circumference. It is far more voluminous than either Sealline taper, and much easier to pack.

I started test packing typical off season tripping clothes in that bag. And kept packing, and packing, enough clothes for a week or more. Starting with a pair of size 12 trail shoes at the wide end, couple tee shirts, pair of shorts, a weeks worth of underwear, wool socks and liners, wool gloves, winter hat, quick-dry UV pants and shirt, fleece tops and bottoms, capilene tops and bottoms, down vest, all 2XL sized. . . . still room to spare. . . . pack towel, more socks, bandana. . . . (Rain jacket and pants are packed easier to access)

And, the real moment of truth, how well does that tapered bag fit in/under the Monarch stems?

Tapered bag (slightly under filled) in the Monarch bow. Oh freaking my, I like that a lot; I could stuff in a little camp pillow for a fuller form fit

P8111154 by Mike McCrea, on Flickr

Monarch stern, just as nice and could be stuffed fuller.

P8111157 by Mike McCrea, on Flickr

What the heck, how does that tapered bag fit in the converted 1970s Hyperform Optima?

Under the high decked bow of the Optima. I stuffed in the glamping pillow in to better fill the bag voids, and there was still room to spare. More socks maybe.

P8111159 by Mike McCrea, on Flickr

Under the (also tall quite tall) stern deck of the Optima. Not bad, but again I could have stuffed it more full.

P8111160 by Mike McCrea, on Flickr

Well, heck, lets see. That bag fits in the 70s Klepper Kamerade, and even in the humongous 71 Old Town Sockeye if I stuff it to max full. I am not that good at calculating dimensions, or that smart, I just got lucky. One tapered end bag to rule all of the decked canoes, sized in length to leave half the deck covered area open for a sideways Baja bag, small barrel or soft side cooler.

With a weeks worth of clothes in one XL tapered bag I wondered what I could put in a second bag for the other stem.

Test pack number 3; that tapered bag swallowed a Hubba Hubba tent, Tundra tarp, day hammock, fake grass mat for the tent entrance or under hammock, Windchair insulating piece of Ridgerest with pokey stake bag rolled inside, extra lines, moccasins and still had room to spare. All of the bedroom and living room accoutrements in one bag.

I am pleased, in fact amazed and surprised, at how much gear packs into a properly tapered-to-size dry bag, an how much more room was provided in the boats without the voids left trying to arrange cylindrical dry bags in tapered spaces. Cylindrical dry bags under decks are like square pegs in round holes, or in this case round pegs in vee shaped holes.

FWIW, that decked canoe tapered bag, with the template strategically cut out placed along the running yard, used 49 inches of heat sealable fabric. At $8 a running yard for the Packcloth that custom bag cost less than $12, including the buckles, webbing, tape and glue.

Time to make one for the other stem.
 
Tapered dry bags for canoe stems?

Just for funsies I dropped that decked canoe tapered bag in the stem of an open canoe. As expected, that was an ill fitted nope

P8111163 by Mike McCrea, on Flickr

But, have seen how space efficient those custom fitted tapered bags are in the decked canoes, it would be no harder to make shorter, more bulbous ones sized for the ends of a solo canoe or the stern of a tandem

A more bulbous canoe-sized tapered bag would definitely benefit from some kind of harness or shoulder straps, and I have no idea how to accomplish that. Well, I have ideas for a simple webbing harness, but that would require sewing. Through webbing. Nope.

I do not do long portages, but sometimes a campsite is 100 yards away from the canoe, and just that short hike is a PITA with tapered bags.

Even the smaller Sealline Kodiak tapered bags are awkward to carry very far; they are long enough they drag on the ground if hand carried by the webbing straps, and the shape makes them problematic to shoulder carry while wearing a portage pack. Plus, the material on those Sealline bags is thin as heck, which concerns me when busting through brush or green briar with them in hand (not so much an issue with the Packcloth).

I do carry a cheap nylon day pack that scrunches down to the size of a softball, for explores afoot from camp. The decked boat tapers do not fit in that ancient thing, but I bet I can find a simple nylon daypack into which they will fit. That pack does not need to fit the whole tapered bag, just accommodate the wide end and maybe half the bag length.

A nylon day pack with a 44 inch top circumference and a drawstring top would be a perfect tapered bag toter. This probably means filling the DIY tapers to max stuffage with pillows and rags, and bringing them with me for in-store test fits.
 
Yeah, time for me to give this a try, too. Good winter projects. I have some gear that wants an odd sized bag and that's always best addressed as DIY. Shoe bag, tent bag (fitted to my specific tent), fishing gear, etc.

Thanks for the tutorial, Mike.
 
Holmes, I sent you a PM but I’m not sure I did it correctly. Let me know if you get it.

I learn something new with every DIY dry bag I make. Lessons learned, or reinforced, on the last batch of tapered bags.

Experiment with that tapered dry bag template, doing test folds on the two flaps before calling the template finished and cutting the fabric. Cylindrical bags are easier (still check the folds), tapered bags are more confusing at the open end.

The continuation of the taper angle, once folded inside the bag and ironed, is the mirror image of what I (continue to) think it should be, and needs to be angled and notched to fit inside the planned heat seal seam width on one side. Fold everything over on the template, see how it fits and make template adjustments as necessary before cutting the fabric

The open end roll overs on a tapered bag should not continue the tapered angle; leave 10” or so of fabric at the open end cut parallel, so the folds and roll overs are even. Tapered templates are exponentially trickier; I recommend making a simpler cylindrical bag before tackling any odd shapes.

Unlike a manufactured dry bag the DIY version does not have a circular bottom piece, they are more of a flat envelope. Dog earring over the corners on the bottom helps round off that end, but it’s still not exactly a circle, so leave some extra length. Duffle/wedge/taco bags eliminate some of that issue.

The correct length of webbing, to pass through the buckles, slides and/or Drings on either side and tuck back into the fabric sleeve is several inches longer than I (again, continue to) think it should be. Just cut the webbing wayyyy long and trim it to size (hot putty knife) after the closure hardware is place and you know how much left you need left to tuck into the fabric sleeve. The buckles should not be positioned tight against the fabric (look at a manufactured dry bag for a model).

I used wider but thinner nylon webbing on the big canoe stem taper. After having bent or broken several needles trying to push through the thick poly webbing from Thule straps I was dreading sewing, but on that big bag I wanted the webbing sewn together, not just glued in place. Even using thick poly thread the needle went through the webbing like a hot knife through butter, so quick and easy that I put 6 courses of stitching in place. That oughta keep the webbing together; that DIY dry bag webbing is not holding a boat on the roof racks at 70 MPH; thinner nylon webbing is fine.

I had sewn the webbing on some previous bags through both the fabric and webbing, which was tough sledding. No need, just sew the webbing together between the buckles and fabric. Another reason to not have the buckles tight against the fabric

Is was easier to make the template for that open canoe taper bag by inflating a shortie flotation bag and using that as a measurement model, adding the extra inches needed for the heat sealed seams and roll over top. My first attempt at a canoe stem template, despite measuring around the exterior of the hull at both the wide and narrow bag ends, turned out comically undersized and misshapen. I’m still not sure how I managed that template measurement mistake. Well, I have some idea. . . .

Speaking of mistakes, now it can be told. Pride goeth before every DIY dry mistake one could make.

I proudly considered myself so skilled and well practiced at making DIY dry bags that I thought I could treat myself to a couple beers and etc late in the day as I was finishing that oddball taco bag shoe bag. Meh, its not like I am running power tools and losing fingers.

Miscue #1. I ironed down the 1 inch flap down quite well. Except that flap should be sealed with the iron inside the bag, not on top both sides of the fabric (same thing with the long side flap). I did not know that the fabric could be ironed stuck together heat sealable side to non-coated side.

It can, provided you do a really fierce job with the iron. I discovered that ironing miss-orientation half way through heat sealing the seam. Having the open end ironed shut would not be good. “Oh crap, oh crap, oh crap, the bag is almost finished, what the heck have I done?”

Panicking, what I did next was stick my index finger inside the seam and run it along, forcing the just ironed, incorrectly stuck edges apart. Those edges are hot. Very freaking hot. Trust me, do not do that. Or at least wear gloves. It came apart cleanly enough, probably only because it was still very freaking hot.

Miscues # 2 through 4. On that late at night scrap bag I once again cut the webbing just barely long enough, and Sharpie marked out where the ends get glued back inside the sleeve. I then placed the webbing on the wrong side of my Sharpie marks. And glued and clamped it in place. Glue and clamped in place not only on the wrong mark, but offset, with (barely enough) 4 inches of webbing sticking out one side and 8 inches of plenty on the other.

That multiple miscue was incorrectly glued in place except the last two inches of sleeve on either side, where the bitter end of the webbing gets tucked inside and glued in place. It is easier to do that webbing gluing in two steps. Wait a bit for the adhesive in the middle to set up, have another IPA, squeeze some E6000 in that remaining 2 inch deep sleeve opening, install the buckles, cover both sides of the bag with wax paper, clamp the ends down tight and walk away.

Miscue #5. Passing by an hour later I noticed that I had missed an important step. While I had clamped the glued sleeve ends tightly closed, I had not actually inserted the webbing end into the sleeve, it was just dangling free waving at me as I walked by. On both sides. Fortunately I still had some working time with the E6000 and rectified that beery oversight.

Miscue #6. When installing grommets it is very important avoid interactions with funny lettuce, and to remember to place the washer piece atop raised grommet on the anvil before hammering things in place. Fortunately that lack of washer miscue pulled cleanly out of the melted hole.

Miscue #7. Do not attempt to iron Gorilla tape thinking that will help it stick better. Seriously Mike, what the heck were you thinking? Either call it a night and have another beer, or clean the black Gorilla tape smutsch off the iron.

None of those miscues ruined the bag, and maybe I will not make those mistakes again. “Maybe” because that was the second time I have neglected to insert the bitter ends of the webbing into the glued and clamped sleeve ends.

Those DIY dry bags are not difficult to make, but gawd there are a lot of sequentially incremental steps.

At least I did not rebuild an asymmetrical tandem canoe bassakwards, glue a foam seat in place facing the stern or step out to take a leak with wet epoxy on my fingers. Or get my thumb stuck in a pair of scissors for a half hour. I want to see that guy make a DIY dry bag, or at least see the video.
 
Got it, Mike - thanks.

And the wealth of your experience is incredibly useful. Thank you for posting it.

I used to have rather long hair and fifteen years ago I had to cut it dramatically during my first strip build. I was doing the inner seams on a long skinny kayak and got my 'tail' gooped up with resin. Didn't realize it until it had setup to a point past cleaning it up. The new haircut spoiled me in terms of grooming labor and I never grew it back out.

Now I'm old 'n lazy and wear a buzz cut!

In my younger days I had a ponytail down the middle of my back. At the time I lived in the attic of an old house with no air conditioning and only one small gable end window. It was a sauna in the summer, so at bedtime I tied my hair atop my head like a Troll doll. Occasionally I would forget to let it down in the morning. Nuff said.

I am with you on the old ‘n lazy buzz cut, usually a #3. $8 at the barbershop (er, ok, “ShearCountry Salon”, attached to the local country store).

Lately though my son has been cutting it for me at home using electric clippers. Last time we couldn’t find the attachments, so he just shaved my head. Turns out I don’t mind that look at all, and can go longer between haircuts.

The worst haircut I ever had was a similar to your wet epoxy encounter. I was trying to sneak under a low headroom road bridge on a hot August day. I barely squeezed under the bridge, but my head did not clear the dangling stalactites of road tar. A friend gave me a haircut at the take out using the scissors on a Swiss Army knife. It was not a pretty picture, although he seemed to quite enjoy the process, giggling maniacally as he tugged at the tar and clipped off bald patches.

Back on topic, another DIY dry bag consideration. The cardboard on the ironing table works great, but there is cardboard and there is cardboard. Some have corrugations that are plainly evident on both sides, some have a smoother, flatter exterior side. Use the latter type of cardboard, otherwise the fabric will seal over with a ||||||| ridge pattern.
 
Back
Top