• Happy National Bugs Bunny Day (1938)!❓⬆️👨🏼‍⚕️

Klepper Kamerad TS rebuild

Minicel, Dragonskin and contact cement day

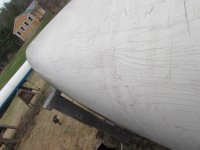
It was time to start on some of the comfort outfitting, minicel pads for bracing my knees, pads for my heels on the bottom and my toes on the rudder controls. This necessitated putting the Comrade on the test-sit pad on the shop floor and making some areas for minicel. The sliding seat meant that some of those pads be longer than usual.

12” long knee bumpers, rather than the usual 6” length that works with a fixed seat. A bit of band saw work and some custom Dragonskin carving and I had the necessary pieces made from a scrap box length of ½” minicel. I wanted real outfitting minicel for the knee bumper to provide some serious cushion for the pushin’.


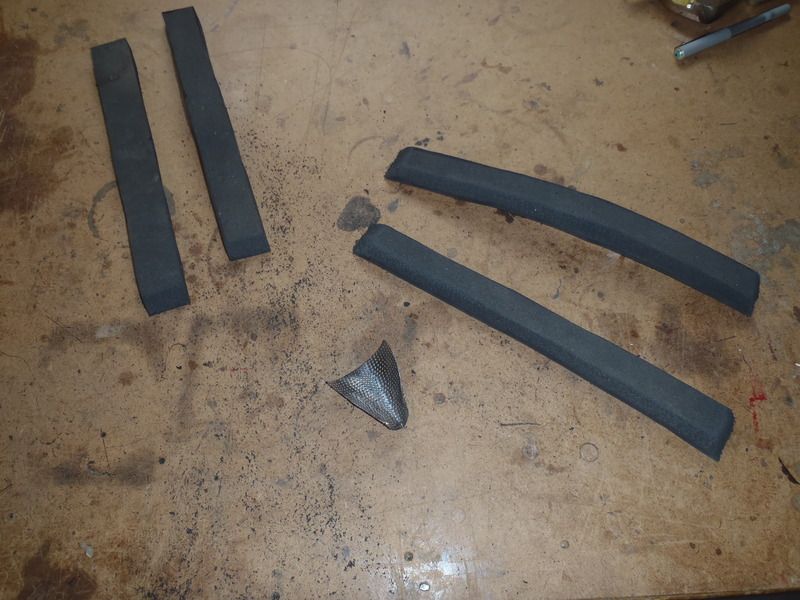
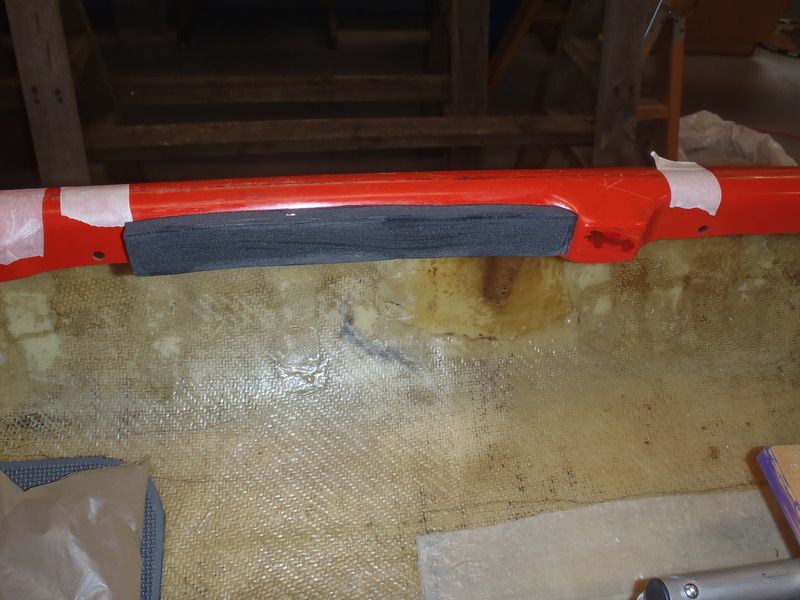
To get the knee brace spread I wanted an inch of minicel on each side, and I needed to cover the cockpit coming “dimples”, which stick out exactly where my knees hit with the seat furthest back. Two overlaid ½” thick pieces did the trick.


I’m a comfort wuss. Sometimes a barefoot comfort wuss. I want padding on the foot pedals as well. A couple of wee pieces cut from scrap exercise flooring will do nicely.


As a sometimes barefoot wuss I also want some padding under my heels. That padding is not only a comfort issue, it helps keep my heels or shoes from sliding when braced in a wet hull. In thin-skinned composite canoes I think of those minicel heel pads as a sacrificial layer; I’d rather wear down a couple bucks worth of minicel than a couple thousand in boat bottom.

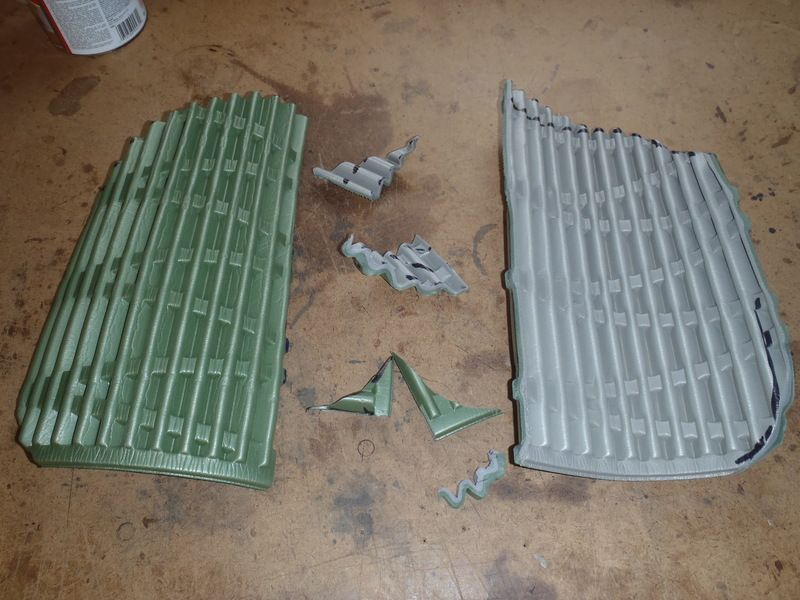
Those too were bigger than usual, 12” x 9”. Outfitting minicel is cushier than exercise flooring, exercise flooring is more durable (embossed side out) than standard minicel. I couldn’t bring myself to cut those oversized pieces from a virgin chunk of outfitting foam, so exercise flooring it was.

Oh, what the heck. While I was getting foamy and ready for a contact cement session I decided to install RidgeRest padding on the bucket seat. The Grade VI pad is plenty cushy, but it is one more thing I would need to remember to bring, and one more thing to install before launching. I know how bad my memory is, and how strong my urge to get gone and not have to futz with outfitting once I reach a put in.

I came up a tiny bit short for full seat pan coverage on the last remaining scrap of RidgeRest foam. Wabi-sabi good enough, and waste not, want not. And there wasn’t a lot of wastage. Two-tone Wabi-sabi, or maybe that’s Yin Yang; the RidgeRest scrap wasn’t big enough to cut into color matching sides.


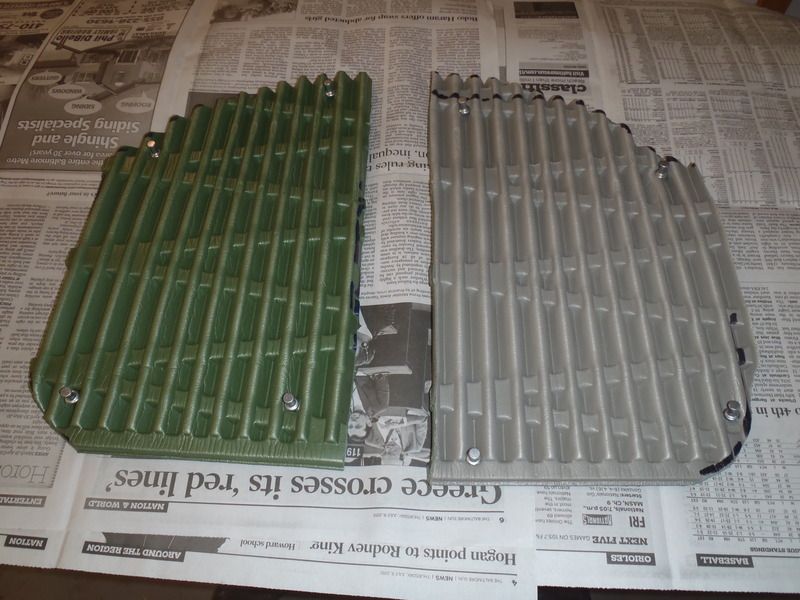
With all of the application areas cleaned with alcohol it was time to set the exhaust fan and make some contact cement stink in the shop.

Whole lotta gluing going on. The push pins in the RidgeRest foam are to keep it from curling up in between coats of contact cement. The usual timed multiple coats, three on the foam, two on the hard surfaces, dried ‘til just barely tacky, flashed with a heat gun, stuck in place and weighted or clamped in place.


I walked away overnight and next morning laid a bead of Plumber’s Goop around all of the minicel edges for a better edge seal and resistance to shear forces.
 
Time for some D-rings and pad eyes.

One D-ring on the floor below each deck. Those serve a couple of purposes; I can anchor flotation bags onto that ring or use it to tie in gear. Or tie off a pull string to retrieve tapered dry bags from deep in the hard to reach stems.

I had a bit of a dither – DIY my own D-rings, or use Northwater Double D pads? I had two of the latter in shop stock and I haven’t had one fail yet. They are a little ca-ching, but worth it.

Floatation bags necessitated some pad eyes under the decks. Those are double pad eyes, paired one atop the deck for paddle blade stuffage (the shaft of the paddle is held by a V of bungee off the utility thwart) and one under the deck for float bag clips. The bow deck under pad eye also got a cable clamp through which to run a length of bungee to self-center the foot pedals.

Six pad eyes and two cable clamps resolved float bag clip points, deck bungee and pedal bungee attachments.

I had thought that the sliding seat might require additional pad eyes spaces along the coming edge, but some measurement and testing produced locations that work with the ladder-lock straps adjusted for the seat all the way forward, all the way back and everywhere in between.

Four more pad eyes. I’m glad a bought quantity discount 100 of them years ago from TopKayaker to have as shop stock, and it may be time to reorder.

http://topkayaker.com/


I’ve got balls. And good quality bungee, and dressed the front deck with paddle blade keepers. I used the heat shrink tubing trick to dress the cut ends of the bungee.


The balls are there so I can stuff a paddle under without digging at the deck with the blade.


I wanted some attachments for webbing straps on the back deck to lash down a dry bagged sleeping pad or chair. I would use Nexus strap grommets, but I needed four and had only two left.

http://na.itwnexus.com/content/bottom-strap-grommet

Those I can DIY easily enough. Four short pieces of webbing, four nylon D’s and a hot 20 penny nail. Installed using wide flange foot brace rivets to help spread the stress on the webbing


Last task of the day, mix up some G/flex and glue the Northwater double D’s in place. Cover with wax paper and sandbag weights and walk away. Once the epoxy set those got a perimeter bead of Plumber’s Goop as well.


The float bags fit well enough, and between the D-ring, pad eyes and OEM holes in the cockpit coming I have a decent end cage. I’ll work on an easier and more elegant clip system off those anchor points, but I need to find another half dozen of my favorite clips first.


I have been procrastinating the installation of the rudder control lines, still cogitating the “How best?”. Before I tackle that puzzle the oversized rudder control line holes in the back deck need a flange epoxied in place so the cable tubing sheath fits snug and water tight.


While I was at tiny paint brush work I dabbed a bit of aluminum primer on the exposed pad eye rivet heads, so that I can paint them black-on-black. I usually dab them with vinegar a few times before painting. And the paint usually flakes off after a couple of years, so this will be a good test.
 
Ah, tiny paint brush work. The Comrade needed the Shop Gogetch. And of course a Duckhead sticker.


And a re-do on the underdeck cable clamps. I had a tiny sealed bag of two nylon cable clamps in a parts box, that bag sitting in a bin of a couple dozen cable clamps from an outfitter. I only needed two and grabbed those.

Those which proved to be nothing like the beefy outfitter version. After pop riveting them in place I broke one with a gentle tug. Crap, drill them both out and replace them with the real thing.

With all of the pop rivets installed I flipped the Comrade upside down on the tall sawhorses for the umpteenth time and laid a button of Plumber’s Goop on the exposed rivet shanks to protect float bags and gear.

With the float bags protected from possible puncture I could work on an easier cage clip system. Yeah, that’s better. Black cord for verticals, yellow for diagonals. 30 seconds to clip the float bag in place.


I discovered one missing pad eye. I want one a few inches in front of the bow cowling on top so that I can clip the storage cover in place. That way if it implodes from water or blows away at least it is still attached to the hull. Well, two missing pad eyes; I doubled them up with one underneath for another float bag or gear attachment point.


Those pop rivets do look better dabbed with primer and black paint.


How many pad eyes is that so far?
 
I've enjoyed reading your exploits with this restoration so far. I have an English made copy of the Klepper from the 1970's, called a Comrade II. You've got me thinking about sailing possibilities now!
 
I've enjoyed reading your exploits with this restoration so far. I have an English made copy of the Klepper from the 1970's, called a Comrade II. You've got me thinking about sailing possibilities now!

I can only hope that some of the shade tree boat tinkerer stuff is useful to other folks.

I haven’t yet had the Comrade out with a sail rig and rudder, but since it was designed as a tandem sailing craft I have high hopes that it will perform well as a solo sailing tripper with a gear load.

I’ll back awork on the Comrade in a few days. I just finished up outfitting a friend’s brand new UL Kevlar Wenonah Wilderness. Deck bugees, webbing loops, float bags, minicel knee bumpers, D-rings, reflective tape, etc.

33 lbs when it came into the shop, 34 lbs when it left (not including float bags and clamp-on portage yoke.
 
I have an English made copy of the Klepper from the 1970's, called a Comrade II.

Art, I should have taken the opportunity to say Howdy to another Kamerad owner. There isn’t a lot of information out there on the Kamerad TS, and probably not a lot of them still in use.

Do tell. What is the construction on yours? Same woven roving, Vinylester and gel coat? Does it still have under-coming floatation loaded along the sides?

Do you have a complete rudder assembly, with the pin-hole adapter piece?

And, most curiously, how does the rudder on your Comrade retract? Given the odd eye bolt appendages on the rudder housing there must have been some way to retract that rudder while underway.

Some of the obscure/out of focus archival photos of the Kamerad TS appear to show a clip and attached line gripping the edge of the rudder.
 
Mike, my boat appears to be constructed from similar materials as yours, but a more basic model. There is no rudder attachment or float bags( or means of attaching any) at the sides. I've fitted it with canoe airbags front and back. I'm still considering options for a rudder.These boats seem rare enough these days although there is the occasional advert on Ebay.de selling Kamerad TS.
 
The Wilderness outfitting came out well. My apologies for having no outfitting photos; friend Willie requires constant shop supervision.


With an open shop I was ready for rudder cables.

I knew I wanted to have the rudder control cables and gravity retraction line detachable from the housing and blade itself, so that the entire rudder assembly could be removed for transport. A couple of short eye bolts through the existing control arm holes provided easy attachment points. The best clips I have at hand are 10 lb S-biners for the control arms and a smaller 5 lb S biner for the rudder blade.

I don’t need an S-biner in that application. I need to find some stainless steel carabineers or clip 1 inch in length. I have 2 inch biners in SS, but it is overlong/overkill for this purpose.


I had been procrastinating until I had the tubing sheath for the rudder cable on hand. The good news is that the tubing fits perfectly snug in the flanges I G/flexed in place.

The better news is that the obvious place to run the tubing for the stainless rudder cable is through the remaining bulkheads, with a couple of cable clamps pop riveted in place inbetween. Easy-peazy, drill four tubing sized holes through the bulkheads, drill four more holes and pop rivet in two cable clamps between the bulkheads.


I like it. When I’m eventually done I should count the holes I’ve drilled in the hull. There’s more holes yet to come.

The cable clamps are tight enough around the tubing to prevent it from sliding, and I’ll add a dab of G\flex on either side of the bulkhead penetrations to hold the tubing uber securely in place. The tubing exit through the flange needed a final fitment touch. I heated the point of a dulljunk center punch with a torch and melted a bit of bit of flare in the exposed tubing end, also TBGF (to be G/flexed).


I surely wished I had shop partner Joel on hand. He has installed and replaced hundreds of rudder cables, and makes it look quick and easy. It still makes me slightly “Don’t eff this up” anxious.

With the SS cable in slid through the tubing I secured the rudder held straight


And clamped the sliding foot pedal bar in the track so they couldn’t move. Even when an extra set of hands is available clamping those movable parts is best for assurance that nothing slides during the cable installation.


Two swedges and two pieces of heat shrink tubing on each cable. Loop the cable around the bolt on the end of the foot pedal slider, pull taut, back through the swedge, crimp it and heat gun a piece of shrink tubing over the swedge. Pass the free end of the cable through the second swedge, crimp it, cut the excess cable and heat shrink another small pieces tubing.


Rudder cable installation isn’t difficult or especially time consuming, but like everything else rudder installation wise it is finicky. Phillips head, swedges, heat shrink tiubing, crimper and cable cutters, heat gun. Save the cut off lengths of SS cable for possible field repairs.

Installing the deployment line on a Kruger-style gravity rudder is easy and straightforward. A single pull line on some pivot point high on the rudder blade run alongside the cockpit rim and through a close cam cleat.

I’m right handed, so positioned on the right hand side. And a little behind me; the bitter end of that rudder line gets a drilled ball, in part so that the line can’t slip fully out of the closed cleat and in part so that I have something easy to grab with cold, wet fingers.

Easy and straightforward. Or not, due to the Comrade rudder and deck the retraction line crosses tightly against the stainless rudder cables. It wouldn’t take a lot of rudder action to start sawing through that poly line.


Another drilled wood ball for some anti-sawing elevation on the rudder line did the trick. As usual I installed a pad eye as a rudder line guide mid-way on the stern deck., which helped hold the elevation ball in place

With the closed cleat installed (SS machine screws, washers and nylocks) I ran the line through the cleat and tied off yet another ball, leaving enough slack for the control line to fully deploy. The Comrade has balls; four of them.


I do like having a supply of drilled balls for sundry outfitting purposes; the plastic ends of a bungee ball work well, but I kind of like the wood ones, available in most crafts stores in a variety of sizes. I just dip them in varnish and hang them to dry a few times.

Not too Wabi-sabi. The foot pedals and retraction line all function well. The rudder retracts to near 90 degrees, and drops with a resounding clank if I release my fingers from the line/ball.


One last rudder task, or two.

When the rudder housing and blade come off for transport I need some place to hook the SS cables and retraction line, ‘cause those are permanent installs. An SS pin through the top gudgeon with a split ring will do until I find a proper size SS eye bolt and nylock. And a place to install that transport part on the boat when not in use, so it is always there when I go to rack the hull.

And I installed bungee from the front of the slider pedal bar through the underdeck pad eye I previously installed, so that the pedals self-center when I remove my feet. Time to flip the Comrade upside down on the tall horses for some inside work. How many times have I flipped the Comrade from rightside up to upside down?

And how many holes have I drilled in this hull?
 
How many times have I flipped the Comrade from rightside up to upside down?

And how many holes have I drilled in this hull?

I dunno how many times I have flipped the Comrade upside down or on its side, but I think that’s it for drilling holes in the hull. Time to count.

28 holes drilled in the hull.

Time to flip the Comrade back upright and get started on the utility thwart. Not really “in the hull”, but that sail thwart gets another 14 holes once it has been glassed in place.
 
Oh boy oh boy oh boy, my favorite and most peculiar part of outfitting. Shaping, installing and dressing the utility thwart. I found a piece of hardwood in the scrap pile that would fit. I don’t know what the wood it is, but it’s got tight, straight grain. 5 ½ inches wide x ½ inch thick. And heavy as heck for its size, but weight has long since ceased to be an issue on this rebuild.

Cut to shape to fit between the coming sides a comfortable distance away from paddle swing rang in front of the seat, quarter round the edges with a router and sanded smooth.

A test fit, resting on an installation platform, making sure I left enough gap between the butt ends of the thwart and coming edges to slide it into position with pieces of epoxy saturated kevlar felt stapled to the ends. That’s the first adhesive hold, just to keep it in position so I can lap some cloth between the thwart ends and coming edges top and bottom.


Before I epoxy anything I needed a trip to the cutting table to cut the kev felt, glass and peel ply to size. And I needed to paper the inside of the hull; if case I got sloppy with the epoxy I really didn’t want to drip it into the foot controls.

Staple the kevlar felt to the butt ends of the thwart, saturate with epoxy and slide it into place atop the platform. Walk away.


The epoxied felt is there only to hold the thwart firmly in place when I lay the cloth, and to take up any Wabi-sabi fitment issues between the thwart edge and coming and I can remove the platform once firmly in place


A couple pieces of 2 inch tape epoxied across the top with peel ply. Red pigment in the epoxy mix; the coming is red and I’ll paint the thwart to match well enough for the colorblind. Walk away.


I flipped the hull (tall sawhorses again) and lapped the bottom side of the thwart the same way. Another case where the extra tall horses paid dividends in being able to comfortably face my work. Walk away.


Back upright on regular sawhorses. I wanted to drill and install all of the utility thwart hardware so I could seal the holes (hardware back off after fitting and drilling), and then do the final sanding and painting on the thwart.

The utility thwart is a necessity to hold the base mount for a Spirit Sail.


The utility part comes with the addition of an open cleat to keep the bo line near to hand, J-hooks for a deck compass (a huge boon when sailing), J-hooks to complete the paddle keeps and a run of bungee for miscellaneous stowage.


Even a 5 ½ inch wide thwart gets crowded, and various bits and piece require custom positioning to be functional.

Add eight more holes to the hull drill count for the pad eyes to anchor the paddle keep bungies. 36 holes drilled in the hull. Wait, I forgot to count the gudgeon holes. 44 holes drilled in the hull.

The vee of bugee off the utility thwart holds the paddle shaft securely aside the coming lip, while the deck dungee and ball holds the blade. Properly secured the paddles are not going anywhere. Improperly secured, which would take special talents, and they might float off down the South River.

The webbing loop on the paddle keep bungee provides something easier to grab than taut bungee with cold, wet fingers.


With all the holes drilled everything came back off and I sealed the holes and prepped for a primer and painting session.
 
The paint session turned into something more than just the utility thwart. There were 8 more pop rivet heads to primer and dab black from the newly installed paddle keep pad eyes. I should probably wait until the last of the outfitting has been installed and then do those all the exposed pop rivet heads at the same time.


The unsightly rectangles and wedges of blacked-out or red tinted repairs on the decks were a bigger painting challenge, and needed some decorative touch. Something seventies, befitting the vintage of the boat.

Flames!

Carbon paper transferred outline onto wide painters’s tape, with the flamage part razored out, primered and spray painted black.


My frugalness got the best of me, and instead of grabbing the full, unused can of black spray paint I tried using up the last remains of two 1/8[SUP]th[/SUP] full cans. Aged, mostly empty spray paint sucks. I wasn’t expecting the clog, splatter and blowback, and one of my few unstained tee shirts now sports micro polka dots.

I used up the spitting remains of those cans on the outside sawhorses. The foot ends of those have received excess epoxy from various rebuilds, and some crappy black enamel will help protect UV the resined ends.

I didn’t like the squareish front edge that remained on the repair hiding flame bars, those needed a little swoop. Or maybe I just have too much time on my hands. And too much old spray paint on my fingers.


When I did get around to priming and painting the utility thwart I was again stymied. The only primer I have for oil based enamel has a 12 to 16 hour cure time. More walk away time.

Of course the paint color isn’t close to the same red, but Wabi-sabi good enough. I’m at the waste not, want not stage, trying to use (or use up) what I have on hand in the shop. Despite the primer the utility thwart needed multiple red enamel topcoats, with walk away dry times inbetween.


That’ll do it for that old can of red enamel paint, and it can join the two unruly and now empty spray paint cans of black on a dump run.

With the thwart hardware reinstalled I can move on to wet sanding the bottom for the third and final time and priming and painting the bottom.
 
Priming and painting the bottom

I wet sanded the bottom again, until any gloss from the last coat of epoxy had been removed. Rinsed and alcohol wiped, again. Taped and papered, again. And turned to what primer and paint I had available. Again.

I’m still in the use it up with existing materials stage and have several choices in bottom paint. One being some Inter-lux Interthane Plus; but less than a half-pint of white, a wee bit more in light blue and an unopened pint of clear. That is good and expensive stuff, but I want a white bottom and if I mixed them to have sufficient paint I would have a very light blue.

That is probably a popular color in men’s board shorts from REI, but not a product and color I would not want to match to cover future scrapes and scratches. I’ve looked at those cans of Inter-lux on the past several boat rebuilds and put them away every time. I gotta use it up someday, at least the unopened clear, if only to create shelf space.

White paint on white bottom won’t show scratches as badly. I had a full and half can of white gloss enamel Rust-oleum, an easy to find and color match product. And half a can of white spray primer. Another can of primer and I should be able to cover the white bottom up to the seam line.

The spider cracked white hull bottom has been (weeks ago) rolled and tipped out with two or three G\flex and 105/206 mixture layers, chemically adhered with the previous coat still green. Four layers at the Dynel skid plates. White primer over that, then white enamel paint should gave me a white on white on white layers, and the inevitable scrapes will not show as badly.

And, of frugal course, I had barely enough primer, and not quite enough white spray paint. I sprayed the cans to exhaustion but the bottom remains splotchy glossy/flat, and could really use a second coat of white enamel. Which means buying another can of white spray and waiting anther 48 hours to top coat that spray. If I wasn’t in cheap mode I’d have bought another can of white while I was at it.


Much as I’m getting psyched to finally paddle this boat with completed comfort outfitting, rudder and sail, the hull is already washed, wet sanded, taped and papered.

Part of me wants to say “Screw it, it’ll pass the 30 foot test and I’m not going to see the bottom while I’m paddling it”. But one more can of white enamel should serve to gloss the entire bottom.Second can of white enamel. Much better and well worth another $4 and 2 day wait.

I wanted a project that could last all summer. This be it.
 
Time for some seam tape. I have a virgin roll of 1” black Gorilla tape and a couple of quarter rolls. I have used Gorilla tape as seam tape on several decked boats and it works fine, especially if hit with a heat gun immediately after application and smooshed down firmly with a soft rag.

Measuring around the seam I found that I needed 16 feet 2 inch per side, or a little over 32 feet to warp the entire perimeter. I have 1 inch Gorilla tape in a 30 foot roll. One roll won’t wrap the entire seam, so I’ll need to install a short length around the stern first, and then lap over that with the full 30 foot roll.


Easy peezy. The most time consuming part is heating up 2 foot long sections of tape and pressing them firm with the cloth. I’m not actually getting the tape hot, just warm, and could probably accomplish the same surety of adhesion with some close up inspection and simply pressing the cloth into any visibly suspect areas.

Seventeen heat gun sections later and the tape is as stuck as its gonna get. I am always amazed at how much better a cockpitted hull looks dressed with that simple black transition line.

I knew the painter line holes would be covered by the seam tape. I wanted them both accessible, although I plan to use only the bow hole.

The cleanest and simplest solution seemed to melt a hole through the tape with the taper of the sacrificial center punch and re-seal edge hole edges with tiny batch G/flex.


For tiny batch epoxy disposable plastic shot glasses (Hefty Mini-Me cups) and disposable WalMart “artists” paint brushes (30 each for 97 cents) are hard to beat.


While I was at tiny G/flex work I laid a bead on the exposed ends of the seam tape to prevent it from lifting.
 
Getting close, just a couple little things before the outfitted Comrade can go out for another test paddle.

It needs a deck compass on the utility thwart. The decked canoes all have a utility thwart, with J hooks spaces to attach a deck compass. So do most of my open canoes. Except for the Sea Wimp utility thwart, where I was too cunning for my own good and installed a curved utility thwart.


The Wimp has a deck compass strapped to the bow, which is much further away than on a closed cockpit boat. I find it awkward for visibility past the sail, and I like having the compass close at hand immediately beside the map. I end up sticking a Silva under the thwart bungee for more convenient map reference.

The easiest deck compass for thwart installation I have found is the Suunto Orca-Pioneer. Those are as easy to install as popping out the plastic mounting place and tying in a sized loop of bungee to hold them tightly between the J-hooks

Selfish to say, but I have only one Orca compass amongst the family hulls, and daddy gets it. We do all carry a compass, but the size and shape of a deck compass is appealing, especially when holding an ideal sailing angle in the wind.

I couldn’t find a black Suunto at a reasonable price. I did find a yellow one on sale. I’ve got black utility thwarts and red utility thwarts. I don’t much like the yellow on red, but it will have to garishly do.


While I was tweaking the fit out I realized that it would be helpful to have someplace in the boat to attach the pin and ring that is used clip the rudder lines in place on the naked gudgeon when the housing is off. I don’t want to be remembering where I put that every trip, and I’d like to have it always at hand near the stern.

Another cable clamp. Another hole. Another pop rivet head to primer and paint. I REALLY should wait ‘til the end and do all of them at once.


It is starting to look like a semi-attractive functional boat.


All that is left is painter lines and I can finally get the Comrade out on the water with rudder and sail.

I use my painter lines as rooftop bow and stern lines. If I need 30 feet of painter line for awkward camp landing conditions I’ll add them. The easiest way to size the lines is to put the Comrade on the truck racks and see what’s what in length.

I want the bow line to reach a bit further back than my seated position, so I can grab some excess rope, extracted in hand from the keeper cleat and thwart bungee when climbing out. But I don’t want it so long that I have 6 feet of extra painter to dangle deal with when tying down on the roof racks.

Well, shucks, if the Comrade is going up on the roof racks for painter line sizing I might as well rack Opie and plan a test trip with rudders and sails. Susquehanna Cold Cabin put in on the upper Conowingo pool

There is some interesting stuff in the area; Muddy Creek and the ruins of the old aqueduct from the Susquehanna and Tidewater Canal, historic stone canal buildings and the vestiges of water diverting dams and channels on side streams.

https://en.wikipedia.org/wiki/Susquehanna_and_Tidewater_Canal

Mount Johnson Island, a historic Bald Eagle nesting area cited by Rachel Carson. There are worse dammed waters to see in the middle of the east coast megalopolis, and a lot of history on that long abused river.

Great read:

http://www.amazon.com/Susquehanna-R...F8&qid=1439484298&sr=1-1&keywords=susquehanna

Time to rack some boats.
 
Test trip number 2

Opie and Comrade


I had planned a 10 mile down lake sailing run, complete with two vehicles and shuttle. The forecast was for an ideal 10-15 MPH NW wind. And then abruptly changed my mind just before departing in favor of a no shuttle into the wind and sail back trip.

We arrived at the put in to find that perfect wind direction was as predicted, but the Stars and Stripes flying at riverside camps were standing straight out and a steep chop was blowing down lake. I don’t recall what that is on the Beaufort Scale, maybe a Fresh Breeze inland.

With the river valley funneling that ideal wind angle we would have been at the take out in 2 hours tops, without paddling a lick. Something about a 4 hour road trip and shuttle wouldn’t have made sense.

Into the wind we go, and I immediately discovered things about the Comrade. The foot pedal are mounted high enough that an additional piece of minicel heel foam would be advantageous, especially for anyone not clomping around in my size 12’s.

The Comrade is trim sensitive. Even with the hull slightly bow light the bow plunged through choppy waves instead of riding over them, although the high peak of the bow cowling shed all of the wash over and the boat stayed dry inside.

Sliding the seat back to further lighten the bow helped rectify that immensely. The choice of a sliding seat was either lucky or wise.

The Comrade is not in the least rudder dependent, except when sailing. Which is a good thing, because that giant rudder created noticeable drag. I had minimal gear in the boat and found the Comrade is plenty stable even lightly loaded, but I had the impression that the high seat position, exposing more of my bulk to the oppositional wind, also created more drag.

It may also have been that I had a young, strong son paddling the Opie into the wind beside me (and soon ahead of me), making it look easy.

As expected the Comrade shines under sail, but as is often the case, we were the wind killers. We beat into the wind and chop for 5 or 6 miles, exploring some tributaries and island complexes before stretching our legs on a sandy beach and turning to sail back.


Hop in the boats, put the sails up and 100 yards later the wind died to a light breeze. We noodle downlake at barely paddling speed for a while before taking the sails down and continuing an inter-island explore. The wind picked back up, we put the sails up again. And the wind dropped again.

One huge advantage of the Spirit Sail is how quickly and easily to goes up and down and stores away at the ready. In variable wind use I don’t break the sail battens down and put it in the storage bag, I just furl it and stow it to one side under the deck bungee and utility thwart paddle keep so it is ready in seconds when the wind picks back up.

We had the sails up and down a couple of times, and finally did manage a decent steady breeze back to the launch, but the flags were droopy, not stiff in the breeze.


And, of course, as we were loading the boats, the flags snapped back to full attention. If you want calm waters, bring a sail.

The Comrade needs a couple of small tweaks, taller heel pads for better foot position on the pedals, and the foot pedals are overly stiff. I never silicon sprayed the slider tracks for ease of motion.

Which was a good, and I will claim intentional, oversight. Silicon spray is the very last thing I want to do on a rebuild/outfitting. The aerosolized silicon spray gets on everything and is contraindicated for any paint or glue adhesion. I can bulk up the heel pads with another layer of minicel before spraying the tracks.

The Comrade is absolutely the best of those seventies decked tandem conversions for single blading, which was my rebuild design intention.

The Optima is still my all around favorite. High decks for gear storage ease, smallest cockpit/longest decks of any of the tandems and the bow layout handles waves and chop wonderfully.

Those seventies decked tandems are all very different when converted to soloized decked trippers. I need to get a dedicated bent shaft single blader in the Comrade for test trip number 3. And get it out on a trip with a gear load as number 4.
 
Those Seventies Decked Tandems

I admit that I have a problem – I enjoy converting those seventies decked tandems into solo sailing trippers. The Klepper Kamerad TS was number 4 in the conversion line. Number 5 counting DougD’s Cadillac conversion.

MadMike is an enabler.

All of these were originally tandems in the “European touring style canoe” realm and all had incredibly uncomfortable 70’s seats, outfitting and absurdly crude rudders. Gut the hull and start anew for an open water gear hauler with sail and rudder.

Top to bottom (and left to right)


Old Town Sockeye (The Sea Wimp)
16 feet 5 inches long x 31 ½ inches wide, 13 ½ inches deep at center, cockpit 81 x 20 ½ inches. Gel coat and woven roving. I have seen a total of two Sockeyes for sale.
Heavy as heck, but very well constructed. A voluminous gear hauler, paddles well and sails even better. Still my favorite in terms of sheer day long comfort.

Phoenix Vagabond (The Rambler)
16 feet 5 inches long x 29 inches wide, 10 ½ inches deep at center, cockpit 92 x 20 inches. Pigmented glass and nylon. Still manufactured.
The weight is nice, and the hull has some slight but continuous rocker, so it is nimble. The low 10 ½ inch center depth and very shallow stern make it wet in steep following waves. Happiest with a lighter weight paddler or smaller and well-trimmed gear load.

Hyperform Lettmann Optima (Opie)
16 feet 5 inches long x 29 inches wide, 11 ½ inches deep at center, cockpit 77 x 18 ½ inches. Pigmented glass and nylon. I have seen two, DougD owns the other one.
There is some shared history between the Vagabond and Optima, and the length/width is identical. And yet the Optima is by far the superior tripping boat .With deeper stems and higher decks Opie for shines when hauling a load or padding in waves and chop. Unquestionably my all-around favorite of the soloized seventies decked boats.

Klepper Kamerad TS (Comrade)
15 feet 11 inches long x 30 ¾ inches wide, 12 ½ inches deep at center, cockpit 90 x 19 ½ inches. Woven roving and gel coat. I have seen two, both thanks to MadMike’s searching eye.
Heavy as heck, built like a tank and a mofo to soloize. The only one of those 70’s hulls specifically designed for sailing. My initial impression and criticisms after a daytrip paddling and sailing in wind and wave are above. I like it, and if I was a dedicated single blade user the high sliding seat would make it my boat of choice.

Now I have a hankering to get those four seventies boats out for a paddle and compare sailing tip.
 
Last edited:
No Title

Due to Mike's computer/internet skills I am posting these pictures for him of the what the Comarade hull looked like when it was picked up. Pretty nasty. I think he made a turd look like a rose when it was all done with! Kudo's Mr. McCrea!
 

Attachments

  • photo2775.JPG
    photo2775.JPG
    99.9 KB · Views: 0
  • photo2776.JPG
    photo2776.JPG
    81.7 KB · Views: 0
  • photo2777.JPG
    photo2777.JPG
    102.7 KB · Views: 0
  • photo2779.JPG
    photo2779.JPG
    98 KB · Views: 0
  • photo2778.JPG
    photo2778.JPG
    85.8 KB · Views: 0
  • photo2780.JPG
    photo2780.JPG
    85 KB · Views: 0
  • photo2781.JPG
    photo2781.JPG
    106.7 KB · Views: 0
  • photo2782.JPG
    photo2782.JPG
    122.7 KB · Views: 0
  • photo2783.JPG
    photo2783.JPG
    97.4 KB · Views: 0
  • photo2784.JPG
    photo2784.JPG
    90.1 KB · Views: 0
  • photo2785.JPG
    photo2785.JPG
    79 KB · Views: 0
Due to Mike's computer/internet skills I am posting these pictures for him of the what the Comarade hull looked like when it was picked up. Pretty nasty.

I hadn’t looked at those before photos since I started the rebuild. Doug had sent photos of the Kamerad soon after he picked it up for me. I had yet to see it in person, but my first thought was What the heck have I gotten myself into?

Little did I know that refurbishing the inside of the hull would require more work and more new-to-me stuff than repairing the massively spider cracked bottom.

There is a peculiar satisfaction in taking a dumpster-ready boat and turning it into a functional open water sailing tripper, and the Kamerad was the most challenging rebuild yet.

And also the most educational; I got to try some new techniques, ponder and resolve new difficulties and learn new things along the way. If I had seen the hull first I would probably have passed.

I’m glad I didn’t.
 
Back
Top