• Happy Pawpaw Festival in Paw Paw, WV! 🌳🥭⋒

Kite +6%

I've been thinking about the double layer thing quite a bit lately. My first Osprey, which saw several thousand kilometres of tripping over the course of a decade was built with one single six ounce layer of regular fiberglass, inside and out. It saw some very rough usage, had some bad dumps in whitewater, and did get quite a few superficial repairs. Since then I've always put a football on, but I'm thinking that unless you are going to beat the heck out of your canoe, why bother?

I would agree with this. I nearly always put in extra layers somewhere, and it now seems to be the thing to do, but the vast majority of cedar strip canoes have been built with 1/4" strips and a single layer of 6 oz cloth and they work great.

I haven't done the math but I'd guess that 1/4" strips with a single layer is lighter weight than 3/16" strips with an extra layer to add stiffness. I've built boats where I used thicker strips on the bottom (where I wanted the stiffness) and transitioned to thinner strips on the sides.

Alan
 
Twice over the years, the double layer would have been the "Stitch in Time"
Once, on a friend's canoe, that developed a small split, in the keel.
This was in the BWCA. Duct tape got him home.
The other time, was a guy, that decided to climb into one of my Wee Lasse strippers, while sitting on dry ground.

I heard the crack. When I got her home, I gave her an extra layer, over the football.
Two lessons learned. Don't let people climb into my canoes on dry ground. and double layer for longevity.
My $.02 worth.

Jim
 
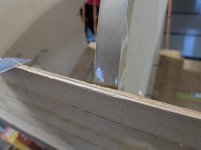
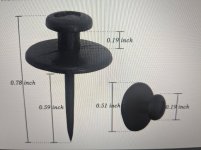
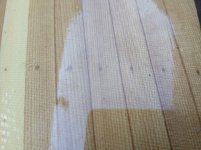
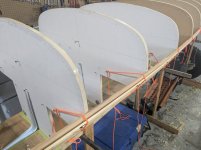
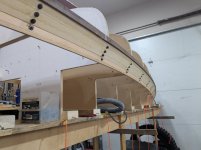
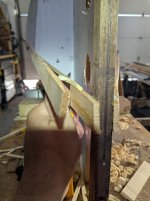
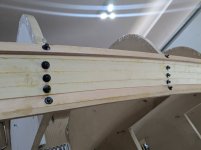
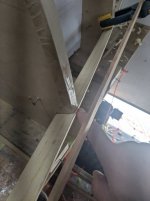
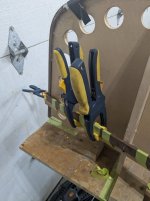
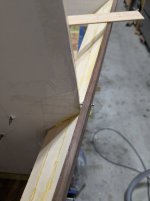
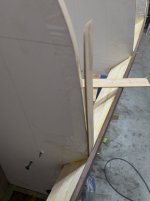
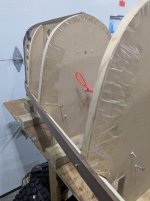
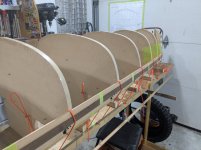
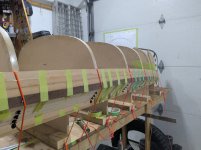
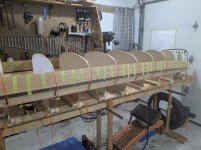
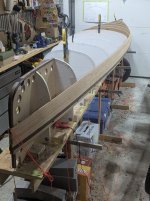
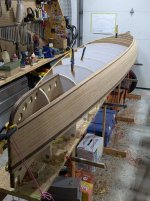
So today I moved away from the instructions. When I was deciding whether to use the yellow cedar or not I came to the conclusion that it would look best framed in. That was one of the reasons I was hesitant to use it. I tied a test strip into place for reference. After getting it secured end to end I put a pencil line down the inside of the test strip. I used a razor knife to knock the big chunks down before switching to my hand plane and shaving down the rest. I put the test piece back up and and worked on fitting the ends. The ends were tricky because of the tumblehome tapering into the hull. This makes the plane stand off the last bit. I found a razor knife worked best for shaving it down. I tried scraping and sanding first but they didn’t work as well. I also learned that if you fumble your knife just let it fall... After getting the ends to an acceptable level I swapped out the test piece for the oversized walnut accent strip. I had to drill it and pin it before spending some more time working on the ends. It still needs some more fitting on the ends but it’s almost ready to be glued in.
 

Attachments

  • 20.jpg
    20.jpg
    109 KB · Views: 10
  • 25.jpg
    25.jpg
    98.6 KB · Views: 11
  • 24.jpg
    24.jpg
    101 KB · Views: 10
  • 23.jpg
    23.jpg
    105.6 KB · Views: 9
  • 22.jpg
    22.jpg
    73.8 KB · Views: 8
  • 21.jpg
    21.jpg
    74.8 KB · Views: 9
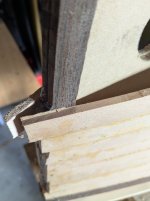
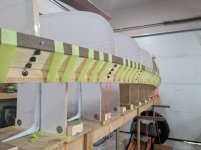
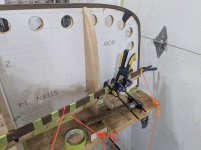
It took a fair bit more work today on the ends to get the walnut sitting well at the ends. I used my oscillating tool with a sander head to help me fit it tighter then a final shave with the razor knife. When I was ready for gluing I was able to just slide the walnut back 3/32 on the nail to run a bead of glue in the gap. I used tape to keep it fitting tight to the existing wood between stations. I started at the bow, glued two stations worth then applied tape. This allowed me work slower and not worry about the glue setting up. I went for lunch and came back to discover the nail in the bow stem popped out and the tape let go. There was a big gap between the yellow cedar and the walnut. I was able to pull it back and scrape out what glue I could. I re-glued it and added some clamps for good measure. I'll know once I sand it.

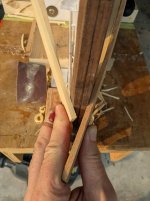
After it dried and took off the tape I could see I had a few gaps between the walnut and the stations up to 1/8”. I had some cedar laminations on hand so I cut some pieces and sanded them thin to fit. I would have used tongue depressors but I only have a few. After taping the shims in place I played with the Robo bevel a little then test fit a strip. It looks ok, tomorrow I get to start planking.
28.jpg29.jpg30.jpg31.jpg32.jpg33.jpg34.jpg
 
It took a fair bit more work today on the ends to get the walnut sitting well at the ends. I used my oscillating tool with a sander head to help me fit it tighter then a final shave with the razor knife. When I was ready for gluing I was able to just slide the walnut back 3/32 on the nail to run a bead of glue in the gap. I used tape to keep it fitting tight to the existing wood between stations. I started at the bow, glued two stations worth then applied tape. This allowed me work slower and not worry about the glue setting up. I went for lunch and came back to discover the nail in the bow stem popped out and the tape let go. There was a big gap between the yellow cedar and the walnut. I was able to pull it back and scrape out what glue I could. I re-glued it and added some clamps for good measure. I'll know once I sand it.

After it dried and took off the tape I could see I had a few gaps between the walnut and the stations up to 1/8”. I had some cedar laminations on hand so I cut some pieces and sanded them thin to fit. I would have used tongue depressors but I only have a few. After taping the shims in place I played with the Robo bevel a little then test fit a strip. It looks ok, tomorrow I get to start planking.
View attachment 149103View attachment 149104View attachment 149105View attachment 149106View attachment 149107View attachment 149108View attachment 149109
You have discovered the problems involved keeping the strips tight to the forms.
There are more to come.
Good luck !

Jim
 
Mike,
You're sure moving right along...
I can't quite tell from your pics how that accent strip works relative to the crease.
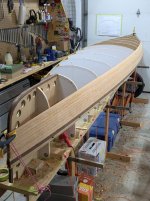
When I strip built my Kite (2014, had to look back at mt photos) I followed the build guidelines. Specifically, I stripped the crease, extending up beyond where the hull profile blends in. The next strip nearly falls into place against the crease profile, making for easing stripping and plenty of material at the crease for blending and radiusing.
easier to see than explain...
I even added some temporary guide rails, to keep the crease strips in profile as they extended up beyond the forms.
The pics that I have from that stage of the build aren't ideal, but in the last one below you can see the crease strips extended beyond as described.

AP1GczPRiDSsb5ccmhPn7rP06pedHDfPfYYYYEoO6CJxtDKSFQpaJmSVu0VSfMb9tMOcxnEgV6lA5TIPoGZi0CYljxI5Q4KrmHO80nfN23DJxVd8jGt-Ikq6VkLbiBwnuM0AQLYhq4y8YtN3E9PUQBstxuto8w=w1339-h896-s-no


AP1GczNl57aV1Aq2vcCr9RySWqW5kazufD--dI1GVnMmhsHqYuGSi69FJroimOtkcbQTmiX0Z2-Q1NN_1GopoSI8FJ9SuBKoIpM8NaWew_DEq9D4dYnzCGuUdzL1KChfWma2q5eMbHIy4IfcnLQ-UAYiJZmL_w=w1339-h896-s-no


AP1GczO2-tpRWXPQccGcwndJdg5X6Y30IPuaBx6k578o1IUyWCAXPgKBlSSVDGRiqqZk6FJdIPwq81M3lzE6otYYwUwQPPzwKcHeAbqIYFQxfGW8S9_-24xKraehftUQ9diFvxmIOdY6Ye7AX6MLQqFjLGapmQ=w1339-h896-s-no
 
SG, my wife is away right now so I'm free to put the hours in. Like you mentioned before the plans come with very good directions for stripping. The reason I varied from the directions was the colours I chose. The instructions with my wood choice would have the yellow cedar all the way down the tumblehome section and draped over top of the walnut. The yellow cedar would be the corner. The way I did it the yellow cedar transitions to walnut and the walnut will be the corner edge being rounded over. It will be a very long exposed joint that the eyes will be drawn to so I'm really hoping it's a tight fit. I just thought the yellow would look better captured.

I should have stated at the beginning that I'm hoping that this will be a quick build. I pushed an ongoing project to the side and had to relocate everything that lives in the garage. Once I get the hull varnished it will have to wait until mid October when I can pick up the aluminum gunnels.
 
Last edited:
Back
Top Bottom