• Happy Weed Appreciation Day! 🌱🌿🌻

Installing a new Wenonah foot brace in a ‘94 Prism

Joined
Nov 25, 2021
Messages
782
Reaction score
607
Location
Florida
Long version is here: https://bushcraftusa.com/forum/thre...ff-my-boat-repair-or-replace-replaced.316284/

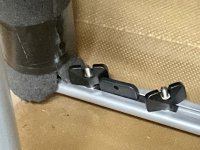
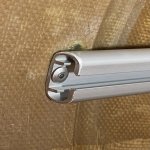
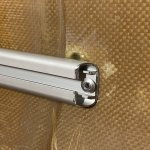
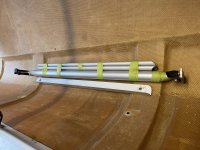
I replaced the old style L-bracket and wing nut adjustable foot brace with the new style sliding Wenonah brace. Now I’m left with 4 holes from the old style brace to plug (yes it would have been easier to plug before installing the new brace). After reading about the potential to melt holes in boats with large amounts of epoxy and high curing heat, I’m a little worried about pulling my own stupid human trick. Are Kevlar boats susceptible to this or is it just the royalex and plastic boats? If epoxy is a bad idea, what would you suggest? Good ol’ 5200? If epoxy is fine, I have Gflex 650, is that compatible with my hull?
00C0BA17-DF48-4B5D-9C35-A843158EA7C7.jpeg

Thanks for the help!
 
Last edited:
You'd need a lot more epoxy and heat to start melting things than what this will require. I'd thicken some epoxy and mash it down into the hole with my finger, wipe it off flush, and maybe put a small fiberglass patch over the top of each filled hole.

Alan
 
Have plugged many a rivet hole with g-flex. Got a bit of a chuckle reading your long version post; the last two footbar assemblies I got from Wenonah needed a good bit of de-burring as well. I think they were painted black instead of black anodized.
 
You'd need a lot more epoxy and heat to start melting things than what this will require. I'd thicken some epoxy and mash it down into the hole with my finger, wipe it off flush, and maybe put a small fiberglass patch over the top of each filled hole.

Alan
At this point I’ll need to get the epoxy into a syringe and squirt it into the holes! Or maybe a pastry bag? 🧐

Have plugged many a rivet hole with g-flex. Got a bit of a chuckle reading your long version post; the last two footbar assemblies I got from Wenonah needed a good bit of de-burring as well. I think they were painted black instead of black anodized.

Good to know, and, I aim to please!
 
Back when I was mounting bindings on foam core XC skis, we didn't use epoxy on screws due to the heat involved--the heat would melt the foam. That was a long time ago, and who knows what the foam core was.
 
My experience with the Wenonah sliding footbar has led me to prefer the fixed position version. The 2 sliding footbars I've used will both slip forward on me when strong bar pressure is applied. I tried to swap out my current slider for an old fixed position foot bar but the old fixed footbar didn't line up on my ultralights ribs.

My solution was to get new Wenonah parts - the sliders themselves. Field test had them slipping as well. Not much, but enough to annoy me and have me at different leg lengths. What seems to have worked is adding another knob tightening slider to each side. Doubles the gripping power, provides reinforcement to the first finger tight connection. Inexpensive part, might be worth adding to your rebuild.

Footbar, Wilderness.jpg
 
Back when I was mounting bindings on foam core XC skis, we didn't use epoxy on screws due to the heat involved--the heat would melt the foam. That was a long time ago, and who knows what the foam core was.

I can't imagine there being any heat buildup from an epoxy coated screw. Is possible you were using vinylester or polyester resin rather than epoxy? Epoxy doesn't seem to be an issue with foam but the same can't be said for poly/vinyl ester, which eats some kinds of foam.

At this point I’ll need to get the epoxy into a syringe and squirt it into the holes! Or maybe a pastry bag?

Put the thickened epoxy into a zip-lock baggie and cut off one corner. Instant piping bag.

Alan
 
My experience with the Wenonah sliding footbar has led me to prefer the fixed position version. The 2 sliding footbars I've used will both slip forward on me when strong bar pressure is applied. I tried to swap out my current slider for an old fixed position foot bar but the old fixed footbar didn't line up on my ultralights ribs.

My solution was to get new Wenonah parts - the sliders themselves. Field test had them slipping as well. Not much, but enough to annoy me and have me at different leg lengths. What seems to have worked is adding another knob tightening slider to each side. Doubles the gripping power, provides reinforcement to the first finger tight connection. Inexpensive part, might be worth adding to your rebuild.

View attachment 128548
That was a good idea. I took the cheap way out and installed a star washer behind the plastic wing nut. It holds now, but leaves little dig marks in the rail. Luckily, I rarely change the position.
 
I’ve really read others have tried adding a rubber washer with some success. I have a handful of rubber-backed galvanized washers used on sheet metal roof construction, I will try those if I’m getting slipping. Regarding the holes, I really should have plugged them before I installed the new channel supports. What a mess! Suffice to say, more than the rivets are holding these on now 😂
 
For a future installation, it would be tempting to drill holes on inch centers vertically through the channels, skip the wingnut tensioners and just use cross pins to locate the bar.
 
I can't imagine there being any heat buildup from an epoxy coated screw. Is possible you were using vinylester or polyester resin rather than epoxy? Epoxy doesn't seem to be an issue with foam but the same can't be said for poly/vinyl ester, which eats some kinds of foam.
It may have been chemical rather than heat, but definitely epoxy and not resin. This was all in mounting Trak and Karhu foam core skis. And even manufacturers recommended not using epoxy. Garage tests found no problem, as outlined in this article: Epoxy and skis. I was mounting skis in a shop 40 years ago. I've noticed some things have changed since then.
 
I have plugged a lot of old holes in RX boats, and composite ones too. Epoxy resins don’t heat up the way large pots of polyester resins did. Anyone who, back in the day, mixed a too large pot of poly resin and left it sit too long has stories; if they are lucky just a smoking hot hockey puck in a container.

I prop the canoe on its side, stick a piece of painters tape under the holes on each “downhill” side and dribble in some G/flex 650 or 655 with a teeny paint brush.

With the hull held propped sideways I can G/flex fill the topside from the exterior and the bottom side from the interior. If the hole fill seep craters a dimple just dab in a bit more G/flex, with a thimble-sized pot you have a lot of working time.

It helps prevent overflow if you tape a little # perimeter around the open, epoxy dribbled side of each hole. Pull the tapes after several hours, or the next morning, patch inside if you think waterline hole locations are warranted.
 
I wish I’d read your advice about the painters tape in time. The canoe shifted on my camp chair “sawhorses” during the day and I got a pretty good run from one of the spots. No worries… half the holes are plugged. Will mix up a bit tonight for the other two, then she’s good enough to get back in the water. Time allowing…
 
Back
Top