• Happy National Zipper Day (pat. 1913)! 🤐

GP build

Alan Gage

Super Moderator
Staff member
Joined
Jun 12, 2014
Messages
3,951
Reaction score
1,357
Location
NW Iowa
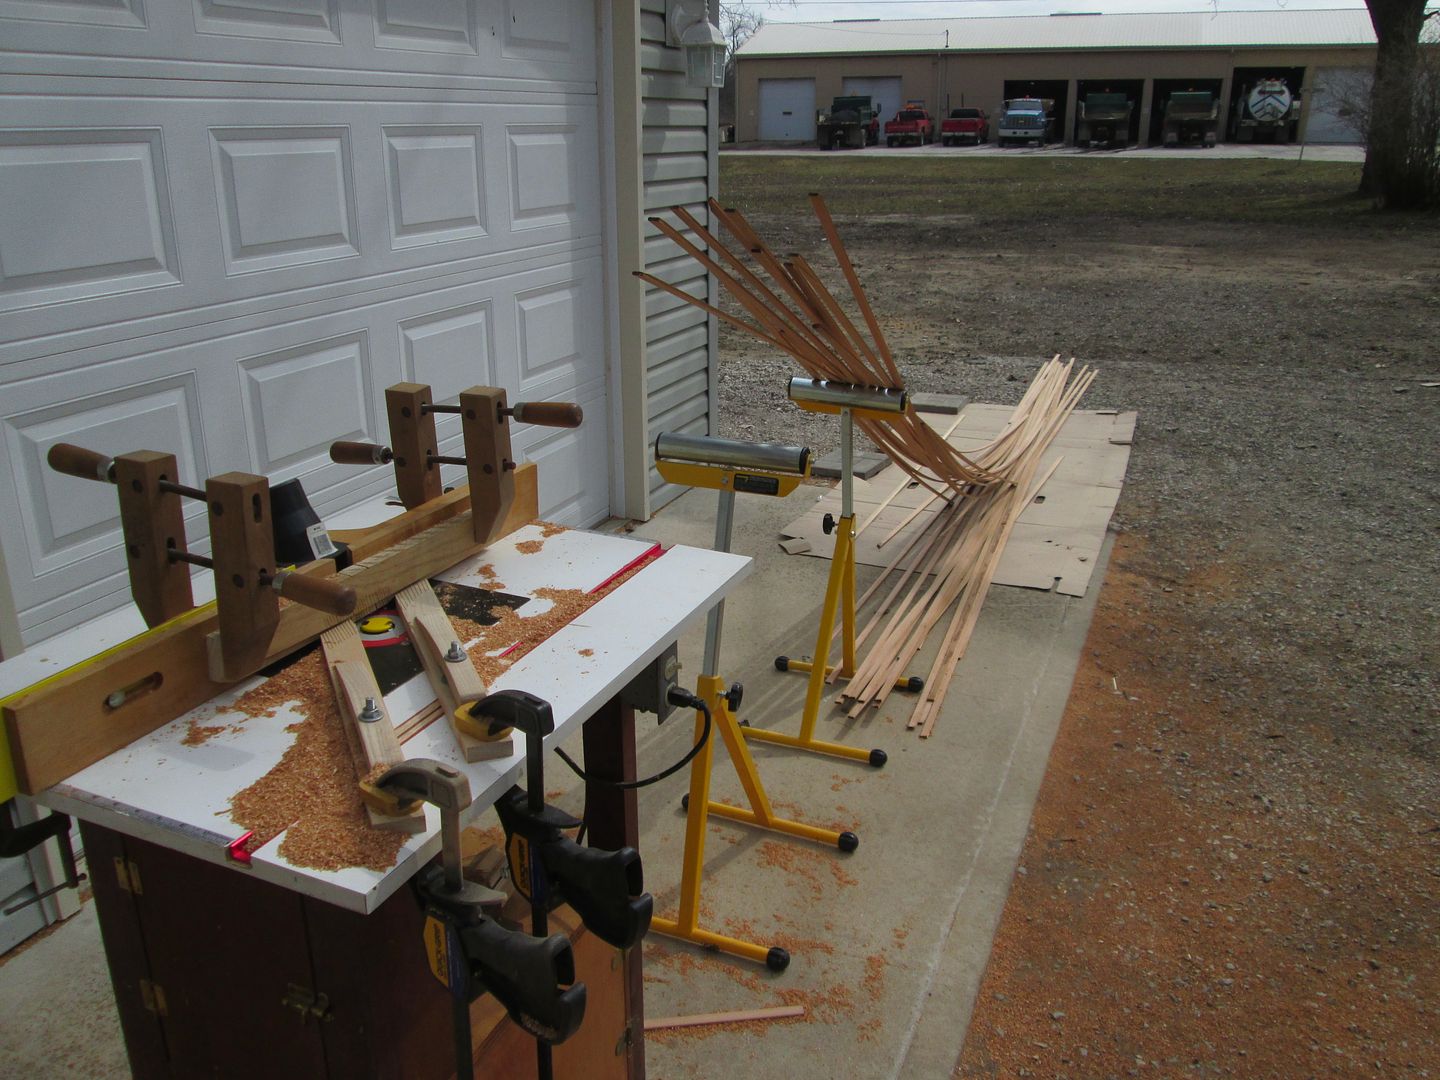
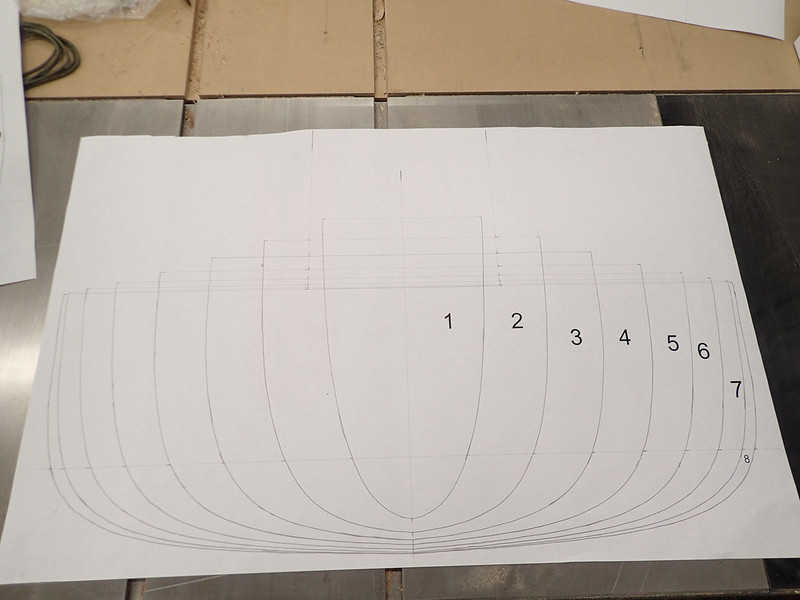
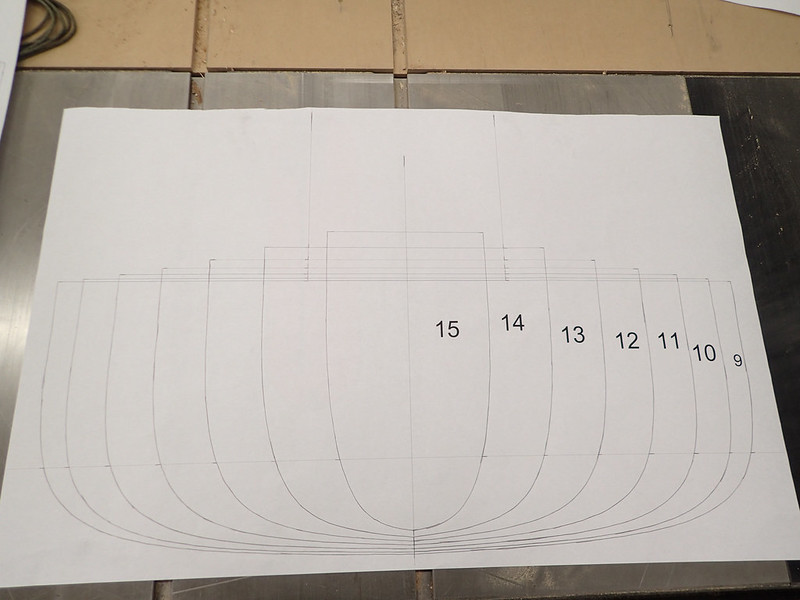
Another tandem for the nature center to raffle at their spring fundraiser. Should be a nice boat but nothing unique at 16.5' by 35" wide. Roughly 19, 13, 16 if I remember correctly for shear heights. I plan to use this stripper as a mold for a carbon/kevlar copy for myself before it comes off the strongback.

20151111_006 by Alan, on Flickr

20151111_007 by Alan, on Flickr

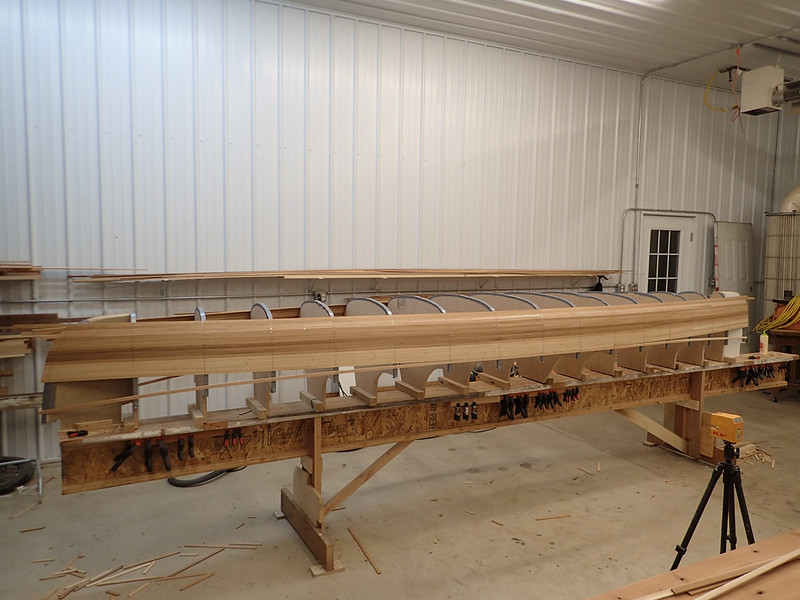
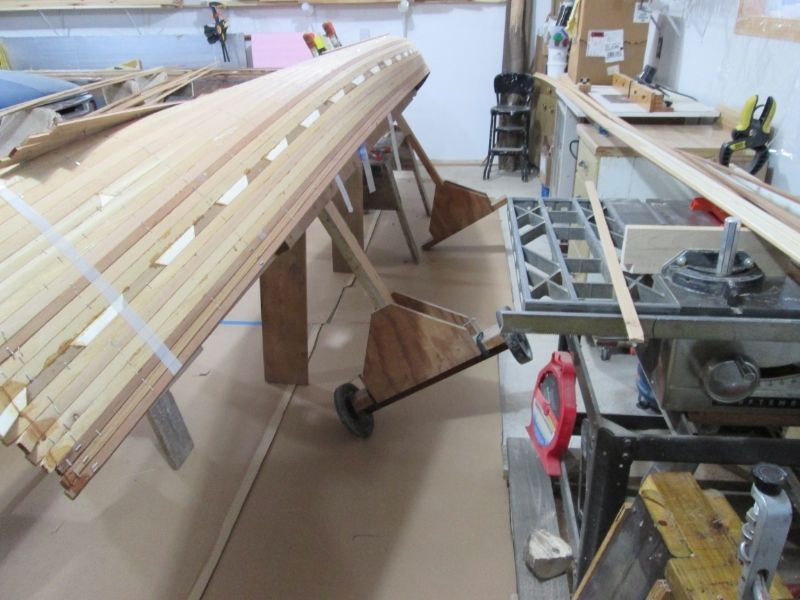
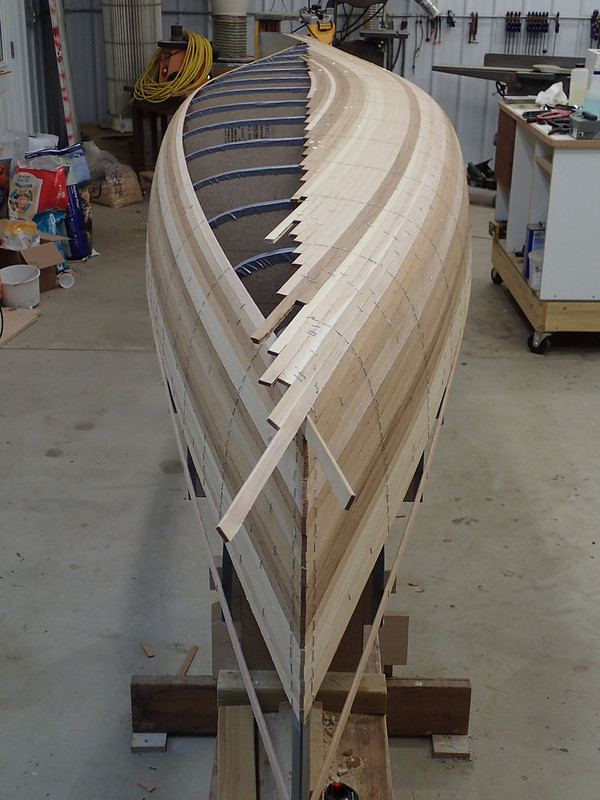
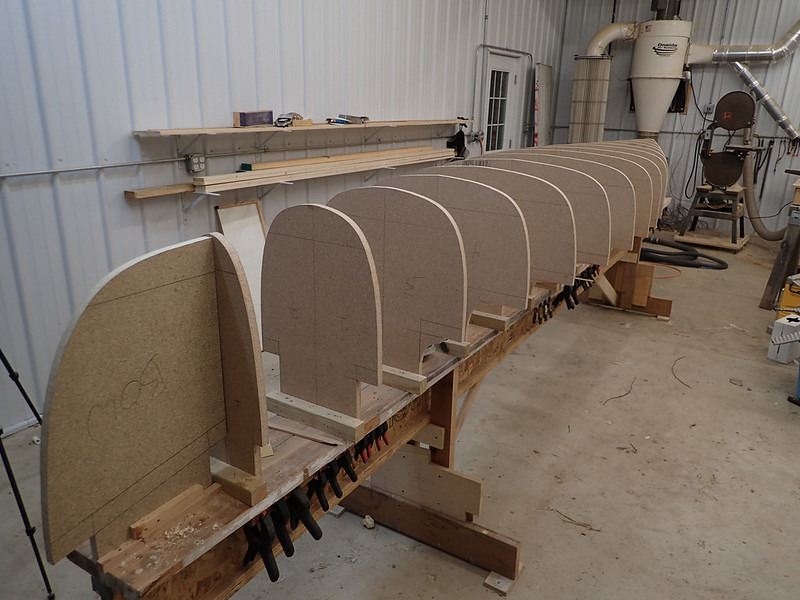
Forms went up quick tonight; not that it really matters because the cedar that showed up today is junk as far as strips go; so I need to hold my horses and wait for more. The stem forms aren't attached yet and still need to be tapered. So far everything looks pretty fair after holding strips in place along the forms.

20151111_003 by Alan, on Flickr

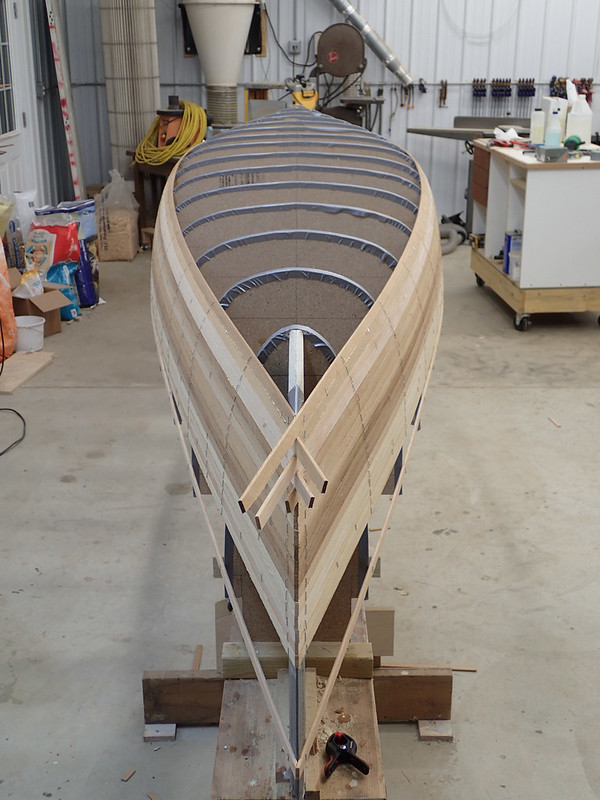
The shear line is 1 1/2" lower than the edges of the forms show. The actual shear line is the black pencil marks.

Hopefully I'll come up with a catchier name but for now the working title for the boat will be 'GP' for General Purpose.

Maybe since I'm waiting I can finish cleaning up the shop. As soon as it got to the point it was clean enough for another build I sorta lost motivation to go further. :rolleyes:

Alan
 
Something like The danged Trump?

First thing that came to mind was a boat with a small leak. But the boat confidently tells you there's no leak at all and makes you feel silly for ever questioning it. It's simply water that dripped from the paddle and came in with your feet. Any idiot can see that. The boat confidently takes you to the middle of the lake as it slowly fills up with water, denying the leak the whole time, and then promptly sinks, taking everyone down with it.

I lean more towards 'Hope Floats'

Alan
 
WOW ! You ARE at it ! I'm behind all ready ! HA ! It's not a race. It's not a race ! I keep telling myself.

I'm working on a name, but I better think fast ! Ha !

Looks like it should be easy to strip. And the stern low enough for a motor mount. That might be a requirement with all the big lakes up your way !

You know I'm a fan of flare, and I might have added a little more to the bow. But that's me ! Planning on any extra Flotation ?

OK a name. the AG Bogi Express ? OK, I'll keep working on a name.

Great start !

Jim
 
Replacement cedar showed up yesterday. Really nice stuff but unfortunately already finished down to 11/16". At least it will make turning the bilge a little smoother. Got the strips ripped last night. Tonight bead and cove. Hope to start stripping tomorrow.

Will use 1/4" strips until roughly the turn of the bilge and 3/16" above that.

Alan
 
Appears you are planning an inner stem ?
It should be small enough to easily glass over, that's always been my biggest complaint about inner stems.

11/16" is what you get for buying that High dollar Cedar ! HA !
It does go down nice in the bilge. And really 4 or 5 more strips will be just a hiccup. Another nice thing about the high dollar stuff, is it's planed uniform. Or it should be.


IMG_0302_zpsvt6ov78u.jpg


Jim
 
Last edited:
Appears you are planning an inner stem ?

No, it will be stemless. I haven't gotten around to shaping the stem forms yet.

11/16" is what you get for buying that High dollar Cedar ! HA !

Thankfully I didn't have to buy this lot. The local lumber yard is donating the cedar, as they did for the donated canoe last year. The original order came in as the wrong stuff (knotty) and the few extra days waiting for material were well spent as I managed to finish (mostly) tidying up the shop and built a second strongback so I can get two going at once.

Got the bead and cove cut last night. Tonight I'll finish up with the forms and start stripping.

Alan
 
Looks like your bow form is a little low, is that so you don't have to shape where it ties int the first form?
 
Looks like your bow form is a little low, is that so you don't have to shape where it ties int the first form?

Right now it's low only because the stem forms are just set loosely into place. But the thought of shaving it down near when it meets the first form has crossed my mind. It's probably one of those things that won't make a speck of difference in the long run but I'll tie my brain in knots trying to decide which way to go anyway. :rolleyes:

Alan
 
I always lower my stem forms a little. For some reason when I crowd all the strips at the ends, I end up with a little hump. Almost like it was HOG nosed !
I either had to rasp it big time, or live with it. I found by lowering my stems a little, I at least reduced the hogged end.

Snow this weekend, so we won't feel bad about not being out paddling ! HA !

Lookin great Alan !

Jim
 
About done with the easy part. Things are going very smoothly so far. This is my first stemless build without using a solid wood sabot/shoe at the ends. I'm curious to see how it goes as I get closer to the keel.

20151119_002 by Alan, on Flickr

20151119_003 by Alan, on Flickr

I also got a new shop helper:

20151119_004 by Alan, on Flickr

Winter has returned but feathers haven't. The other chickens are starting to pick on her too. I'll let her spend a few nights in the shop.

Alan
 
Alan,
I typically build stemless.
Somewhere between the stem overlapping strips and the keel line joint will be an area of transition that can be tricky.
Some hulls are easy to strip that transition, others, not so much. The more rise near the stems, the easier will be that area. Arrow straight keel lines with little rise at the stems are the hardest.
Since I put bulkheads in most of my builds, any imperfections in my stems are easily hidden. Most of the gaps occur on the inside of the stems, the outside that's readily visible, is fairly easy to get a tight joint. Any stem transition gaps on the inside are also easily filled with cabosil thickened resin, but that might not be an option for you based on depending on how visible that area is.

I'm sure you'll find a practical, efficient way to strip those areas, it's what you do best IMHO. (finding elegant solutions, that is)

As for the hen, not everyone can be a movie star! A buddy of mine raised a brood of 50 or so...out of that group was one rooster that was stunted and underdeveloped. Poor little guy would get torn up by every other adolescent rooster as they matured. Buddy had to take the little guy out early to spare him from daily (or thrice daily) mashings...
 
I always looked at the transition from vertical, to horizontal stripping as a challenge. You fit the strip, and if you are not happy with it, try it again, until you are!

I'm feeling like a real SLACKER ! Great progress !

Jim
 
I'm curious Alan... considering with the type of paddling you do you seem to have no need for a tandem boat, so is using this build as a plug an experiment in a way for building your first composite boat?

Funny, you stripped half a boat yesterday and I got 4 strips on, ha ha.
 
I'm curious Alan... considering with the type of paddling you do you seem to have no need for a tandem boat, so is using this build as a plug an experiment in a way for building your first composite boat?

I paddle tandem a couple times a year but, yes, you are correct. I'll be building a composite Bloodvein next and this will hopefully teach me a few things. As long as I don't ruin the plug in the process I'll call it a win in the education department.

Funny, you stripped half a boat yesterday and I got 4 strips on, ha ha.

I was thinking about that while I worked yesterday. I can see the pleasure of stapleless building in finding different ways and making jigs to hold the strips tight. I don't think the slow pace would bother me as much as having to wait for the glue to dry before laying the next strip. Maybe someday I'll give it a shot. Just need two projects going at once so while I'm waiting for glue to dry I can be working on another boat.

Alan
 
My plan may have worked with different wood but with the curves on this boat and how dry the wood is I have had to resort to staples to keep them in the curves. The glue I am using says to keep it clamped for 25 minutes so I give it 40 then lay the next strip. The tape and dowel approach worked on the first boat which had less ample curves and the straps again would work if I had enough of them and better cedar I suppose. I'm doing what I have to do to get it to work.

Hopefully with these strips being darker wood the holes won't show as much, or I just paint both sides, ha ha. I do like using the straps but having to feed each strip under each strap with having to bend the strip into the corner of the shop to make it fit is a tad annoying. I can work the bugs out of the system the next time.

The shop is an old fashioned single car garage, so basically about 12 feet wide by 22 feet long with 6 1/2 foot high walls.

The two project concept works really well with w/c restoration since there is much of the hurry up and wait kind of thing. Always waiting for something to cure, dry or whatnot, so having a second boat to fiddle with while the other one is in wait mode is a much better use of time.
 
Alan, considering how much you like to design and fabricate new things, how about a rotisserie for the strongback, much like they do with restoring cars. It would need to be bolted to the floor, but when at the point of stripping the bottom just roll the boat to the side you need to work on. Would make doing the bottom much more pleasant and efficient.
 
Alan, considering how much you like to design and fabricate new things, how about a rotisserie for the strongback, much like they do with restoring cars. It would need to be bolted to the floor, but when at the point of stripping the bottom just roll the boat to the side you need to work on. Would make doing the bottom much more pleasant and efficient.

Martin Van from Ogalee Canoes, in Wisc.. Had such a thing. While on a tour of Martin's shop with the Minnesota Canoe Asc. Martin demonstrated. It was made out of iron and very ridged. Martin mixed a powdered plastic resin for his strip glue. It was a little runny, but with his bead and cove it worked great.

I believe Alan is using an upside down, bead and cove technic, where the cove is facing down. This means he applies glue to the strip, off the canoe.

I tilt my strongback to aid in keeping the glue in the joint.
827d6067-0768-46d0-9170-19375003effa_zpslnvcurkf.jpg


Jim
 
Well how about that. Looks like a winner, Jim!

I was hoping to strip the first side past the keel line last night but realized I was going to run out of 1/4" strips and had to stop a few strips short. I actually have enough to finish one side but after looking at my cedar supply I only have dark stuff left and I'm going to need to save the few lights strips that are already cut to match the bottom pattern.

Today has been spent doing all the things I should have done before it snowed 8" yesterday and tonight I'm going out with a friend so as much as it pains me it doesn't look like any work will get done until tomorrow.

Alan
 
Got home about 9:00 tonight and convinced myself to go into the shop to cut and bead and cove the rest of the 1/4" strips I'll need before proceeding; only about 10. Then I realized if I put them on tonight the glue would be dry right away in the morning so I can cut the keel like and go right to work on the other side. So that's what I did.

20151122_002 by Alan, on Flickr

You'd think it would be strange working with a chicken walking around the shop but it's really not. Maybe that means I'm strange. But the dog doesn't seem to mind either.

20151122_001 by Alan, on Flickr

She's still losing more feathers than she's gaining. Spends the day out of the snow and in the sun under the covered patio behind the house.

Alan
 
Back
Top