• Happy Ride of Lady Godiva (1040)! 🎠🦵🫣🇹🅾️🇲

Gel Coat or Epoxy for Repair?

Been a bit, have fires needing held back and have another canoe to use. If it were the fishing canoe that were down this repair'd happen'd sooner, but as is I can use fishing canoe for sport but not sport canoe for fishing. I'll document what I'm doing for sake of later lurkers, and if there's time to stop me before I screw up on this holiday weekend: please jump in.
I got a fracture repair kit, a scratch repair kit, and a stem bumper kit from Northstar. Doing it essentially all at once.
Fracture repair kit says sand a scoop into laminate 1in around fracture, then roughen 3in around that. If fracture is below waterline the boat needs three layers of 'glass, above water line only needs two, each successive layer is 2in bigger than one underneath.
I found a few other pale spots in interior that don't show broken weave, I decided to put a single layer on each of those.
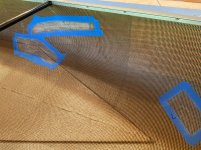
I taped off the areas I intended to sand. Were targets to aim for with paper in hand, showed true borders if sanding obscured specific location of actual injury, and also provides a pattern for the 'glass.
IMG_9450.jpeg
 
'Course, for you to stop me from doing something I shouldn't, it helps if I post my plans long before doing them. Northstar recommended sanding the repair areas with 80grit, and the whole hull with 150g to prep for the scratch repair. I didn't like the idea of 150, but the only discs I had for my orbital were 400 and 120.
I wondered 'how in heck do Cedar Strippers get so glossy? Seems like all the books just say 'sand'.' I looked them up. Yep. Sand, then varnish. And sand with 80.
I won't varnish, but maybe I'll sand with 400.
This is 120.
IMG_9456.jpeg
 
Repairs sure aren't invisible. But, as one poster said on this forum: "Once a beater, always a beater." I may have fallen in love with it's 10yrs of near pristinity and use as a delicate precision craft, but I got this canoe to be a beater. To know more about canoeing with, and turns out that includes repairs.
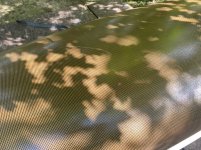
Patches on inside. I didn't use PeelPly, maybe probably should have, but I went shade tree and used plastic wrap. Maybe should have used wax paper for shade tree, because plastic wrap left worse wrinkles than an after-sanding later brush over with plain vinylester. It's smooth there now, smoother than rest of hull interior. Northstar went light on filling the weave: the stock surface is pebbled. I might sand down the patches again to take the gloss away, then I'd probably sand down the whole interior to take the gleam away. Or I might leave it as a reminder this is a 10yr old beater, and one I'd rather not crack again and have clog up my shop for a month. A little humility reminder about not going places I'm not sure I can get thru safely.

IMG_9465.jpeg
 
Last edited:
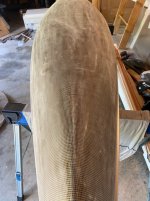
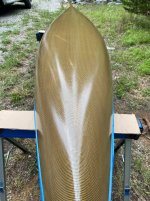
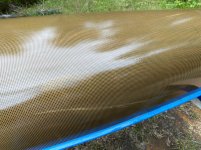
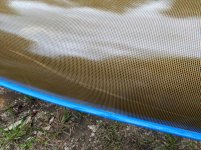
Exterior is two layers of vinylester.
Oh, one thing I forgot to mention on interior. Vinylester cures quicker in a can than spread out in a pan, just like epoxy. I didn't get all seven patches filled in by time can went solid. The big, main injury got clumpy application.
Also, vinylester is much harder to mix at 50:1, than epoxy is at 1:1 or 2:1. The second coat is not fully cured after 24hrs, its still vaguely sticky and a cardboard left a mark in 15min of this light canoe resting on sawhorses. I was hoping to use this boat tomorrow, I still might but it won't have been sanded with 400 by then.
First layer worked well, but the 3/8in roller in the Northstar kit left some significant stucco texture. For second coat I used Lowe's highest quality 1/4in roller, and it's much smoother tho still pebbled.

IMG_9464.jpeg
 
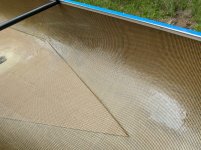
Main break is repaired. That area of hull is stiffer than surrounding now, instead of collapsing in a crease as it did after the accident. But weave is still poking out in 1-2 hairs.
I did not cut/shave/off the protruding fibers before attempting to paint in the vinylester because they were very small. And very flexible. Perhaps I could have tried a face/leg/armpit razor, but I did not think it'd work. I merely painted on the resin mix, and after first coat cured I used a scraper tool to take off the hardened sticks. I thought I did a good job. But after the second coat there are still two sections of the break, about 1/4in long, that have a sharp knife-edgy ridge. I can't really shave them down and re-repair, because I am out of vinylester.
Oh, one thing I forgot to mention on entire exterior. Two layers of vinylester as mentioned. Before first I sanded with 120g as mentioned, between coats I sanded with 220.
I wish I'd weighed the boat before repair. It sure does feel heavier now. Might just be weakness due to discouragement things didn't come out better than they did, because I can't imagine this 17lb canoe went over 19 after this work, and I can't imagine my biceps can notice a 5-10% change from a month ago. Why I worry I do not know, as said it was bought to be a beater, a loaner, a small creek poker. And I have a brand new Northstar ADK with wood gunnels to pick up as soon as I have time for a six hour drive. But I grew up in Maine, where boats are the religion. Others obviously feel differently, but I feel how well I take care of what I have reflects how grateful I am for the opportunity to have them.

IMG_9462.jpeg

IMG_9463.jpeg
 
Last edited:
Looks good, Max! Thanks for taking time to document your repairs with informative words and pictures. They will help both current and future composite canoeists to take on such repair projects, which is one of the purposes and strengths of this site.
 
Looks like a solid repair to me... nothin' wrong with any of it.

One note on the interior texture: Northstar might have gone light on filling the weave to give better traction. I think most stripper builders only do a wet-out coat on the inside for that reason and avoid fill coats completely (I know for sure that I do).
 
Awesome job, looks good!. You did a much better job than I did with mine. Bought an outfitters NW17, it was recoated down to the gunwales but a very uneven coat throughout. I remember the hull was just built up with vinyl ester in most areas, and it would flake off in the thinner areas. I ended up doing the best I could, replacing all the decals and selling it to a guy a few counties over.

Bet you can’t wait to get it in the water. A couple extra pounds isn’t that bad, I think you’re sitting pretty good
 
Yes, thanks @GladMax for posting your repair process. I'm about to do one very similar (on more of a beater), and this helps me feel better about it.

On texture...
One of the things I like about my kevlar tandems is that the weave on the inside has not been filled in, so my feet don't slip easy like they do when standing in a royalex boat. But I assume that the main reason for not having it filled smooth is weight saving.
 
Back
Top