• Happy Marine Mammal Rescue Day! 🐳🐬🦭🦦

First stripper build: Prospector-16 Help & comments appreciated

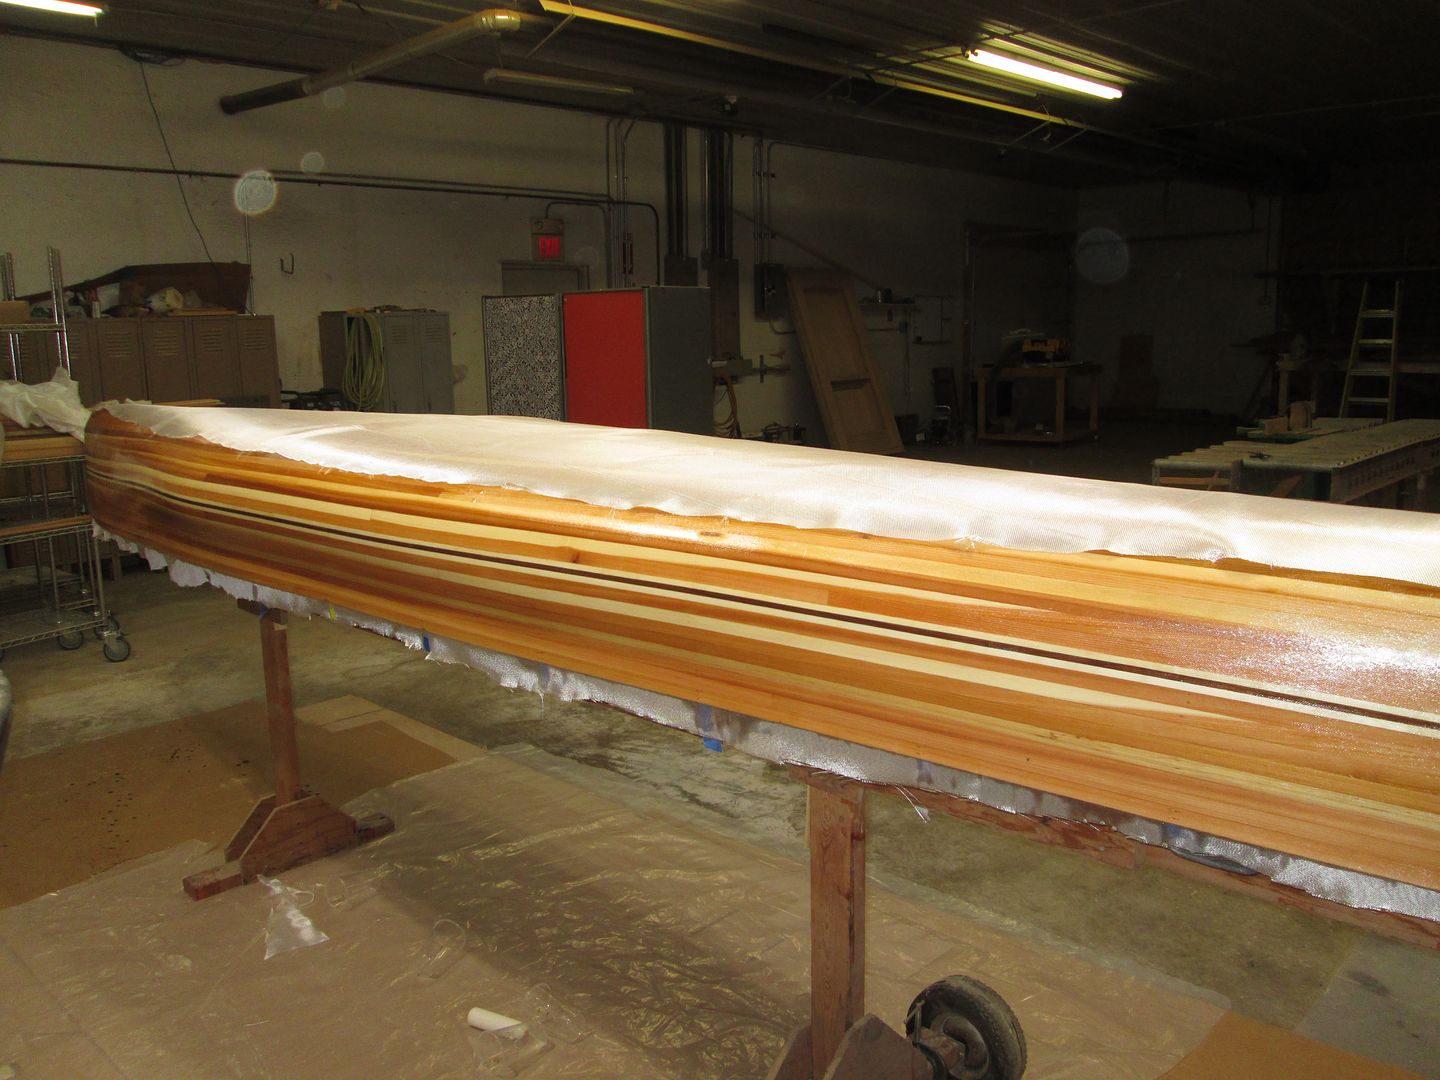
I always put my half layer under the full layer, and I carefully lay all the cloth out and sweep away any wrinkles long before I mix the first batch of resin.
I wet out both full and half layers at once, although it does take a bit longer for the inner layer to thoroughly wet through.
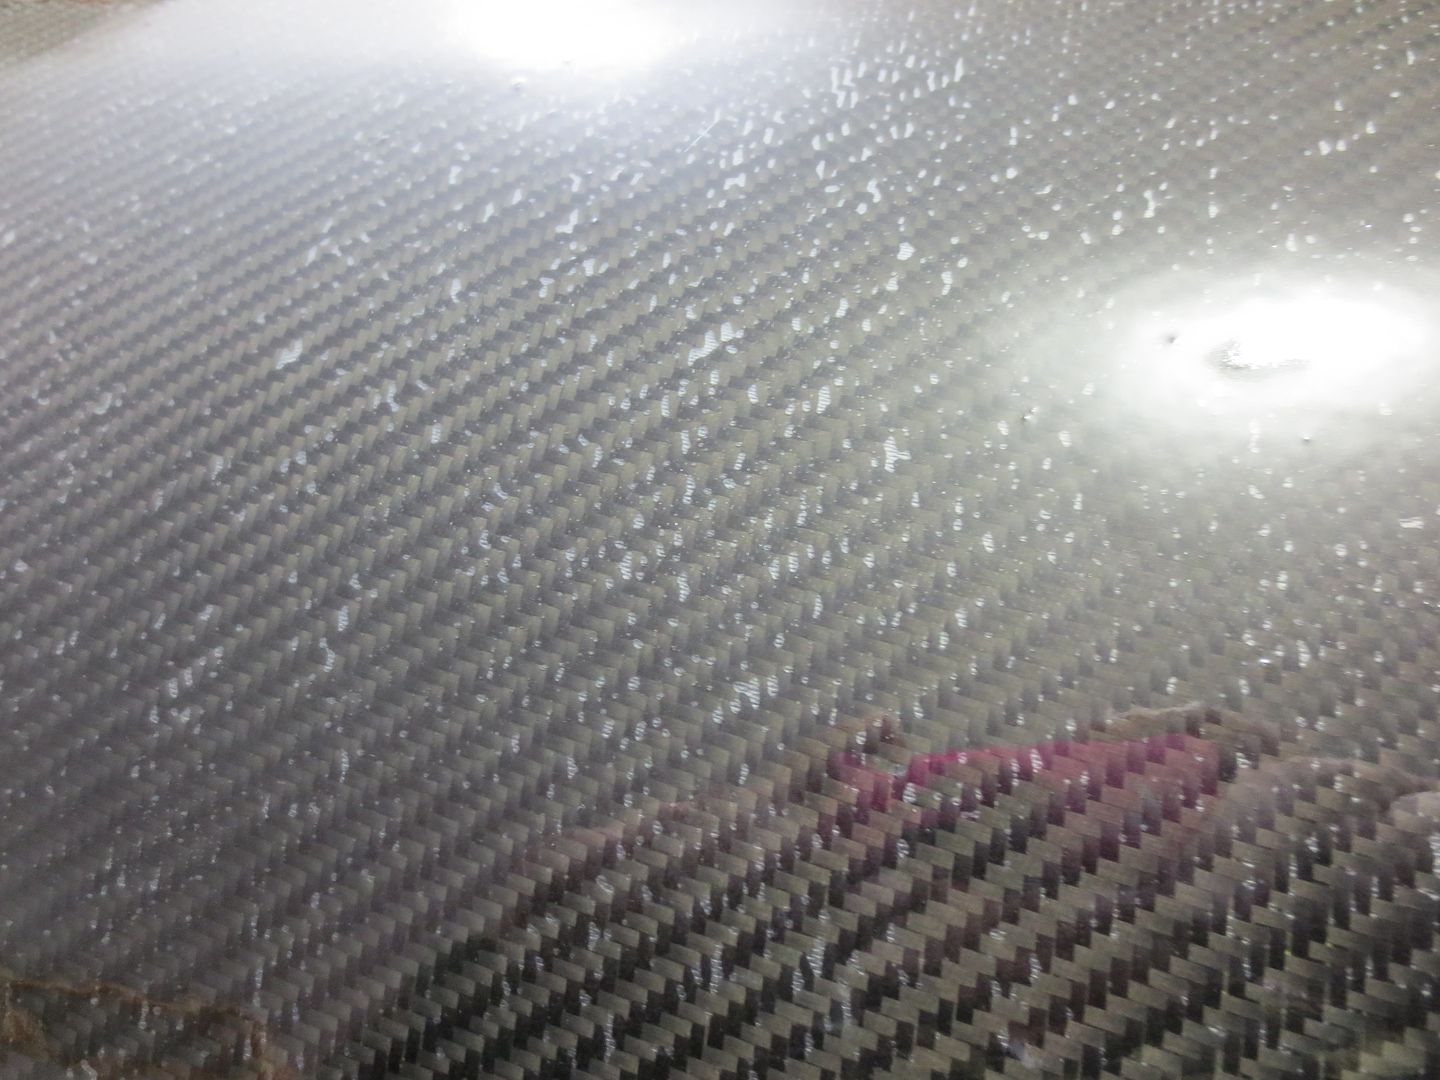
You didn’t mention it, but I also prefer to put a seal coat of epoxy on the hull before draping the cloth. Obviously the seal coat needs to be completely tack free before laying any cloth on the hull. I have found that the bare wood can suck in some epoxy and starve the cloth if not sealed before wet out.
Definitely hang around for an hour or two after wet out to squeegee the entire hull and remove any entrained air and eliminate any runs.
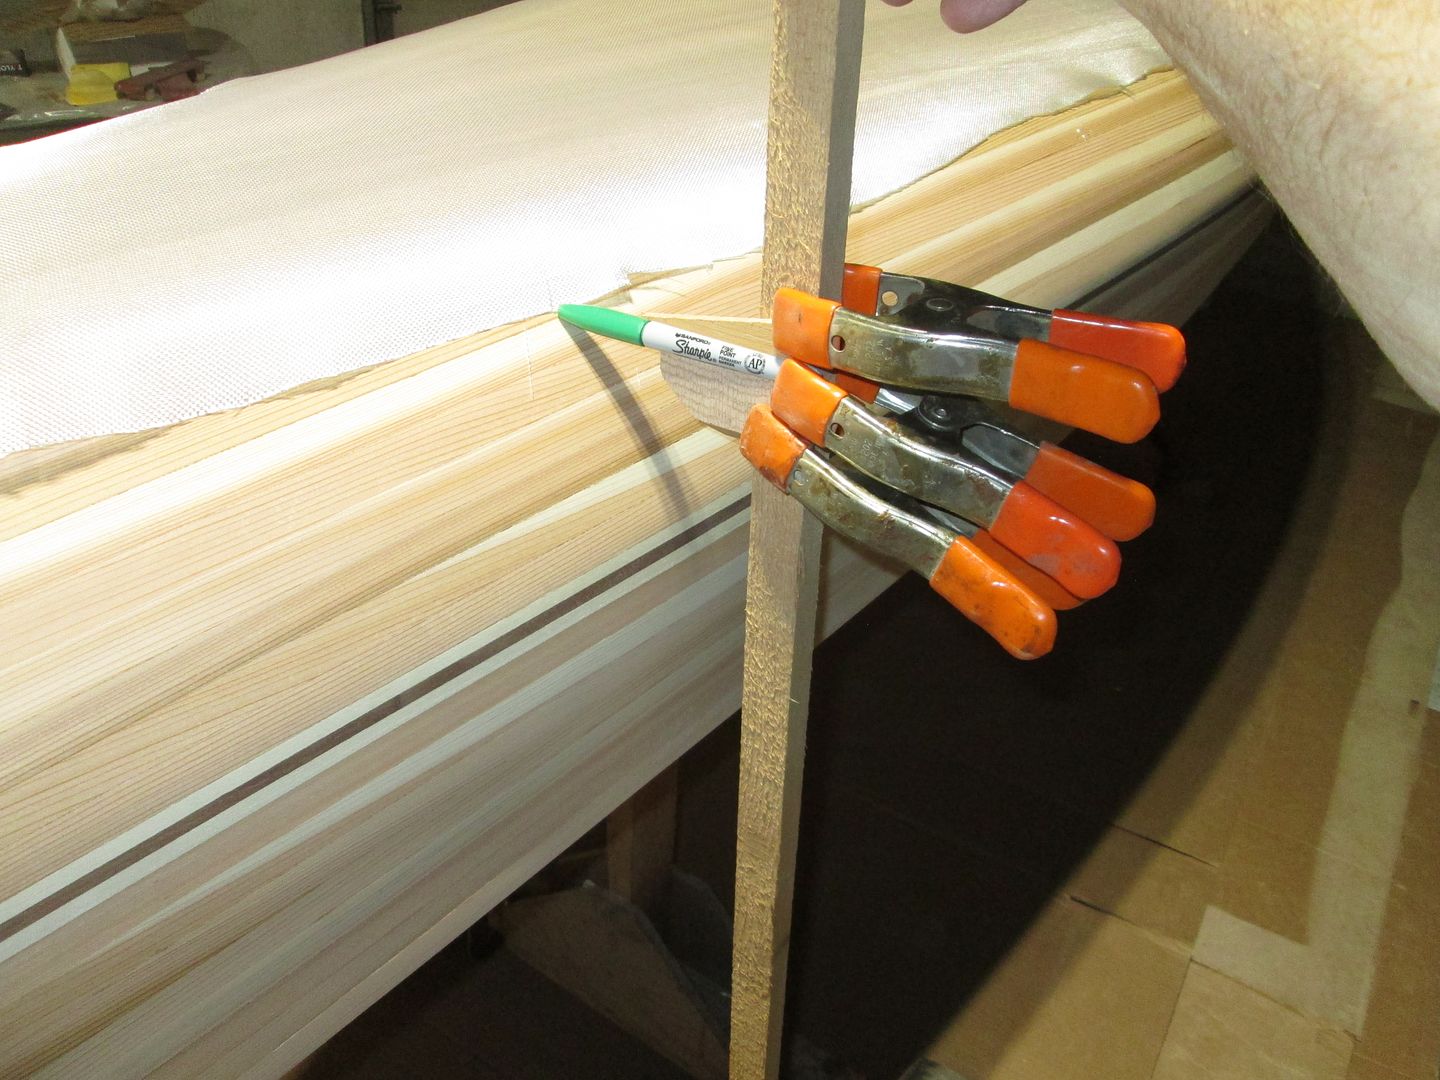
I apply my stem strips as soon as I have all the cloth wetted out.

As you build more boats, you’ll refine your technique to find what works best for your skill set and expectations.
We all have differing methods but a common goal…a beautiful functional canoe at a fraction of the cost of any production boat!

Good luck today

The Science of putting the extra layer on Top of the main layer.
IMG_1696_zpsuruxzrov.jpg
 
I do the same as Stripperguy, I put my football under the main sheet and wet both out at the same time. I have done both seal and non seal, I don't notice a big difference on the exterior hull. However, I do like to seal the interior hull, as I find that is when most bubbles will occur.
 
Nice diagram Jim, but I haven't found that to be the case. Once wetted out, with fill coats applied, it's very hard to see where the line is, in my experience.
 
Nice diagram Jim, but I haven't found that to be the case. Once wetted out, with fill coats applied, it's very hard to see where the line is, in my experience.
I have yet to try your method.
Extra layer on top makes too much sense.

The two bias strips I add to each stem, are laid, on top of main layer, widest one first. They Feather out nicely, again, without getting into the main layer.

Glad it works for you.

Jim
 
I was wondering, would a seal coat applied before the cloth is laid on the hull reduce any gassing out? Is the gassing out from pits and little pin holes in the wood? Thought maybe where the resin fills in the voids, creates a small puddle that gasses out ward when the epoxy heats up. Maybe a fill coat would seal the voids, pin holes and voids in the wood, so it eliminates the potential of it happing under the glass. I'm not good at explaining what I mean, sorry. I hope you understand what I'm trying to say.
Roy
 
I think there may be an assumption in this discussion about putting the extra layers on ... I think that assumption is that the extra layer is going to be feathered, but in reality if you add an extra layer on the football, that may not necessarily be the case.

Jim's point is completely valid (IMO) if you are going to scrape the "bump" flat, whether that is for the football area or the extra stem strips ... if you put them under the cloth AND scrape you will get that thinner area ... a weak spot. The however, is that I suspect one of the reason to put in under the main layer is to just skip the levelling step altogether.

If you put a partial layer under the main layer, and don't feather, there will be a small strength reduction where the cloth goes over the edge, the little hump area. This impact will likely be proportional to the thickness of the cloth being used, the impact being less as the thickness is reduced.

Brian
 
I was wondering, would a seal coat applied before the cloth is laid on the hull reduce any gassing out? Is the gassing out from pits and little pin holes in the wood? Thought maybe where the resin fills in the voids, creates a small puddle that gasses out ward when the epoxy heats up. Maybe a fill coat would seal the voids, pin holes and voids in the wood, so it eliminates the potential of it happing under the glass. I'm not good at explaining what I mean, sorry. I hope you understand what I'm trying to say.
Roy

Roy,
Gassing out is generally due to entrained air expanding as the resin heats during cure. Even minute bubbles can expand quite a bit when heated to twice the ambient temperature.
Porosity in the wood, or gaps in the substrate can allow resin to seep through, by gravity or osmosis, and starve the cloth from behind. If this happens, it's usually very difficult to fill in those starved spots without removing the laminate.
 
I used to seal coat all of mine.
Out gassing is more about temperature control, than whether or not you seal coat.

As far as the amount of resin is required ? I feel thee is a slight saving, by not seal coating.

Seal coating is more work, and I have no way of testing if one bonds any better than the other.

I recently glassed the outside of a stripper, no seal coat, and had no out gassing at all.

Plain and simple ? If you do a good job of filling staple holes, cracks and gaps ? Skip the seal coat.
 
Well, I got the cloth on, and two fill coats. Started about 10:00 am, finished about 10:30 pm. I'm going to do a light sanding, and a final brush coat. In hindsight, I think I would have done both layers at once, with the football layer on the bottom. I was continuously getting hairs pulling off the cut edges of the football.

I didn't put a seal coat on, and it seemed to work really well that way. Yeah, the wood sucked in the epoxy, but it seemed to suck the cloth down too. I just added more epoxy after a half hour or so, and rolled again, then squeeged.

All in all, It wasn't as difficult as I had envisioned it would be, and with the Raka epoxy I had plenty of working time.
 
Oh, and I forgot. I had no noticeable outgassing on first layer of epoxy. Second fill coat, after I completed the coat, and went back to look for runs, and roll a second time, there were tiny bubbles all over the place. Heat gun on low took them right out.

This remains the best stripper I've ever made.
 
Looks like you have the process down very well, the extra step of going back and checking the hull several times for a few hours after application is , IMO, the best way of fixing/avoiding issues like runs/drips/bubbles on a hull.

Also think you have the right of it, putting the football layer under the main glass ... but that is also conditional on the materials you are using and can get away without feathering the small ridge created. As Jim has pointed out many times, feathering that little ridge, will create a weak line all along the composite edge ... so just plan on having that small ridge. The ridge itself, where the top layer goes over the boundary will be slightly weaker than a plain single layer, so you need to pick that boundary to occur in a low load zone of the hull (like after the bilge turn).

Your point on the edges of the football extra layer fraying and being somewhat hard to wrangle, is exactly the reason why I will likely put mine under the main layer ... having said that, putting that layer outside like you have is the strongest configuration.

Your build is looking really good so far,

Brian
 
Ok, I'm afraid to ask, but I feel the need. How far out should the "football" go? Keep in mind, I already have mine on. So, if I made a fatal mistake, I also need to know how to fix it. I've been simmering on this all day. I realize now, I should have asked first. Basically, I have the points of my football overlapping the ends of the stem a couple inches. I then followed the strip line around. It seems now, perhaps I should have gone wider, like past the sharp curvature of the hull.

I don't have a picture to share, but here's a drawing that's pretty representative of what I did. If this is terrible, do I just light sand, and add a second "football" (third layer) that extends to where it should?

-Sleepless in Wisconsin
IMG_2298.jpg
 
I guess I didn't describe my process well enough ! Sorry.
Lay the extra layer over the football, about 6 hrs After wetting out the main layer ! It would have saved you time, sanding and epoxy fill coats. Then proceed to add fill coats.

Now that you have waited. Lay the cloth on the hull and trim to about the 3" waterline. Then remove the cloth, so you can sand the football area, where the cloth will go
To mark where to trim the cloth. Take a stick and clamp a Magic marker.

IMG_3827.JPG

IMG_3843.JPG

It's a Dot to Dot thing. I place dots in the cloth, about a foot apart. Be sure when trimming, you cut above the dots, otherwise they will show on the hull. to guide me trimming the cloth. I start in the middle and with the stick, as a gauge, I work towards the ends marking. It's not critical to get it exact, as when done ? You won't know where the extra layer is !

You will need to let the epoxy cure a week, before sanding. Then wet out your extra cloth layer. This is necessary to create a Mechanical bond.

Once you have wetted the extra layer, and filled the weave ? Take a carbide scraper, a day later and feather the edge of the extra layer. It takes about 1/2 hour. Again, when done you won't be able to see the edge.

Wetting out two layers of cloth, is not always easy ! The epoxy needs to soak through two layers of cloth, and penetrate, into the wood to get a good bond to the hull.
You can experience incomplete saturation, and likely more trouble with out gassing, not to mention bonding issues.

Incomplete saturation pic, from trying to saturate two layers at once..
IMG_2118_zpsrfsqfx0u.jpg
 
Last edited:
Ok, I followed the strip line, not the water line, but I feel I am pretty close. I think I will proceed as is. Scraping tonight, and hopefully I'll be good to go.

Yeah, personally, I'd be afraid to wet 2 layers at once. I did like the football under idea, until you drew that picture comparing the two. Makes sense to me.

Your picture reminds me of something else I forgot. Floor covering. Uh oh. Guess I'll have a long lasting reminder of my first build.
 
You already are building strong enough with the 6 oz glass, so anything you add is just "over the needed strength". So nothing you have done so far is detrimental to the build.

Having said that, typically, as Jim said, the extra football layer is done along the 3" water line, which catches a lot of the "turn at the bilge" near the centre.

The thing to keep in mind here IMO, is the reason you added the extra layer. It is on the out side, so that gives you extra abrasion resistance and marginal strength increase (from for exterior impacts), so going somewhat narrower than the 3" water line is not such a big deal. If you were looking to increase the impact strength (from external sources), then the extra layer goes on the inside and going a little higher up the "turn at the bilge" is a little more important to get the full benefit of the extra glass.

Brian
 
Not to be contrary, but I don't agree that a weak edge is created when you do two layers at once. Both layers of glass bind together and become one. There is no sharp edged shelf, it just all merges together. If you use a very thin penetrating epoxy, like system three clear coat, it's a breeze.
 
You already are building strong enough with the 6 oz glass, so anything you add is just "over the needed strength". So nothing you have done so far is detrimental to the build.
I'm currently building a Kevlar copy on a stripper now. I glassed a layer of 6 oz Kevlar, with a full layer of 4 oz S-glass on top. After a week, I lifted the hull off the stripper mold. Hoping it would be some what stiff. The hull was very flimsy. I opted at that point, to add a 6 oz of E-glass. Yes I had to sand in order to get that mechanical bond !
I lifted the the hull off the mold today, and can testify that the extra layer added considerable stiffness ! Couple that with the added abrasion resistance I gained. It's the way to go.

I don't know how often I've told this story ? But ever since I've added the extra layer to every hull I build.
A very good friend who was building his third canoe, decided to make it as light as possible ! It was a 17" tandem at 52 pounds. One layer of 6 oz E-glass inside and out . I was with, when his canoe cracked down the middle on a BWCA trip. We Duct taped it, even melted some hot melt glue used to repair fishing rods. He made it out OK, but since that day I've added that double layer to everything.
As a Builder everyone makes that decision. Me ? I'm adding the double layer !
 
Last edited:
Not to be contrary, but I don't agree that a weak edge is created when you do two layers at once. Both layers of glass bind together and become one. There is no sharp edged shelf, it just all merges together. If you use a very thin penetrating epoxy, like system three clear coat, it's a breeze.
Mem, there are some realities here that you can't get away from.

A layer of 6 oz glass is some 8 mils thick, when you have 2 layers it is 16 mils thick ... where the top layer goes over the 'edge" of the inner layer, it has to drop 8 mils to get back to the hull.

When a fiber is put under load, any change in direction of the load (i.e. knot in a rope, splicing amsteel) in the fiber will manifest as a weaker point (compared to straight load on the same fiber). The magnitude of that weak point is dependent on the rate of change introduced and the material.

In this case, going off the edge of the inner layer and back to the hull will create a slope/ridge/shelf of some sort and whether the edge crushes a bit to soften that shelf, or it doesn't actually smush and creates a epoxy plug underneath the slope is moot. Unless something is done to check that rate of change (i.e. feathering to the correct distance) a weakness of some magnitude is formed at that spot.

For my posts i didn't say a "sharp edged shelf" would be formed or even that a "weak edge" would be formed ... I simply stated that running over the inner layer like that "will be slightly weaker than a plain single layer" at the transition point. In the example above, that area is where it goes from 16 mils to 8 mils.

As far as the idea of 2 layers at once, I agree, that should be quite workable by picking a thinner epoxy, which is the plan for my next build.

Brian
 
Not to be contrary, but I don't agree that a weak edge is created when you do two layers at once. Both layers of glass bind together and become one. There is no sharp edged shelf, it just all merges together. If you use a very thin penetrating epoxy, like system three clear coat, it's a breeze.
System three's Clear Coat, does penetrate very well. It doesn't build up worth a crap, taking maybe twice as many coats, to fill the weave.
The builder would need to order two epoxies, at a considerable more expense than RAKA, to get a proper wet out of two layers .

Again all I can say, is I haven't added the extra layer, or the bias strips, under the Main layer.
You may have enough fill coats added to blend.
To me ? This is how I learned it, and it makes sense. It eliminates the possibility, or probability, of sanding into the main layer . Why take the chance?

Again, we as builders make our own decisions, and differing ideas are good to kick around !
 
I'm currently building a Kevlar copy on a stripper now. I glassed a layer of 6 oz Kevlar, with a full layer of 4 oz S-glass on top. After a week, I lifted the hull off the stripper mold. Hopping it would be some what stiff. The hull was very flimsy. I opted at that point, to add a 6 oz of E-glass. Yes I had to sand in order to get that mechanical bond !
I lifted the the hull off the mold today, and can testify that the extra layer added considerable stiffness ! Couple that with the added abrasion resistance I gained. It's the way to go.
Jim ... you can't seriously be comparing a full composite build layer strategy with a stripper build strategy. Of course another layer of glass is going to make it stiffer. The prospector build is pretty standard at 6 oz cloth, I don't disagree that another layer of glass won't make it stronger, and another layer will make it stronger again ... you won't be able to lift it after a few more layers, but it will be STRONG. As has been mentioned so many times, you start with a standard recommendation and then build to suit your usage.

I don't know how often I've told this story ? But ever since I've added the extra layer to every hull I build.
A very good friend who was building his third canoe, decided to make it as light as possible ! It was a 17" tandem at 52 pounds. One layer of 6 oz E-glass inside and out . I was with, when his canoe cracked down the middle on a BWCA trip. We Duct taped it, even melted some hot melt glue used to repair fishing rods. He made it out OK, but since that day I've added that double layer to everything.
As a Builder everyone makes that decision. Me ? I'm adding the double layer !

And I have a Kipawa (at 16'6") and Freedom 17 both built with single 6 oz glass in and out. Both have been loaded, both in heavy water (what I consider heavy at least) both heavily loaded and both are just fine after quite a few trips. Anecdotal information is useful at times, but it can also create misconceptions, I suspect there are lots of plain 6 oz hulls running around out there that have had no issues. In fact it seems to me StripperGuy had a light weight Freedom 17 with thinner strips and lighter cloth that seemed to survive just fine (maybe you could refresh my memory on that SG)


Brian
 
Back
Top