G
Guest
Guest
I have a new Hubba Hubba tent, and a footprint from an old one that fits perfectly. Two tents, one footprint won’t work if both tents come on a family trip. A new footprint is $40. Time for some DIY.
The shape and design of the HH footprint is functionally efficient and effective, with scalloped edges that don’t peek out from beneath the tent, corner webbing with grommets for the pole ends and cord loops for the stakes.
The mission was to replicate all of that with materials I had on hand in the shop.
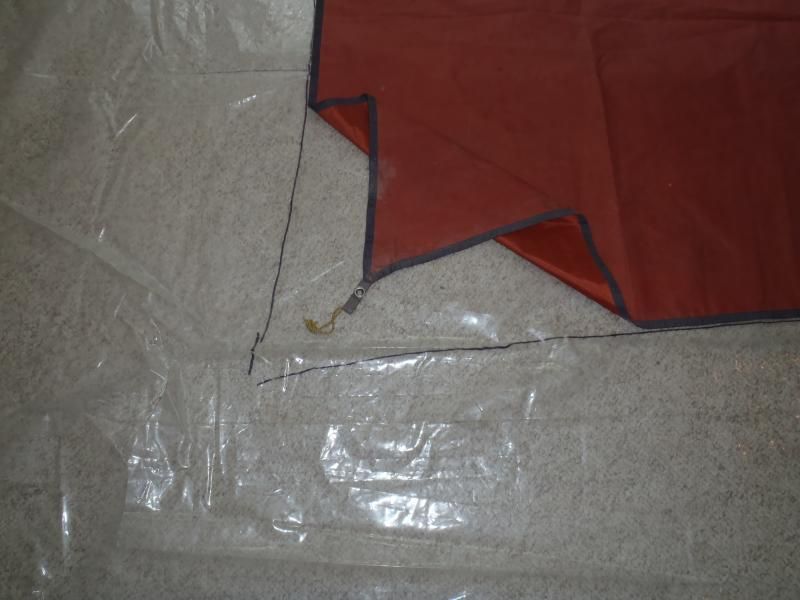
First thing out-of-stock, I did not have enough scrap Tyvek. But I did have a big piece of thick plastic, so that will have to do to cut out the body of the footprint. Having the existing perfect-fit MSR footprint available made getting the size and shape easy.
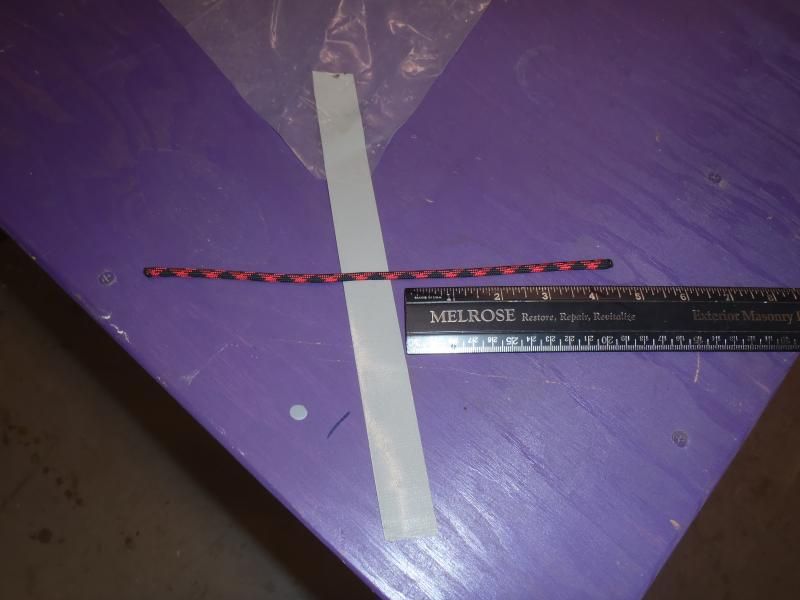
I have lots of scrap webbing, but adhering it to the plastic footprint seemed problematic. I used 1” Gorilla tape instead. I wanted to duplicate the same 2 ½” of tape/webbing sticking out past the footprint body and have 3” stuck on the plastic, so an 11” piece of Gorilla tape folded in half should do.
The stake cords loops are 4” long, plus an extra inch for the knot, call it 10 inches of cord with a little excess I can trim off later if need be. I marked the plastic footprint 3” in from the edge, stuck the tape under, marked the tape for a center fold over, laid the cord on the sticky center mark and folded the tape over onto the plastic to the 3” line.
Dang, that looks just about right.
The most critical measurement is the location of the pole end grommets, but I have that exact position courtesy of the OEM footprint.
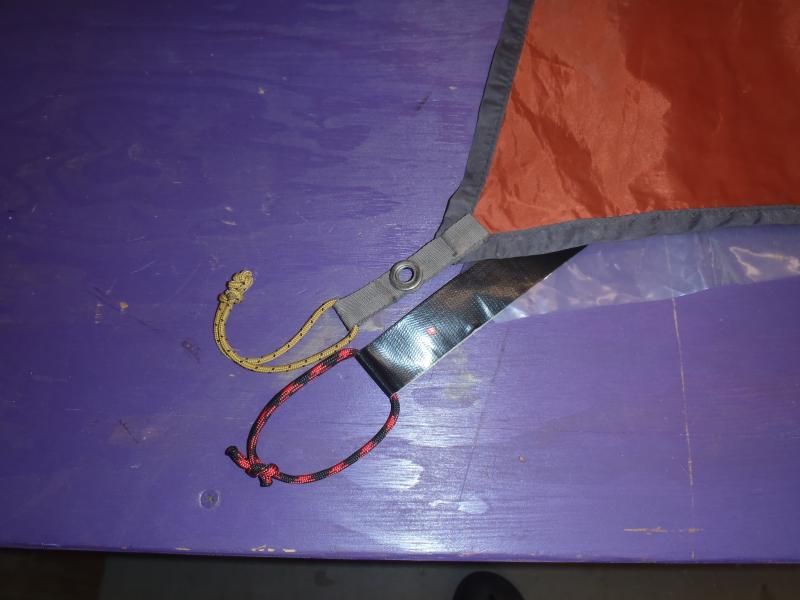
I may have been out of Tyvek, but grommet kits I got, in various sizes. Half inch grommets appeared to match those on the MSR footprint, but just so I didn’t screw up the last step I checked to see if the pole ends fit.
Those proved to be a snug fit with an unassembled grommet. Hmmm, let’s not eff it up now.
Step 2 of not screwing up – I installed a grommet in a test piece of folded Gorilla tape and checked the pole end fit. That also gave me a chance to test my hot nail head size for melting the grommet holes.
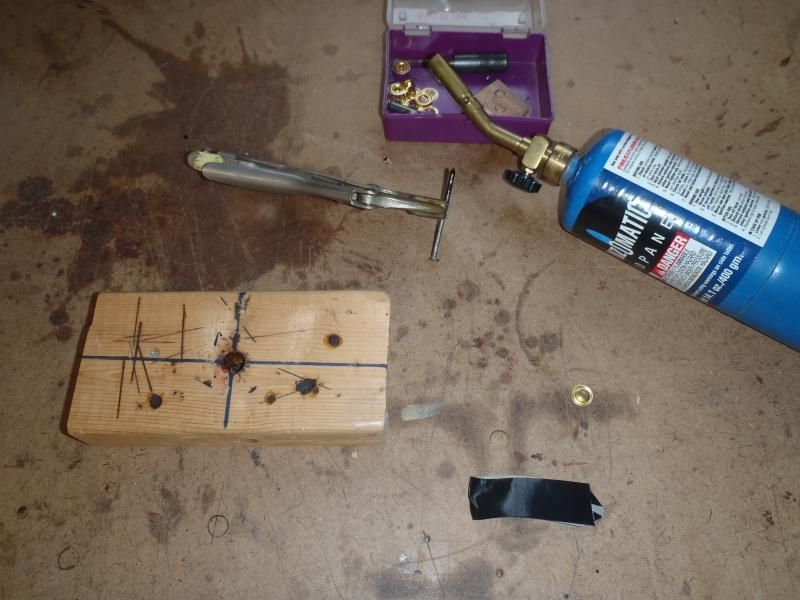
Pretty work, and if you seat the grommet immediately after melting the holes the still-hot and gooey tape edges seal nicely inside the grommet. (Works well with webbing too).
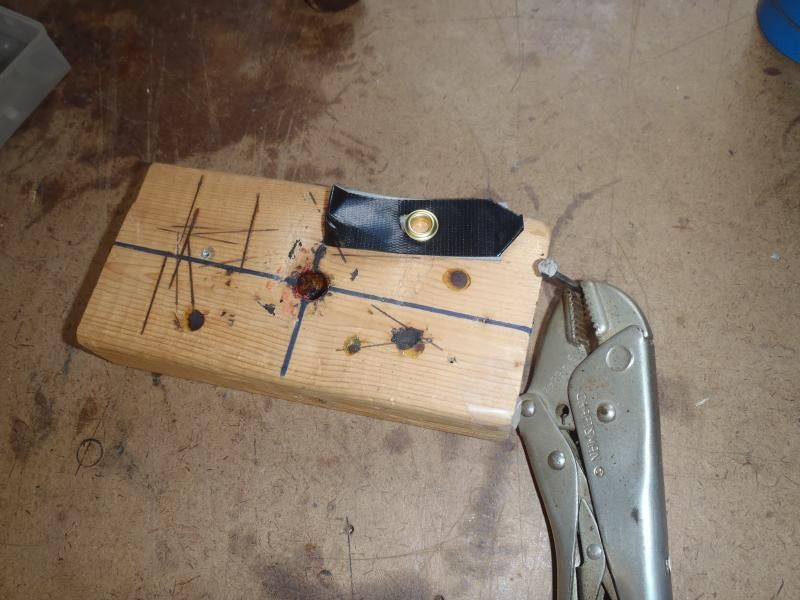
I checked that pretty test work, only to find that the poles did not quite fit into an assembled grommet. So close, but I’ll have to use ¾” grommets. I know from past experience that a 20 penny common nail head melts a perfect hole for a ¾” grommet (and a 20 penny nail point melts a perfect 3/16” hole for machines screws).
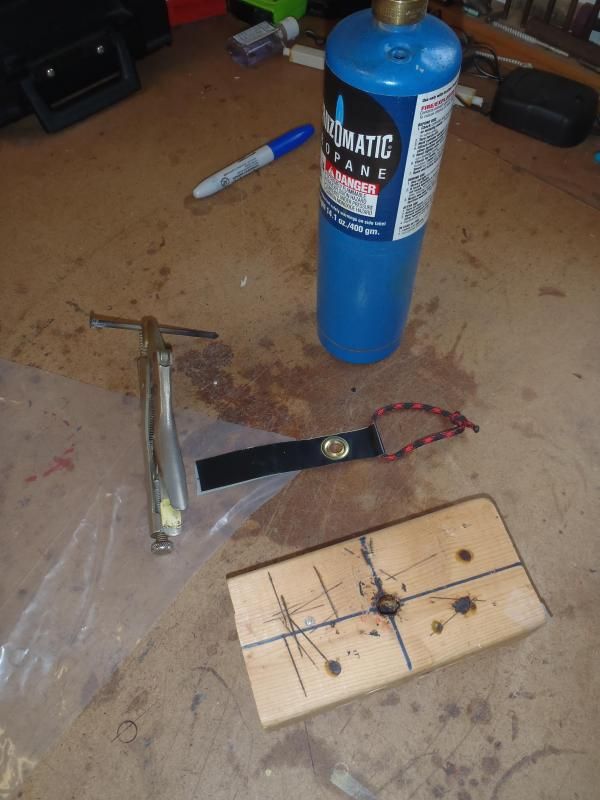
Holes melted one at a time and grommets seated in still gooey tape. Done and done all four corners.
Me likee. Me out a piece of plastic, 44 inches of Gorilla tape, 40 inches of cord and a few grommets. Me still have $40 for beer.
I have in the past always scalloped the edges of our various family tent ground cloths so that they don’t peek out from underneath and collect water, but I like the cord loops for holding the ground cloth in place during windy set up or take down, and the pole end grommet seats.
I see a roll of Tyvek and weekend of DIY tent footprint customizing in my future.
The shape and design of the HH footprint is functionally efficient and effective, with scalloped edges that don’t peek out from beneath the tent, corner webbing with grommets for the pole ends and cord loops for the stakes.
The mission was to replicate all of that with materials I had on hand in the shop.
First thing out-of-stock, I did not have enough scrap Tyvek. But I did have a big piece of thick plastic, so that will have to do to cut out the body of the footprint. Having the existing perfect-fit MSR footprint available made getting the size and shape easy.

I have lots of scrap webbing, but adhering it to the plastic footprint seemed problematic. I used 1” Gorilla tape instead. I wanted to duplicate the same 2 ½” of tape/webbing sticking out past the footprint body and have 3” stuck on the plastic, so an 11” piece of Gorilla tape folded in half should do.
The stake cords loops are 4” long, plus an extra inch for the knot, call it 10 inches of cord with a little excess I can trim off later if need be. I marked the plastic footprint 3” in from the edge, stuck the tape under, marked the tape for a center fold over, laid the cord on the sticky center mark and folded the tape over onto the plastic to the 3” line.

Dang, that looks just about right.

The most critical measurement is the location of the pole end grommets, but I have that exact position courtesy of the OEM footprint.
I may have been out of Tyvek, but grommet kits I got, in various sizes. Half inch grommets appeared to match those on the MSR footprint, but just so I didn’t screw up the last step I checked to see if the pole ends fit.
Those proved to be a snug fit with an unassembled grommet. Hmmm, let’s not eff it up now.
Step 2 of not screwing up – I installed a grommet in a test piece of folded Gorilla tape and checked the pole end fit. That also gave me a chance to test my hot nail head size for melting the grommet holes.

Pretty work, and if you seat the grommet immediately after melting the holes the still-hot and gooey tape edges seal nicely inside the grommet. (Works well with webbing too).

I checked that pretty test work, only to find that the poles did not quite fit into an assembled grommet. So close, but I’ll have to use ¾” grommets. I know from past experience that a 20 penny common nail head melts a perfect hole for a ¾” grommet (and a 20 penny nail point melts a perfect 3/16” hole for machines screws).

Holes melted one at a time and grommets seated in still gooey tape. Done and done all four corners.

Me likee. Me out a piece of plastic, 44 inches of Gorilla tape, 40 inches of cord and a few grommets. Me still have $40 for beer.
I have in the past always scalloped the edges of our various family tent ground cloths so that they don’t peek out from underneath and collect water, but I like the cord loops for holding the ground cloth in place during windy set up or take down, and the pole end grommet seats.
I see a roll of Tyvek and weekend of DIY tent footprint customizing in my future.


