• Happy Weed Appreciation Day! 🌱🌿🌻

Definitely not another Explorer!

Joined
Nov 25, 2021
Messages
782
Reaction score
607
Location
Florida
This isn’t going to be a big job, but I plan on doing it right. This week my in-laws who normally keep the kids are traveling and so we parents have to take care of our own kids. So unfair…

Luckily I have a fair amount of work I can do from home via Remote Desktop, and I have my field teams spun up to go do their things. Plates spinning and jugglers juggling, today I finished the rough draft pub reviews, and tomorrow I begin the improvement of our 16’ Not-An-Explorer.

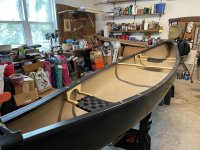
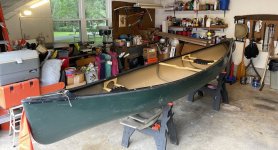
It’s an Old Town of some belligerently heavy persuasion. I could barely load the dang thing on my truck by myself. A difficult task under normal circumstances, this boat has no portage thwart so it was much harder than I thought it was going to be. Taking it down at home was easier, because I decided to follow the adage “work smarter, not harder”. My T-bar hitch rack has extendable ends to accommodate more boats. I pulled one out all the way, scooted the end of the canoe over onto it, then lifted the front end off the cab bar and walked away from the truck so I could set the tip on the ground without raking it down the side of the truck. Yes, I *can* be taught, but it’s still a shame I had to learn that particular lesson the hard way.

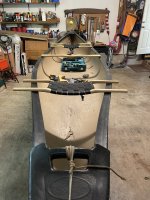
The Plastic Fantastic:
C3866F21-3ED0-4B77-9312-A37FB7292F9D.jpeg

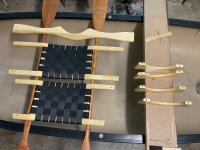
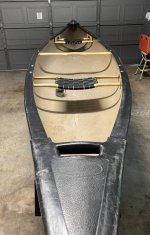
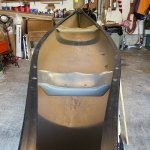
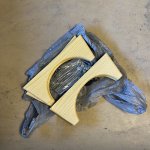
The documentation I have says it’s a Discovery but I don’t think so. Plastic seats in a Disco? And only one thwart (long since rotted out and not replaced). Not a Disco. I emailed Old Town the serial number but they couldn’t tell me based on that. Odd, that. Not that it matters. It’s about to be a lot better canoe than it’s ever been before. It’s getting contour web seats from Ed’s Canoe and a new thwart.
AB2A248F-3571-4C53-B2AC-D663FB271938.jpeg
1A6A159E-D72B-4DAB-8EFC-E39274258529.jpeg
2BF0F4BA-E761-4A44-B517-488F8DE08883.jpeg

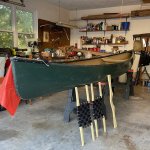
Tomorrow morning I’ll take out the original plastic booty-shaped seats which preclude paddling bow-seat-backwards and I’ll cut and fit the new seats and thwart. Since the users are decidedly not canoeists, at least not yet, I’ll keep the seats low. Then I’ll take it all apart again and start soaking the cut ends with drilled holes in Mike’s Arkay oil. I want deep penetration in these vulnerable out-of-sight-out-of-mind spots. After I get those soaking, it’ll be time to hop on Teams and conduct two interviews for my vacant driller’s assistant position.

Questions

1. How long is enough soak time? These are thirsty ends, not a paddle with the grain filled up already. Half a day each end? 2 days each end?

2. The stern seat pulls in the gunwales a bit from the appleseed-shaped end that is most pleasing to my eye. The bow has a better shape. On an over 20 year old plastic boat, does it matter if I push the gunwales out a little? I suspect that being plastic and rather warm it would give me no trouble. Heck it’s going to be shaped like a Dali canoe if I leave it on the sawhorses too long.

3. This thing oil cans like a sonuvagun. Could pulling in the gunwales at the thwart help, or would I just be making the handling worse? That new 36” thwart fits right in place without any consternation or fuss, or even any swearing on my part. At least not yet.

Once done with the soaking operation and drying, I have straight spar varnish (rustoleum brand) to top-coat the ends with. I’ll probably do a couple full coats on the thwart as well. This boat lives outside, upside down on a well shaded rack.

Last time someone checked the canoe out, and before I let them leave with it, I drilled nice big drain holes in the tips of the plastic decks. I’m also sorely tempted to adopt Mike’s / \ deck bungee pattern to manage some painters which in our parts won’t be for lining (no one has ever cared about the shallow water consequences to the bottom of this poor old workhorse) but for tying off to the bank while fetching charcoal packs and water samples.

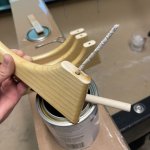
In one of Mike’s most recent posts he demonstrated the genius of extreme packratting by installing salvaged camp chair cup holders in a utility thwart on his patient. I was gobsmacked. Have you ever been gobsmacked? My mind went

1A677205-41DB-4BA7-8416-AFF7524B90C2.jpeg

I just threw out a failed camp chair last weekend or the one before that. I had to show my bride what Mike had done, and used it to justify further and more extensive packrattery in my own life. She was mildly amused by the recycling but much less so by my vow to save more crap.

Time to help bathe kids and put them to bed…
 
I bought my Disco 158 back in 99' and it came with those gawd awful and heavy plastic seats, water catcher to keep your arse wet. First thing to go and replaced with cane seats which promptly ripped out so converted to web. Many of the early Disco's came with those darn things. Take em' out and maybe make them into swings on a swing set or send them to the curb.

dougd
 
There are a lot of Discos ... I think of the 158 and 169 as "classic" Discos, but there are also 119, 133, 164, 174 IIRC. Could it be a 164? It doesn't look like a 158/169, those have more recurved stems.

I share your hatred of those plastic buttsweat petri dish seats. Also they're heavy, although on a 16' poly boat what's another couple pounds. Swing set is the way to go!

I've seen some local racers use rigid foam insulation under the yoke as bracing to reduce oil canning, but it would be in the way for tripping. Seems like most big poly boats oil can unless they have a load in the center.
 
I had a poly 164, it had a spreader thwart in additional to the portage thwart. I just measured stem to stem - it’s 16’ 2-1/2”
 
Then there’s this…

4A5B8637-70CF-4AF4-9FDE-163A6B6A8D32.jpeg
I should have checked with Ed’s to see if they carried replacements. Some knucklehead used a ratchet strap to tie the canoe down at one point.
 
Old Town made a dumbfounding variety of numerically monikered Discovery models, and a lot of them had those awful plastic seats. The one benefit of those seats was that, on a floppy hulled poly canoe with only a yoke, they added considerable lateral stiffness.

If you are adding bench seats, even on truss drops, you might want to consider adding both a yoke and a thwart. Or, uh, you know, a utility thwart ;-)

The 158, or 164 designation indicated the length; a 158 was 15’ 8”, a 164 was 16’ 4. I don’t remember a Discovery 162.5

OT also used other names-not-numbers, the Kineos. With the demise of Royalex some now bear the name of their RX cousins; Penobscot 164, Penobscot 174.

Most, maybe all, of the Discovery canoes oil canned to some degree. On a Maine trip 20 years ago we stopped by the Old Town factory to pick up a set of vinyl gunwales. There was a stack of factory fresh OT Discovery boats in a pile outside the factory; every single one had a wobbly bottom that looked like ocean swells. They were all so badly wobbled as to be unsellable.

To the questions.

I have no idea about soak time for brightwork butt ends. I varnish all my thwarts and seats, and put extra coats on the ends. I guess a couple days soaking in oil would be sufficient. Not sure about the combination of oil soaked ends with the rest of the wood varnished, but if any incompatibility develops it may be at the ends tucked under the inwales where no one can see. . . . .

I don’t think pushing out or pulling in a little on the gunwales will have any negative effect on the hull other than to add some flare or tumblehome near the sheerline.

Not much you can do about the oil canning. Outfitter friends who ran a string of RX Solo Plus canoes added minicel blocks under the center seats. On a Disco, maybe not worth the effort.

About the misshapen deck plate, I’d be tempted to drill out the rivets and see if I can reshape it enough using a heat gun to reinstall, even if that meant using a couple extra pop rivets, or even flange rivets.

The utility thwarts came about because I needed a thwart wide enough to install a sail mount in various solo canoes. At first I used a wider Dr. Seuss-ish thwart shape, but quickly decided that I could use more platform space for things like bungee cord, compass mount, etc.

The frou frou cup holder only goes on bowman’s utility thwarts, the stern paddler gets a yoga block canoe console.
 
The registration says it’s a Discovery 164, but I thought the plastic seats meant it wasn’t. Maybe I will add a utility thwart!

Not sure about the combination of oil soaked ends with the rest of the wood varnished, but if any incompatibility develops it may be at the ends tucked under the inwales where no one can see. . . . .

I figured the excess would wipe right off the existing varnish, and all will be hidden from sight. Do you think I’d be better off just varnishing the butts and drilled holes? Or would the soaking provide longer term protection? 🤷‍♂️ I’ve got to finish fitting the seats so I’ve got time to decide.

About the misshapen deck plate, I’d be tempted to drill out the rivets and see if I can reshape it enough using a heat gun to reinstall, even if that meant using a couple extra pop rivets, or even flange rivets.

That’s a good idea, I didn’t think of trying a heat gun off the boat. How long must those rivets be?!?
 
The registration says it’s a Discovery 164, but I thought the plastic seats meant it wasn’t. Maybe I will add a utility thwart

I would, but then I’m Batman dammit; I want utility!

A straight edged platform, wider than a shapely slender traditional thwart, has innumerable advantages. Even just as a flat surface for a compass, a map, some bungee keepers; it is a wee Captain or First Mate’s desktop.

And, if you are trying to add some lateral rigidity, which is better, a 2” wide butt end thwart with one machine screw, or a 5” wide platform of mysterious outfitting wonders, double hung with two machine screws?

I guess I would just varnish the butt ends of the brightwork. I’m of the opinion that it is near impossible to put too many coats of sealant on yokes, thwarts and seats/drops. Especially the dirt and moisture trapping under-inwale butt ends; that is where unmaintained rot always commences.

I would take the bent deck plate completely off the canoe, which will involve drilling out all of the rivets in the deck plate, and probably at least a few on each side at the stems along the gunwale; you’ll likely need to “free” the last couple feet of gunwale ends to slip the wanked deck plate off.

Once off, try a little heat gun reshaping and while-hot clamping ‘til cool. The rivets will be need to be longish, ½” at least, maybe more like 5/8” for the wide end ones going through deck plate outer, sheerline RX, and deck plate inners. If you can reach under and back up the rivets at the two layer tips with a washer that will help.

And, if you really need to pop rivet force it back into conforming shape, maybe use some flange head rivets.

I know Chip has a bag of forty six leftover 3/16” x 1” long mandrel flange pop rivets, and I have a similar quantity. When you need a long flange rivet, and nothing else will do.

Those vinyl deck plates, if you can find matching* replacements, they are stupid pricey. IIRC, like $30 apiece. It’s 50 cents of molded plastic. What da fug?

*And of course the “matching” part matters. They need to have the correct channel to accept the gunwale profile, different on different manufacturer’s gunwales. They need to match the /\ angle at the stems.

And, not as critical, they need to approximate the stem tip shape; \ for some projecting stem layout, | for plumb vertical stems, / for some recurve. You can get away with \ for this, or this | for this /. A stem tip end replaced using this / for this \ leaves a large, fugly gap.

As it happens I am sitting on a couple sets of different OT vinyl deck plates.

Lesse, with shipping and handling, packaging fees and tax, custom shipping labels (ask Doug), $50 each.

Seriously, if you can’t heat gun it back into pop rivet-able shape I may have what you need, just mail me a tracing of the outline, and the /, |, \ description of the stems. One set of those, I think are excess from DougD, one set are off some rebuild where I went another way.

All I ask in return is that you draw me like one of your French girls.
 
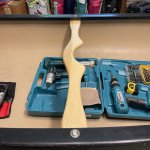
Well the easy part is done. A little minor math and measuring to make sure when I trimmed the seat stays (spars?) the seat pad was in the middle of the boat. Measure twice, cut once. Yes I have learned this one the hard way too, though I know of a certain bike mechanic who learned it harder than me.

Gawdawful plastic seats out!

DA2F15A9-6F74-4C02-9904-E98F80FDCC65.jpeg

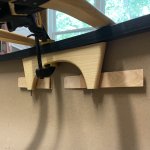
First up the thwart cause it looked easy. It was. I simply clamped it in place, drawing the gunwales up tight to the ends of the thwart, drilled holes through the gunwale holes and through the thwart ends. Then I rolled the corner of the butt end on my benchtop belt sander to debur it.

1B049131-945D-4A2A-9DD1-A3CA6D369AF4.jpeg

E08E837D-177E-47D3-ABA5-807AC9A72CF2.jpeg
67F692FB-9020-48BA-855B-8E7250B42DF3.jpeg

I repeated the same butt-corner treatment on all the seat butts, too. I prefer nicely rounded butts to pointy ones.

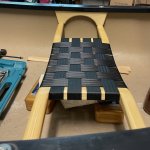
The seat trusses went right up like they were supposed to. I used some wedges and clamps to hold them where I wanted them so I didn’t have bolt holes too close to the ends of the seat butts.

BB1F660C-7150-44F3-91E5-480F8363C92D.jpeg

I had intended to leave the trusses full length to leave the seats installed low, but then the bolts were too short so I wound up cutting an inch off the trusses. Probably a good idea anyway with the contour seats creating a lower seat height. I put the seat trusses on the belt sander so the cut legs were even and straight. I didn’t do such a bad job with the saw, but I’m picky apparently.

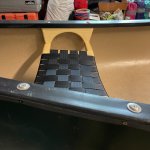
Seats went in easy. I was rather pleased that I didn’t screw anything up!

08EFCA12-5226-4995-B3CD-74627B68EB11.jpeg
90AC2AA9-FDE8-4F4B-8997-5773FD8512E3.jpeg

And it looks like a canoe again.

2A10E51A-311E-4990-BCAC-70B3DDE02791.jpeg

That was short lived, because it’s time to take it all apart and varnish my butts and holes.
 
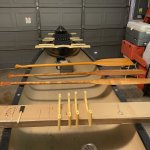
First coat of varnish on and drying… warm garage, not overly hot (yet), oscillating fan on for general air movement purposes. I used a pipe cleaner to make sure all the bolt holes got a coat of varnish. No we wait. The can says I can revisit after 8 hours, so 18:00. Basically anytime after dinner and before bed, and it’ll have all night to cure.

—> How long should I wait before reassembly? I don’t want these pieces to wind up glued to each other.

4D35ABE7-97D3-4B25-A8BB-9BB893925CE5.jpeg
E6100B82-9923-4151-99DA-6FEC12B10F09.jpeg


And no, I didn’t get any on those two magnificent paddles!
 
I am jealous of your progress; I’m still patching the slice and dice on the bottom of YARR. Should be done today or tomorrow, and ready to turn the hull back right side up and install the new brightwork.

How long to wait to install the newly finished brightwork? Assuming that you are lightly sanding between coats, that long. If it is sandable without gumming up it should be cured enough to install.
 
Sounds like you went factory spec with thwart and seat width. I heard changing the width changes the rocker. I also heard Discos are the same hull shape as Trippers. I love the ability of the Tripper to turn when on edge and go straight when level—I wouldn’t want to change that, so I hope you stuck with the factory specs.

looks like you are doing a nice job of restoration.
 
Thanks Mike!

This boat has plenty of scars on the bottom too, and a big dent on the top of the bow stem that cuts into the core. As far as I recall none of the bottom scars get into the foam core. I definitely need to find some shock cord and wooden balls. I’ve salvaged enough cord keepers over the years that I can donate a couple to the cause.


@Chip I did in fact leave it factory. I decided that any attempt by me to boost performance would probably have had unintended consequences and/or be lost on the people who will be using it. I certainly don’t want to become know as the guy who bubba’d this canoe! I chose “first, do no harm” 😉. Depending on the purpose of a canoe trip for work, I’d probably take my own boat anyway.


On many boats the spreader thwart appears to be located just aft of the bow seat. But on my old Disco, it was not and I could paddle bow-seat-backwards and I absolutely want to be able to preserve that flexibility here. So installing a McCrae-inspired special utility thwart forward of the stern seat seems a good plan. I’m not sure I’ve ever seen ash in the big box stores here, but I have seen oak and poplar. Either of those would be easy to work with. I’ll be following Mike’s current build and looking for inspiration in his previous ones. Things that seem useful to me after having done some boat based fieldwork include being able to securely hold a clipboard with a map in a ziplock bag, having a bracket or ring to secure a GPS, a water bottle holder, a means to hold my fieldbook in either the open or closed position; the over/under bungee should handle some of that. Probably need some random omega shaped tie down doodahs for securing things I haven’t thought of.
 
Second coat of varnish applied this morning after a light sanding. I’m pretty happy with coverage and this’ll be the last coat unless I think some areas need touch up tonight. I’ll reassemble tomorrow afternoon and take it back to work Monday. The rest of the good ideas can all happen later and require sourcing “stuff”. I might start mocking up a utility thwart out of cardboard.

6C5D3F99-41F7-4D7F-A680-C93C6E478A61.jpeg

I also treated the cherry paddles to fresh oil. These only get better with age and sun!
 
Last edited:
Well it’s done for now. Lessons learned include the fact that I apparently don’t apply varnish smoothly. I used a fresh foam brush each time. 🤷‍♂️ It doesn’t matter a bit for this work boat since the goal is purely protection for the butt ends and bolt holes. The parts that came from Ed’s Canoe were finished rather nicely in a matte finish, and my can is high gloss. I’ll be looking for a can of matte at some point… shiny bits are blinding in the right/wrong light. And of course, it has only just occurred to me that they might have used urethane rather than spar varnish 🤦🏻‍♂️ Well at least the raw cut wood ends are sealed. My other big ideas will have to wait for materials and inspiration. And round tuits.

92B62F94-DB1E-4047-8BC4-9759431155CF.jpegBD7A2B0C-D46D-4B92-BC08-3F462C6B6E37.jpeg
 
looks good and the wrinkle came out of the deck plate very well.
 
looks good and the wrinkle came out of the deck plate very well.
That’s the other deck plate! I didn’t fool with the warped one, don’t have the rivets on-hand and while ugly, it’s still functional.
 
I do have a go-back when I get the time- I failed to level the seats when hanging from not level gunwales, and while this is not a problem with the stern seat, and not a problem while paddling bow-seat-back’ards, it tilts the wrong way when paddling forward in the bow station. None of the users have noticed it yet, so maybe no worries, but I noticed it immediately upon its first launch 🤦🏻‍♂️
 
Back
Top