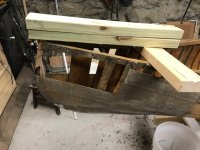
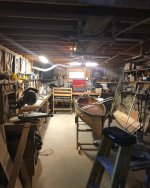
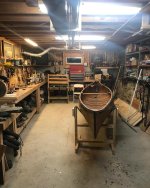
My first owned wood canvas canoe restoration of the Chestnut Chum.....or Chestnut "Doe" has commenced. Rib spacing is 1.5” which leads me to believe that I may have the “Doe” which is the economy version of the chum. I was fortunate enough to find this Chestnut Chum/Doe almost a year ago but could not seem to find the time to start the project until recently. The chum has been located in my workshop since purchase and in order to get started with the project I needed to build two new practical saddles. The saddles were built by dimensions provided in Mike Elliotts “This Old Canoe”. I am very pleased with the practicality and rigidity of the simple design. 
 Since this is my first go at a wood canvas canoe restoration I have relied heavily on the contents of “This Old Canoe”. I keep reading and re-reading in order to make sense out of the sequencing and tasks at hand.
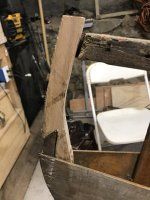
  First order of business was to identify with repair items on the canoe. There is obvious wood rot on the Bow and Stern Stems, Inwales and Outwales. Hull integrity is in great shape and the need for a few planks is most likely necessary. It is possible that I have two rib replacements required but not sure at this time.
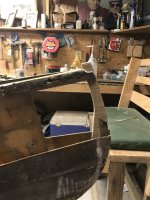
 The outwales and inwales will need to be scarfed and new bow and stern stems scarfed. I then removed the outwales with much ease. I believe the screws are the Silicon Bronze slotted screws that Northwood Canoe has listed on their website.
 I then removed the outwales
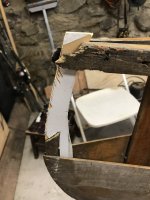
 I was surprised to notice the rabbit cut into the outwale. Made more sense when I remembered reading that the sheer line planking will need to be a 1/2” below the rib tops. At this point I am taking my time to understand the full construction of this canoe as more of the components become exposed and investigated. I also observed an old scarf joint that failed immediately when removing the outwale.
 After the outwales were removed I went after the seats and carrying yoke. Heavily corroded fasteners required some mechanical persuasion via drill. Had to drill out the heads of the fasteners to pop out both seats and carrying yoke.
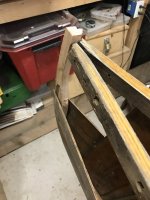
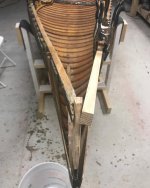
 I then removed the keel and the remaining canvas from the canoe. I will not be stripping the interior as it is in great shape so I proceeded to remove the entire canvas.
 Next step was to start opening up the stern to gain access to the stern stem for further observation.
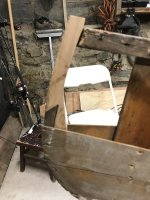
  I have employed the use of a tack remover and putty knife to remove the tacks. The putty knife allows for a leverage surface so I minimize the damage to the planking which seems to be in great shape. I continued removing planking to gain access to the stem and removed the starboard stern cant rib. I also commenced removing sheerline planking to get a better look at all the rib tops. Nothing too crazy found but definitely plan on hitting some of the tops with some wood hardener and some wood filler…..perhaps even some toothpick tricks that I have seen on several of the canoe restoration posts. I plan on finishing the repairs on the Stern before opening up the forward end of the canoe.
  This is progress……at least for me. Trying to take it slow. I want to enjoy the process as well as become a student of the wood canvas canoe restoration. More to come…..lots of work ahead as many of you already know.
Since this is my first go at a wood canvas canoe restoration I have relied heavily on the contents of “This Old Canoe”. I keep reading and re-reading in order to make sense out of the sequencing and tasks at hand. First order of business was to identify with repair items on the canoe. There is obvious wood rot on the Bow and Stern Stems, Inwales and Outwales. Hull integrity is in great shape and the need for a few planks is most likely necessary. It is possible that I have two rib replacements required but not sure at this time.The outwales and inwales will need to be scarfed and new bow and stern stems scarfed. I then removed the outwales with much ease. I believe the screws are the Silicon Bronze slotted screws that Northwood Canoe has listed on their website.I then removed the outwalesI was surprised to notice the rabbit cut into the outwale. Made more sense when I remembered reading that the sheer line planking will need to be a 1/2” below the rib tops. At this point I am taking my time to understand the full construction of this canoe as more of the components become exposed and investigated. I also observed an old scarf joint that failed immediately when removing the outwale.After the outwales were removed I went after the seats and carrying yoke. Heavily corroded fasteners required some mechanical persuasion via drill. Had to drill out the heads of the fasteners to pop out both seats and carrying yoke.I then removed the keel and the remaining canvas from the canoe. I will not be stripping the interior as it is in great shape so I proceeded to remove the entire canvas.Next step was to start opening up the stern to gain access to the stern stem for further observation. I have employed the use of a tack remover and putty knife to remove the tacks. The putty knife allows for a leverage surface so I minimize the damage to the planking which seems to be in great shape. I continued removing planking to gain access to the stem and removed the starboard stern cant rib. I also commenced removing sheerline planking to get a better look at all the rib tops. Nothing too crazy found but definitely plan on hitting some of the tops with some wood hardener and some wood filler…..perhaps even some toothpick tricks that I have seen on several of the canoe restoration posts. I plan on finishing the repairs on the Stern before opening up the forward end of the canoe. This is progress……at least for me. Trying to take it slow. I want to enjoy the process as well as become a student of the wood canvas canoe restoration. More to come…..lots of work ahead as many of you already know.