• Happy National Telephone Day! 🔔☎️📱📶

Ain't been out yet, but...

That's a nice job on the form for the gunnels. The steamer is excellent, your gunnels should look great and be an easy install.

What's with the outboard, you doing engines too, or are you an outboard'er in denial. Scrap metal is at an all time high, free up some space in your nice new shop....
 
We bought a 16 foot aluminum boat 3 years ago since we had been blown off too many lakes when out fishing in the canoe. It still needs to be fixed, all the wood replaced and Christine picked up that old Chrysler last year for $200, it just needs coils. Now, finding coils for a 40 year old Chrysler isn't as easy as it sounds. Eventually the boat will get fixed and on the water, or I will just convert the trailer for canoes and sell the boat.

There is good fishing on the big lakes up here so a boat would come in handy.
 
Almost there... got the seats in today and both ends of the gunwales are bent, 2 coats of varnish on the inside of those rails is on too so hanging them may start tomorrow.

So, that leaves... installing the gunwales, varnishing them and the inners, finish coats of paint and brass stem bands. Another couple of weeks oughta do it. Before ice out maybe.

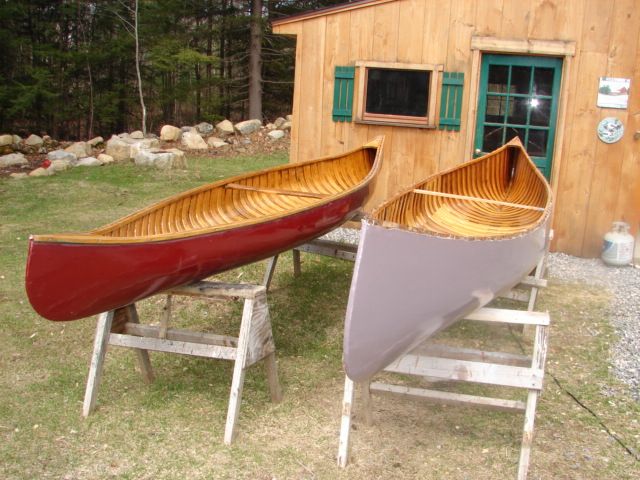
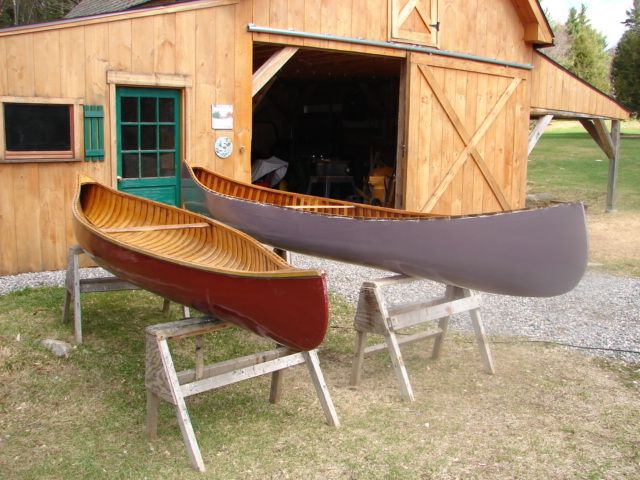
It is still more purple than I want so I will need to tweak the next coat of paint.


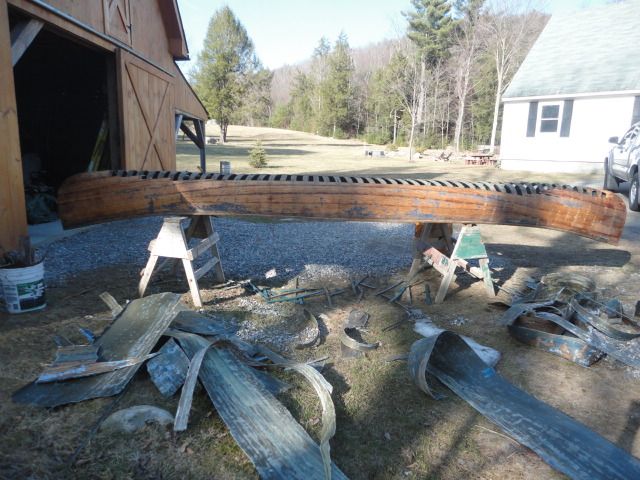
Also got started on Red's Tremblay. It had been "glassed" and showed just why we don't do this to w/c canoes. A great deal of the planking was puckered from water damage. Christine took it upon herself to start deconstructing this boat. It is going to need a ton of planking, very likely all of it, and about 30 rib tips. We might shoe horn it into the shop beside the Canadian by next weekend.


We haven't gotten that deep into our Robertson yet. Work gets in the way. My nightmare is rib tips.. We just don't know. How are you going to fix those?
 
Rib tips are pretty easy actually. Many different ways to do them and I will photo essay it when we do Red's boat so you can get the hang of it. First of course would be to cut some stock to match the ribs, width, thickness and the bevel if there is any.

How far down the ribs does the rot go, or is it just at the top near the inwale?
 
We can't see any but the inwales are still on.. so it's just a concern. Looking forward to seeing your remedy pictures..just in case.

The trouble lately is the office has been calling to fund our newest old age risk averse trip. Off tomorrow with canoe to Utah and Montana.

We might revisit the reconstruction effort in June.
 
Are those brass screws seated with something extra? Glue? Varnish? It still amazes me to see a gunwale bent into place.

That's looking mighty fine Mihun.
 
It sure does. What great work.

I'd like to know what kind of drill bit to use to make clean holes in gunwales. I have several, but the only type that gives a good hole is a brad point bit, and of course I don't have one small enough (3/16"). This is for non-countersunk holes.

Help?
 
Gavia: It is a tapered counter sink bit with collar. You can set the depth for both the drill bit and collar for the length of your screws and how deep you want the counter sink. I got them at Lee Valley, they sell them in sets, I have it for #8 and #10 screws. We are using #10's on this boat. I lay the screw on the gunwales to the depth I want it into the inwale, then set the drill bit and collar to suit. For holes without the counter sink you could likely remove the collar and counter sink and just use the tapered bit.

Brad: Actually they aren't brass, they are silicon bronze. It is nigh impossible now to get brass screws that won't break since most are made in China. These were ordered from a place in Minnesota, (Top Notch Fasteners) with whom I have never dealt with before and the order showed up about 2 weeks after I placed it online, without exchanging a word between them or I. I got 10/24 carriage bolts at the same time to hang the seats and thwarts, also silicon bronze.

The wet is brushing varnish into the newly drilled hole before setting the screw. It helps to lubricate and seal the raw wood.

Despite steaming and pre-bending we lost at least an inch of arch even after 2 days on the jig. I had over cut the jig by about a half inch but I figure the oak didn't get steamed long enough and because they are taller than we would normally do, it is harder to get them to bend. When they came of the steamer they bent smooth as silk, so now, to get them to take the small sharp upturn at the start of the deck, I will wrap a towel and pour boiling water on it to give it some flex before being able to finish them out to the ends. I also need to plane off a bit of the lip since the ribs taper as the approach the ends and I plane it to get it to fit better.
 
Although the soaking approach has worked in the past, we still had to horse this end into place and we aren't going to do that for the other 3 ends. The one that is on the boat will be steamed in place next weekend and the other gunwale will be re-steamed and put back on the jig in the hopes it will hold the bend better. That will likely have to wait for next weekend due to my work schedule and the forecast, which includes snow for Wednesday.

This is the first time we have worked with oak in this fashion, we have done ash before but usually do gunwales with cherry. It is a learning curve. On the positive side, in a couple of months or less this wood will have relaxed into this shape and any further refinements needed could be done then. Regardless of how long it takes it will see water this year, the first time in likely 10 years or more.

 
Gavia: It is a tapered counter sink bit with collar. You can set the depth for both the drill bit and collar for the length of your screws and how deep you want the counter sink. I got them at Lee Valley, they sell them in sets, I have it for #8 and #10 screws. We are using #10's on this boat. I lay the screw on the gunwales to the depth I want it into the inwale, then set the drill bit and collar to suit. For holes without the counter sink you could likely remove the collar and counter sink and just use the tapered bit.

Thanks, Mihun. I have a set of those. I can see that they'd start out with a small hole and then basically ream it out. Better than the usual twist drill way of cutting against the grain and leaving a ragged opening.
 
dang fine! That's about all I can say!

Thank you. That is high praise coming from someone I believe has far more skills than I do, considering the number of boats you have built over the years. I'm still fumbling through the learning process.
 
Speaking of Purple canoes, my first coat of paint on the 17' Prospector yesterday with mixed leftover paint...(and my other Bob's with 2nd coat of mixed red paint).
The finished Prospector will be light green like they used to be painted way up north, and the Bob's will be a dark red.


That purple just might be your color, Robin! :) Keep enough for the top coat just in case you really like it.
 
Here's another fine canoe nearly destroyed by someone using fiberglass rather than canvas to restore it. It's an 18'5" 1924 Kenebec Maine Guide wood canvas. Not sure if my skill level is worth attempting to put it back in original condition.
The plank on the bottom was rotted from the fiberglass trapping moister under the plank. The ribs and stems, inwales and decks are still sound so it might be worth saving, till then it sit's on the rack up in the barn loft.

 
It is great you have some really old boats to work on and available where you live. Out here there isn't much of anything and even Chestnuts are as difficult to find as hen's teeth. That Penobscot you have would be a cool project, I would have a hard time trying to bend gunwales onto the curve, although it would be a real test and treat to do it.
 
Back
Top