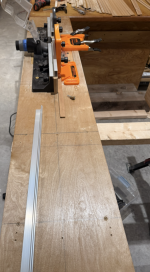
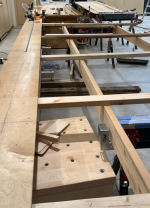
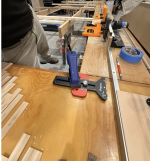
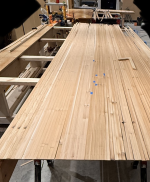
• Happy Birthday, Buddy Rich (1917-1987)! 🥁

Light Weight Prospector 16 stripper build

Joined
Oct 8, 2025
Messages
9
Reaction score
26
For your interest:

I have been working on a Chestnut Prospector 16 that I lofted from the plans in the 2000 Canoe Craft edition but I have made a few changes and intend to have 38lb finished canoe. I am not done but I am fairly far into the process and figured at this point I'm confident enough to make a post. So here are some notes that I will add to with photos and more details for each stage of my process. Please note that I am comfortable with my calculations for my purposes but who knows right? This is also an experimental and underway project so no guarantee that this will result in a usable canoe.

Goals:
-38lb or less
-wide bodied stable prospector
-reasonable workmanship
-build a usable boat
-learn some new skills and derive some enjoyment out of the process.

Build resources and method:
-Combination of Ted Moores, Gil Gilpatrick, "Canoetripping.net", Guillemot Kayaks, and general recklessness as well as many other sources

Changes to Chestnut Prospector 16 plan:
1-reduced prescribed station distances from 12" to 11 7/8" for stations 1-6 but maintained station 6-7 at 12" and kept station 6 to stem measurements as originally written. I had hoped this would allow 16' dressed lumber to span the sheer without scarfs...it did not.
2-uniformly applied a 1/4 round over to all stations believing this would somewhat uniformly reduce the overall size of the hull while efficiently avoiding bruising strips. I am not sure what impact this actually had.
3-after FG application, I reduced the sheer line by 1.25" or there abouts.
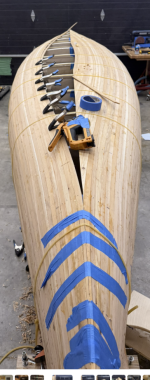
4-no inner or outer stem. However I ended up cutting/planing my bow and stern areas before exterior FG until i have a gap right down my center line and massaging in and sculpting an thickened epoxy rock guard that I could shape as desired.
5-No staples (intended)
6-Followed the shearline with strips.

Build Materials:
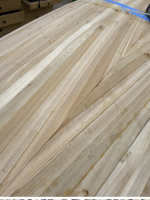
-16' WRC cedar decking boards, ripped to north of 3/16 (0.201") with circular saw method with a small twist. I intended 3/16 but was concerned about fairing insurance.
-1/4' Bead and cove for final 0.75"x0.201" dimensions.
-60" 4oz s-glass 6522 from Sweet Composites
-West Systems 105-207 and 403 adhesive filler
-Cherry everywhere else

Layup bottom up:
-4oz s-glass exterior
-2"x30" bias cut 4oz s-glass on stems
-2"x40" bias cut 4oz interior stem strips.
-4oz s-glass interior with intended 14" overlaps at bow and stern seat positions plus a 12"x48" bonus strip centered about the yoke but not reaching up to the sheer. (overlaps were not executed as intended)

Trim and Furniture (TBDish)
-Cherry Inners and Outers: 0.320" rips, 0.75" width extending 36" from center toward bow and stern, straight taper to 0.5" at the ends. 45 degree bevel ~0.25"on the bottoms of ins and outs.
-All to be epoxied in place
-cherry yoke with epoxied sister support blocks
-cherry seats (dimensions tbd) with epoxied cleats
-Cherry deck, 2 piece book match 1/4- 5/16" thick, water fall face veneer to match inwale thickness/height. 5-7" beck from the inner "stem", 4oz s-glass on the topside.

As of this post:
-The hull is glassed, ins and outs of one side have been shaped and the other side needs shaping. No decks, yoke or seats started.
-The exterior FG fill coats were too conservative to start but a failure to tip-off has lead to subsequent coats leaving some heavy stipple or orange peel that can be sanded back (hopefully)
-I have an absolute garbage looking interior stem FG chaos job that needs clean up, and some pooling on the interior glass overlaps that should be touched up.

Here are weights so far:
Weights with a starting sqft of 61sqft
-Hull with exterior FG: 28.8lb
-interior fairing completed: 27.31lb
-Sealed interior: 28.01lb
-Glassed hull, no exterior sanding: 32.81lb
-Sheer line chop: 30.41lb (2+lb for 2x strips on either side!) Reduce area to 57.7sqft

That is where we stand atm. I will endeavour to make some catchup posts for each of the build stages from strong back to (hopefully) test paddle before the lakes freeze.

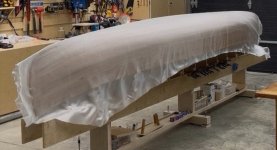
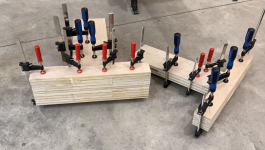
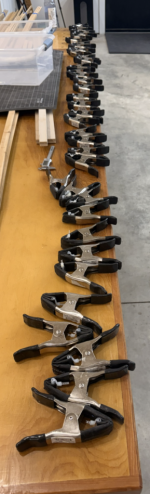
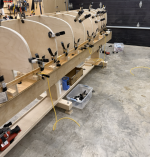
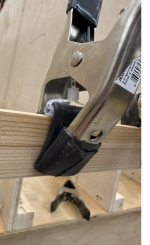
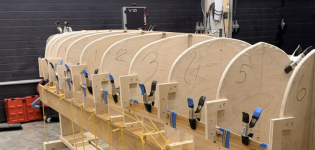
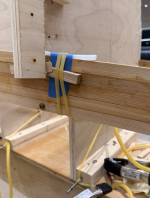
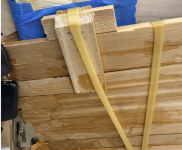
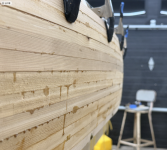
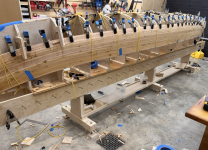
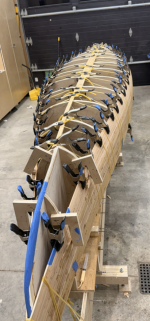
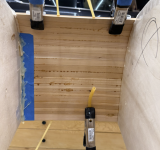
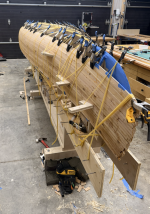
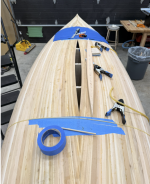
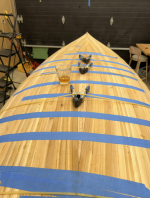
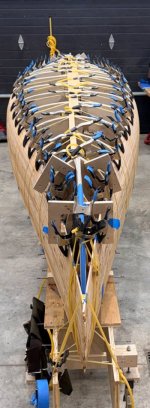
Here is a huge thanks to "jimmy clamps" and a picture of the pile strips under her veil.

Thanks!
 

Attachments

  • IMG_2870.jpeg
    IMG_2870.jpeg
    85.6 KB · Views: 29
  • IMG_3368.jpg
    IMG_3368.jpg
    37.7 KB · Views: 29
A few thoughts on reducing weight. An admirable ambition by the way ! We all try !
Fill coats can be reduced by Peel ply, if you can get it to work, without wrinkles.
You can scrape wrinkles, without getting into the cloth. You can reduce one fill coat, with just as strong of a hull.

I recently added an extra layer, over the football, on a friend's canoe. This usually take two fill coats, plus the wet out coat, on the cloth. The owner requested a Graphite bottom. After applying the wet out coat, I applied the Graphite ( Epoxy mixed with Graphite ).

Result ? wet out coat, and one graphite coat. The weave was filled, and best of all ? No sanding.
The graphite added almost no weight.

I know you are past this point ! But food for thought on your next build !

Glad you like the Jimmie clamps ! They make assembling the hull easy, especially if you are going the stapleless route !

Anxious to see your results !

Jim

PS For most peoples use, the Prospector is plenty deep. Reducing the shear is good !
 
I know very little about stripper builds but I really like Chestnut canoes, especially Prospectors and Cruisers. That second picture looks so nice, really looking forward to your progress. Thanks for posting, interesting.
 
Hey Folks.

First off, thanks Jim (and thanks for the background advice!). I did not enjoy solo-glassing the exterior one bit and solo glassing the interior was even less enjoyable even though I thought I had taken measures to make it more efficient. I did everything I could to optimize both experiences from projecting consumption, prefilling containers with insurance, recording weights, making a cheat sheet and it was a huge PITA anyway. Fortunately, I did a passable job but I think peel-ply will be on the menu next time and honestly, vac-bag resin infusion is looking really attractive--that is for next one though.

Back to the build. My order of ops was a little irregular for a number of reasons including, prioritizing tasks I was comfortable with, procrastinating tasks I did not think would be enjoyable, attempts to conserve material/consume shop scraps/produced useful cuts, lots of limited understanding of how the whole process would actually come together, and how much time I thought I could actually allocate to a given task. Thanks is all to say, if this process looks silly and a good reason is not provided, then there is a bad a reason and/or it was a mistake and I regretted it.

Here we go:

StrongBack and Lofting:
I used 18mm Cabinet grade hardwood plywood for both. I like the material, I have used it a fair bit over the last few years and I find the waste pieces can be useful. I also wanted to have station molds that I could reuse, screw into, machine easily, etc. Same goes for the strong back. This also meant that I could purchase an extra sheet or two of "insurance" material that I would be happy to keep on the rack--and old waste pieces could be easily incorporated without having to do too much figuring.
I started with the strongback. I built essentially to the Canoecraft description with minor changes to suit my long term intended application.
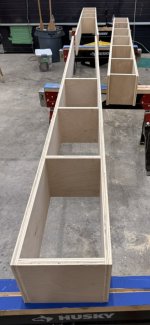
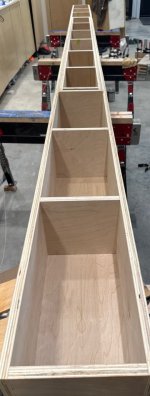
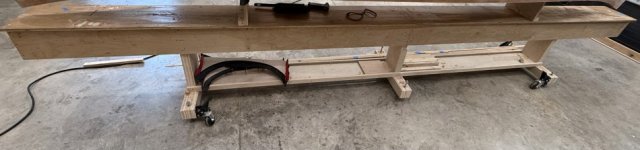
My lower completed box is 16' long 8" tall and 9.25" wide with a 12" top plate. The box is consists of 3 joining boxes including two outer 9.25" wide x 8" tall sections with cross-blocking every 16", and one similar 8' center box sized to nest between/mate the outer boxes My "design" differs from Canoecraft in that my nesting box is 8' and not 4', the idea was to make a strongback that could be extended if I wanted to build an 18-20' canoe in the future.--But if my description of the box above is adequate, you may notice that at 16', the strongbox is long enough to build a 18' canoe without modification, in fact, its actually maybe too long to build a 16' canoe as it was constructed. If you didn't catch that, no worries, neither did I until much much later.

1790705177211.jpeg
1790705219978.jpeg

3 legs were built from the some stored offcuts and strongback offcuts, just several layers of 18mm plywood interwoven. The extra leg was to accommodate a longer future build if it stretched the strongback At 5' 8" on a good day, I made my legs slightly shorter than suggested in the book, believing that I could adjust the height with shims or blocks as necessary. Unfortunately, I failed to account for the little casters i intended to install, so it ended up at the same height. Either way, after having to walk up and down my stepladders several times for each of the belly strips even after struggling to remove that casters, i will be making some adjustments before the next build.

1790705560024.png

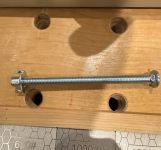
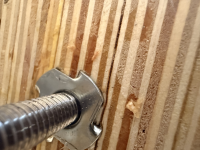
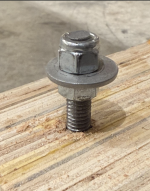
In additions to the casters, which would allow me to move that assembly around when needed as a infeed or outfeed. I also wanted make leveling easy in my shop where I aggressively sloped the floor to two floor drains when finishing the slab which makes finding a level area impossible. I used these pronged nuts and some carriage bolts, the nut goes on the bottom of the leg, and the carriage bolt threads upwards leaving the round head to act as a foot. A scrap block with a hole sized to larger than the carriage bolt head can be hot glued to the floor when doing final leveling keeping everyone in place. It seems to be important to have lots meat to support the carriage bolt and to keep the carriage bolt hole through the leg as small as possible--at least i think it helps.

The exposed thread gets a nut then washer then lock nut. They are tighten towards each other to create a flanged head that makes it easy to use a socket on a drill to make fast adjustments and the flange supports a ratcheting wrench. Additional, the lock nut has a rounder head which could be important if you stumble or even just drop a strip on one.

I don’t know if these are the best solution but they support a terrific amount of weight, they go in pretty quick and can be adjusted easily, plus cheap materials—and if the next step is lofting canoe molds and you still don’t want to do that, then they are also a great distraction.
1790705923514.png
1790706033777.png


1790706146150.png

The legs install into the strong back by sliding on either side of internal cross blocks at centre, and 32” in from either end. Then centre leg proved necessary for addressing 1/8 - 3/16” sag in the middle of my strong back when loading the middle with something like planer or even a stack of station molds.

I also managed to further delay lofting by applying several coats of contaminated polyurethane onto the strong back, believing that it would help me remove glue and epoxy drips plus create a slick surface that could be easily waxed for an in feed or out feed table. I have to say I was quite proud of what I had created and it looked fantastic…. Then I built a canoe on it, at one point had more than 50 duplex nails on it for hanging clamps, and attaching surgical tubing, had to cut portions of the top plate off here and there so I could access my canoe for fibreglassing, had lots of drips that I waited too long to remove, I even installed my mold station blocks three different times and drilled, countless other screw holes in it, etc. it’s still very serviceable, just not a pretty as I had hoped. Here she is post canoe build.
1790708653928.jpeg

Lofting had to happen eventually and so it did. I started off by further procrastinating and instead of lofting, and actually understanding the TBH and TBHB I developed my understanding only as fare as figuring out what size rectangles would be required for each of the stations. Then I used my cut list optimizer (https://www.cutlistoptimizer.com/) to layout my rectangles and get the tracksaw back out. It is worth checking out a cut list optimizer if you have not used one. It allows you to list "stock sheets" where I normally include offcuts plus full sheets, then insert pieces required and their dimensions, and then you can optimize for long cuts, less waste, larger waste, small pieces used, etc. You can also consider grain directions, different saw kerfs, etc.

I was nice to have all my stock pieces ready for actually cutting into molds but it would have been far more efficient for material use to have cut each mold directly from the plywood--but i didn't.

I finally sat down and spent a very long evening developing an understanding of the tables, then I tried to convert all of the tables into more familiar measurements that looked like " 24 7/16" " instead of "2 - 00 - 3+". After making my converted table, I plotted station 0 onto a single sheet of large 1x1 graph paper, got confused, made some unknow mistake, and started again...and again...and again. I did this enough times that figured i would run out of paper so at least got comfortable enough to plot all stations onto one sheet, believing the end result would be similar to the "full size plans" that actually came with the Gil Gilpatrick book. I succeeded as far as plotting all dots from 0-7 then when the batten and finishing nails came out it turned out that I had enough mistakes in my converted table that my sheet was completely useless and so was my table. I found a erroneous conversion on my table, then another and another, and enough that double checking the table was taking longer that creating it. I so had crumpled up my sheet and called it a night.

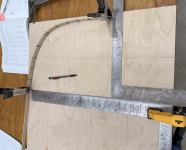
The following morning I decided i would just do it live and right off the tables onto plywood. I clamped one large rafter square to centre, and used another for plotting pencil dots, then finishing nails, batten and eventually had a handsome fair curve representing each half of each station.

1790710791228.png

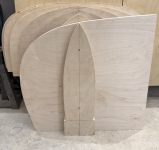
I found that the larger prepped pieces were awkward on the bandsaw so the majority of the cutting was done with an M12 jig saw, then sanded up to the line at a slight angle making the back face large. I occasionally find that my jigsaw cuts end up not being square just do to a bit if poor technique and applying pressure in the wrong spot or direction and the same goes for sanding an edge square where sometimes I just cannot. To ensure that this would not cause problems, I intentionally made the blind side of cuts angled, then grabbed a top bearing router bit and trim router and squared up faces, sanded were necessary, squared up the face, etc. the result was a pile of 8 pieces of plywood that I will call the stern molds, with a half the canoe on each.

Each half-baked mold was laid on its corresponding bow mold rectangular piece with a centerline mark. I traced one side, jig sawed ~ 1/8 from my line, then clamped the stern mold back onto the bow and used the top bearing router bit again to make them hopefully identical. Then a combination of flipping these two molds and tracing and cutting and routering until the router could would yield no dust after a full circuit.

This process produced a stack of molds and their sisters that were as identical as I believed i could make them, along somewhat flawed

1790711824328.png

After stacking them up together I did see some imperfections in their curves, so matching stations were screwed to their sister, tuned up with some " angled sanding" and re routered square. Same process for the stems molds, although i did was not building or install stems so the numbers right off the table were used.

1790712277865.png

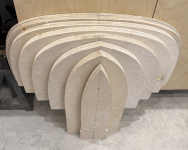
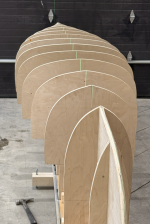
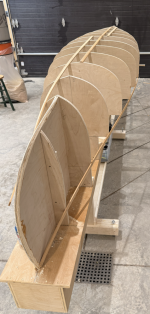
Next up, were station blocks and setting up the mold (the first time). I marked my 12" lines from centre, installed my blocks, screwed in my molds and grabbedf a few ew random strips from testing a ripping on a table saw vs bandsaw.


1790712596048.png
1790712638642.png

What i had looked pretty cool, but somethings were weird. Among my concerns were the stem to station 6 union, the interface between the strips and the stations, and some lurking feeling that I made a mistake. I fussed around, thumbed through the book, etc. and it turned out that i had affixed my molds on the wrong side of the line which was a big enough error that i forgot about everything else. So everything came off, then went back on.

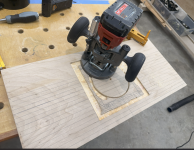
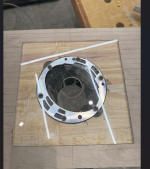
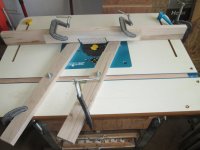
I was still waiting on lumber which I believed would be the next step so I killed some time making a new router table/plate that could fastened between two sawhorses and corresponding in-out feed tables when I needed to start putting the bead and cove on. Although I have made a few router table tops, I recently ended up with a new router with variable speed and a 1/4 or 1/2" chuck but a larger base plate. I used an 18mm off cut and some acrylic sheet then routered out the plywood so that my acrylic sheet would sit flush. I have made a handful of these where normally I hole saw my center hole, then awkwardly router out for the acrylic. I have never had great equal contact between my acrylic and my plywood so i end up using masking tape and or hot snot to shim up my acrylic flush. This time, i just started my center hole with the hole saw, then routered out the recess while the hole-sawn section was still present which allowed for consistent support for the recess-routering router. And who knew, i actually ended up exactly were i needed to be with full contact and no shims. happy day.

1790713276566.png
1790713950687.png

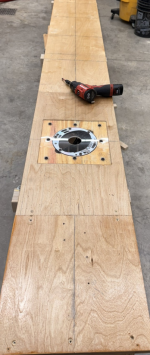
At some point during clean up i plopped in on my strong back and noticed that it looked really pretty alright there and if I could maybe suffer cutting my strongback top plate, install the new router plate, then i would would address some flexing concerns I had about the router assembly and at least have one perfectly flat in or outfeed table.--it later occurred to me that i also could have just recessed and new router plate area right into the top plate..oh well.

1790714722114.png

Notice in the photo above that there are no station molds on the strongback even though they had been installed for the second time...It turned out that part or "my" plan necessitated the use of the strongback processing the lumber but i was so excited to see the mold...another mistake.

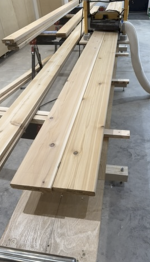
I had to give up on the lumber supplier that was suppose to have the material "ready tomorrow" for 2 weeks, so i picked up some plain jane WRC decking and a few 2x6. This was probably double my requirements but, having never built a canoe, and being comfortable with some extra lumber i thought this would give me the chance to try either thickness planing the 5/4 down to 3/4 and ripping, or ripping the 2x6 to 3/4 the resawing down to 3/16 strips. Ultimately, the planed decking route is where i start and was so slick that I didn't touch the 2x6.

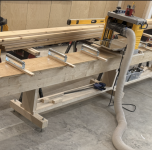
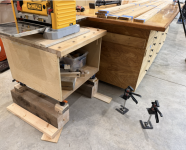
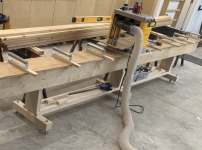
I started off by planing down 6 pc of 1.25" x 5 3/8" decking to 0.75". I plopped the planer in the middle of the strongback and installed some bench rollers for in and out feed as well as some additional roller stands. Recently I have only planed some really pretty wonky undressed hardwood 8/4 and 6/4 using a 12' long planer sled so this was an absolute treat but it did hurt to fill a whole dust collector with shavings, maybe even twice.
1790716294218.png
1790716239972.png
The same blocks that were shimming up my bench rollers to match the planer table where cut long to be the supports for ripping my strips.
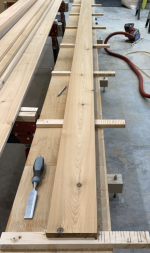
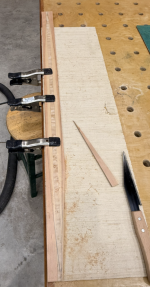
I used one of my planed boards as a circular saw table support, and ultimately found that applying 3 or 4 strips of double sided tape under the board being ripped was the more efficient and effective way to keep it in place while being cut.
I used a track saw for my ripping but no track. Instead, i picked up two cheap circular saw ripping fence guides, ground them down until they fit inside the slots on the table of my tracksaw, attached a long 5/8" square of hardwood and ended up with a fairly robust ripping fence with lots of forward and rear support that could be adjusted and squared. It work out fine.
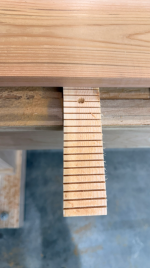
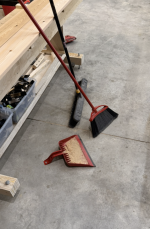
I think the best part of a track saw is the dust extraction. When paired with a good dust collection, it had limited clean up and practically (if not actually) zero dust in the air. There is a photo below of dust pan after 18 rips if not more.

1790717104453.png
1790717226269.png
1790717260749.png

I noticed at some point that occasionally, a ripped strip would go really wild and appear to zig zag. At first I thought it was just built up tension in the board but i ended up concluding that going too fast/labouring the saw, accidently lowering blade rotation dial, or cutting at the end of a battery life was the cause of spaghetti strips. I am not 100% on this theory.
I also switched from a Milwaukee 40t 0.0645" blade to a much thicker Freud14t 0.098" kerf blade and it rocked. The 40t blade yeilded 18 strips per board and did a good job but was prone to spaghetti, but the Freud was incredibly fast, easy to move through the rip and only cost me 2 strips per board.
In total, 6 boards ripped, 18/board with the milwaukee for 2 boards, 16/board with the freud for 4 boards. 100 strips in total.

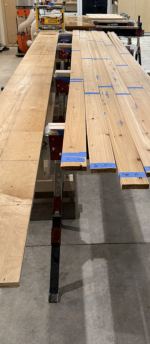
Next up was thickness planing the strips down. I had ripped my strips thick enough to make sure i could remove any saw marks or burns. They were really good before hitting the planer but i was kind of stuck as i did not want thick strips and using my long work bench as an outfeed and strong back as and infeed was fast enough when gang planing 10 strips at a time. The real pain is getting everyone level.
Here is a photo of getting the planer in position and then a photo when ready for resizing.

1790718282315.png
1790718612082.png

More to come!
 

Attachments

  • 1790715790501.png
    1790715790501.png
    1,021.2 KB · Views: 4
Onto milling that strips--and here is where I felt like i unlocked something kind of neat...

I got my planer out of the way, pulled my work bench up to my strong back and got everyone leveled up and ready to install fences dust extraction, etc. Some how, I messed up and my router table fences had to be on the "wrong side" for the feed direction to work and for me to be able to move up and down the line without having to reach to the other side of a 4' table, or run around all of my sawhorses acting as milled strip sorting and storage. I could not wrap my head around how to remedy this so said f-it lets get going.
here is that setup: Not some spaghetti strips on the table in the background
1790720955854.png
1790720984773.png
1790722380532.png

I used the suggested method for getting my bead bit and fence in the right spot and went nuts with feather boards and fences. I probably ran a dozen strips through and was very happy with the resulting product but it took forever and I could not for the life of me keep my strips moving at a consistent pace. This didn't result in and burns or bad beads but it sucked, i was gassed and I was not looking forward to finishing my bundles, then having to do it all over again to put my cove on. In finding no joy in the task I called it a night and sat down to drink beer and stare at my set up.

I wanted something like the Nick Schade power feed stock roller but could not justify that kind of purchase and had not seen anything available used. At some point i figured that i have a feed rollers in my thickness planer and i know that it will feed but not cut if you set you height just so, but whatever research i did said that 26 fpm is too fast and I had "cheaped out" on an onsale DW734 instead of the DW735 which had an adjustable feed rate, also if i put my fan speed regulator/interrupter on the plug on the planer then either the regulator would burnup or the planer would...

By morning i figured it would be worth the hour (i thought i would be 15mins) to move everything around get my planer in the line, get everyone level and stable and maybe cause some catastrophic failure at 26fmp with some of my lesser strips. I popped a strip in and just about had a s*** as it went through, then a full length strip with a follower and it was working like a hot dang! So that is my "kind of neat" thing that i figured out.

Unfortunately, i did not take photos of the arrangement but here is link to a video of the set up in action:

1790726322543.png

I am not sure if i can insert a video, if so, please let me know

After the some minor changes, the set up was this:
-~10'x4' work bench with some supplemental sawhorses as infeed
-8' long 1" aluminum angle clamped to the table inline with the router fence
-4' long 1" angle clamped at a bit of an angle opposing the 8' piece to act as an infeed shoot so my spaghetti boards would head straight to the router
-then the planer setup just so the feed rollers were touching the strips as they passed through and the blades were not cutting
-at the outfeed of the planer, a board was clamped to extend the router fence right up the the outfeed of the planer
-a roller guide with oneway bearings on the opposite side of the router fence was angled to force wayward strips into the forest of featherboards
-then came the router fence, forest of featherboards, cove or bead router bit, then more feather boards and another 8' of 1" angle with some gratuitous feather boards and blocking

Ultimately, the milling process became very quick with a few hiccups here and there. Generally speaking, I would work one bundle of 16 or 18 boards on my work table at the infeed all place to ensure the correct side was about to get processed, then feed in one strip, once it processed far enough down the line, another strip could be sent in directly behind it to push it the rest of the way through the router.
I would then move down to the outfeed and slide the finished strip onto the rack and head back to the infeed to get another strip into the feed shoot to keep a constant line of strips processing.
When i had no follower strip because my batch was spent or my sorting rack was getting cluttered, i would just pull the last few feet of the strip through the router, shut everything down, do some cleanup and get ready for the next batch. It go to the point that i stop pre-arranging my bundles on the infeed table and could get away with a solid 30-40mins of constant strip milling, but that pace meant really hauling butt to get the next strip bundle ready and get the outfeed cleared and get back to starting the follower strip.

The biggest issue i had was forgetting to clear a finished strip out of the way before it was pushed by the following strip all the way to the end of the building and up against the far wall. A few knotty strips were broken this way but clear strips in some cases would bend up until their middles touched the ceiling. Most of the time though, if I forgot to clear a strip, it would get bypassed by the following strip and i would address it without issue.


Build time:
It was finally time to start building. I took no photos of reinstalling my molds but I did end up making the decision to shorten my station distance by 1/8" in hopes of reducing the length of the boat to allow for my strips to span the length of the canoe with out requiring any scarfs. I had intended to knock the hull down to 15'8" but on the fly decided to keep the distance from 6-7 and 7-stem the same. Additionally I decided to put a uniform 1/4 (or 1/8") round over on all the stations believing that it would reduce strip bruising from the sharp 90 degree face that the strip inevitable crossed at angle. I also figured that it would slightly reduce the size of the hull perhaps even proportionately with my minor length adjustment.

When i went to install my first strip that intended to be sacrificial, I also noticed that it was possible and almost easy to conform my strip to the sheerline and always thought that looked prettier. For some reason, I believed that this would be the longest strip on the boat and was the most difficult to install. Soo...if my first strip went on easily and was long enough....then i'd be done in no time and why did i buy all those clamps and zipties and cutup all those innertubes?

1790727242017.png
1790727281820.png
1790727359971.png

I figured out pretty quickly that screwing my starter strip into the forms was as easy as it would get, but just gluing my first real strip on would be more challenging. And basically exponentionally more challenging as i continued. At some point in the first 4-6 rows i figured out that i did not have to apply glue to the full strip before installing, that relieved a lot of pressure. More clamps were made and given a colour so i would know what i was reaching for (black for normal, blue tape for jimmy), then dowels and surgical tubing came into play and cleats and wedges.

1790727647454.png
1790727818533.png

I also discovered that scarfing would be necessary, and that I would struggle getting the bow stern pieces to always nest even under immense clamping for. So some pretty bad scarfing was done and let a few crack slip in here and there.
1790728117131.png
I also got a little lazy with glue squeeze out thinking that i would be super easy to clean up. (the screws in the bottom left were just on the block i used, they dont get screwed through the hull)
1790728184744.png

1790728266827.png
Eventually, every strip resulted in a choas round the work area, oodles of tubing, and more and more clamps
1790728405367.png
1790728462502.png
I also was having trouble keeping the hull conforming to the stations when the straps were removed to install subsequent strip and even tried some hot snot on the stations. This worked pretty well but just taping everything off was time consuming.
1790728581575.png
More tubing, more clamps, more mess for each strip.
1790728673497.png
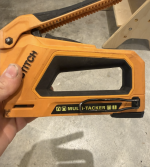
Then, after waving this thing at the hull i dont know how many strips, i finally caved and placed a brad, and other and another.
1790728822096.png
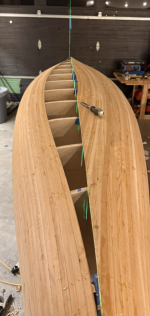
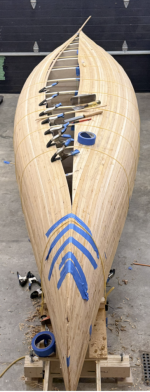
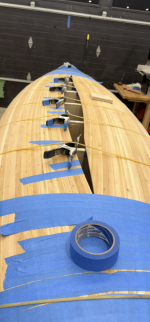
Then really quickly i got to cutting my centreline and closing the hull.
1790728956311.png1790728992336.png
1790729235700.png
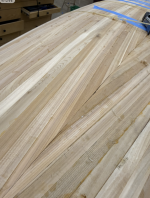
I broke some cove lips trying to fit the first few closing strips, and unfortunately had some suboptimal gaps but after 3 or so i figured it out. It was definetly challenging to make sure full length strips were the right length after getting them cut, but i likely spent more time sorting book matched strips and walking up and down step ladder than actually shaping the strips.
In some cases, i had to adjust my centerline so that my tips would match up. It was not impossible but i didnt fully get the hang of it until a few had already been installed a few muddled my centerline a bit.
1790729325497.png

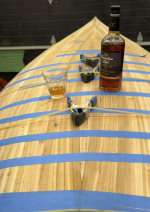
Pretty soon it was whiskey strip time. I spent way to long digging through scraps to find a nice piece of cherry that would yield a good book matched bit of heart and sapwood that matched the shape of the joining pieces. Then when i marked it for cutting i discovered that i would cut most of the heartwood off and that the birdseye piping strip would actually be about 1/3 of the strip.
1790729612444.png1790729656343.png1790729736791.png


Now to fairing.
 

Attachments

  • 1790728898452.png
    1790728898452.png
    576.6 KB · Views: 4
  • 1790729275810.png
    1790729275810.png
    1 MB · Views: 3
  • 1790729695616.png
    1790729695616.png
    940.9 KB · Views: 3
Seems everyone has their own method to bead and cove. I've improved mine over the years.
My set up, now ! So simple but worked great.
IMG_3652.JPG


Love my old Craftsman 10" three wheel band saw for trimming strip bevels.

But we all use what we have !

I know some don't like staples, until it comes to keeping the strips tight to the forms.
Actually they don't look that bad ! ( Opinion )

That's the way to do a Whiskey strip !

Nice work !

Jim
 
Seems everyone has their own method to bead and cove. I've improved mine over the years.
My set up, now ! So simple but worked great.
View attachment 157685


Love my old Craftsman 10" three wheel band saw for trimming strip bevels.

But we all use what we have !

I know some don't like staples, until it comes to keeping the strips tight to the forms.
Actually they don't look that bad ! ( Opinion )

That's the way to do a Whiskey strip !

Nice work !

Jim
That looks like a perfect set up. And honestly, I think the reason I couldn’t keep a good pace originally was because I had too many feather boards in place and likely too much pressure on them. But the set it and forget it system made me pretty happy. For my last batch I think I may have put a cove on half my strips in under and hour just feeding the pig and getting a steady stream of ready to go strips out the other end. With another set of hands and/or maybe a sloped portion of the outfeed to a sloped deck so strips just slid off, I bet you could batch out a canoe’s worth of strips in an afternoon. But who knows. It may have taken just as long to just push them through normally if you account for the amount of time I spent setting up, brooding, looking for posts about other dummies that tried my theory already, setting up again, leveling, re leveling, etc.

Re whiskey strip, I believe I saw an exchange on a post between you and cruiser where you had suggested staying several strips back not just 2. I thought that would be excessive (inspite of looking at the exchanged photos) then when starting into make my strip I was considering goring out a strip or two so that I could have more to play with.

Regarding gaps and cracks and errors: I found that I was carefully taking photos throughout the build so that the ugly bits or excluded or blurred… before fairing I took a pretty thorough inventory of all of my errors, some of those photos may have been included above, but I’ve got an album of shame that may or may not be shared.

Lots of credit to you, cruiser, stripperguy, Alan Gage, and many others from here for this build!
 
Back
Top Bottom