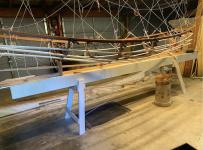
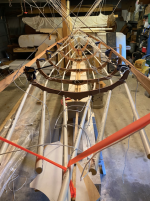
I am going to make one more post on steam bending here, with the sum total of my education and (limited) experience, so it can all be in one place. Not all of it is relevant, I don’t promise any of it is right, but it’s stood me in good stead and should get you started. Much of it might be elementary to you longer termers, but weigh in with anything to correct or add and this can be another location for later learners.
First, everyone seems to agree the rule is one hour in the box per inch of thickness. These strips were 1/8in so I went 7min, the 1/4 I’ve done I did for 15. So on and so forth. That’s where you start at and you can adjust it for wood genus and unique genetics and soil composition: all way beyond my understandings. Mostly I think about heat in the box and the outside air. When you pull your part from the steamer you have about 15 to 30sec to get it into shape. What I can also tell you is: if it’s a chilly rainy late fall night in TN, you don’t even have that long.
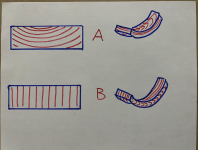
I’m not sure grain orientation is all that big a deal. Most of the articles and books I’ve read don’t mention it. As I said, this trip I had fairly even results in either angle, and the time I broke the most was largely flat grain, but that was that cold night. Most of the issues you’ll run into is with grain run-out. Which is found mostly in flat grain… The best way to avoid run-out is to rive (split) it, which except in case of I think Cedar will almost always only be flat grain…
In maybe my favorite book on building boats: Robert Morris’ Building Skin on Frame Boats, (Out of print. I paid 1/2 $ of second lowest price online and got a perfect copy, your mileage may vary), he says if it splits on outside of curve it was too cold, if it crushes on inside curve it was too hot.
He also says if you don’t have heat, you can chew on it.
Warning: works better on smaller boats.
(Reason I like his book so much is instead of the Indo-European attitude of: ‘You must have this best wood from other side of your country or half way around the world, (you really want OldGrowth but you probably can’t find it unless you’ve established a deep enough relationship that locals let you pick thru their stack (I've been doing this so long I have stored a great stash for me and my best buds (my paypal email is…))), and you must put this part such-such fraction of an inch in the XYZ axii or your boat’ll suck,’ Morris says: ’these boats were invented and perfected where they didn’t have trees, they killed almost every calorie they ate using whatever washed up on their beach, in a region where any maritime mishap or sullen seal killed them (but hey, if you can, get this and orient the frame grain like this.). If you want it to handle like this put that part here but if you like this attribute do it like that, this thing is around the size of your fist and this thing is about the length of your arm spread.’. He teaches simple but detailed how to build one boat including trusting you with theory, later adds a bunch of extra small random helpful infos so didn’t confuse you in initial mind dump, then provides basic plans for a bunch of extra boats you can use the same methods on. Good book.)
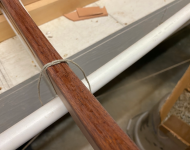
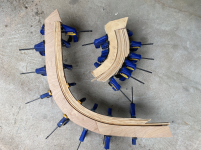
Another way to reduce snaps is straps. Idea is, as softened lignin allows fibers to slide, it’s better to have them compress a bit than release out. So a metal strap on outside of bend, with two end clamps as far apart as the wood was before bending, can keep that from happening. You can spend a lot of money on specialty tools from companies catering to wealthy boaters, or one tipster somewhere mentioned Plumber’s Hanger Straps. He used I think a clamp for securing copper wire to ground rod, but I can’t remember where I read that and three hardware stores I checked didn’t have the shape I had in memory. Or not one that’d work. For this Wasioto Whitehall I bought barrel bolt locks, those things you lift the pin and slide the rod sideways into the part you don’t want to move. The loop the rod goes into seemed to have the slightly less than 90deg angle I figured would hold these 1/8in thick strips in place. And a regular C-clamp would hold those in place. I got copper Hanger Tape because though these are Ash, wet Oak sometimes reacts to ferrous metals, and I'd prefer to avoid polka dots on later projects.
But I didn’t use them here. These bends just aren’t that tight and the strips are pretty thin. They almost went where I wanted without heat. There’s some formula, like no less a radius than Xx the thickness of the part you’re bending. I forget what it is but if you’re building a boat I can assume you have some common sense and/or have seen one before. These are Earth born organics not space age ceramics: its all just generalities. Don’t bend tighter than you remember seeing, and you’ll break less of them.
Morris says if you break a third of them, you’re doing OK.
Lets see, what else. Green wood is better than dry, air cured is better than kiln killed. Domestics are better than Foreigners (tho Mahogany does great), Hardwoods tend to be better than Softs, except Cedar which is crazy flimsy. White Oak and Ash are among the best, fruit and nut woods among the worst, but I’ve bent both Cherry and Walnut without breaking either and wait, wouldn’t Oak be a nut wood? ??? Must not be any solid rules here folks. Try whatever washed up on your beach.
Another thing I've read is you can’t steam a second time. The guy didn’t say why, so I’m free to disagree. I’ll guess because an already partly bent part won’t go back in a straight box?
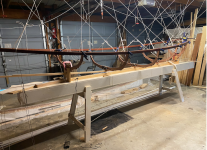
Another writer said don’t worry if all the ribs aren’t perfectly equally shaped: once you pop the rib and stringer basket off the Strongback, the boat’ll align itself how it wants. Averaging about how you wanted it. But I was building a boat I wanted to be precisely the way I wanted it. I steamed the ribs, inserted the ribs, rested the ribs, and while resting the ribs I built a flat steam box. More like a drawer with a door than a duct. I also cut a bunch of solid forms so each rib’d be shaped exactly how I wanted.
On second steam, when I pulled the first one out it had straightened out.
So I drilled holes in the extra length of all the ribs, tied them to about the U I wanted, and steamed them like that. Then stuck them in their perfect forms.
Not a single one of those rebends broke. On a chilly rainy early spring night in TN.
And they all stayed pree-cisely the way I wanted them.
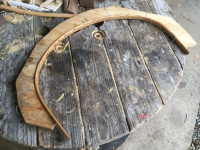
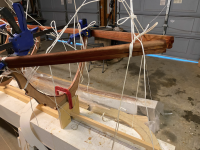
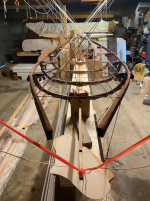
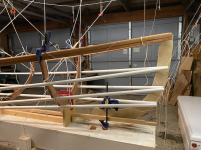
I say that partly to say, with these laminates I was ready to do that. The stem not being an even arc but one with a straight edge on either end, and not any longer than I needed them later, instead of tearing wood fibers with a bit I planned to stick them in two socks on sticks, pulled together with string (do you really think I’d do it any other way?). Once epoxied in a stack this laminate should hold itself to shape pretty well, but even if it spreads some I could trim the ends at an angle, tighten the angle of the keelson scarf without losing strength, and increase the size of the stem knee I intend to install anyway, but I do like this shape and those perfectly parallel stripes and it’s the principal of the thing. I’ve still got my drawer. I was set to resteam. After resting for two days, when I pulled the strips off their form, the tips went from 30in apart to 31.
Good enough. It’ll go.
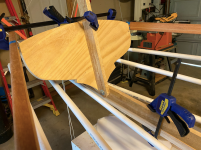
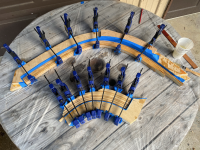
Not a particularly additionally illuminating picture but here it is anyway. I hope that tape works. These only need to be 3/4in wide to line up on the keelson and most of the strips are an inch, but some of them aren’t much more than 3/4. If the strips get stuck together staggered, after I plane the parts flush they might be too narrow. I found a fairly flat surface to push them to: a spare spool top saved for when my current (warped) workbench wears completely out. (I can get these because I have established long term relationships with select locals.)
I think that’s all I think about steaming. All I can think of anyway.

