• Happy National Zipper Day (pat. 1913)! 🤐

Trying resin infusion

Alan Gage

Super Moderator
Staff member
Joined
Jun 12, 2014
Messages
3,951
Reaction score
1,357
Location
NW Iowa
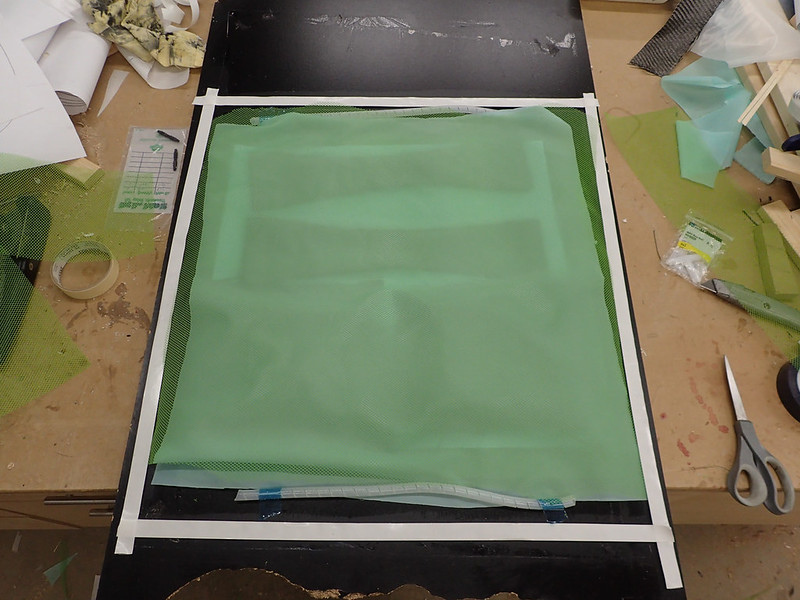
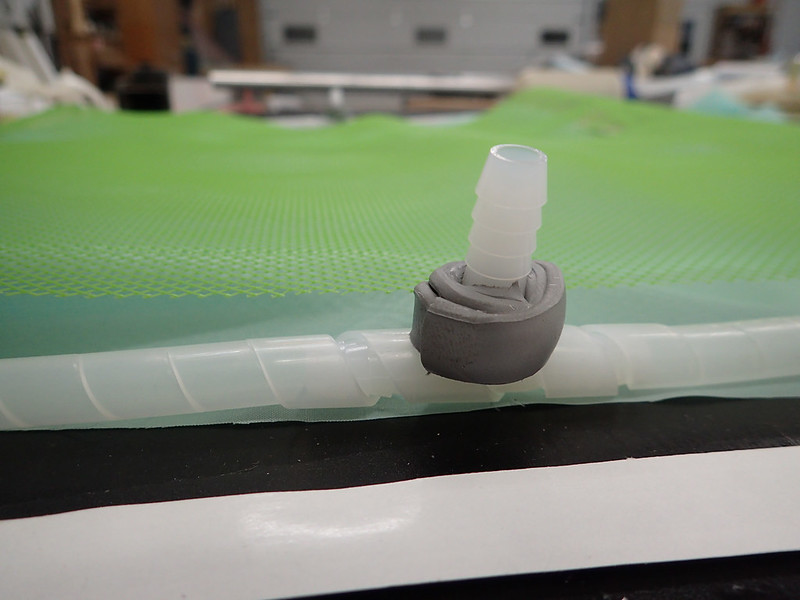
Infusion looks pretty neat so I thought I'd give it a go. I'm already set up for vacuum bagging so I didn't have to buy much for supplies to do infusion as well. It's similar in that everything is sealed up in a bag under vacuum but with infusion everything is set up and the bag sealed when dry. After it's sealed you pull a vacuum and then suck the resin in. Pretty nifty and I really liked the thought of working with dry cloth as opposed to wet and not having to get the bag sealed up while everything is smeared with resin.

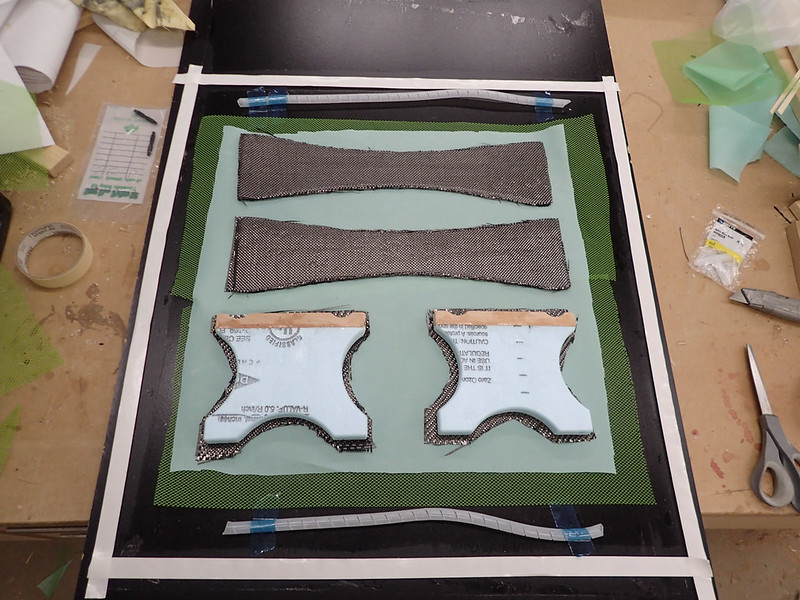
Last night was the first run. Some carbon over foam sliding seat braces and a thwart and grab handle. At the last minute I pulled some other seat components out because there wasn't much room and I decided if it all went south I didn't want to have to remake them. I got some vinyl ester resin just for this because it's thinner and cheaper. I don't like the smell but that should mostly stay contained in the bag.

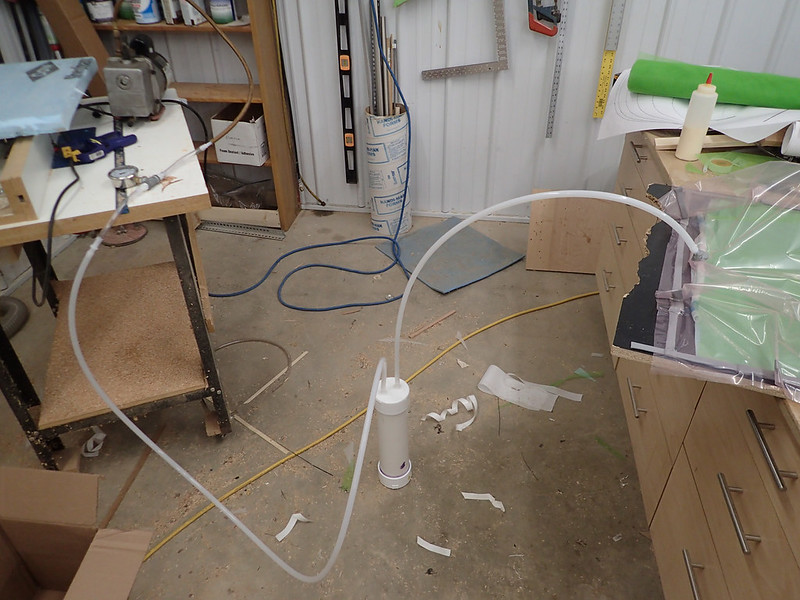
Things started off like they normally do in my shop when I started mixing the resin in my standard plastic dixie cup. Something felt sticky in the bottom of the cup while I was stirring it. Then the cup started to turn a funny color. Oh crap, it's gonna eat through! Hurry up and set it outside before it dumps all over the floor. Of course I now realize, in hindsight, that was a giant red flag, but at the time I had about a million things on my mind so I let it slide. At least that's my excuse. Grabbed a more industrial rated cup and proceeded to mix another batch.

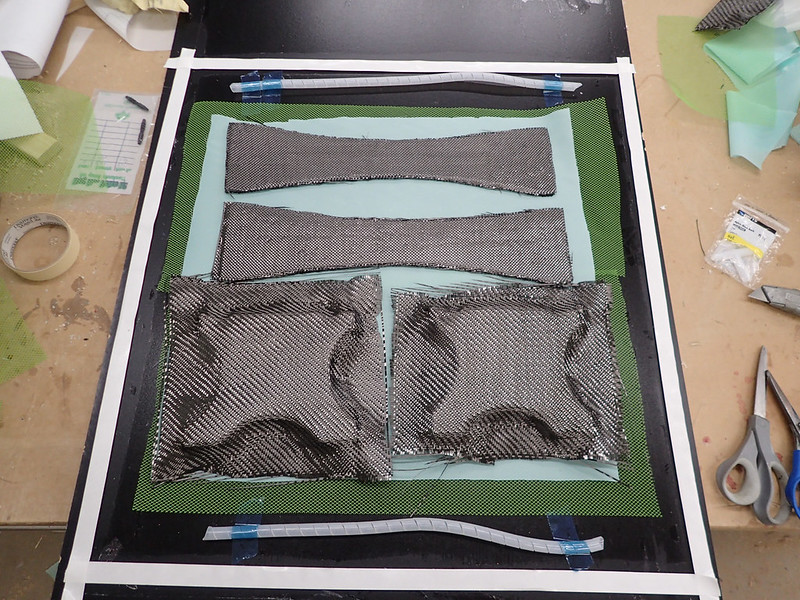
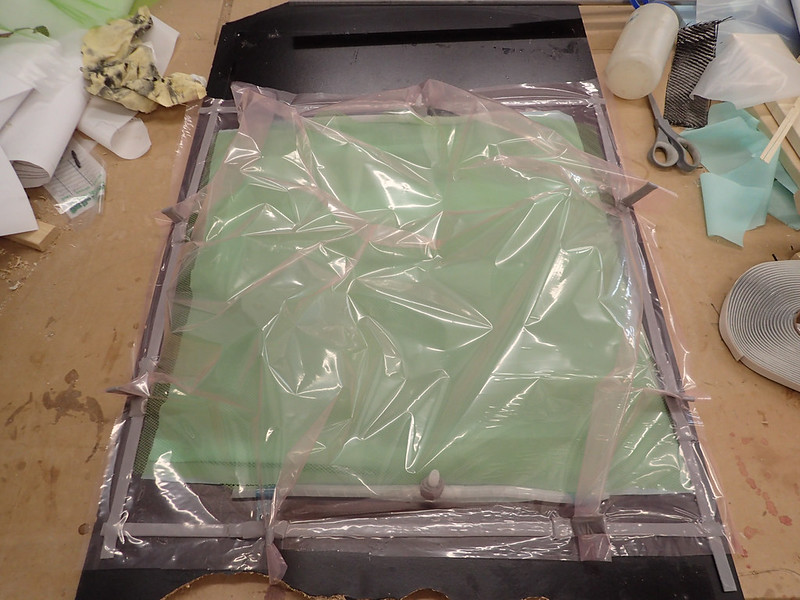
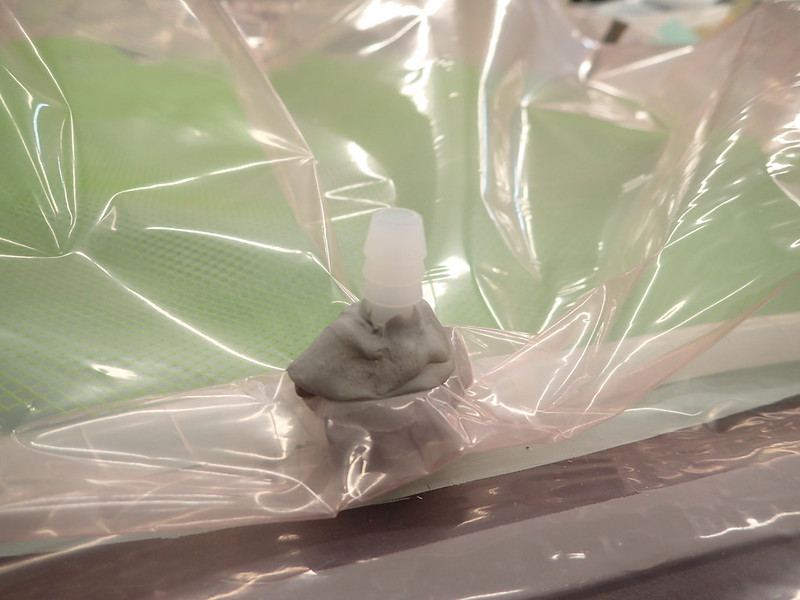
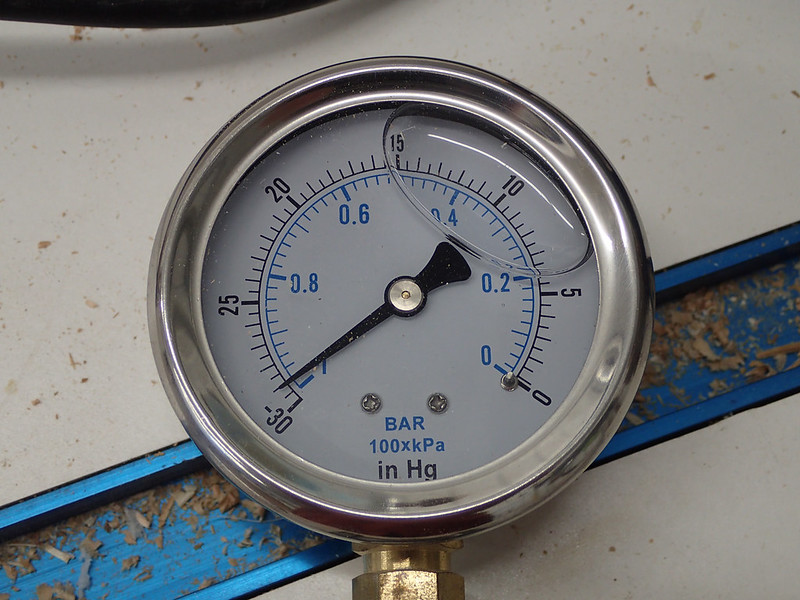
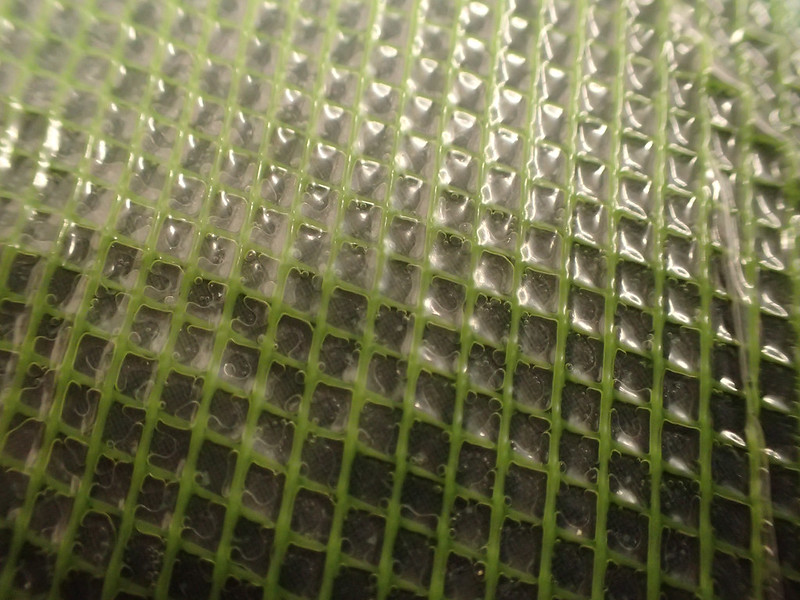
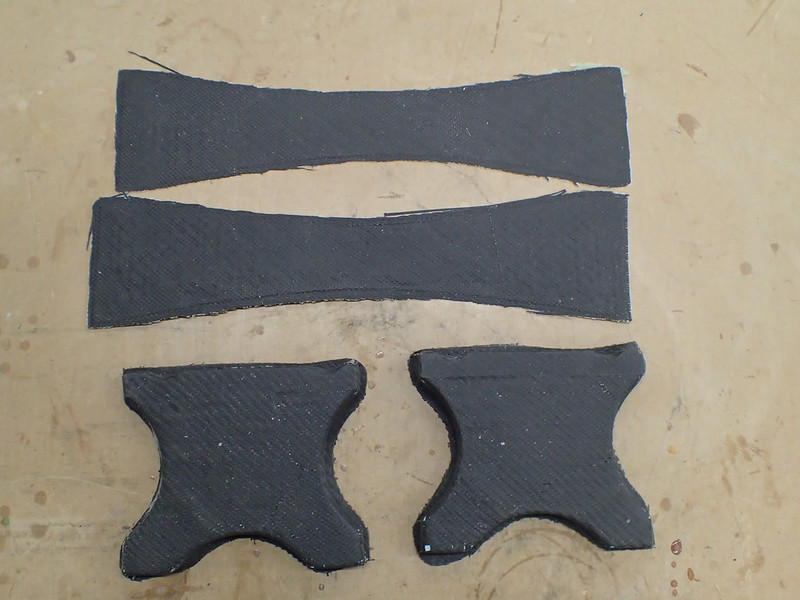
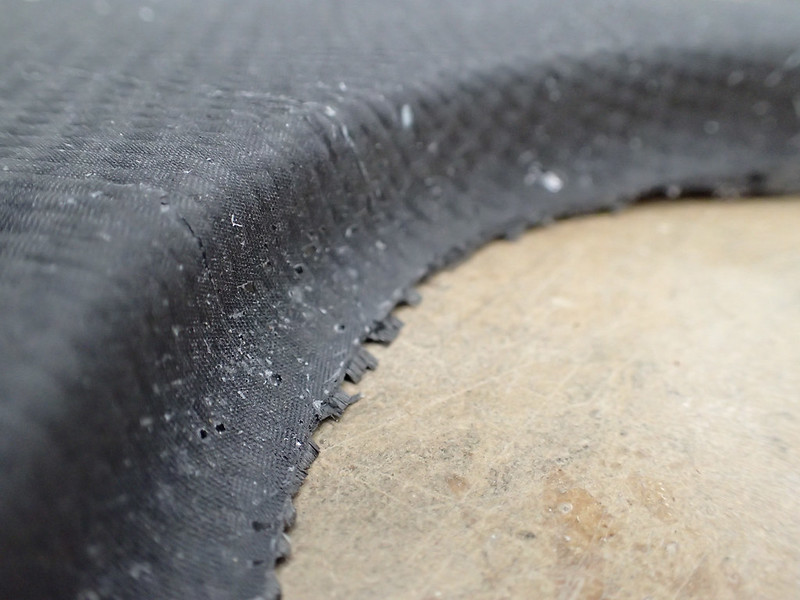
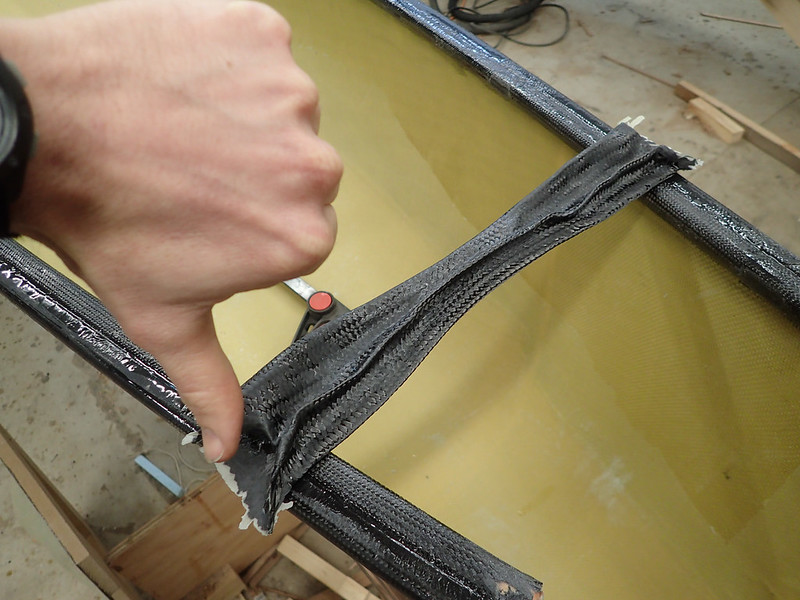
So the vacuum is pulled, it's holding well, and it's finally time for the big moment. Open up the clamp and let the resin get sucked in. I anxiously watch the front line as it slowly advances across the bag, wetting out each piece in turn. It's like magic. It looks just like all the videos on the interwebs. It's beautiful! When it reaches the opposite side I clamp off the resin line and look at my grab handle, which was the first part the resin contacted. Hmmm, looks kinda funny. What the heck is going on here? Oh mother %$#!*&$%! That danged vinyl ester resin is eating the XPS foam! Shut off the vacuum pump, kill the lights, and go back in the house. Two and a half hours down the tube with every piece ruined and my shop smells terrible. Good thing I have a sense or humor. I was still chuckling about it when I went to bed.

So I'm calling test #1 a complete success. I learned a valuable lesson that I won't be repeating anytime soon. Just to be sure this grab handle will be hanging on the wall as a reminder:

20160216_002 by Alan, on Flickr

Alan
 
Oops..... That doesn't look as good as we are use to with your work... Good for you it wasn't the entire canoe... Good luck on the next try!!

If we don't try we don't know... And we would certainly don't learn!!
 
Good work Alan! I found learning resin infusion to be a somewhat steep (and expensive) learning curve. When it comes together, though, it's a magical thing to behold. And I agree, even with infusion, it stinks out the shop.
 
I've always been curious about Vinyl ester, but never bought any. I remember Bell used it, and how the Mid West Mnteerings tents reeked of curing Vinyl Ester at the Spring event, years ago.

Cedar or Balsa would have worked fine.

Thanks for sharing ! What foam were you using ?

Jim
 
Alan,

OOps!! But the infusion worked exactly as planned, right? You just need to use a different foam substrate...
 
Last edited:
Alan, if you're using foam or balsa as a core, you might consider installing a hardpoint before you infuse. As you know, the hardpoint is denser material that will carry the loads from the gunwales through the bolt to the thwart. It prevents crushing of the thwart caps and elongation of the bolt holes.

Here's an image of fir hardpoints I installed in balsa thwart cores. This thwart will be trimmed an inch or so.

IMG_1306.jpeg
IMG_1417.jpeg
 
Last edited:
Here's one of my bumps on the Infusion Learning Curve:

​Carbon fibre cloth $400.
Core material $100.
Resin $200.
Bagging materials $200.
Time to assemble 16 hrs.
Time to cut in half, 45 seconds.

IMG_1558.jpeg
 
Last edited:
Here's one of my bumps on the Infusion Learning Curve:

​Carbon fibre cloth $400.
Core material $100.
Resin $200.
Bagging materials $200.
Time to assemble 16 hrs.
Time to cut in half, 45 seconds.


What was wrong ? I bet I could have made a "Rat" canoe out of that !
 
Alan, don't feel like the Lone Ranger. I have been having some incredible learning experiences in my work shop as of late. I have been thinking of taking up coloring instead. Not the grown up color books mind you, they look too hard. I'm thinking 6 year old level.
 
Hi Jim. The setup sprang a couple of air leaks half way through the infusion, and I couldn't find them fast enough to save the layup. I had lost some of the bottom seal around the mould, as well as a couple in the upper end seal (there's about 60 feet of seal in a 2-piece mould infusion setup, and I was working alone). I chased it and chased it, but by the time I closed all the leaks, the resin had started to kick.

The hull looked okay on the inside, but the outer hull along the bottom seam (at the mould joint) had about 2 square feet of un-infused material. It took a couple of days to get back at it, but eventually I got my carbon fibre hull.
 
Wow ! And I thought building strippers was hard !
That is some serious technical production stuff !
 
Here's one of my bumps on the Infusion Learning Curve:

​Carbon fibre cloth $400.
Core material $100.
Resin $200.
Bagging materials $200.
Time to assemble 16 hrs.
Time to cut in half, 45 seconds.


Ouch! I guess now I know what I have to look forward to. :rolleyes:

I never even thought about having to worry about leaks at the mold seam. How is it sealed? Is some sort of sealant applied to both halves before they're mated?

That carbon thwart looks beautiful. Nice finish.

Alan
 
Oh man! I feel a bit guilty but the way you wrote that up..... I have to admit, I was laughing with you Alan. I have never worked with any of that stuff and I have no words of wisdom fer ya but keep moving forward. And I now know more than I ever did about vynilester!


Jason
 
Last night was round two of infusion fun. I took some more pictures of the process. The parts are for my sliding seat assembly. I was curious if I could get the peel ply and bag to suck in tight to the inside corners on the 3/4" thick pieces and if it would force the cloth into those curves properly.

First I laid down breather flow material and peel ply on the bottom side. The flow material helps the air flow out and the resin flow in. Then placed the parts on top.

20160216_004 by Alan, on Flickr

20160216_001 (1) by Alan, on Flickr

Then another layer of peel ply and breather over the parts. I don't know if it's necessary to use the flow material on top and bottom but I'm playing it safe at this point.

20160216_002 (1) by Alan, on Flickr

The spiral tubing on one end is connected to the vacuum source. The tubing on the other end is where the resin gets sucked in. The tubing lets the resin quickly spread along its length and it can flow out at any point since it's not a solid tube.

20160216_003 by Alan, on Flickr

Sticky tape over the tee to seal when it's poked through the bag.

20160216_005 by Alan, on Flickr

Bag is sealed up.

20160216_006 by Alan, on Flickr

Fittings poked through with some more tacky tape for good measure.

20160216_007 by Alan, on Flickr

DIY resin catch pot. 3" PCV pipe with fittings epoxied into the cap.

20160216_008 by Alan, on Flickr

Good vacuum and it held too.

20160216_011 by Alan, on Flickr

At this point I could see there was some pretty severe bridging at the inside corners of those thicker pieces. I relieved the vacuum and tried to move things around. I improved it but never could eliminate it altogether. I decided to proceed anyway. If any areas didn't have good contact I could cut them off later and patch by hand.

About half way infused. I'm using epoxy this time so it doesn't eat the foam. It's rated at 400cp. The vinyl ester was rated around 200cp. The epoxy took a lot longer but it worked.

20160216_013 by Alan, on Flickr

I kept getting tiny bubbles in the flow media.

20160216_016 by Alan, on Flickr

Couldn't figure out where they were coming from. Finally figured out the bag was completely compressing the 1/4" thick flat pieces of foam and squeezing out all the air. DOH!

After pulling them out of the bag today.

20160217_001 by Alan, on Flickr

Bridging

20160217_002 by Alan, on Flickr

The tiny bubbles seemed to stay in the flow media and off the surface of the parts. They have a nice finish with only the texture of the peel ply showing. I'm happy with that. The bridging is unfortunate but not a surprise. I was impressed with how well it forced the cloth around the outside corners and around the curves. I was expecting wrinkles but there weren't any. They could have been saved with a little work but unfortunately, as I was unsticking them upon removal, they flexed and the cloth easily pulled away from the foam. This foam has a kind of slick surface on the outside and I always make a point to sand that off with 80 grit for a good bond. I forgot to on these parts so they're no good.

The flat pieces ended up really flat. This is the only 1/4" foam I could source locally. I'm not sure exactly what it is. It's softer than XPS. They really got flattened in the bag. They measure less than 1/16" now!

Getting closer. Test #3 will be a seat.

Alan
 
Alan, good work! As you are discovering, there are a great many variables to explore in order to answer all the questions that will emerge as you work.

It isn't necessary to put peel ply and flow mesh on the bottom; for small flat layups I use a 2' X 2' X 10 mm thick piece of shower door glass. Of course the side facing the glass comes out perfect-- which is fine if you can make that your 'finished' side.

In a layup like this there will always be some bridging because the bag just can't go around the lower edge of the part. Perhaps the best you can do is wrap the carbon cloth around the part and stick it down to the foam with sticky spray made for this purpose: see airtechintl.com. Still, you will get some resin bridging, but you can sand that off. Lighter, more flexible bagging yields less bridging.

When the resin front has crossed the tool and is entering the suction manifold, you might reduce the pressure to 24 or 22 inHg for a minute-- this will allow the part to become resin-rich. Then double-clamp off the resin and let the vacuum work on the bubbles. Re-check all your seals. If you have good core material it won't compress or out-gas, and you can up the suction to reduce the amount of resin in the part as desired.

The bubbles appear as a part of the first phase of the infusion especially if there are bubbles in the resin before you start-- let the mixed resin stand a few minutes for bubbles to rise out. The more viscous resins are slower to surrender bubbles along the resin front as it progresses. They will break into tiny bubbles and flow along bag fold pathways. Bubbles may rest temporarily in the upper part of the flow media, but after you clamp off-- with the resin viscosity still low-- the bubbles will be drawn off. When in doubt re-check the seals all around. The compressing foam you mentioned is unusual, to be sure.

My shop is at 4000 ASL, and I can't draw any more than 25 inHg.

The two-piece mould is sealed with grey or yellow sticky bag tape covering the joint. A more sophisticated mould would have a full-length 1/8" rubber gasket in a routed channel all around the lower flange; I went low-tech, however.

Good luck on the seat!
 
Last edited:
It isn't necessary to put peel ply and flow mesh on the bottom; for small flat layups I use a 2' X 2' X 10 mm thick piece of shower door glass. Of course the side facing the glass comes out perfect-- which is fine if you can make that your 'finished' side.

Good to know I can get by without the bottom layer. I like the glass idea, I'll have to pick some up.

When the resin front has crossed the tool and is entering the suction manifold, you might reduce the pressure to 24 or 22 inHg for a minute-- this will allow the part to become resin-rich. Then double-clamp off the resin and let the vacuum work on the bubbles. Re-check all your seals. If you have good core material it won't compress or out-gas, and you can up the suction to reduce the amount of resin in the part as desired.

The bubbles appear as a part of the first phase of the infusion especially if there are bubbles in the resin before you start-- let the mixed resin stand a few minutes for bubbles to rise out. The more viscous resins are slower to surrender bubbles along the resin front as it progresses. They will break into tiny bubbles and flow along bag fold pathways. Bubbles may rest temporarily in the upper part of the flow media, but after you clamp off-- with the resin viscosity still low-- the bubbles will be drawn off. When in doubt re-check the seals all around. The compressing foam you mentioned is unusual, to be sure.

How do you vary your vacuum level? Are you using a vacuum regulator or just loosening the fitting at the vacuum pump?

That foam that compressed isn't very good stuff. Like I said, it was the only 1/4" foam I could find locally. It's builder's foam and even softer than the 2lb/cu. ft. density XPS I have. It's noticeably softer. Unfortunately I haven't been able to find a semi-local source for better quality foam for composites. Express Composites in Minneapolis has a lot of core materials but they're all scored and scrimmed, not what I'm looking for most of the time and they can't order just a couple sheets at a time if I wanted something different. Nor did they know of anyone in the area that stocked any. There is a company about 20 minutes away that builds fiberglass truck toppers; I should stop and see what they have and it they'd be willing to sell me some.

I think my seat went well last night. I'll find out when I go home for lunch and open it up. Still got some bubbles showing up in the flow media that didn't want to go away. Held 100% vacuum for 10 minutes when leak testing so I don't think it was from leakage.

Last night I clamped off the resin feed line when the seat was about 3/4 resinated. The resin continued to spread after clamping and a few minutes later the part was fully wetted out. The resin just barely made it to the suction manifold. Is this a good practice would would I be better off to flood the piece and let the excess be drawn out the suction line?

Thanks for the help.

Alan
 
The vacuum level is controlled with a shut-off valve that may be installed anywhere in the line between the pump and the pressure pot or catch pot. You can control the amount of suction with this valve by bleeding off some pressure at the pump and closing the valve. Alternatively you could install a bleed valve in the line and this would allow pressure to bleed off while you are pumping.

In the photo, the shut-off valve is on the left; the T on the right goes to the suction manifolds on each end of the infusion.

It's possible to close the shut-off valve after the part is infused, and then shut the pump off. I don't do this, however-- I run the pump until the part kicks, reaches max temperature--and I wait for the temperature of the part to subside. Then I shut the pump off with the pressure still held on the part.

Behind the pressure pot and gauges (in the photo) there's a perforated piece of green core. For infusion, the core material needs to be perforated (typically 1/16" holes 3/4" apart) to enable resin flow through and around the part. The scored cores enable curves, but also encourage thorough resin flow.

It's typical to allow flow through to the suction manifold to ensure max wet-out of the part-- at Abaris Tech in Reno where I learned infusion, they would let it run to the pressure/catch pot before clamping off the resin line. Another point to consider is that the first part of the resin to enter the part is often aerated the most, while several minutes later the resin feed is more free of bubbles.

For those interested in trying vacuum infusion, Airtech offers a Starter Kit. It's here: http://catalogue.airtech.lu/product....id=264&lang=EN

image_3742.jpg
 
Last edited:
Good work Alan! I found learning resin infusion to be a somewhat steep (and expensive) learning curve. When it comes together, though, it's a magical thing to behold. And I agree, even with infusion, it stinks out the shop.

I was just over to Soller Composites, and they rate vinyl ester at 1/3 the strength of epoxy. Is there a reason not to use epoxy in the infusion process ?

Thanks !

Jim
 
I was just over to Soller Composites, and they rate vinyl ester at 1/3 the strength of epoxy. Is there a reason not to use epoxy in the infusion process ?

Thanks !

Jim

I think the biggest reason is because it's thicker and doesn't flow as well. I noticed a big difference between the vinyl ester and Adtech 820 epoxy, which is quite thin.

I'm sure there are others but Souris River is the only canoe manufacturer I know of that doesn't use vinyl ester so it can't be that bad.

Alan
 
Back
Top