Mike, it was a posting oops - accidentally hit “post” instead of saving a draft and since I couldn’t figure out how to delete it so I just edited it down.
Ok, so on this build - Glenn and Gamma1214 and others make a good point, and I do like me some shadenfreude as much as the next guy. So here we go with some details to date. Not a hot mess yet, but I came close a couple of times and the most risky part is still ahead.
I have tried to take relevant photos as I go. There are several more detailed, better-written and better-photographed tours of this type of construction already available, including through the link noted at the beginning of the thread. I used plans from Flo-mo, who has a website (
http://flo-mo.weebly.com/), and he also led-off a number of detailed threads on woodenboat.com and songofthepaddle.com (there are 3 or 4 build threads by other people on that site, plus a few standalone blogs here and there). Flo-mo’s plans are posted free of charge. This build is a slightly modified version of one of his 14 foot solos (14 FB+) in order to lengthen it by 6 inches or so (he did the tweaking of his original plan for me after I asked how I could go about lengthening it - great guy).
I started with 3 sheets of 3 mm (1/8 inch) thick Baltic Birch. Probably the best material would have been a couple of 4x8 sheets of 3 mm Okoume marine plywood, but that was not available to me locally. Baltic Birch is very strong and well-made but it is not a marine plywood, and is susceptible to water damage and delamination if left wet for an extended period of time - if it comes out ok this boat will be fully fibreglassed and inside-stored so that won’t be an issue.
The Baltic Birch comes in 5x5 sheets, so the first job was to trim them down to 4 foot widths, which I did on my garage floor.
View attachment 129142
Next I had to scarf the 3 sheets at a 12-1 ratio to make a single 4x15 sheet. While scarfing chunky pieces of wood for gunnels etc is not that difficult, cutting a 12-1 scarf across a four foot span of 1/8 thick material was a bit of a challenge for me, and not a good time in a freezing cold garage. I tried a variety of approaches, including building a circular saw jig, all of which either took way too much elbow grease with my limited hand tools or just obliterated the thin plywood layers. After almost 2 days of experimenting with scrap pieces (and confirming that insanity really does involve doing the same thing over and over but somehow expecting a different result) I was seriously thinking about declaring a hot mess without even getting to first base. But after some more fiddling and tool sharpening I was eventually able to pull off acceptable scarfs with a combination of careful power planing, some hand planing with a small apron plane, and 40 grit sandpaper. The photo shows two sheets of the 3 layered plywood, one on top of and set back from the other.

1
Next came the glue-up of the three pieces of plywood on my basement floor, which went ok I think, but far from perfect. I am nervous about whether the scarfs will take the bending that’s ahead.


Next came the markup of the 4x15 sheet to prep for cut-out. Seemed to go fine, and then I remembered I had a laser level and decided to double-check things with it before beginning the cuts. This revealed that marking the centre line relative to the edge of inexpertly scarfed plywood sheets was not a smart move - one sheet was slightly out of line and resulted in quite a bit of variation from centre once the laser reached the far end. Flipped it over, redrew the lines following the laser level and it came out much better - hot mess avoided (barely).


The canoe is fully symmetrical, so the layout is the same across each of the four quadrants once the lengthwise and cross center lines are accurately marked out. To save time and ensure symmetry all round I used the plan offsets to make a quarter hull template to mark out the cut lines, and simply flipped it around for each quarter and the gore (dart) end points as I went.

Cutting the lines and gores was pretty straightforward. Bought a new fret saw to reach the cut lines from the plywood edge, but for most of it I found a small razor saw followed by sanding to the line worked better (but I added to my tool collection - bonus!!!). I used cheap utility knives and a straightedge to cut the 20 gores - even thin and floppy 3 mm birch plywood is pretty tough, and after running through 3 utility knives my wrist and hand are still aching.
Just FYI for weight weenies like me, before scarfing I weighed the three 4x5 sheets and they came to about 23 pounds total. All the material cut off to this stage came to 5 pounds, leaving around 18 pounds for the wooden core of this canoe. That is about the same as the wood-only weight for a strip build using 3/16 cedar, for a boat the same size (about 47 square feet of surface area)


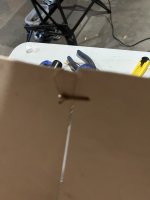
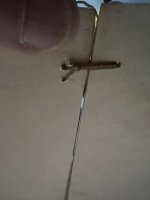
The next step is closing the gores. I put together a simple mechanism of clamps to draw them together at the edges, and then went though a half day of trying to glue them closed with cyanoacrylate glue as some other builders of this boat have used (Starbond brand, but as far as I know it is the same as Krazy glue). This was frustrating, as the glue is very brittle and the pressure from releasing the clamps once dry just popped the joint almost every time. Eventually I gave up on the glue and just drilled some tiny holes and lashed the gore ends together using waxed sinew left over from my SOF builds. Hard to get the ones near the center completely closed, but they are very very close, strongly held together, and the sinew gives enough flex to avoid distorting the joint once the clamps are removed (whereas the glue just locked them into a sharp-angled position, when it actually stuck at all). I will cut out the sinew once the inwale is attached to support the edges and gores, and fill any remaining gaps with thickened epoxy once the plywood is bent into shape.


Once all the gores were closed I got this weirdly cupped, free-standing banana shape as a result of the tension along the outside of the sheet.


That is where it sits as of today. I just finished cutting and scarfing some 7/16 x 3/4 inwales out of cherry, and will epoxy them in tomorrow. After that I will be bending the sheet lengthwise into its final shape (with about a 40 percent chance of some level of wood splitting disaster if I am not careful, as far as I can tell from reading the limited number of other build threads I can find). Oh the suspense!!!

 www.songofthepaddle.co.uk