I mentioned in another thread that I make my own shoes for wood canoe poles. I'm pretty happy with this design - which I stole from Ed Hayden's aluminum poles. It isn't traditional, but it works and holds up real well under heavy use.
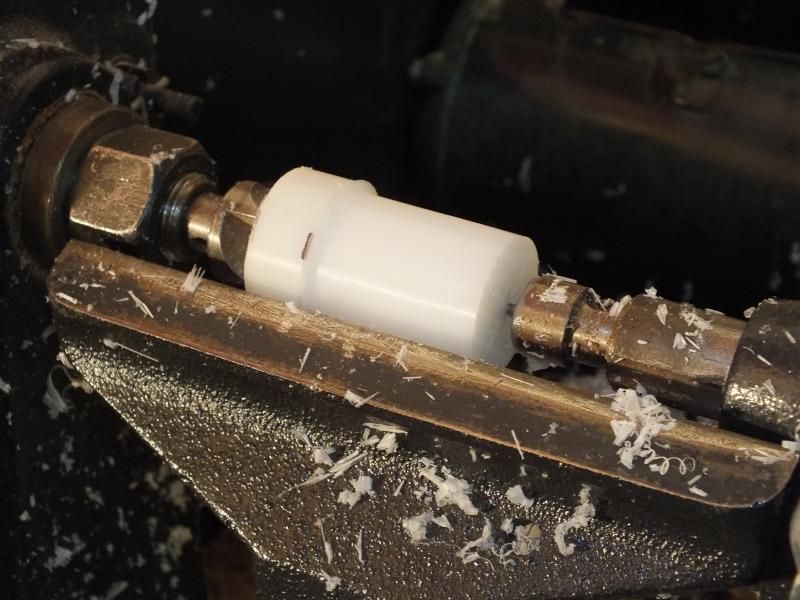
I start with a couple inches of 1.25" delrin rod chucked into the lathe, and turn all but the last 1/2" down for a press-fit to the ID of my aluminum tubing.
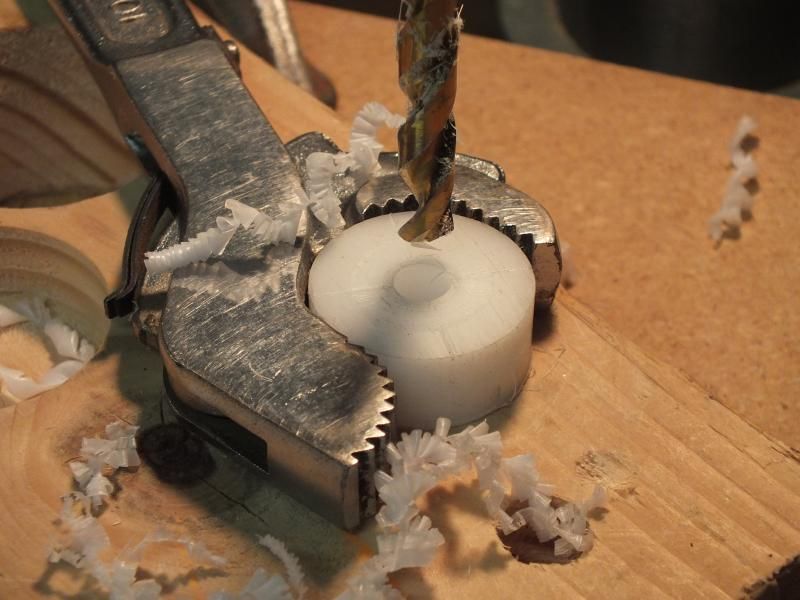
Then, I drill a slightly undersized hole for a 3/8" x 2.5" grade 8 bolt. I place the small end of the plug in a matching hole drilled in a wood block to hold it straight, and a spring-loaded pipe wrench keeps it from spinning while drilling the hole. The hole is drilled just deep enough for the threaded part of the bolt - it does not go clear through.
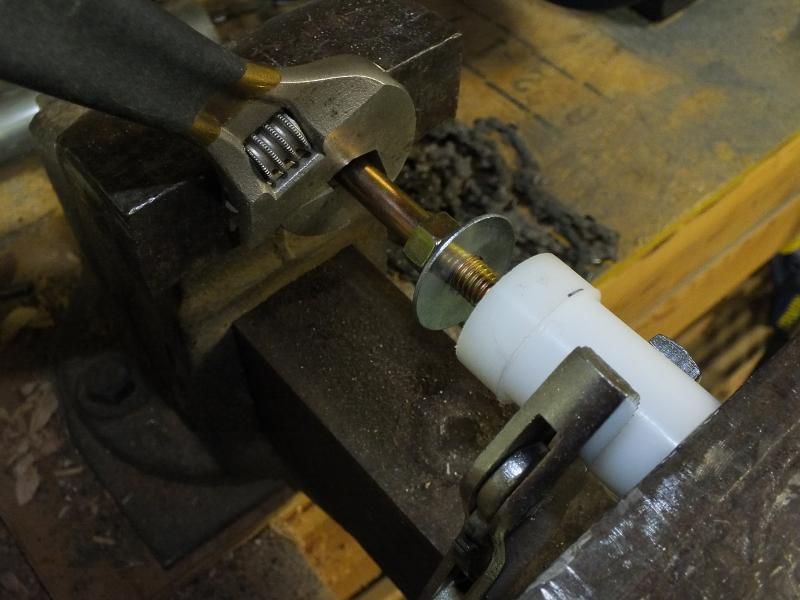
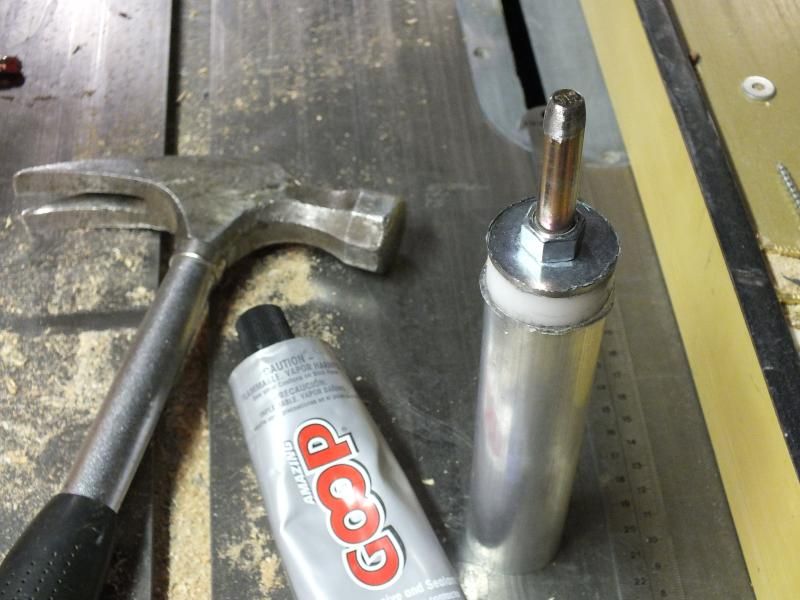
Next, I thread a nut all the way onto the bolt, add a flat washer under the nut, and thread the bolt into the delrin plug. The bench vise keeps pressure on the bolt head and plug to aid in threading it in, while the pipe wrench again keeps it from spinning. A little teflon spray lube also helps. This is the step that made me start using grade 8 bolts. Softer bolts were breaking before threading all the way in.
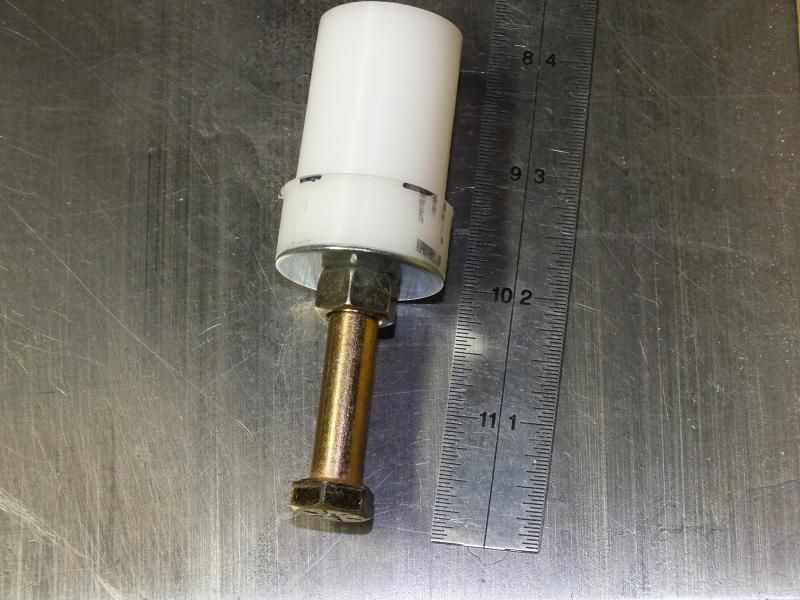
This is what it looks like when the threading is done.
The next two steps are interchangeable. The bolt head has to be ground off so it won't catch in the rocks. I can do this before pressing the plug into the tubing, or after. The inside of the tubing has to be clean and roughed-up with course grit, and I seal the plug into the tubing with Plumbers Goop. If I did everything right, I have to tap it all together with a hammer.
Oh - those pieces of tubing are about 6" long, but that surely isn't critical. The material for these pieces was left over from making aluminum poles. My supplier gets the .058 wall 6061 T6 tubing in 20' lengths. I buy two 20-footers and cut 8' from each. This gives me material for two one-piece 12' poles, one two-piece 12' pole, and enough left over for shoes for four wood poles.
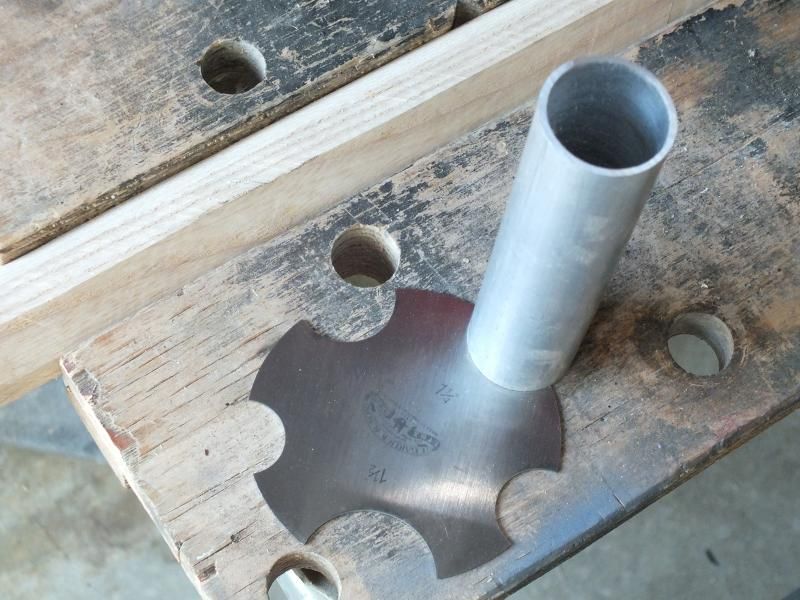
So, for now, I shape the wood poles with these tools after ripping an octagon blank. I'm working on a faster method, but this is it for now. I keep a piece of tubing handy to test the fit as I size the ends for the shoe. I measure and mark where the shoulder will be on the pole so that the end fits all the way into the shoe with no air gap.
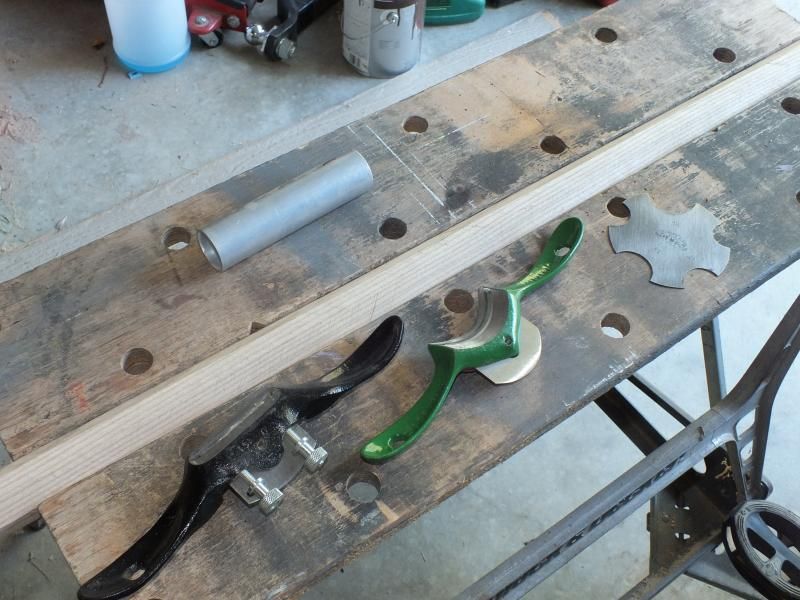
Notice that the scraper is marked for various diameters. It's actually pretty accurate.
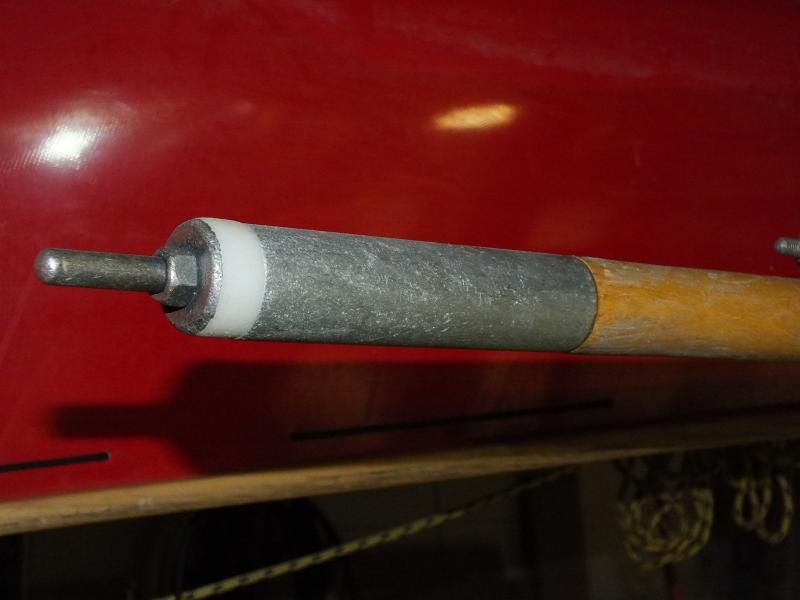
This is how it all looks - after a couple years of use. I decided not to wait until my current pole is done for a photo.")
After roughing up the inside of the tubing, I drill a tiny hole just behind the plug for excess epoxy to squeeze out. If the fit is right, that hole is necessary to get the shoe to press into place with epoxy.
That's it. These shoes are lighter than the bronze shoes I have on one of my poles, and I suspect they are also lighter than any steel shoes. They may not wear quite as well, but I'm happy with the way they are holding up. If I need to, I can heat up the ends and pull the plugs out to replace them - but I haven't had to do that yet.
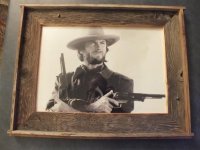
Hey, BTW - I tried to upload photos directly at first and decided that wasn't going to work. When I tried to delete the first one, I couldn't make that work without replacing it with another photo. So - I left you all a sample of some of the work I've been doing in between canoe projects. That's a framed print made with 100 year-old barn wood, that I put together for my son.
I start with a couple inches of 1.25" delrin rod chucked into the lathe, and turn all but the last 1/2" down for a press-fit to the ID of my aluminum tubing.

Then, I drill a slightly undersized hole for a 3/8" x 2.5" grade 8 bolt. I place the small end of the plug in a matching hole drilled in a wood block to hold it straight, and a spring-loaded pipe wrench keeps it from spinning while drilling the hole. The hole is drilled just deep enough for the threaded part of the bolt - it does not go clear through.

Next, I thread a nut all the way onto the bolt, add a flat washer under the nut, and thread the bolt into the delrin plug. The bench vise keeps pressure on the bolt head and plug to aid in threading it in, while the pipe wrench again keeps it from spinning. A little teflon spray lube also helps. This is the step that made me start using grade 8 bolts. Softer bolts were breaking before threading all the way in.

This is what it looks like when the threading is done.

The next two steps are interchangeable. The bolt head has to be ground off so it won't catch in the rocks. I can do this before pressing the plug into the tubing, or after. The inside of the tubing has to be clean and roughed-up with course grit, and I seal the plug into the tubing with Plumbers Goop. If I did everything right, I have to tap it all together with a hammer.
Oh - those pieces of tubing are about 6" long, but that surely isn't critical. The material for these pieces was left over from making aluminum poles. My supplier gets the .058 wall 6061 T6 tubing in 20' lengths. I buy two 20-footers and cut 8' from each. This gives me material for two one-piece 12' poles, one two-piece 12' pole, and enough left over for shoes for four wood poles.

So, for now, I shape the wood poles with these tools after ripping an octagon blank. I'm working on a faster method, but this is it for now. I keep a piece of tubing handy to test the fit as I size the ends for the shoe. I measure and mark where the shoulder will be on the pole so that the end fits all the way into the shoe with no air gap.

Notice that the scraper is marked for various diameters. It's actually pretty accurate.

This is how it all looks - after a couple years of use. I decided not to wait until my current pole is done for a photo.

After roughing up the inside of the tubing, I drill a tiny hole just behind the plug for excess epoxy to squeeze out. If the fit is right, that hole is necessary to get the shoe to press into place with epoxy.
That's it. These shoes are lighter than the bronze shoes I have on one of my poles, and I suspect they are also lighter than any steel shoes. They may not wear quite as well, but I'm happy with the way they are holding up. If I need to, I can heat up the ends and pull the plugs out to replace them - but I haven't had to do that yet.
Hey, BTW - I tried to upload photos directly at first and decided that wasn't going to work. When I tried to delete the first one, I couldn't make that work without replacing it with another photo. So - I left you all a sample of some of the work I've been doing in between canoe projects. That's a framed print made with 100 year-old barn wood, that I put together for my son.
Attachments
Last edited: