• Happy Scream Day! 😱

Tandem Tripper build

Joined
Sep 4, 2019
Messages
178
Reaction score
97
Location
Ontario
So getting my ducks lined up for my next (second) build which will be a cedar strip tandem tripping canoe (medium duty). Haven't finalized what plans I will use yet, but it will be a 16.5 to 17 footer. Planning to use 3/16 strips, with 6 ounce s-glass in and out, and 4 ounce s-glass exterior football (and I have some 4 ounce e-glass on hand for the inside football if needed). Have the wood (eastern white cedar, and some western red) which I will start to process this week. I am going to finalize my glass and epoxy purchase today, which brings me to a couple of quick questions that I would appreciate your views/advice on before I complete my order.

1) the plans that I am interested in have a max beam of about 34 to 36 inches. My understanding is that you need to be careful using 3/16 strips for wider-beamed canoes (over say 30 inches), and at least one of the designs I am interested in suggests adding a keel or shoe keel to deal with bottom seam/joint stresses if using 3/16 strips. That would not be my preference but not the end of the world either I guess. But are there other ways to achieve the same result - e.g. a run of carbon tape down the bottom seam from end to end on the inside or outside, buried under the glass? Heavier glass for the football layer? Any thoughts on this from those who have built wider-beamed canoes using 3/16 strips?

2) is peel ply for a hand layup of the hull a "thing"? I have seen a few internet postings elsewhere where people have used 18-24 inch wide strips of peel ply, with slight overlaps, to get a smoother, low epoxy finish on large multi-dimensional shapes like a boat hull. I am pretty sure if this worked reasonably well for canoe builds some of the builders here would have been all over it for a while, but it doesn't really come up in any of the searches I have done here and elsewhere (aside from some great posts, notably those by Mike McCrae, on skid plates and small area hull repairs). I probably have my answer in that fact, but gotta ask if anyone has tried this with any success for the main hull layup.

That's it for now - will update periodically (hope to have the hull together and at least glassed before the deep chill sets in around Christmas).

Thanks all

Tony
 
I've done an entire hull with peel ply. Don't think I'll do it again. It works but is a lot of material waste for not much gain in my opinion. It's hard to get it to lay flat everywhere so there will inevitably be areas where it doesn't make contact so you'll be sanding/filling spot areas anyway. No doubt with practice a person would get better.

On wider hulls with flatter bottoms I've used 1/4" strips on the bottom and then switched to 3/16" at the chine.

Alan
 
Your hull shape has a large influence on how stiff the bottom will be...a flatter bottom will have more deflections for the same load than for a shallow arch bottom.
With that said though, the single largest factor is the hull thickness. As Alan said, some thicker strips on the bottom and thinner strips around and beyond the bilge could satisfy both of your desires for stiffness and lightweight.

I mentioned the geometric and strength relationships in another thread about seat frames, but I'll quickly reiterate here. Apologies in advance for speaking under or over your understandings, I don't know your background (I've spent 40 years in R & D, 20 years as a design engineer)
For a simply supported beam, with materials being the same, deflections for given loads will be a function of the geomtries as follows:
Inverse function of the length squared.
Linear function of the width.
A function of the thickness cubed.

So, if you double the thickness, you'll decrease deflections by a factor of eight. This is clearly the most influential factor.
Of course, a canoe hull is not quite a simply supported beam, but the cross sectional shape contributes greatly to increase the moment of inertia of the hull, in the orthogonal axis. (Think arched stuctures)
Again, depending on your hull shape, adding some carbon fiber tape may also increase the hulls stiffness considerably. If the hull has broad and flat sections, then some carbon tape parallel to the keel may help. If the hull has a shallow vee, then the hull might benefit more from some carbon tape across the keel, like ribs in a W & C boat.

As far as the peel ply, I think you'll be better served by skillful use of a squeegee during the wet out and subsequent additional layers of epoxy.
 
Thanks for this gentlemen - kind of thought that peel ply would be more trouble than it is worth for a full hull application, but not having used it before I had to ask. I like the suggestion of 1/4 inch below the water line and 3/16 elsewhere.

Not an engineer and would not want to do the calculations, but conceptually I get what you are saying stripperguy - if I have it right, it translates to something like: a 16 foot two by four supported on each end will have much more flex in the middle than an 8 foot board; change that to a two by six board and you will get somewhat less flex over your 16 feet (even better if the two by six has a concave warp - ie arch - down its length); but move to a four by four and you will get pretty well no flex at all (especially if it has an arch as well).

Thanks again.
 
I've done an entire hull with peel ply. Don't think I'll do it again. It works but is a lot of material waste for not much gain in my opinion. It's hard to get it to lay flat everywhere so there will inevitably be areas where it doesn't make contact so you'll be sanding/filling spot areas anyway. No doubt with practice a person would get better.

I can’t imagine covering an entire epoxy wet hull with peel ply. Even just laying peel ply on large patches and skid plates it is tricky to get the peel ply draped without getting off kilter and laid down without wrinkles. Even there bigger pieces of peel ply are best done as a two-person task.

Mislaid or wrinkled it is a nightmare to correct without screwing up the fabric below.

To cover long strips of Dynel sleeve or glass tape I wrap the pre-cut length of release treated peel ply “tape” around a short foam roller sleeve and roll it down in place. If I’m doing something like a full length vee bottom strip my arm span isn’t 16 feet long, and the roller helps keep the peel ply flat and straight.
 
Good advice so far. I tried the Peel Ply on a hull, once, and learned that lesson the hard way !
Never again !

Double layering the cloth on the outside up to the 4" waterline adds a lot of stiffness, as well as abrasion resistance. Consider using S-glass, as opposed to E-glass. Another gain in strength and abrasion resistance !

Starting this late in the season, you must have a heated shop.

Sounds like a great Winter project ! It will brighten your days, when you get up and look out and see the White stuff on the ground ! It will make you forget all about it !

Good Luck ! And What plan have you settled on ?

Jim
 
Last edited:
Thanks Jim. Peel ply is definitely off the table - now I just need to work on the "skillful use of a squeegee" point that Stripperguy made above. That didn't work out so great with my last build, but it gets easier second time around, right? Right?

On the layup, I already made the financially painful decision to go with s-glass (hellishly expensive here). 6 ounce s-glass as the main layer inside and out, with an extra 4 ounce s-glass layer over the outside football. May put a 4 ounce layer of e-glass on the inside football as well, but will see on that.

On the plan I will use, first off the canoe is not primarily for me, but rather for my daughter and her fiancé (but I will have usage rights on account of storing it at my place? - my wife is a non-swimmer and will never, ever set foot in a canoe (that is pretty well a direct quote), so my use will likely be solo). My daughter is not an experienced paddler at all, while her fiancé does a couple of one to two week lake trips a year, with what for me is a ridiculously heavy load (around 150 pounds of gear and food). So I am looking for something that is 1) not a handfull from a stability/tracking point of view, on account of my daughter being a bit of a novice, 2) reasonably light but tough, on account of her fiancé being a bit of a gung-ho thirty-something year old, and he will have my daughter aboard, and 3) able to carry 500 pounds routinely, with a bit of room to spare.

I like the Ashes Stillwater designs, and have narrowed it down to either the Anglers Trip (36 inch beam symmetrical , Bobs Special-based 16.5 footer), or the Tandem Trip (33 inch beam asymmetrical 17 footer, basic specs similar to Freedom 17). The Anglers Trip has a higher payload capacity and would be the most stable of the two, but the Tandem Trip is a sweeter looking, faster boat that will probably be more manageable when soloed. That said, probably going to go with the Anglers Trip as it seems a little more suited-to-purpose, and I will stick with my personal solo boats.

Thanks
 
I too struggle with Squeegees ! My wrists after 28 years in a packing plant are not that flexible anymore !

I opt for those 4 or 6" Cigar type Foam rollers that RAKA sells. I get an even application, without the lines that Squeegees leave.

In my Book Solos are the way to go, easier, and cheaper to build ! And you go paddling when YOU want to go ! I love the solitude a solo gives you ! There is a learning curve to learn to paddle , but worth the education !!

I have no experience with either hull, but looking forward to another build thread here !

Jim
 
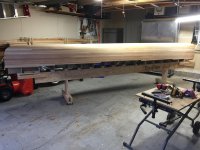
Not going to be a proper build thread, but since I have taken my efforts at a tandem tripper pretty well as far as my unheated garage will let me, I thought I would share a few things about it.

The canoe is a Freedom 17’9” from Bear Mountain, shortened to about 17’4” to give me a little more maneuvering room to build in my garage. It’s a pretty big canoe (in my experience at least) - an asymmetric design with 36” beam, 21” and 18” deep at the stem and stern respectively, and 14.5” deep in the middle.

I am more concerned with durability than weight, but still want to keep the weight down where it can safely be done on a boat this size. I used 3/16 strips above the waterline and 1/4 inch below to head-off possible oil-canning, based on advice from Alan and others here. The design calls for stems, but I opted to go without for a little bit of weight savings and to reduce complexity.

The strips are a mix of Western Red and Eastern White cedar, a few 12 and 16 foot lengths but most are 8 feet or less, so lots of butt joints, and no fancy strip pattern. I will be painting the exterior hull and leaving the interior clear. First time cutting and using bead and cove - extra prep work for sure, but well worth it once I got to finally put things together.

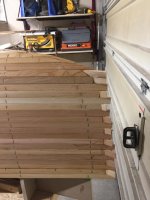
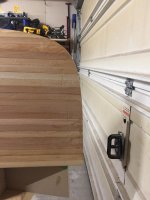
I didn’t take any photos of the form set-up etc., or first bunch of strips - nothing different than for other builds. As is visible in some of the photos below, I had to add a foot-long “shelf” on each end of my strong back to accommodate the extra length (the strong back was originally built to adjust for builds from 13 to 16 feet, as at the time I couldn’t see any reason why I would ever want to build something longer than that).

Started strips at the centre sheer line, letting the first strip find its own positioning towards the ends, and went from there. The transition from 3/16 to 1/4 inch strips was done without drama at the waterline on the middle forms, and since the waterline is not parallel with the sheer the first couple of 1/4 inch strips wound up above the waterline as they moved away from the centre.

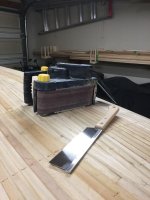
I used a variation of the sanding stick described by Cruiser in his last build to bevel the stem forms as I went - worked great, and also great to get the tips of the strips to converge nicely at the stem points. Also took Cruiser’s advice and used a cold tolerant glue (Lepage express) as most of the time I was putting this together the temperature was below 10 Celsius.

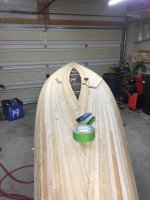
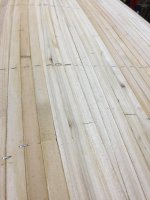
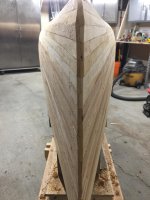
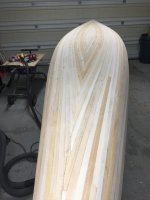
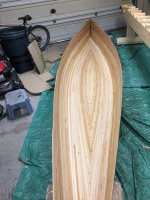
Once I got past the stems I kind of accidentally cut the first of the flat-laying strips to fit a herringbone bottom pattern, and decided to just go with it. I did the centreline cut thing on my last build and didn’t find it that bad, but was happy to try something different.

Click image for larger version  Name:	B3CCC99D-1DE1-42F1-910B-7A5F6F31DE09.jpeg Views:	0 Size:	271.7 KB ID:	119754

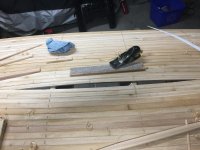
As I got closer to finishing off the football I was getting a little worried about whether there is a special way to close up a herringbone pattern. After many fruitless internet searches I decided to just keep going and deal with it when I got there, and wound up with an easily filled, single-wide whiskey strip gap.

Click image for larger version  Name:	5EEA0159-D3C3-4D16-8179-AACC3DCD3938.jpeg Views:	0 Size:	325.1 KB ID:	119755

After about a half hour of fussing with a plane and the sanding strip to get the end bevels right, it went in surprisingly easily.


Click image for larger version  Name:	32A9AFB5-2484-4B9E-83B0-B01EF9AA92B9.jpeg Views:	0 Size:	264.5 KB ID:	119756

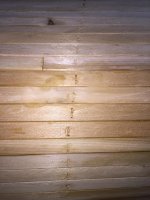
Then moved to pull the staples - point to note: I have tendonitis or something in my right thumb and wrist, that was really aggravated on my build last year such that I needed a couple of shots of cortisone in my hand afterwards. In order to avoid repetitive stress on my hand I used an air-powered stapler for this build. Worked great in that my hand is fine, but was tough to calibrate the force of the stapler to deal with soft cedar, leaving many dents in the wood. Doesn’t bother me because I will be painting the hull so I will just fill them in along with the staple holes before glassing, but obviously not something you want to do if you intend to have a clear finish.


Click image for larger version  Name:	7545DA7A-5916-4387-8473-46FB287759AB.jpeg Views:	0 Size:	415.1 KB ID:	119757

After the staples were pulled I moved to roughing out the stems with my trusty Japanese saw and (gasp) belt sander.


Click image for larger version  Name:	9AABA5DA-40D5-41D7-9257-C6ADE972CDD5.jpeg Views:	0 Size:	261.5 KB ID:	119758

Will fine tune and epoxy-fill any gaps when I do the final sanding - you can see from the front view photo of the bow stem where the stripping moved from 3/16 to 1/4

Click image for larger version  Name:	D731D5C9-1399-443E-8458-7D9F80324341.jpeg Views:	0 Size:	305.3 KB ID:	119759

Click image for larger version  Name:	0D027E54-6505-4B6E-806F-91B5BFDC0CA6.jpeg Views:	0 Size:	273.0 KB ID:	119761

Click image for larger version  Name:	0D027E54-6505-4B6E-806F-91B5BFDC0CA6.jpeg Views:	0 Size:	273.0 KB ID:	119761

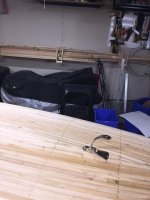
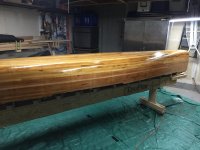
Did a rough sanding with 60 grit today and here she sits until things warm up in a few months - hope to get a mild day or two so I can fill any gaps and dings with thickened epoxy before final sanding with something like 120 grit. But any further real work will have to wait until April probably.

Click image for larger version  Name:	5D42C620-5B42-408C-8C92-29801CFDE19E.jpeg Views:	0 Size:	319.9 KB ID:	119763

Click image for larger version  Name:	5D42C620-5B42-408C-8C92-29801CFDE19E.jpeg Views:	0 Size:	319.9 KB ID:	119763

My layup plan is 6 ounce S glass on the outside, with a 4 ounce S glass football. I have enough 6 ounce S glass for the interior as well, but thinking that might be overkill and may go with E glass instead. Unfortunately, I have lots of time to think about all the permutations and combinations that are possible.

But I’ll still keep busy in my toasty warm basement. Have another skin on frame “paddlecraft which shall not be named” planned, using carbon fibre this time to move more towards something ultra lightweight. Also bought a bunch of carbon and fibreglass sleeve from Soller Composites and will be trying to develop my mediocre skills to do carbon over foam or cedar gunnels, thwarts and maybe seat frames for this canoe to see what I can reasonably pull-off while maintaining a strong boat (and shamelessly stealing from the work of Alan, Stripperguy, and others). Will post some of the results of these experiments, probably along with some panicky questions/pleas for advice as I go.

Thanks all, and stay safe

Tony
 
Last edited:
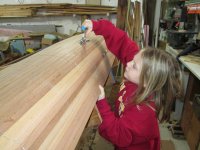
I've probably shared Nick Schade's staple puller a hundred times.
Another trick is to get a Grand kid to help !
Tilt the strongback, and give them the puller !

IMG_0860_zpsiymgmb21.jpg
 
Alas, I don’t have access to a Munchkin labour force Jim, but I do have the staple puller - bought it off Amazon not long ago after seeing a post you made on it. Works great!!!

943CF490-DD18-4A0C-AACF-ACD77527A3DD.jpeg
 
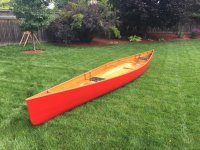
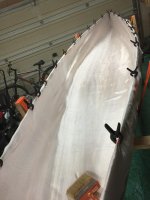
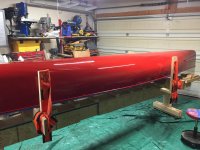
And this one is done, after much delay. Didn’t take many photos along the way, as opportunities to work on it were always unpredictable so I just put my head down and pushed forward as fast as possible on each step before having to take a break for other things. Used s-glass all the way, with 1/4 inch cedar below the waterline and 3/16 above. The exterior has a football of four ounce buried under a layer of six ounce, while the inside has a single six ounce layer. With 3 additional layers at the stems if should be a pretty strong hull overall.

Interlux Brightsides Fire Red on the exterior - 3 coats over a coat of their grey primer for good coverage of the strip pattern and giant dents around the staple marks - not my first choice in paint colour but building this for my daughter and her boyfriend, who were pretty emphatic that it should be red.

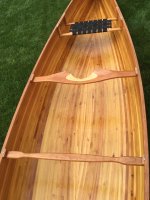
I originally intended to try a few things like carbon over foam for the gunnels and seats, but found through a few rudimentary experiments that at least in my unskilled hands the weight reductions were not that great with hand layups, compared to the effort and cost required. So I decided to go with wood instead.

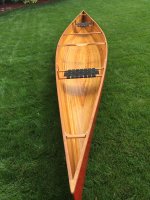
The gunnel is cherry - one piece, scarfed from a 10 foot board I had, and cut 7/8 wide by 3/4 high. Once the slot was cut on my table saw to fit over the sheer they came out to a little over 2 pounds each side, before about 8 ounces each of thickened epoxy to attach them. Wish I could say I took the time to make the seats and yoke myself, but it is freaking August and I wanted this done and on the water before the fall, so I bought all the fittings from Trailhead Paddleshack here in Ottawa. Webbed seats, fancy deep dish yoke, thwart, and two handles, all in cherry, came in a 6.5 pounds overall once all the trimming was done (which I actually found to be surprisingly light). In total, the canoe tops out at 55 pounds all in, about 5 pounds more than I had hoped for but still not bad for a 35 inch beam, 14.5 inch deep canoe that is approaching 18 feet long.

Has not touched water yet - likely in the next week or so. To my mind this is a very large canoe (not my personal cup of tea), but it should be stable and strong, and able to carry a ridiculously heavy load, which suits the kind of tripping my kids and their significant others like to do. Happy to answer any questions, but overall this was a very straightforward build, even for a relative novice like me. All the best

Tony
 

Attachments

  • photo19485.jpg
    photo19485.jpg
    658.4 KB · Views: 8
  • photo19486.jpg
    photo19486.jpg
    303.6 KB · Views: 9
  • photo19487.jpg
    photo19487.jpg
    375.2 KB · Views: 8
  • photo19488.jpg
    photo19488.jpg
    431.1 KB · Views: 7
  • photo19489.jpg
    photo19489.jpg
    328.9 KB · Views: 8
  • photo19490.jpg
    photo19490.jpg
    366.1 KB · Views: 8
  • photo19491.jpg
    photo19491.jpg
    617.9 KB · Views: 8
Back
Top