• Happy National Paranormal Day! 🔮👻👽

Stapleless or fill staple holes

Joined
Jun 10, 2015
Messages
107
Reaction score
8
Location
Wakefield RI
I'm getting ready to begin my third build. The previous two builds were stapleless (using different methods), but both boats were "traditional" designs. One was an EM White the other a prospector. Neither on has any tumblehome.

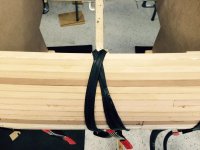
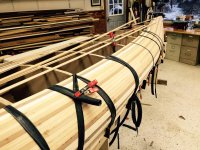
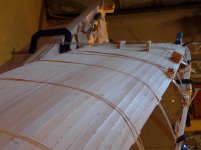
I'm getting ready to build a modern asym solo hull with quite a bit of tumblehome and am worried about securing that area, but I don't like the look of staple holes.

I'm seeking any advise this group of talented builders have for me!
 
The boat I just built has decent tumblehome and other than nailing the first strip on I did not use staples at all through to the 4" waterline and only then due to the strips being so dry they would not lay flat while the glue set. Whatever process you used prior should work for this build. On my first build we routed a slot into the forms about a half inch back from the edge and used spring clamps to hold the strips to the forms. That really only works if your forms are thick enough to take the groove. Next one I build if I make my own forms I will go back to doing that and expand upon my strap idea to avoid staples.

Karin
 
I would build my canoes without staples, except for two reasons.
Time, and keeping my strips true to the forms.

A tumblehomed hull can be built stapleless.

If you start stapleless, and you have troubles keeping strips against the forms, start using staples.

Recently I've been using Elmer's Max, for gluing up strips and filling staple holes, before sanding the hull. I dab a little glue at the staple holes, press it into the hole with my finger, let dry, and sand.
It's not perfect, but the best I've found so far.

Jim
 
Wow you sound exactly like me as far as builds go. Two staple less and a solo that is stapled. If I can make a petrel kayak staple less I'm pretty sure anything can be done stapleless. My technique is hot glue and lots of tape. You have to get the right hot glue and tape for it to work well though. Use the green 3m tape (paint store). It has good adhesion and is slightly stretchy so it tends to clamp better than most tapes.

The hot melt works really well holding the strips to the forms. A sharp blow from the side shears off all the glue so you can pull the forms. You need the right glue also I have to look it up I don't remember right now but I can get it if you're interested.

The other thing to do is pre end your strips so the glue and tape don't have such a big load. I use a heat gun while placing the Stinson the forms. It works unbelievably well.
 
I always wonder about the sandal staples, I've seen them advertise some where, but can't remember where... Any thought on that??

Are you thinking of composite staples that can be left in and sanded down, like these: http://raptornails.com/

I've tried them on a couple boats and I think they stink. First time I tried them I used them for 1/4 of the hull and then switched back to metal for the rest. I gave them a second chance when building the wood mold for my composite Bloodvein and while I got along a little better I was still not impressed.

They're a larger gauge than metal staples and they blow a pretty big hole in the cedar. The hole they make is usually bigger than the staple leg so they don't grip tight unless you can drive the heads flush, which is not easy. The legs also tend to break when being driven and the extra thickness of the legs makes them more prone to split the cedar if close to the edge. They also have a wider crown than most metal staples which makes them hard to place without getting a leg close to the edge. In the end you end up spending a lot of money on special staples and stapler only to have more hassle during assembly and the same black staple holes when done because of the extra large holes they make.

I think a pneumatic nailer with small gauge composite brads could be a nice setup but I'm not willing to spend the $250-300 for a gun to find out. I'm pretty happy with metal staples and it only takes 45 minutes to pull them out.

As far as staples or stapleless that's a personal decision. If you don't like the holes then I think stapleless is your only option. I don't think there's a good way to fill the holes where they won't be noticeable. Tumblehome will offer challenges but where there's a will there's a way. One way to cheat would be to staple the tumblehomed section and later on mask it off and paint that area to contrast with the rest of the hull and cover the staple holes.

Alan
 
Thank you Alan, makes a lot of sense!! I think I like the outside of the boat to be painted, so I guess it doesn't really matter...
 
Just leave the outside clear and paint the inside like Mem does so you needn't look at all the ugly staple holes.
 
I don't have any input on this debate but I do sure like the way a stapleless stripper looks! Alan, have you seen the Ryobi air nailer? They work remarkably well on interior moulding with half the cost (assuming you already have their batteries for a different tool)

Food for thought


Jason
 
No Title

When I began my build, I considered using the composite snap brads rather than staples as my father has a pretty nice cordless brad gun. Upon short order, I found that the operation of the gun quickly shattered the brad making the process unacceptable. A thrifty guy, I returned the box of brads and went without brads or staples. Now constructed, the Merlin required 17 additional finish nails (holes) to assure compliance with the forms at critical points, with the exception of the shear-line, which was affixed to the forms with removable brads. These holes will be under the gunwale when complete A series of bicycle tubes and spring clamps allowed for a very tight stapless build even around the tumblehome. Using the long rubber straps, I was able to strategically tighten the strips to the form by wrapping the binder around the opposite side of the form and returning the end to the starting point, snugging the strip quite nicely both to the form and the adjacent strip.
 

Attachments

  • photo3539.jpg
    photo3539.jpg
    313.8 KB · Views: 1
  • photo4196.jpg
    photo4196.jpg
    495.2 KB · Views: 1
  • photo4197.jpg
    photo4197.jpg
    471.5 KB · Views: 1
I don't have any input on this debate but I do sure like the way a stapleless stripper looks! Alan, have you seen the Ryobi air nailer? They work remarkably well on interior moulding with half the cost (assuming you already have their batteries for a different tool)

Food for thought


Jason

I've got plenty of air nailers but the composite brads and staples, as far as I know, require their own specific nailers.

Alan
 
Along the lines of what MacCamper did with inner tubes, I built a stapleless Kipawa using a 1 lb bag of regular elastic bands from...Staples (oh the irony). I still have at least half of the bag left. The first strip was placed along the gunnel line, about 1/8 inch proud of the final height and held in place with finishing nails which were left proud by about 1/4 inch. This was used to hook the elastic band, which was then looped over the newly installed strip, wrapped around the bottom and hooked onto the nail. The strips were installed cove up and a small dowel (wrapped in packing tape) was placed in the cove to protect it from crushing were each elastic went. You can install multiple elastics if you need more pressure, link them together if they aren't long enough and in places were more tension was needed to pull the strips into the form, adding a nail to the middle of the form to pull it horizontally worked or just adding wedges of wood between the elastic and the strips also worked. The ends required a lot of persuasion to follow the forms and I think for the next canoe (I can dream, can't I), using inner tubes and/or ratchet straps would work well. The only thing I didn't enjoy much using the elastics is that inevitably, some would break, just as they were stretched to their limit. Not a technique to be used around those with sensitive ears.
 
One method That I've seen, and it works, is stripping with the bead up on bead and cove, and wrap thin fish line, to hold the strips in place.
Once you have the strip secured with the fish line, you continue stripping. The builder used brads nailed to the forms to wrap the line on. I wish I had the link, but one builder built two Wee Lassies ,one right after the other. The photos looked great.
More food for thought !

Jim
 
Please use caution if trying the fishing line method. I've done it twice, now, and am looking for an alternative. I have not seen the builds that Jim Dodd mentioned, but I suspect that the strips were laid in such a way that they were not flexed much against the 3/4 dimension. When I lay strips following the sheer, it takes a lot of pressure to hold them in place. Fishing line under tension can cut your hands, and can leave scars in the gluelines. They are definitely not as noticeable as staple holes, (they fade into the glue) but they are there.

MacCamper and kolo were you able to continue stripping "run-on" or did you need to allow the glue to set before the next strip was laid?
 
"were you able to continue stripping "run-on" or did you need to allow the glue to set before the next strip was laid?"

The time between strips was fast enough for me, roughly 45 minutes on one side. That gave me plenty of time to set a strip on the opposite side and then go back and lay another. This is a new hobby for me so the lag time was/is fine as it gave me time to "think" through my decisions. As I continue forward I will use that "down time" more efficiently by creating the other components of the canoe, items that I have been building as needed or when the part is required. On occasion I would bring my lap top and conduct business between strips if necessary ... or surf the canoetripping ocean. I can appreciate a skilled builder might consider this process too slow, but in my mind the pace was perfect and product pretty nice.

In hindsight, going forward I will allow myself many more "extra" loose straps and another dozen 3 inch clamps for cinching down pesky strips. Also, I only had long straps affixed to one side of the strong back so was forced to take additional time between runs. On the next build I will definitely have tubes on both sides of the forms and this will very likely speed the process up.
 
Last edited:
Thank you all for the thoughtful input, it's part of the reason that this is the only web site I participate in. Everyone is willing to share knowledge.

I'm leaning toward using 3/4" stations and routing a grove for spring clamps. It seems the only downsides are the cost of the plywood, and the pace of adding strips. Am I missing something? What is anyone's experience that has used this method.
 
I'm not sure what 3/4 stations are but in my experience you'll need a way to clap strips to each other between the forms also.
 
If you use 3/16 strips it gets easier to clamp everything also.
 
He is talking about 3/4" thickness for the mold stations. You need to be careful as to how close to the edge you make the groove, it depends on the span of your spring clamps and how much pressure you want on the strips. Too much leaves dents although those would most likely get sanded out when fairing the hull. We used old plywood, re-purposed and had a few issues with the edge failing when they were shaped but it was minor really. Next boat I may go that route again just for convenience. For what it is worth, our spring clamps are metal and came from either Canadian Tire or Lee Valley. I personally do not like the plastic ones and will pay extra for the metal. It may also help to remove the vinyl covering at the end of one arm of the clamp that goes on the form but leave the other one if possible to lessen damage to strips.

I used dowels and fibre tape for between forms rather than clamps.
 
No Title

"were you able to continue stripping "run-on" or did you need to allow the glue to set before the next strip was laid?"

I would alternate sides, one strip at a time, and would typically do 3-5 strips (per side) in an evening. There was enough time between sides - taking the rubber bands off, applying glue, seating the strip and re-attaching the rubber bands - that the glue (regular carpenters glue) was set up enough on the previous side to be stable. I enjoyed the process and wasn't in any rush, and I would guess that I would take approximately 2-3 hours to do this, per evening. I was also shaping the stems and trimming the ends of the strips as I put them on.

Here are a couple of pics of the stripping in progress. The blocks/wedges were used to apply pressure towards the forms where needed.
 

Attachments

  • photo4213.jpg
    photo4213.jpg
    268.5 KB · Views: 0
  • photo4214.jpg
    photo4214.jpg
    282.7 KB · Views: 0
Back
Top