• Happy National Blueberry Pie Day! 🫐🥧

Solo expedition build

Ha! That's pretty good.

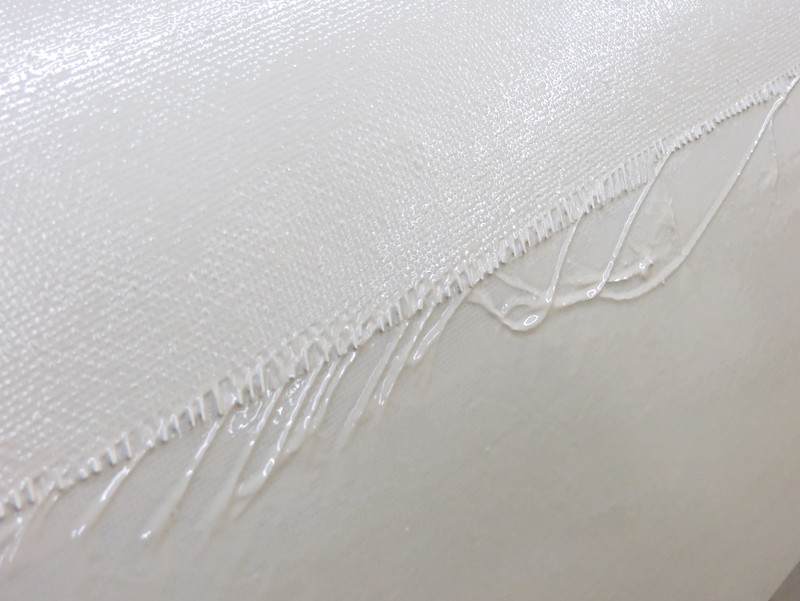
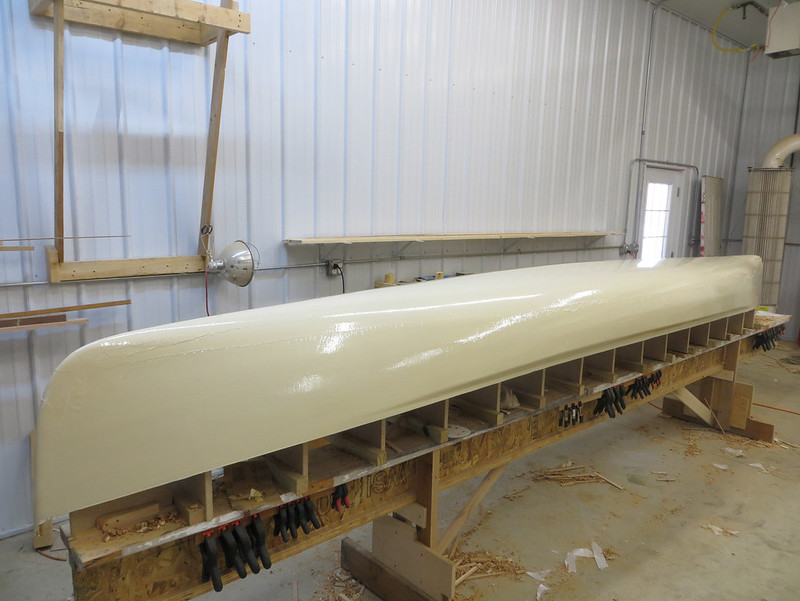
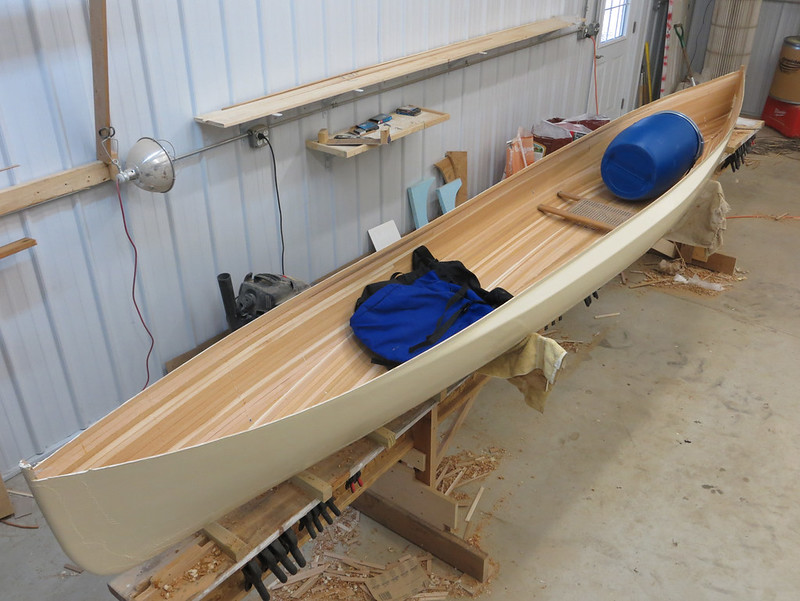
I had a hard time keeping it secret but surprises are fun. Wetting it out certainly was different. Lots of second guessing on whether or not it was fully wet out or not and any little stray strand of fiberglass, which would normally be nearly invisible, looks like a piece of 1/4" rope laying on the hull. If you want to highlight every flaw in the hull and finish then using a solid color is definitely the way to go. Thankfully I haven't noticed any flaws in the hull yet. We'll see what it looks like after the weave is filled and it's been sanded flat.

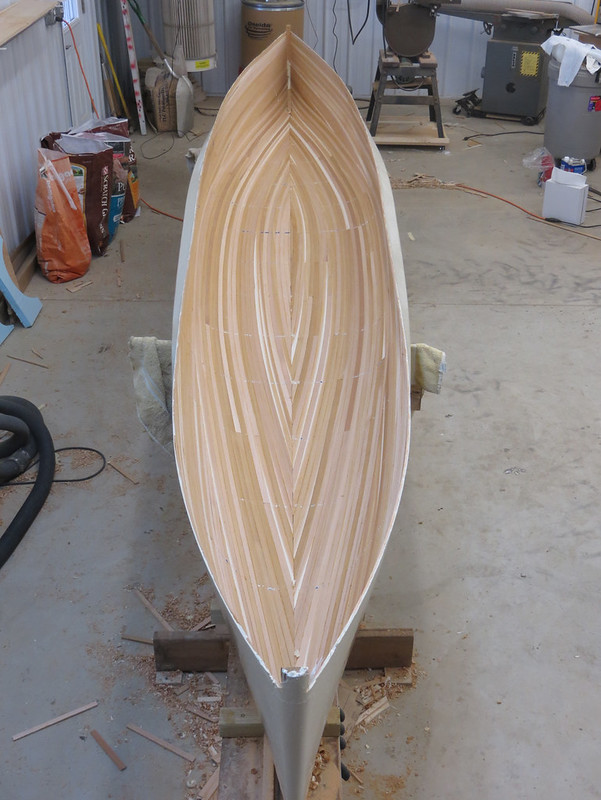
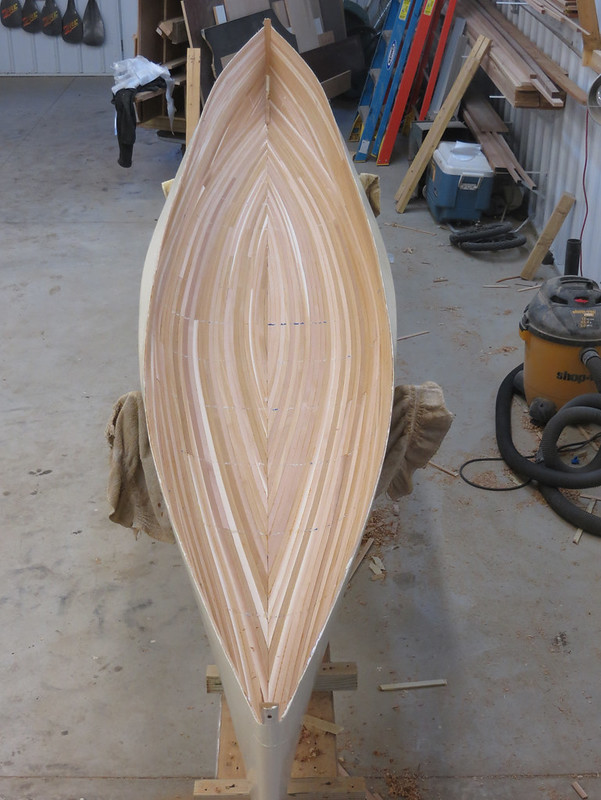
I did take a peak underneath and it looks like my fill coat must not have been heavy enough to fill all the staples holes and gaps, I see some pin points of white. I doubt it will be pretty when the forms are knocked out.

Hey Stripperguy Mike: If you can pull yourself off the slopes long enough talk to me about carbon over foam gunwales. How easy/hard was it? Would you do it again? Would you do it differently? I don't know if that's what I'm going to do with this boat or not but I need to figure it out soon so I can get materials ordered.

How hard was it to keep a neat edge with the carbon tape? Seems like that would be difficult and that it would wander all over.

What about slipping a carbon sleeve over the gunwale and wetting it out on the bench before putting it into place? The edge of the hull would pull everything tight as it slips into the groove cut in the foam. Sounds like it would be tidier but it would be impossible to smooth out wrinkles or adjust the cloth after putting it in place. If it worked that would keep the carbon neat and then a layer or two of fiberglass tape could go over the top and it wouldn't really matter if those edges stayed perfect since they'll be clear.

Alan
 
Alan,
You have just expressed my thought process from last year...
I bought a bias woven carbon fiber tape, specifically so the tape would conform (like bias cut stem strips) and yet not have any stray fibers at the edges. it was very expensive, especially compared to straight woven tape.
I epoxied on the foam first, then shaped and added a stem cap. That part was very easy. I was as careful as I my patience would allow as I aligned the carbon fiber on the hull, it's mostly very straight. I did need to add a layer of glass over the carbon, but only in the sections that would end up on a roof rack.
I'd say the most difficult part of the entire process was keeping drips and runs to a minimum.

I did consider a carbon sleeve over preslotted foam. Then forcing the subassembly over the hull edge. I chickened out though, as I was unsure of my ability to keep the carbon tight over the foam, and also spread out any excess to avoid wrinkles. I even considered using carbon tape wrapped around a preslotted foam gunnel, again I wouldn't due to the same concerns about excess and wrinkles. The carbon (or any reinforcement) really need to be in intimate contact with the foam to get the strength we need.

If I were to do more carbon over foam gunnels, I think I would try to use a less expensive weave. Also, MDB has suggested that I should not suffer so much to get a straight line along the sheer, any flaws could easily be masked with a little bit of black paint. After seeing how rough some commercial carbon gunnels look, I think she's right!

At the moment, I don't remember the details of which tape I bought, nor which vendor supplied it...I can check when I get home, maybe it's already defined in my Kite build thread.

Hope I helped more than hindered.
 
Sweet. What did you use for pigment? Are you leaving the inside of the hull natural or tinting it as well?
 
Thanks for that, Mike, very helpful. I like the idea of using a little black paint to mask the waviness of the tape edge and I think you're right about the fit and finish of some commercial hulls. While I haven't seen anything terrible I have seen things that make me wonder why I beat up on myself so bad.

I thought about it all afternoon and decided not to go with carbon gunwales on this boat. Too much time and money to invest in a boat when I don't even know if it will work out for its intended purpose in the end. I might play around with some carbon seats, thwarts, and yoke though. Cheaper, easier, and more easily reversed should things go wrong.

Still lots of decisions to be made on wood choice and style for the gunwales. I wonder how strong cedar gunwales would be if covered with fiberglass tape?

Sweet. What did you use for pigment? Are you leaving the inside of the hull natural or tinting it as well?

It's a liquid pigment I got from US composites. They were the first ones I found that offered something in an "off white". The plan is to leave the inside natural. I'm afraid there might be some bleed-through at the staple holes so I might have a bit of a stipple effect on the inside.

Alan
 
For your intended purposes for this canoe, I wouldn't monkey around much with the gunwales. You have an extended car trip involved, and cartopping can be pretty rough on the gunwales. Anyway, I' a gunwale man, like big ones, I will not lie.
 
For your intended purposes for this canoe, I wouldn't monkey around much with the gunwales. You have an extended car trip involved, and cartopping can be pretty rough on the gunwales. Anyway, I' a gunwale man, like big ones, I will not lie.

I can't help at least thinking about it and wondering what else might work, that's part of the fun....and agony. Part of it is also looking at what I have readily available for materials. On hand I have clear cedar, clear alder, and clearish cherry with ugly grain. I haven't looked closely at the grain of the alder. I bought all the mahogany from the lumberyard but they could order me some in. I could also order in anything I wanted from my wholesale supplier but I'd need a minimum order size and I was very disappointed with the cherry they sent last time.

Cedar is very soft for gunwales and would ding easily. But what if it's wrapped in fiberglass? That seems to make a sufficiently hard hull. Is it possible cedar gunwales wrapped in fiberglass might be stronger than something like ash of the same dimension? I don't have any fancy measuring equipment but maybe I can cut some small pieces of cedar and ash and do some comparisons. It would give me something to do while I'm waiting for my fill coats to dry.

Alan
 
I've always used Ash, and socked in a good supply before retiring from the school. Our shop teacher gets super prices on lumber.

Glassing cedar would make it tougher, but how would you incorporate scuppers to tie things to ? I gotta have scuppers ! Ha !

I cleared out Forest Specialties here in Humboldt of their WRC yesterday. They usually don't deal with small fry like me, and at $5 a board foot didn't give me a bargain. But I picked up three clear 1"x 8"x 14' flat grain planks.

Alan do you get your cedar from Weekes in the Cities ?
 
I get my wholesale lumber from Daniels Olsen in Sioux Falls. They're hooked up with Metro Hardwoods in Minneapolis. I don't think my pricing is all that great but I'm not a big account. Last batch was $3.50/board foot at 4" wide. If I'd wanted 6" wide stock it was more expensive, don't remember how much. When they accidentally sent me knotty 1x6 cedar it was the same price as I can buy it at the local lumberyard. I should have my cabinet maker friend in Minneapolis price cedar for me and see what he can get it for.

Glassing cedar would make it tougher, but how would you incorporate scuppers to tie things to ?

I've been thinking about that too. What do I need, what do I want, how much do I want to spend and how much time am I willing to put into it? Hopefully I'll reach an equilibrium I can live with.

Alan
 
Hey Alan,

What about just installing a 3/4" x 3/4" clear cedar gunwale with a groove in the bottom of it for the hull thickness? If you rounded over the top inside and outside edge with a bullnose type bit, you could run the fiberglass from outside the hull, right up over the top, and then to the inside of the hull. The end result would look pretty much the same as the carbon fiber idea, but without the major hassle of trying something completely new. I think it would actually look quite good. I'm not sure you need scuppers, as you may want to install some D rings on the inside of the hull once fiberglassed.

Just my thoughts. Not that you asked for them :)

Momentum
 
Alan,
How cool would a black painted, fiberglass covered, cedar gunnel look? The black paint under the glass would last forever, and combined with the weave you can brag that it's carbon fiber. it would contrast nicely with your almost opaque hull.
 
Out of the 20 or so planks I looked at, only about three were usable for strips. I don't trust lumber yards to choose my planks.

Need to make a lumber yard run up North !

Jim
 
Hmmm, I'd never considered painting the gunwales....interesting. I like the idea of a single piece gunwale, assuming it seems strong enough once fiberglassed.

I think I'm going to cut some 1/4" ash strips to match my leftover cedar strips. The cedar strips will be laminated with 6oz fiberglass. I'll suspend them and see how much weight they can handle before failure, and how they fail.

I don't have a scale for pulling but I do have a nice digital scale for weighing. I thought I could place a very heavy weight on the scale (heavier than any of the strips can handle) with a rope running through a pulley, the pulley being attached to the suspended strip. I'd zero the scale and as I pulled on the rope the scale would register how much weight is being lifted and transferred to the strip. Sound like a relatively easy and accurate way to do it?

I wonder if the results of this test would be accurately scalable? If a 1/4" strip of cedar laminated with 6oz glass is 80% as strong as an unlaminated strip of 1/4" ash would that ratio remain when both were scaled up to 1.5" stock?

Alan
 
Last edited:
The birch bark canoes I have seen have all had cedar gunwales, but considerably thicker than you are considering. They were also wrapped with spruce root every four inches or so, as the method used to attach them to the hull. If you don't plan on hanging anything from the gunwales, and if you don't plan on "hanging" the canoe up in the middle of a rapid, perhaps they will work. My concern would be a sideways broach in rapids.
 
Alan,
for simply supported beams, the relationships are as follows:
linear with the width (double the width, double the strength)
inverse square with the length (double the length, reduce strength by a factor of 4)
cube of the height (double the height, increase strength by 8 times)

The ash should scale as above.
The glass wrapped cedar is trickier, it's difficult to determine the strength ( modulus of rigidity, or flexural modulus) of those composites. Especially when the thin composites contributes so much of the strength of the thicker substrate. Maybe you want to laminate a representative section of cedar?
 
Sorry, you'll have to wait until tomorrow for pics. The fill coat marathon just ended not 5 minutes ago. Too many late nights and early mornings the past couple days, I'm going to bed.

I also ripped a bunch of alder and ash strips tonight and then broke most of them along with some cedar strips. I laminated some alder and cedar strips with 6oz fiberglass and will break them tomorrow. Will hopefully have results from that little experiment as well.

Let's see, what else could you do in a hotel room for distraction? It is Canada after all, don't they have a canoe porn channel you could watch?

Alan
 
I think a lot of the wood canvas canoe of the old days had spruce inwale and some hard wood outwale, like ash, cherry or oak. Spruce would be lighter than ash, but tougher than cedar, it is usually easy to source, and cheep!
 
Ok, time for an update with pictures:

Fiberglassing was a bit hectic but it all came out all right. Trying to calculate how much resin I'd need to color with pigment for the outside of the hull already had me a little agitated and trying to lay out the cloth on a slightly tacky hull didn't help things. When I touched the seal coat lightly my fingers didn't stick. With a little pressure they did. I thought that the lightweight cloth would slide easily....I was wrong. I had a heck of a time getting all the wrinkles smoothed out but got it pretty close and figured that once the cloth was wetted out it was slide anywhere I wanted it too.....wrong again. I'd planned to wet out both layers at once but with the way things were going decided to only do the full layer of 4 oz. cloth and then add the extra bottom reinforcement the next day. I literally had a saturated roller poised above the hull, ready to wet out the first of the fiberglass, when I suddenly realized the reason the consistency seemed different was because I'd mixed up the ratios (backwards) of the resin and hardener! Crisis barely averted! I dumped that load, put on another roller, mixed up another batch, and went to work. So you can see why I was a bit tense the whole time.

I usually bury the double layer and don't worry about the slight hump but this time I wanted my extra bottom layer to be 6oz. S-glass for extra strength and abrasion resistance, which meant it needed to go on the outside. It will also help blend it into the hull without cutting through the full layer of glass. It also means I have a very ugly edge. This is what it looked like after the first fill coat:


20150309_004 by Alan Gage, on Flickr

Without pigment the fiberglass turns clear and the random patterns in the wood make loose strands and edges nearly invisible. Not so much with a monochrome hull. I won't be able to get away with as much on this hull.

Finally all the fill coats were done:


20150311_002 by Alan Gage, on Flickr

And it was time to flip it over!


20150311_008 by Alan Gage, on Flickr


20150311_009 by Alan Gage, on Flickr

My seal coat apparently wasn't heavy enough and the pigmented resin soaked through many of the staple holes. Hopefully after sanding they won't be much more than pin pricks. Another lesson learned and, while I'm not happy about it, I can live with it.

It doesn't have the most flattering profile at the shear but it should service its purpose well.

Bow:


20150311_005 by Alan Gage, on Flickr

Stern:


20150311_006 by Alan Gage, on Flickr

And for some size references here is a seat placed roughly in position with a couple blue petroleum packs in place, just for Glenn. CCS Pioneer and 60 liter barrel.


20150311_007 by Alan Gage, on Flickr

The barrel is just proud of the shear line and the pack fits easily between the gunwales. It was a tight fit squeezing it behind the seat of my Magic when full. Still room for Sadie in front of the pack, which I'll probably be able to pull back a little farther.

I gave the inside a quick once over and will attack in ernest tomorrow. I've been starting with the ROS first and it seems to work well. Loaded up with 40 grit I make one round and it quickly chews off most of the glue drips and the worst of the edges. After that I go over it with a scraper and chisel, cleaning up what the ROS didn't get, before hitting it with the power tools again at finer grits.

I'm liking the whitish exterior with natural interior look. Can't wait to see the inside finished.

Alan
 
Oh, wait, I forgot the weight!

Hull is 31.3 pounds as it sits right now.

Before I started sanding the exterior I put a new bag in the shop vac so I could collect some of the dust for thickening epoxy afterwards. I weighed the bag after sanding and there was exactly 2 pounds of cedar dust in it. That's a lot of dust! Should get about the same from the interior.

Alan
 
Back
Top