For those of you contemplating tackling this, here was my process & takeaways. Would definitely do this again as found it to be not terribly difficult & definitely rewarding. ")
PROCEDURE IN BRIEF
PROCEDURE IN BRIEF
- Watch this video (not mine)...https://www.youtube.com/watch?v=rDbkIZo6uBM&t=2s
- Order materials
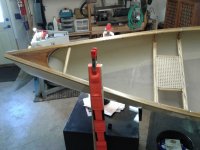
- Remove seats from boat
- Remove existing cane & spline
- Clean out (completely) spline groove
- Sand & color/stain seat frames (avoiding spline groove)
- Install cane & spline
- Apply final topcoat of oil or whatever
- Initially tried removing the cane & spline with seats still mounted however need to get very aggressive when removing the spline and cleaning the groove so best to take them out and clamp them to a work surface.
- I opted not to buy the specific spline removal tool but instead made my own out of an old screwdriver by heating, forming, and quenching to harden. See photo.
- I ordered from WWW.Caning.com
- Make darn certain to measure your existing spline with a caliper as the dimension differences are that slight between the various sizes. Keep a piece of removed spline for reference and send it to the supplier if needed.
- Holy smokes is the original finish/poly coat is hard! Next time I will have purchased a nice, dual-action sander to save some effort.
- Make certain to sand down the sharp edges on the interior seat frame tops as the cane will be bent over this edge when seated and stressed all the more if that edge is sharp.
- As a personal preference I did not completely sand off every last bit of the original coatings being I wanted the seats to look a bit hand-worked to best match the gunwales that were refinished as well. Also leaving some of the original finishing within the grain accentuates it all the more.
- I thought it best to apply the color/stain coat initially to just the seat frame (avoiding the spline groove). My thinking was to ensure the stain covered the portion of the seat where the cane mesh overlapped (inside the spline groove). Not certain if this was necessary.
- Again...Make certain the spline groove is as clean as humanly possible!
- For this 1994 Mad River Sunrunner, I measured (and ordered) 1/2" cane mesh however it is ever so slightly a different dimension than the original.
- I ordered a number of different spline sizes (it is cheap) as was uncertain what mine was exactly. Turns out size 8.0 worked well so imagine this is what M.R. used in the 90's???
- I soaked both the mesh and spline prior to installation as the dry spline did not seem to want to make the tight corners.
- Using short sections of spline to first align & set the seat mesh did not go so well. My suggestion is to make some wedges out of shims or clothespins as I read suggested somewhere. If you do use short sections of spline for this, cut them to length so they terminate within the mesh holes instead of directly on top of the cane material as they can be knocked in easier. Hope this makes sense.
- The plastic wedge I used worked perfect for knocking the cane mesh into the spline grove. I just cut the tip off at a point where it seemed reasonably wide for this function.
- Seems like all installation instructions I'v seen say to use typical white glue to set the spline. This seems weird to me unless they assume the cane will be replaced often. I used waterproof, stainable, wood glue. Imagine I will be cursing this decision if I ever need to re-cane this re-cane job.
- No need to pull the heck out of the mesh to tighten it across the seat frame as I first did when doing the above step #7. Reason being it tightens up like a drum during the rest of the installation. My first seat has an ever-so-slight wave.
- Experiment with how much glue you need to apply before putting a way-too-big bead all along the groove and have it puke out all over when knocking the spline in. Where the glue did puke out, a wet rag took it off easy-peasy.
- I struggled a bit when knocking the spline down into the groove. Rapping it with the plastic mallet seemed easy-enough to get it 80% set, however when I needed a bit more concentrated force enlisted the help of a wood shim which did dent up the spline a couple places before I noticed.
- My first spline joint is terrible as I cut it with a fine hacksaw. The next seat went much better as I took a bit more time lining up the angled joint and did the cutting with a utility knife.
Attachments
-
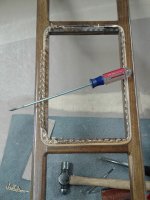 photo10786.jpg478.1 KB · Views: 2
 -
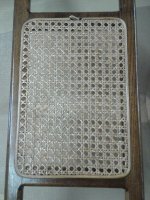 photo10889.jpg507.6 KB · Views: 1
 -
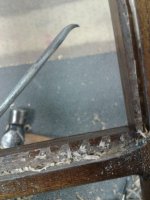 photo10891.jpg289.2 KB · Views: 2
 -
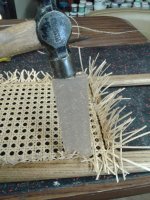 photo10892.jpg419.7 KB · Views: 2
 -
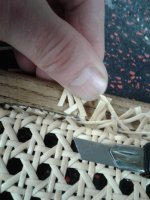 photo10893.jpg285.5 KB · Views: 2
 -
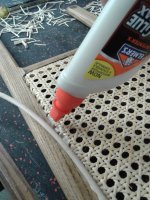 photo10894.jpg406.8 KB · Views: 2
 -
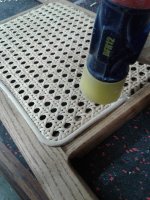 photo10895.jpg372.3 KB · Views: 2
 -
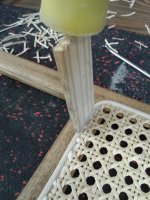 photo10898.jpg354.7 KB · Views: 2
 -
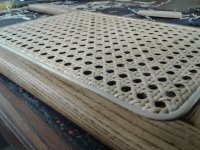 photo10899.jpg342.8 KB · Views: 2
 -
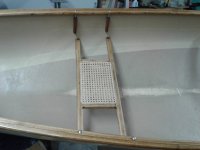 photo10901.jpg254.3 KB · Views: 2
 -
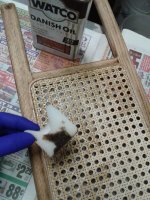 photo10902.jpg491.9 KB · Views: 2
 -
 ReCane (1).jpg300.1 KB · Views: 2
 -
 ReCane (2).jpg448.8 KB · Views: 2
Last edited: