G
Guest
Guest
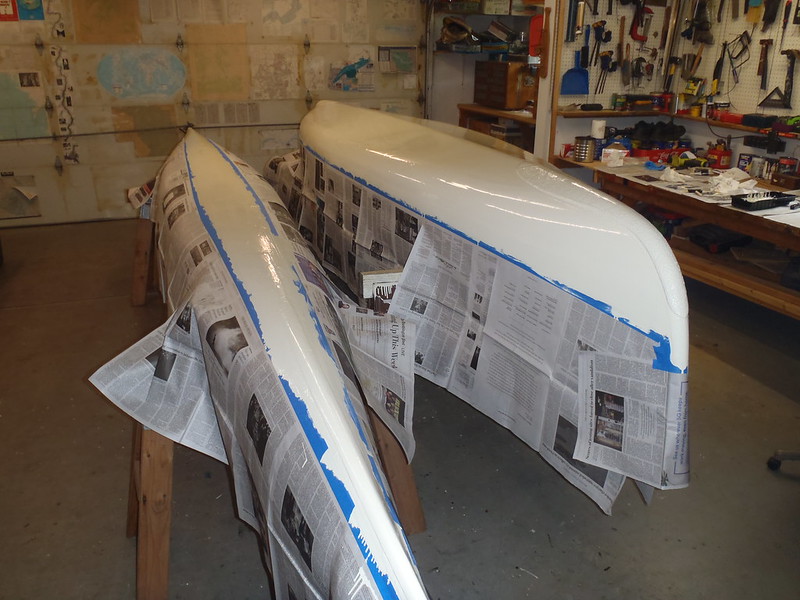
I have Joel’s Current Designs Nomad sanded and washed and ready for fresh coats (x3) of white* paint over some previous vee bottom repairs. The Everglades is hell on boats.
Before sanding the Nomad’s bottom in preparation for repairs and painting. After sanding off flakey gel coat “repairs” that bottom stripe needed some paint protection. (That stanky blue barrel on the table had to vacate the shop toot sweet, followed by the stank lid)
 P6050014 by Mike McCrea, on Flickr
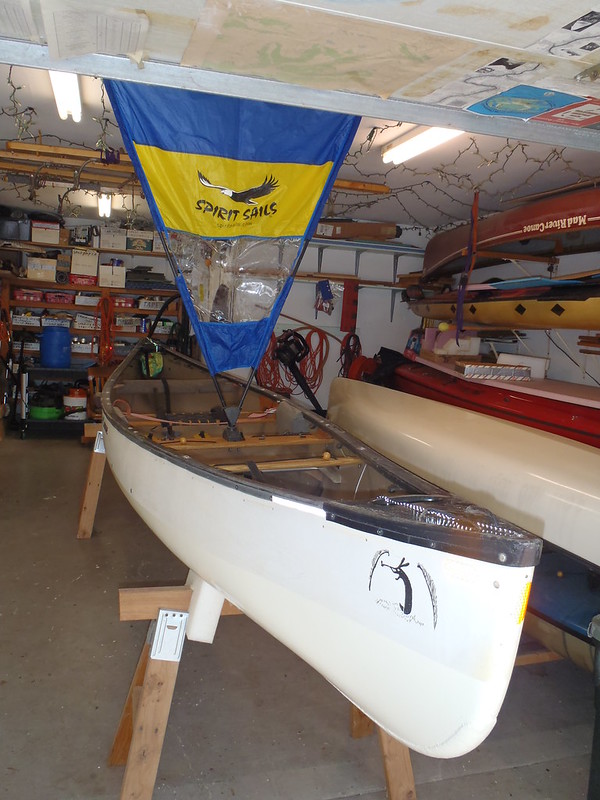
It is easier to paint two boats at once, so I vigorously scrubbed all the grime off the late 80’s soloized Explorer this morning. The Explorer already has a 5” wide (very) white paint stripe over the repairs on worn center vee, and with the canoe clean even I can see that the original color is more of a cream, or what MRC called “Sand”.
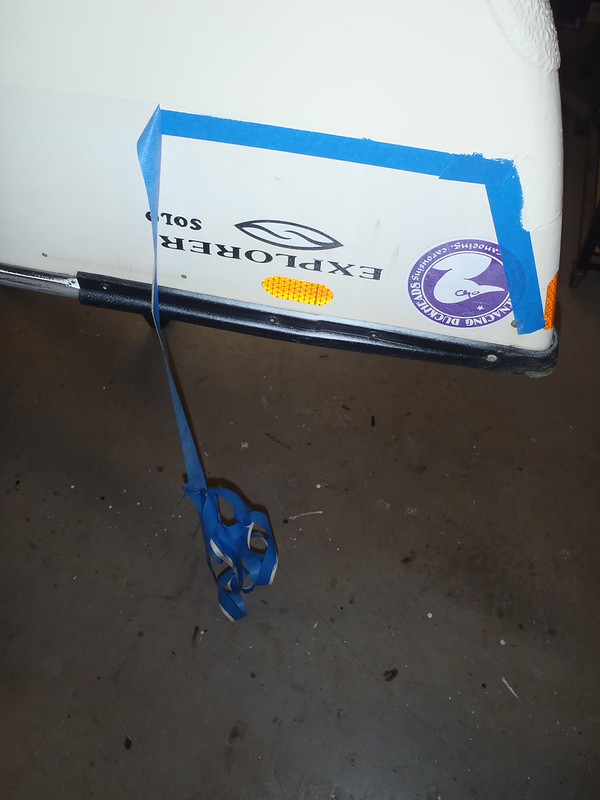
I cut off all the the old painter line loops and through hull float bag lacing, which definitely needed replacing, but I was hesitant to remove the Duckhead stickers and hand painted “Shop Gogetch” and Passamaquody “Rabbit in the ferns” Gogetch recreation and etc to prep it for painting. But the bottom really needs a few coats of paint.
Those decorative elements:
Rabbit in the ferns, more interested in his pipe than today’s MRC logo. He got chubbier with age; didn’t we all.
 P6120009 by Mike McCrea, on Flickr
Shop Gogetch, hand painted on every boat we have owned. A stylized combination of four different Passamaquoddy canoe builder’s personal Gogetch (Noel Polchies, Old Peter Polchies, Joe Ellis and Solomon Paul – pages 84 – 85 of The Bark Canoes and Skin Boats of North America.
 P6120011 by Mike McCrea, on Flickr
Original Passamaquody builder Tomah Joseph’s “Rabbit in the ferns” Gogetch, from whence Jim Henry lifted the MRC Rabbit logo. Page 87 of that wonderful book.
 P6120014 by Mike McCrea, on Flickr
Some of the scratches are actually deep gouges, from when a friend stopped, with the sides wedged between two above water boulders, so he could stand up. Rocking the boat unsteadily side to side as he stood. Sharp edged boulders.Those gouges are well through the vinyl and into the old-school black ABS layer underneath.
 P6130015 by Mike McCrea, on Flickr
New Explorer paint plan; tape off a scum line 7” below the outwales, enough to cover the worst of the scratches and gouges, and use Hatteras Cream EZ-Poxy to paint the bottom.
https://www.jamestowndistributors.co...ct.do?pid=1329
I’m not sure how that will look, I’ve never seen the Hatteras Cream color once painted, but that plan will preserve all of the Duckhead stickers (fast running out), High-Intensity reflective tape (sadly discontinued) and various Gogetches (laboriously teeny brush hand painted) above the scum line.
If that two-tone color scheme proves aesthetically fugly I’ll have enough EZ-Poxy Hatteras Cream left to tape off the outwales and paint the whole dang hull. It won’t hurt to have some extra paint coats on the vee bottom, and I can always repaint the Gogetches.
*I had planned to paint the bottom repairs 19 foot stripe on Joel’s Nomad with a can of (very) white Rustoleum Topside paint, to more closely match the white gel coat. White-ish, Current Designs actually calls that hull color “Cream”.
https://www.rustoleum.com/product-ca.../topside-paint
But Joel called this morning and said he would prefer the better quality EZ-Poxy in Hatteras Cream, which will be one can, one pan, one roller and one foam brush easier for me. And I have two (very) white bottomed decked canoes that don’t see Everglades sharps abuse in need of repainting, and can use the white Rustoleum Topside on those.
I’ll have to send Joel off this fall with a little can of Hatteras Cream for future touch ups. And we can tackle the bottom of his oft-repaired Caribou while he is here.
Time to get taping and papering. I am getting good at that, and fast.
Before sanding the Nomad’s bottom in preparation for repairs and painting. After sanding off flakey gel coat “repairs” that bottom stripe needed some paint protection. (That stanky blue barrel on the table had to vacate the shop toot sweet, followed by the stank lid)
P6050014 by Mike McCrea, on FlickrIt is easier to paint two boats at once, so I vigorously scrubbed all the grime off the late 80’s soloized Explorer this morning. The Explorer already has a 5” wide (very) white paint stripe over the repairs on worn center vee, and with the canoe clean even I can see that the original color is more of a cream, or what MRC called “Sand”.
I cut off all the the old painter line loops and through hull float bag lacing, which definitely needed replacing, but I was hesitant to remove the Duckhead stickers and hand painted “Shop Gogetch” and Passamaquody “Rabbit in the ferns” Gogetch recreation and etc to prep it for painting. But the bottom really needs a few coats of paint.
Those decorative elements:
Rabbit in the ferns, more interested in his pipe than today’s MRC logo. He got chubbier with age; didn’t we all.
P6120009 by Mike McCrea, on FlickrShop Gogetch, hand painted on every boat we have owned. A stylized combination of four different Passamaquoddy canoe builder’s personal Gogetch (Noel Polchies, Old Peter Polchies, Joe Ellis and Solomon Paul – pages 84 – 85 of The Bark Canoes and Skin Boats of North America.
P6120011 by Mike McCrea, on FlickrOriginal Passamaquody builder Tomah Joseph’s “Rabbit in the ferns” Gogetch, from whence Jim Henry lifted the MRC Rabbit logo. Page 87 of that wonderful book.
P6120014 by Mike McCrea, on FlickrSome of the scratches are actually deep gouges, from when a friend stopped, with the sides wedged between two above water boulders, so he could stand up. Rocking the boat unsteadily side to side as he stood. Sharp edged boulders.Those gouges are well through the vinyl and into the old-school black ABS layer underneath.
P6130015 by Mike McCrea, on FlickrNew Explorer paint plan; tape off a scum line 7” below the outwales, enough to cover the worst of the scratches and gouges, and use Hatteras Cream EZ-Poxy to paint the bottom.
https://www.jamestowndistributors.co...ct.do?pid=1329
I’m not sure how that will look, I’ve never seen the Hatteras Cream color once painted, but that plan will preserve all of the Duckhead stickers (fast running out), High-Intensity reflective tape (sadly discontinued) and various Gogetches (laboriously teeny brush hand painted) above the scum line.
If that two-tone color scheme proves aesthetically fugly I’ll have enough EZ-Poxy Hatteras Cream left to tape off the outwales and paint the whole dang hull. It won’t hurt to have some extra paint coats on the vee bottom, and I can always repaint the Gogetches.
*I had planned to paint the bottom repairs 19 foot stripe on Joel’s Nomad with a can of (very) white Rustoleum Topside paint, to more closely match the white gel coat. White-ish, Current Designs actually calls that hull color “Cream”.
https://www.rustoleum.com/product-ca.../topside-paint
But Joel called this morning and said he would prefer the better quality EZ-Poxy in Hatteras Cream, which will be one can, one pan, one roller and one foam brush easier for me. And I have two (very) white bottomed decked canoes that don’t see Everglades sharps abuse in need of repainting, and can use the white Rustoleum Topside on those.
I’ll have to send Joel off this fall with a little can of Hatteras Cream for future touch ups. And we can tackle the bottom of his oft-repaired Caribou while he is here.
Time to get taping and papering. I am getting good at that, and fast.