Canotrouge How well do you like the longer grips? Any thoughts for a guy considering experimenting?
-
Happy National Paul Bunyan Day!🌳🪓🪵
You are using an out of date browser. It may not display this or other websites correctly.
You should upgrade or use an alternative browser.
You should upgrade or use an alternative browser.
Mem's making a paddle so do I....
- Thread starter Canotrouge
- Start date
- Joined
- Mar 20, 2013
- Messages
- 3,356
- Reaction score
- 980
No Title
Sailsman, I'm a big fan of long grip. I put it on all my personal paddles other than my ww specific paddles. In the picture below, you can see my new favorite. Still has a more conventional grip at the top, but have the long grip for different hand positions!!
Canotrouge How well do you like the longer grips? Any thoughts for a guy considering experimenting?
Sailsman, I'm a big fan of long grip. I put it on all my personal paddles other than my ww specific paddles. In the picture below, you can see my new favorite. Still has a more conventional grip at the top, but have the long grip for different hand positions!!
Attachments
- Joined
- Jan 15, 2016
- Messages
- 177
- Reaction score
- 0
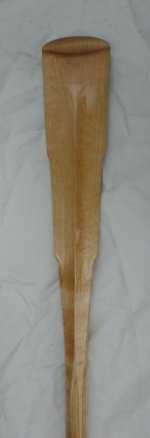
The Sitka spruce Beavertail is finally finished.


Last edited:
Very nice! I love the finish!
- Joined
- Mar 20, 2013
- Messages
- 3,356
- Reaction score
- 980
dang Peach I like it to!!
I might have to try that on a paddle or two or three!!
I might have to try that on a paddle or two or three!!
Nice glass grain.
Thanks! I just rubbed in my first coat of West 105-207 epoxy.
I finish-sanded the paddle, wiped it, and set in the sun for half an hour to heat up. Then I rubbed in the 105-207 wearing rubber gloves. I let it sit and soak in for 45 minutes or so until it starts to kick, then wipe it clean with a rag and alcohol (methyl hydrate). After 3 hours I give it another coat, let that begin to kick and wipe it clean again.
Tomorrow I will sand it lightly with 320 and give it one more light coat of epoxy followed by a wipe-down. After 3-4 days I will brush on a few coats of UV-barrier marine oil like Watco, and that's it.
We like to do wipe coats as the first coat of epoxy, but generally don't let it sit on the paddle long. Makes a good base over the paddle to add another coat to.
Canotrouge, I quite like the look of the tapered glue line. You've been busy!
I managed to whittle my Sitka Beavertail shaft down to roundish yesterday, and I will refine it some today and hopefully prep it for finish.
I looked at some videos from Shaw & Tenney on YouTube and noted the beautiful sanding drums they use. One is about 36" in diameter and the other about 18"-- these machines turn the blade from a slab of lumber into a water-wand in a just a few minutes-- the operators are really skilled! I seem to recall they use as low as 36 grit on some; surely they have a few sandpaper grades on different drums-- don't know.
I was thinking I would make one-- maybe a two-footer. I wonder how much horsepower I'd need to spin it at 1000 rpm.
We actually just made two drum sanders like those. Quite a bit smaller. We used 3/4" MDF cut into circles and glued together to make a 10" diameter x 18" wide drum. They are amazing. Probably ended up spending about $400 for each in materials. We used a 1 3/4 hp motor to power them. Hard to upload a video on the forum here, but we have some posted on our site in our how to section. Here's a link. If you have any questions about how to make one shoot me a message.
I've done Lobby Tables in my Post Office and a hand rail using that basic formula. Almost 20 years later they still look great.
- Joined
- Jan 15, 2016
- Messages
- 177
- Reaction score
- 0
jmhockey23-- I looked at your website and was very impressed by your very beautiful paddles. That build-up model is labour-intensive, but stunning when it's done.
Should I find the energy to build one of these sanding drums I'll drop you a note; thank you very much!
Should I find the energy to build one of these sanding drums I'll drop you a note; thank you very much!
- Joined
- Mar 20, 2013
- Messages
- 3,356
- Reaction score
- 980
 ...
...
- Joined
- Mar 20, 2013
- Messages
- 3,356
- Reaction score
- 980
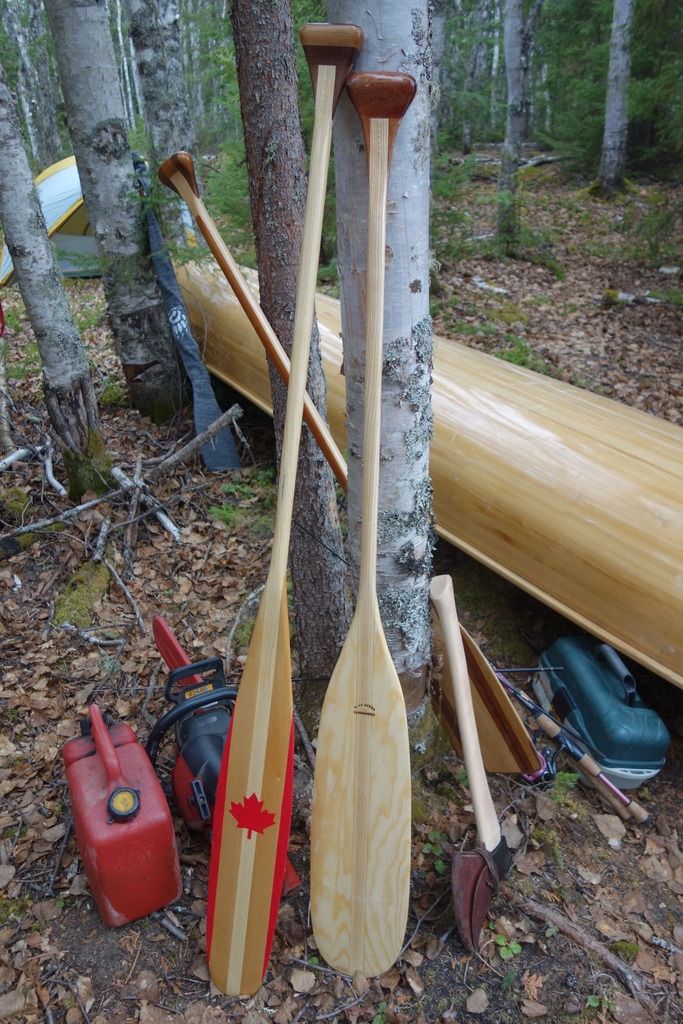
Stuck this pic in another post, but here are my two animal tails, finished and used. I actually like the skinny one, can't wait to try it with my solo!

- Joined
- Mar 20, 2013
- Messages
- 3,356
- Reaction score
- 980
Looking great mem, I really like the look of the skinny one to!
- Joined
- Mar 20, 2013
- Messages
- 3,356
- Reaction score
- 980
No Title
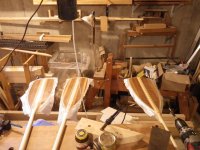
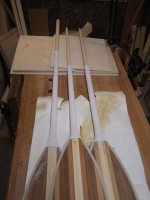
The other side is all trimmed off, and the Dynel sleeve is fitted(dry) on the shafts.... I think that the girls paddles will be awesome... As for the Prototype one, the blade is a bit soft for my liking... Design flaw... I'm learning still lol!!
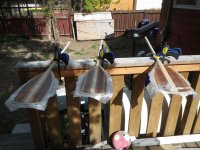
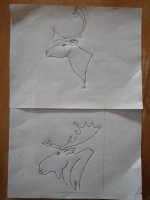
Sophie, my daughter alway like to have a drawing on the face of her paddles, some time I do and some time I don't... This time I will, and I worked on some simple drawings. The moose for her and the Caribou for her cousin!!
The other side is all trimmed off, and the Dynel sleeve is fitted(dry) on the shafts.... I think that the girls paddles will be awesome... As for the Prototype one, the blade is a bit soft for my liking... Design flaw... I'm learning still lol!!
Sophie, my daughter alway like to have a drawing on the face of her paddles, some time I do and some time I don't... This time I will, and I worked on some simple drawings. The moose for her and the Caribou for her cousin!!
Attachments

Nice looking paddles!
It only took me two months with work, life, side projects, canoe trips, etc but I finally got my first paddle made.
I used some shop scraps and a belt sander, table saw, power planer. That belt sander is justification for a bandsaw if I ever saw it.
I winged it a little (a lot..... Ok all of it). Figured I'd make some mistakes on this one and then maybe read a book or something for the next one.
- I made it with a poplar core - I won't do that again as the thing is super flexible and springy.
- It's heavy. I was a little afraid of going too thin.
- It was harder than I thought it would be. Keeping it symmetrical along the centre lines, and side to side and all that. Next time I'll make some templates. Maybe even read that paddling book.
I'm going to try this out and I'll let you know how it goes. Thanks for looking.
Poplar, cherry, maple, walnut.
- Joined
- Mar 20, 2013
- Messages
- 3,356
- Reaction score
- 980
Nice Work!! I finished the girls paddles a few weeks ago, but didn't manage the picture!!
Nice colors
Finally trying my hand at building a paddle. Sorry about the lack of in-progress pictures but I didn't bother taking any because I fully expected to screw it up at every step. But lo and behold it actually came out like I wanted it to.
I used cedar with an ash spline in the blade tip. Blade is pretty thin. Blade and shaft will both be covered in carbon and then some s-glass and dynel around the edge.
 20170310_001 by Alan, on Flickr
 20170310_002 by Alan, on Flickr
 20170310_003 by Alan, on Flickr
Alan
I used cedar with an ash spline in the blade tip. Blade is pretty thin. Blade and shaft will both be covered in carbon and then some s-glass and dynel around the edge.
20170310_001 by Alan, on Flickr20170310_002 by Alan, on Flickr20170310_003 by Alan, on FlickrAlan
Similar threads
- Replies
- 28
- Views
- 6K