• Happy Weed Appreciation Day! 🌱🌿🌻

Making a Composite/Carbon Paddle

I have thought about that too Alasgun. I love the composite canoes, but love the traditionally finished wood paddles. I don’t know why they “go together” in my mind, but they do. I’ve never used a carbon paddle. Heck, I’ve never seen one for sale I could hold in my hands.

My love of wooden paddles may be boosted by my interest in traditional archery. One of my longbows mixes gorgeous woods and carbon in the limbs. I also use carbon arrows that have wood grain graphic wraps. So these things go together!
 
Here's an old thread:

 
@Glenn MacGrady, thanks for pulling up that older post; there’s some interesting reading in there.

Now that it’s rigid the “user friendliness” is improved, today I began using the course side of my double ended rasp to remove all the flashing and excess rosin, right down to the glass. Before moving on i weighed it at 11 oz. At this point i’ll weigh between layers to get an idea what each layer is adding. This combined with the stiffness of the paddle is what will determine when i stop. The goal is “enormously strong and light as a feather”. Of course there will be compromise along the way. While i was at it i weighed the “special” at 2 1/2 lbs and concluded it’s the balance that’s off. That long blade probably creates an illusion of excessive weight because of the “weight forward”.

After rasping i went over it with the palm sander and added todays layer. The shaft now has it’s final layer of glass and the blade edge‘s were covered with a split carbon sleeve. Before sleeve material the edges always took the most time and effort. With it’s u shape (channel) that carbon edge will provide a lot of flexural strength without the added weight of a full blade skin.
Now that it's firm i can handle it while applying the epoxy to the layers. I wear nitrile gloves for this work and once i have everything wetted out i can use my hands like a squeegee and strip off the excess epoxy easily, which makes the cleanup easier between layers. If id spend the money and follow the learning curve associated with vacuum bagging or infusion id get perfectly finished products without all the extra fiddling. However; no more of this than i do it’s just not going to get anymore high tech than this!
i’m going to let this cure out hard for a couple days before taking after the carbon/kevlar blade covering. The epoxy is just easier to rasp and sand if i give it more than 24 hrs.
 

Attachments

  • AB0EBA77-F46F-492D-8E6C-BDA72F51D40A.jpeg
    AB0EBA77-F46F-492D-8E6C-BDA72F51D40A.jpeg
    147.4 KB · Views: 21
  • 90B74ABF-6522-424B-9E13-7B3B3B3DB4F4.jpeg
    90B74ABF-6522-424B-9E13-7B3B3B3DB4F4.jpeg
    173.6 KB · Views: 21
  • A320AED4-137B-438A-886E-F9625599F337.jpeg
    A320AED4-137B-438A-886E-F9625599F337.jpeg
    97.1 KB · Views: 21
Last edited:
While i’m waiting for the glue to dry; i’m going off track just a wee bit. In one of my previous post i probably left some with the opinion i have an aversion to wood, which couldn't be farther from the truth! The goal of this project was “Comfort and efficiency“ and all i’ve really done here was modify a couple Tools for a specific purpose. I doubt there’s many who appreciate fine form as much as myself and i certainly appreciate creativity in those who have an artist eye.
To make this legal, i’ll call it my Canoe gun; even though it’s highly unlikely to take a ride in the canoe. This is a Trapdoor Springfield i recently built. Starting with original parts for the action, breech block and lock; however all the parts were from different vintage guns going back between 130 and 150 years! This is what they call a plank build meaning i started with a thick board and a pile of parts. I won’t bore you with all the tiny details but if you look close you’ll notice the stock is not some awful looking plastic thingy And i hope i offended no one who may view canoe paddles with the same affection. You’ll also notice a canoe paddle lying in the pile, which was the next project in line! Enjoy.
 

Attachments

  • 075282C5-1B88-4207-872C-88C0D8AE1145.jpeg
    075282C5-1B88-4207-872C-88C0D8AE1145.jpeg
    157.2 KB · Views: 15
  • ED2BBD6E-C7A0-4E00-AA5E-E96843F54D20.jpeg
    ED2BBD6E-C7A0-4E00-AA5E-E96843F54D20.jpeg
    173 KB · Views: 15
  • 7AEBF5F4-33EA-4167-B809-1EBC10DA5B38.jpeg
    7AEBF5F4-33EA-4167-B809-1EBC10DA5B38.jpeg
    158.5 KB · Views: 17
  • B891B37C-EE48-4067-BA68-D439841DE221.jpeg
    B891B37C-EE48-4067-BA68-D439841DE221.jpeg
    166 KB · Views: 17
  • 1EA5E1BC-42B5-4A68-8B91-4587933CD532.jpeg
    1EA5E1BC-42B5-4A68-8B91-4587933CD532.jpeg
    202.3 KB · Views: 15
  • 5FCBD1A5-6665-4DD0-A9CF-789D330409D7.jpeg
    5FCBD1A5-6665-4DD0-A9CF-789D330409D7.jpeg
    156.4 KB · Views: 15
  • 712BE293-2436-4417-9FC0-DA4FF6376311.jpeg
    712BE293-2436-4417-9FC0-DA4FF6376311.jpeg
    136.3 KB · Views: 15
  • C850775C-875C-40AF-901B-97321B633BC8.jpeg
    C850775C-875C-40AF-901B-97321B633BC8.jpeg
    99.1 KB · Views: 17
I'm late to this thread. I can only offer my experience with the Pink foam.
I used it as a reinforcing layer on the football of my first Kevlar composite build.

It was 1/4" thick. I laid it down on a bed of filled epoxy, and weighted it. After epoxy had set, I removed the weight and added a layer of 6 oz E-glass.
It Oil cans like a Royalex hull. I still have and paddle it.
I played with a test sample, and found the Pink foam delaminated. It had a super thin coating on one side. Evidently the epoxy didn't bond. Hoping some day to remove the foam, and replace with 1/8" cedar .

I still use the pink foam , more as a form, for my flotation chambers.


IMG_2697_zpss6kji2zo.jpg


IMG_2706_zpsx49dbx2r.jpg


edited-image_zpsjye9e66h.png
 
@memaquay, there’s always some sort of project, about January i’ll start the garden starts then it gets real busy till about October when i can focus on fun stuff! Thanks for the kind words!

@Glenn MacGrady, the wood is maple stained with aqua fortis and nitric acid (traditional stains from the earliest days of gun makers) and the finish is simply an oil finish.

@Jim Dodd i’m not sure what id think about the foam as a structural element but solely as a form to give shape to the fabrics it’s cheeper than balsa and easier to work with. Any number of glue’s dissolve this stuff but epoxy isn’t one 0f them. I cut the blade of one paddle in half (to retrieve the shaft) and was surprised at the strength of the foam cored carbon, even right at the cut section. This gave me great confidence. Im not sure how “paddle factories” build hollow laminate paddles but for a poor boy’s meager efforts; pink board’s just fine. I’m sure id change my tune soon as i break one; which hasn’t happened yet.
 
Last edited:
Yesterday and today i spent some time and covered the blade faces with carbon/kevlar fabric.
The way i went about this was to do one face at a time, a day apart. The right pictures shows the fabric wetted out but i didn’t include a picture of the shrink wrap cover i drapped over it. Then after pulling the two overhanging edges together i clamped the edges together every so often and just let the clamps hang. This gives a nicely trimmed edge as shown on the left.
After a major sanding session over the whole paddle; i’ll be ready for the carbon skin. I’m prepared to put on two layers but would be real happy if i only need one?
 

Attachments

  • 1050AE3A-BE37-42B5-9270-F66E57938D46.jpeg
    1050AE3A-BE37-42B5-9270-F66E57938D46.jpeg
    160.1 KB · Views: 27
  • D23FA5E2-F5B8-4135-B617-E00143D8436E.jpeg
    D23FA5E2-F5B8-4135-B617-E00143D8436E.jpeg
    205.7 KB · Views: 26
Last edited:
The only obstacle i’ve encountered when using the sleeve material is how to finish the ends in an attractive manner. Blade tips are easier because they get the kevlar/carbon split sleeve treatment. Grip’s are different. When i built the carbon dip net i simply used a wood grip. For this one im trying something different. I began with a good wrap of carbon tow all around the knob then draped a piece of 3k 2x2 carbon twill over the end followed by another wrap with the tow. I find the 2x2 twill to be pretty conformable! Then i pulled a nitrile glove over the top and wrapped it tightly with elec tape. Once cured; i’ll peel off all the garbage and rasp/sand the grip to something pleasing, hopefully!

today i also tried out some rubberish craft tubs from the box store for mixing epoxy. Most paint trays etc wont flex enough without breaking to get the residue out. These worked perfect.

my next entry will have the paddle starting to look “more finished”.
 

Attachments

  • 718C190D-004B-480A-A5D6-F4645415B158.jpeg
    718C190D-004B-480A-A5D6-F4645415B158.jpeg
    60.4 KB · Views: 13
  • 03970E98-0B28-408E-A506-AFD1D697CDD2.jpeg
    03970E98-0B28-408E-A506-AFD1D697CDD2.jpeg
    158.3 KB · Views: 13
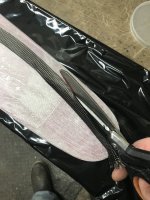
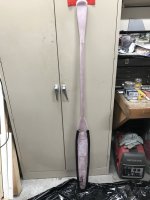
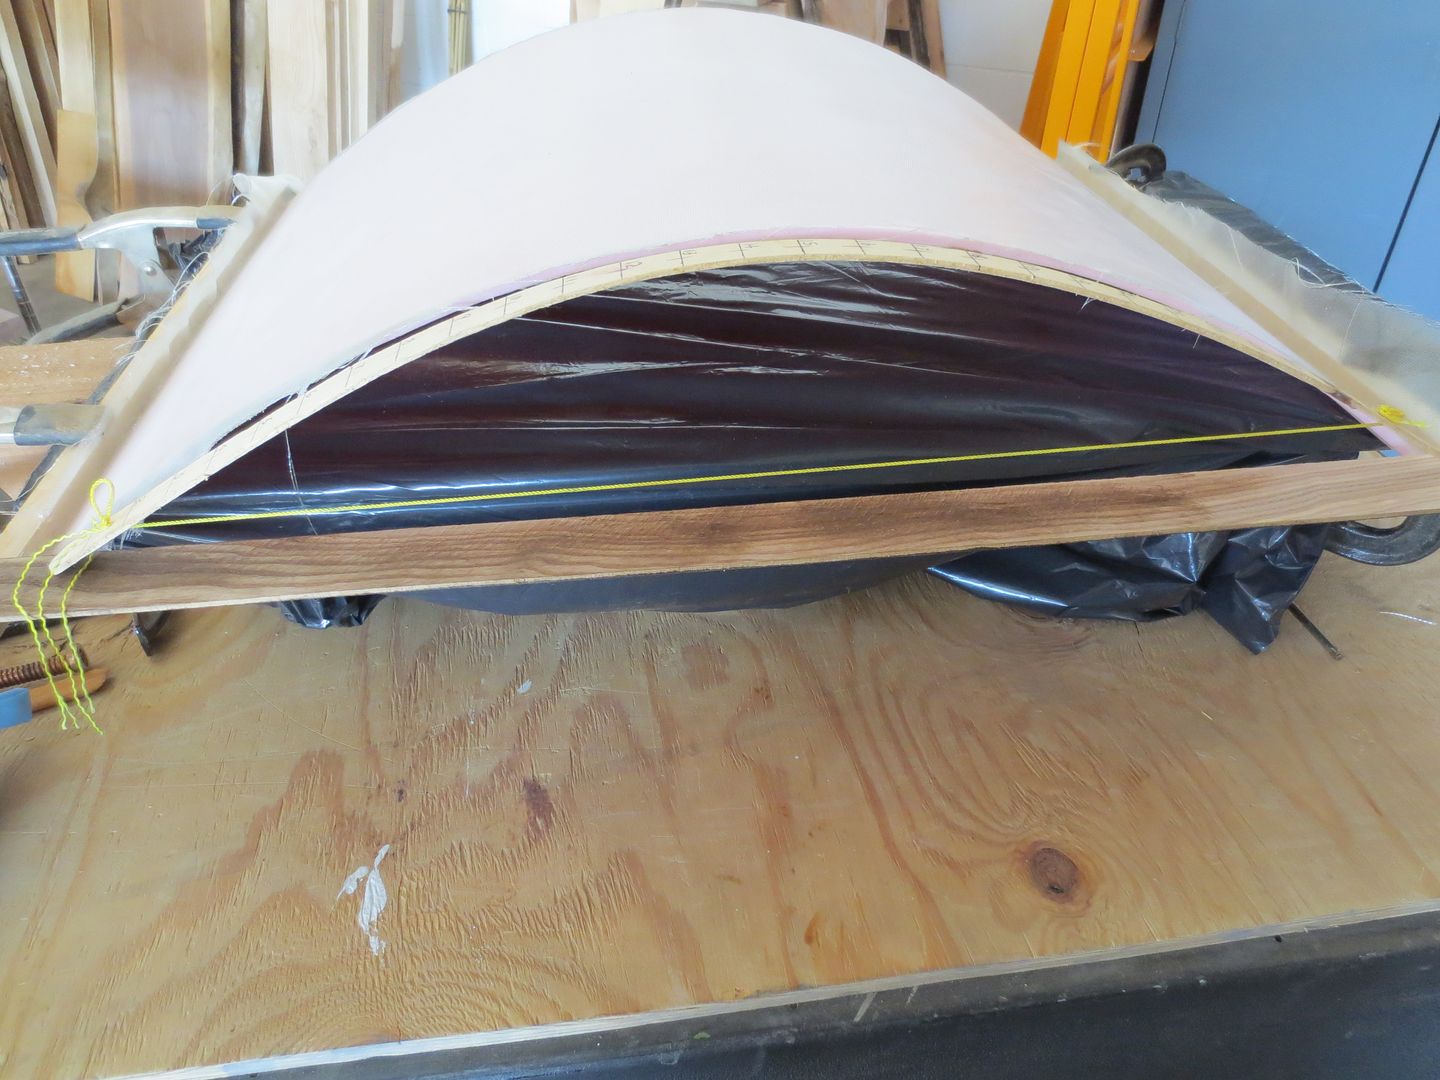
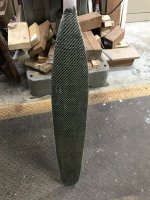
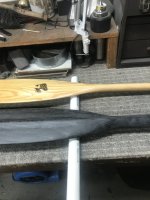
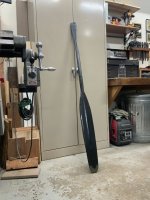
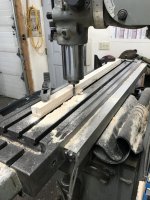
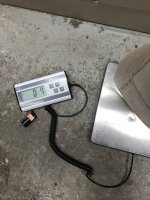
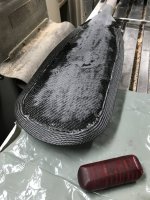
So here we are, getting down to the end. A lot of sanding remains but nothing else except the tip protector will be added. I did some side by side comparing and here’s what i learned. The pattern weighs 40oz. the carbon paddle weighs 32oz.; not a tremendous weight savings but the balance point is enough different that it no longer has a “too heavy blade feel”. When all the sanding’s done i may loose another wee bit but not enough to be note worthy. This paddle has 2 layers of glass, a layer of carbon, a layer of carbon/kevlar over the blade and a full carbon sleeve. This is a big paddle, 65 inches long, large dia shaft etc and im happy with the weight. It’s also robust and capable of more than propelling the canoe, id not go so far as to say it could double as a peavy but it is quite stout. For this fishery the paddle will see service as a paddle, a pole; for pushing off heavy mud banks and thru a small rocky section and possible to “repel boarders”!😉

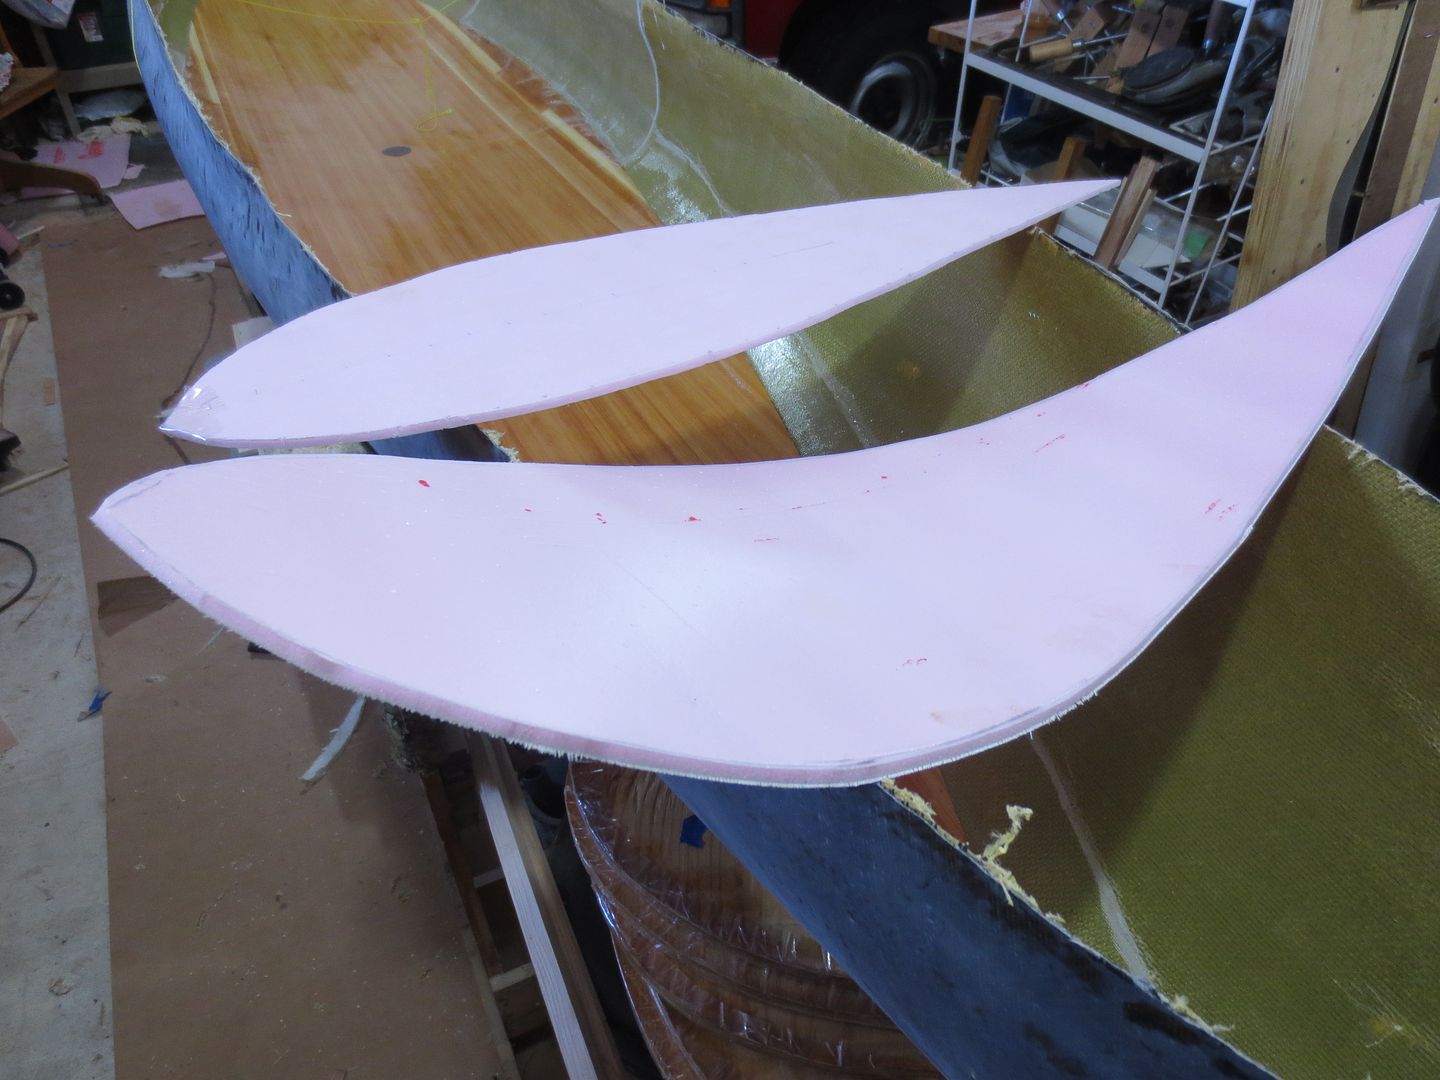
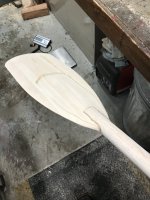
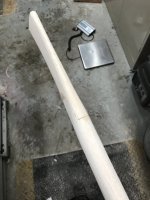
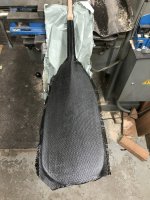
Over balsa, i believe one full layer of kevlar and one layer of carbon would give equal strength and a much lighter weight. So what i have here is a “ray special blade“, an approximation of an Aleutian asymmetrical shaft and a north woods grip, in other words; a collection of compromise. I like the shaft girth and the grip section real well and will use them again, the narrow blade is suppose to be gentler to my shoulders? Time will tell!
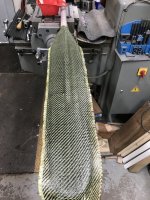
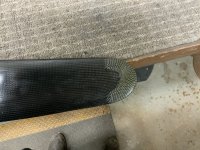
What else did i learn? The spine on the Aleutian blades is suppose to re-direct water and reduce drip as well as prevent chatter (with very narrow blades). Mine should have been added before the last layer as it pretty much went away under the 3 previous layers And unless i see a strong drip deterrent, it will go away next time.
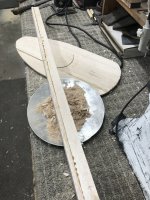
I have enough leftovers to make another paddle and for that i will use balsa instead of foam for the core. I can work it into thinner sections than the foam and will end with something more svelte. The next one will have a shorter/wider blade, better suited to the numerous shallow streams around here. This one will function fine used in the intended tide water fishery. At some point i’ll need one of @lowangle al’s quivers for a two paddle arsenal!

Once it’s done done i’ll post the final pictures, im still a couple days away.
 

Attachments

  • 16FD6E18-063C-40DA-B6DD-79989ADA6201.jpeg
    16FD6E18-063C-40DA-B6DD-79989ADA6201.jpeg
    122.7 KB · Views: 21
  • 55EFEC69-07A7-4184-B1DB-C10811392CA1.jpeg
    55EFEC69-07A7-4184-B1DB-C10811392CA1.jpeg
    134.8 KB · Views: 21
Last edited:
Except for a couple additional coats of the UV inhibitor, I'm done. it went well enough and im happy with the outcome, would it win any prizes at the State Fair; i doubt it!
Early on Glenn had ask for time and material estimates for a project like this. These estimates are very generic as i didn’t spend any time “documenting” but i will tell you it was an enjoyable project and the cost doesn’t even come close to what you can buy a carbon paddle for. The real beauty is that i have just what i wanted pattern wise and none were available commercially.
i used one quart/pint of the West System 105/206 at roughly $100. I have about $200 in the glass and carbon and $6.00 in a piece of foam. And around 25 hours, spent mostly in incremental bits as a lot of the time your waiting for glue to dry.
At this point i’ve only made 3 composite paddles and i can say the first two functioned exactly like i wanted so i have no apprehensions about this one. As with the first two; i learned a few things along the way and look forward to at least one more. What started as a functional exercise to develop a better Salmon dipping platform has re-kindled an interest in paddling that has been dormant for several years. We’ll see where that go‘s when the water isn’t hard!
For any of you who followed my escapade, thanks for your interest!
 

Attachments

  • 715885DA-3A65-45BF-967F-6E9D9B54F658.jpeg
    715885DA-3A65-45BF-967F-6E9D9B54F658.jpeg
    114.7 KB · Views: 30
  • 7F91289B-729B-440E-AF41-43876001D47B.jpeg
    7F91289B-729B-440E-AF41-43876001D47B.jpeg
    182.8 KB · Views: 29
Im still waiting for some supplies to finish my pack board project; so i started another Paddle.
Im using a Balsa core this time and all ready like it better than the foam for being able to work it into thinner sections. Nothing extraordinary here, a little different layup but still a composite. This time i’m using some uni-directional carbon and more glass than carbon in the shaft area.
With the gluing mostly done I'm beginning the rough shaping.

I saved some of the shavings to see how they’d burn? Holy cow batman; this stuff directly competes with fat wood!
 

Attachments

  • 5B8327C2-3F0E-4B1A-AA66-36CBCDE6B8F3.jpeg
    5B8327C2-3F0E-4B1A-AA66-36CBCDE6B8F3.jpeg
    197.3 KB · Views: 12
Last edited:
Today after squaring up my glue lamm shaft, i set up a “router fence” on the milling machine for profiling. Using precision dowels in the T slots gives perfect alignment for not only the fence but later when assembling the shaft and blade! 1/2 inch tool bits under the blade gave me parallelism to the shaft.
Once everything’s hard i’ll fair the joint and begin the final profiling of the blade. It’s going well, at this point.
 

Attachments

  • F8B62DF6-AD7F-48F6-847B-A4430528C8D2.jpeg
    F8B62DF6-AD7F-48F6-847B-A4430528C8D2.jpeg
    166.2 KB · Views: 11
  • 12C7DC6A-7E98-4D56-B24A-6F88EE964EC4.jpeg
    12C7DC6A-7E98-4D56-B24A-6F88EE964EC4.jpeg
    140.6 KB · Views: 11
  • 66AEFC94-3789-4ADE-883C-6D75EEC03F53.jpeg
    66AEFC94-3789-4ADE-883C-6D75EEC03F53.jpeg
    115.4 KB · Views: 11
  • 53369D1D-ECDE-4D4A-93B4-AB969404AF11.jpeg
    53369D1D-ECDE-4D4A-93B4-AB969404AF11.jpeg
    149.4 KB · Views: 10
  • F42B1495-FBB9-42AE-8B17-85AA04D66D1A.jpeg
    F42B1495-FBB9-42AE-8B17-85AA04D66D1A.jpeg
    109.4 KB · Views: 10
Today the Balsa form was completed and came in at 7oz. A bit heavier than foam But; i believe it’s to be preferred simply because it can be worked into much thinner sections and still have a bit of strength. i was able to take the edge down to 1/32 or less and quit when i started having minor breakout issues.
I’m laying the carbon on the blade, one side at a time, trying to use that bit of draping to my advantage as i try to maintain a thin edge. Something else i’m trying on this one is to squeegee the surface once the cloth is in place and wetted out. It was i interesting to see how much extra rosin i pulled out!
Im using a “T” grip and will mill a pocket in the underside that matches the shaft end, once all the fabric‘s in place.
Progress will be slow from here on as i want to really focus on keeping the weight down, which is no big deal; our water will be hard for another 5 months!
 

Attachments

  • F8287472-281F-4521-97AD-83CE346D71D5.jpeg
    F8287472-281F-4521-97AD-83CE346D71D5.jpeg
    155.3 KB · Views: 8
  • DAA639FD-421D-48EA-A215-638DD96A0983.jpeg
    DAA639FD-421D-48EA-A215-638DD96A0983.jpeg
    76.5 KB · Views: 8
  • 06FEE414-82C9-491D-BA12-CEE809D43918.jpeg
    06FEE414-82C9-491D-BA12-CEE809D43918.jpeg
    129.2 KB · Views: 9
  • BA42DF63-DA6B-48C8-B6E5-D438D249711B.jpeg
    BA42DF63-DA6B-48C8-B6E5-D438D249711B.jpeg
    93.3 KB · Views: 8
Last edited:
I now have carbon on both faces and the glass on the shaft. Everything was rasped/sanded today, blending the overlapping areas. The first of two edge hardening layers is in place as well. The 2nd one will be Kevlar and applied at the very end.
I’m trying unidirectional carbon for the top layer on the blade and will be interested in what i learn here!
We’re setting at 13 oz right now.

My grip is coming along as well.
 

Attachments

  • 5089794D-3D5B-48DC-8212-9578B47180F1.jpeg
    5089794D-3D5B-48DC-8212-9578B47180F1.jpeg
    176.1 KB · Views: 11
Last edited:
The unidirectional wasn’t all that appealing to me! Live and learn. Due to the filaments that hold everything together, the options were look at all the connecting lines or put them under and just have the smooth face up. This is what i opted for then had to go over it with a piece of 2oz glass to lay down all the little ripples left from the connecting yarns. it will be fine but i don't like the look. A little sanding will make it look better.
On the remaining face i went back to twill fabric, which is to be preferred. After removing the edge flashing i’ll be ready for the 2nd layer of glass over the shaft and the final kevlar edge trim. We’re at 16 oz now, im guessing 17 or 18 at completion.
 

Attachments

  • 546DE013-5226-47E5-826F-22051ACF9015.jpeg
    546DE013-5226-47E5-826F-22051ACF9015.jpeg
    202.6 KB · Views: 12
Last edited:
On this paddle The various layers were added one side at a time then sanded to remove any flashing, and smooth the texture of the fabric. This is the best i can do In a hand layup.
Today i removed the head from a drywall sander to try, and discovered it doe’s a better job; faster, than the orbital sander i was using. In preparation for the last glass sleeve on the shaft, i went after the entire paddle and found that i gained back 1 oz, just from the sanding!

*on edit; i decided to eliminate the kevlar edge guard and go with carbon instead for esthetic reasons. That edge trim is in place and so is the grip so once the final blending takes place i’ll go over the whole thing with the epoxy top coat. While i was at it, i weighed it and feel safe saying it’ll weigh 18 ounces.
 

Attachments

  • 61391832-A15F-41E6-8A05-545C72F53FA8.jpeg
    61391832-A15F-41E6-8A05-545C72F53FA8.jpeg
    216.8 KB · Views: 11
  • B444697B-6BE9-45AA-9435-AD9941F24707.jpeg
    B444697B-6BE9-45AA-9435-AD9941F24707.jpeg
    145.8 KB · Views: 10
Last edited:
Back
Top