• Happy National Audubon Day! 🐣🐦🦅🕊️

Freedom 17 Strip build

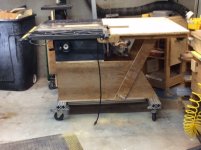
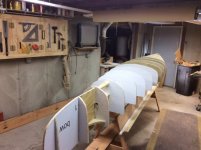
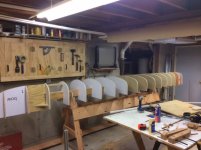
I was able to put some more time in this week. I added the stern forms, and built a giant sawhorse to hold the canoe in position during the build. This canoe is big!! It takes up pretty much my whole shop. I also added a couple of flat surfaces on the sawhorse to hold my strips and tools. The sawhorse was free, I used the wood from the center of the beams I put on my porch. This arrangement is much more stable, I like it. Since got rid of the 80/20 legs and casters I now have some extra material that I'm going to use to make a mobile base for my table saw.

photo%25202.JPG

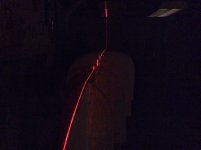
I set up the laser just to check that everything is straight. I was mostly worried about the bow and stern forms since thay are partly unsupported. Everything was scary perfect, I thought I'd have to add some shims somewhere but it all looks good.
photo%25201.JPG


I don't have strips yet, I still need to get about 20bf of wood so I have some extra for this build. Hopefully this weekend. Since I have the time now, I'm going to make the mobile base before I start stripping and maybe clean the shop if I feel ambitious.

One more hour for the stern form, not including the time for the sawhorse.
 
Just finished the mobile base, I should have made it about 10 years ago!!

photo%25202.JPG

Now I can put the canoe on a diagonal so I have some room to work.

photo%25201.JPG
 
It really is nice to be able to roll around a table saw and that looks like a nice solid base. Looks like you've got a lot more room for the boat now! Mine is built into a very large out feed table/workbench but I can only cut up to about 13' lengths before I hit a wall. When I put the table together I planned it so by removing about a dozen screws I can pull off the end of the table and roll the saw out to get it in the middle of the shop for longer pieces. A bit of a hassle but it works.

I like your idea for extending the bow form and attaching the first couple stations directly to it. I wouldn't have thought of that but it looks like it should work fine. I've never seen such a narrow form so close to the bow. Was that part of the plans or did you add that to help keep things fair between form #1 and the stem?

Can't wait to see some strips going on.

What's the large roll of paper(?) hanging from the ceiling?

Alan
 
The roll hanging from the ceiling is 1000 denier Cordura that I've used to build 6 or so skin on frame kayaks. Maybe I can use some of it for a rubstrip...I'll play with it to see how it works out. Those narrow forms were part of the plans, I wasn't going to use them but I figured why not, easy enough to screw them to the bow and stern forms. I think they might help get a good profile at the ends, I'm not sure how much I trust the shape of my bow and stern forms.
 
I'm very interested in watching this build - I was torn between the Freedom 17 and the Kipawa when I decided to build my canoe. The Kipawa won in the end but I think I would have been very happy the Freedom as well.

The strongback you are using is a neat idea. How stable was it when you moved it? Did you need to realign the forms at all?

When building the Kipawa from the Green Valley plans, I used the strongback design which came on the plans. It is a significantly beefier but much less elegant design than yours. I was just able to put it together by myself as the laminated beams are really heavy, but it is incredibly solid. I jumped up and down in the middle of it and it simply did not flex.
 
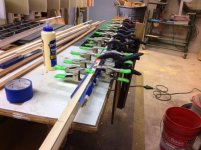
I had big plans today to rip up some strips and start stripping, one of the few Saturdays' I can remember that I haven't had to run kids around or some must do chore. I started this AM by going to my lumber supplier for some clear softwood, unfortunately he was too busy pulling a big order that had to go out today, so I left without any wood off to HD. There I bought some supplies I'd be needing, new circ. saw blade, glue, foam insulation (for the house) and two rolls of masking tape needed for stapleless glue up. You have to use a specific masking tape for strip building...it has to be the 3M green tape. It sticks just the right amount and has some stretch so it keeps the joints tight. When I got home I deceided I'd rip some strips with the wood I have on hand...then it started raining.

Since I rip outside I had to postpone that and do something else...I thought I'd make an accent strip with the scraps I had on hand.


photo%25201.JPG

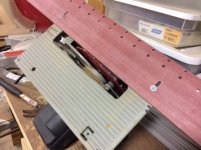
This is the jig I'm going to use to rip strips. Last time I used my table saw but it makes a big mess so I thought I could do it outside with a circ saw and a straight edge.

photo%25203.JPG

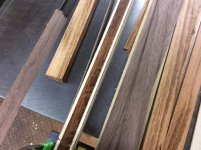
This is the glue up I'm making for the accent. African Zebra wood in the center, wrapped with almost white cedar and then walnut. Incidentally I figured out a way to cut the veneers safetly on the table saw. Start with a board roughly 2*(veneer + saw kerf) thickness and a width 2x the veneer width + 1/4" by whatever length you want. Now set the fence at the veneer thickness and the blade height at the veneer width. Not cut it up...narrow edge on the saw make one cut, roll board 180 degrees and repeat, now flip the board and do it again. You should end up with four veneers all attached to a center web. Now put the board on its side and cut them free. Wow that sounds confusing...I should have taken pictures.

photo%25202.JPG


Lots of clamps, I used a backer to distribute the clamping on the thin veneer pieces.

photo%25204.JPG


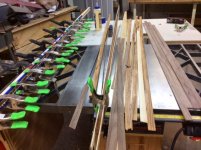
More strips ready to be glued up.


Kolo--- The strongback is very strong and holds alignment very well. The cool thing about this strong back is that its repeatable, I could take all the forms off and reinstall them in about 15 minutes without tools and everything would be lined up first shot.
 
I had time today to rip a few strips outside. The wind eventually stopped me, one of the planks hit me in the head when a wind gust lifted it off the saw horses!!

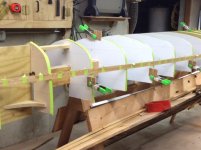
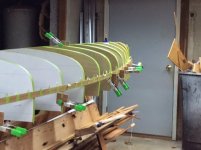
Just getting started with the stripping. I use hot glue to attach the strips to the forms, it shears off pretty easily when you rap the forms with a hammer.


photo%25201.JPG photo%25202.JPG
 
Great setup. I love the small benches on each side to hold the strips.

You're picture gave me a good idea for my build. The little wood wood pieces, which I'm assuming you're using to properly place the first strips, when clamped to the top of the sections would make a nice holder for the strips while applying glue.

I assume you started stripping where you did so you could place your accent strip how you want?

Alan
 
Last edited:
That's eactly why I have those wood pieces clamped to the top of my forms. When I'm stripping in the normal direction (up) I put the glue on the piece already on the form. I was deabting on where to start with the strips, I want to put a dark accent at the DWL and another accent at the top around the gunnels. I'm not sure if I want to follow the gunnel with the accent or just match the waterline. Probably look better following the gunnel but it's more work cutting in strips.
 
An accent strip near the waterline is an interesting idea, it could be used for a quick visual check for trim. How do you know where the DWL is? I don't remember dither a DWL or design load listed for the Freedom 17 only a load range. Did you somehow reverse engineer a DWL based on your intended loading? It might be better to determine what your maximum load will be and put the strip there so that it is always visible.
 
I'm planning on using the 16" WL on the plans for the design water line. I'm not really sure if it's correct or not but it should be close and on the high side so it should always visible. So far I've put in 3-4 hours and I only have 5 strips glued up and the accent strips are now ripped. I was debating having the accents follow the gunnel but they are pretty stiff so I think they are going to follow a waterline. I was curious how much the accents cost me in weight....about 12 oz over the weight of my bone dry cedar...ouch. Might want to rethink these.

Just an FYI, the strips are ending up at 0.14" +/-0.007", they are pretty flexible, they make me a little nervous. If you go that thin make sure the forms are at 12" or less.

Sorry no pictures, nothing really to show except I have been keeping up with cleaning the shop!!
 
Those are some skinny strips! I can't remember, did you say you were doing the whole boat in skinny strips or were you going to have thicker ones below the water line. Do you have a target weight you're shooting for?

Alan
 
I'm debating using full 3/16" after the chine, the hull is pretty rounded so maybe it's not needed. If I keep going the way I am the hull should weigh about 14.5 lbs. before any epoxy (plus 12oz for the accent strip). Really as long as I'm under 40lbs I'll be happy, but lighter is better (unless it breaks in half).
 
PMC, I was looking at the info sheet on the website. It says the draft is 4.25" I guess that would correspond to a design load?
 
Alan's right, those strips are quite skinny. You must have done this once or twice before (wink). Great to be able to see your creation take shape.
Thanks for letting us tag along. Keep those posts coming
 
4.25" probably does correspond to the design load. A few years ago I imported the Freedom 17 offsets in to FreeShip. I'll have to look to see if I still have the files. It would be interesting to see what FreeShip says the displacement will be for 4.25".

Nice to see your progress. I have been debating between a Freedom 17 build or messing around designing my own. Alan's X canoe design is inspiring me to get back to playing with designing my own.
 
Where were you when I was plotting my forms into ACAD? What a pain in the neck. Have you tried Kayak Foundry for designing your own boat, it's really easy to use. I'm sure I'll be going to the Adirondacks in the spring if you want to try it out.
 
Haven't heard anything in a while. Curious to know how the stripping is going. How are the strips holding their shape between forms? Mine showed some sag on the bottom of the hull but not bad.

Alan
 
Still here, lurking. I can't believe you're already off the forms, I'm a little embarassed that I only have about 10-15 stips on so far. It seems like I have too many competeing interests...work, kids and leaves.

Strips seem like they'll be OK, I don't really like working with the flat sawn cedar though, I sould have quarter sawn it.


David
 
Nothing to be embarrassed about. I'd be happy to have something like a wife and kids that kept me from working on a canoe for 3-4 hours every night. I suppose it's one of those grass is always greener things.

My strips are a little mix of everything. I bought "D and better" in 12' lengths, which allows a couple small pin knots per board. While it worked fine it certainly isn't as nice as the A grade 18' pieces I bought for my last stripper. More tear out on the router and a lot of it didn't plane well at all. I used the band saw to cut my angles on the fitted pieces rather than just planing them like normal. While they are a little skinnier they still feel less stiff than I think they should as compared to the last build. It was less than half the cost though ($7.50/bd ft vs $3.15/bd ft).

Alan
 
Back
Top