• Happy National Blueberry Pie Day! 🫐🥧

Chapter II - Swift Gunnel Saga

Joined
Aug 20, 2013
Messages
427
Reaction score
179
Location
Eastern NC
Well, sage advice it was when this was offered to me

" That would make me suspect of every other seat hanger rivet at the least.......".

Trusting that the canoe would hold together for one for more trip before the replacement ash seats, yoke, and handles arrived, I took it north with me to run the middle Potomac. Lets see how this thing handles some quick water.

About mid way on a 10 mile trip, while double blading with vigor, I heard a large pop and felt a slight downward fall of the seat. Sensing I was now on borrowed good fortune, I downshifted into a more temperate pace the rest of the way, hoping the seat would last the rest of the way.

Alas, the canoe held up until about 3/4 of mile before the take out when two more loud pops were heard and the seat on one side fell to the floor. The rivets had broken away on both hangers on the right side. In minor counterpoint, the center thwart cracked noisily as one rotten end of the thwart fell to the floor as well. To no surprise, on the same side as the broken away seat. Now the only thing holding the hull in shape besides the deck plates and the remaining seat are the two new handles I installed before I left on my travels.

So the last 3/4 mile was paddled kneeling and I was quite grateful I had on my wrestling knee pads.

So, canoe repair was in order.

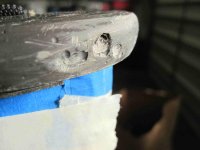
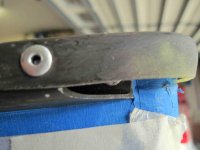
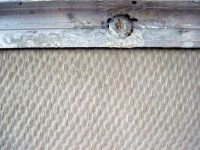
First order of business drill out and replace all seat hanger rivets. I finish this task of 14 rivets. Pause and reconsider.....hmmmmm.....that's an ugly looking rivet just holding the gunwale in place. And he has cousins along that side.
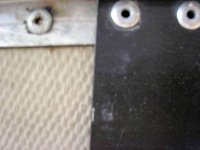


Old and New (2).jpg


Gunnel Rivet (2).jpg


One of my old sayings is "the hardest part of a canoe job is getting the canoe on the saw horse" and here my canoe is on the saw horse with drill and pop rivets beside me. It just makes sense to drill out every reachable pop rivet and reinstall with new rivets. So, every reachable rivet was drilled out and replaced. That should hold for awhile.

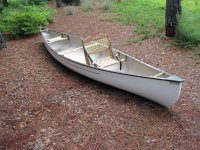
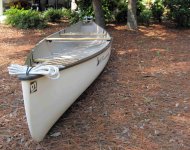
Now how about the gunnels? Reading the paint info reveals it to be too humid so I'll install the new wood members, shock-cord the deck plates, wet sand the remaining crud off and return the canoe to the livery. And paint work can wait until late fall.
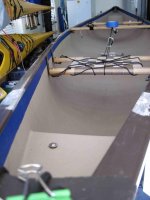
New Seats-lo-res (2).JPG


New Seats-lo-res2 (2).JPG


Maiden Voyage/Sea Trials this morning revealed a nice "tight" hull. The boat glides quite nicely with a sharp entry line and is an easy lift to the shoulders, a definite keeper - small tandem that makes for a great solo overnighter.
 
Well, sage advice it was when this was offered to me

" That would make me suspect of every other seat hanger rivet at the least.......".

Pause and reconsider.....hmmmmm.....that's an ugly looking rivet just holding the gunwale in place. And he has cousins along that side.


It just makes sense to drill out every reachable pop rivet and reinstall with new rivets. So, every reachable rivet was drilled out and replaced. That should hold for awhile.

Well Willie, that advice also included

That would make me suspect of every other seat hanger rivet at the least. And maybe of the the gunwale rivets, especially where the gunwale is weathered flakey and noticeably corroded.

Your photo above showed what may be the fugliest and most corroded rivet I have seen. Did you magnet test one that you drilled out to see if they were aluminum or steel?

The new brightwork looks good. The photos of the original thwarts, with blackened rotted ends, was a perfect illustration of why it is worth sealing the butt ends of those pieces, something most manufacturers do a lousy job of.

I am presuming you sealed the ends after you cut those pieces to fit, either with epoxy or multiple coats of varnish.
 
I like the web colors on your seat !! Now I will really take a hard look at webbing my future seats !! Some one may have posted a source, but would you mind putting it up again ?
Thanks !

Jim
 
Ed's Canoe in Vermont provided the new hardware. The tan webbing was an option. Ed is great to work with, the Swift center to center seat spacing was wider than Ed's stock seats, but they happily made me custom seats for a small extra fee.
 
Well, sitting thru 4 days of incessant rain made me think about how I could put that time to good use. Painting the Swift's gunnels quickly popped to mind, but alas, a tropical rain event is accompanied by too much humidity to make painting a good option for shop work. But there is prep work that can be done.

Lacking the ability re-powder coat the gunnels, what seems the next best approach is to brush enamel on the exposed aluminum gunnels. I went to my local paint store (not a hardware store - paint is their sole focus) to get their advice. Taking a powder chip from the gunwale with me I explained my situation with the paint store owner. He suggested a high gloss enamel well suited for outdoor use in a salt water environment and added some tinting to the paint that is nearly the exact color as the paint chip. Turns out he has regular customers who are in the aluminum window/door and trim business. One of their popular colors is a brown tint almost identical to the Swift's color and he has that formulation recorded.

So after prepping, I'll prime and then brush paint the enamel on all the exposed aluminum areas. Afterwards I'll assess if I need spray paint to give me a uniform cover and look.

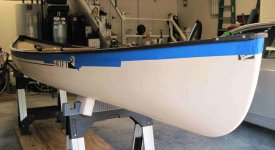
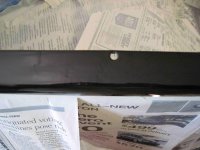
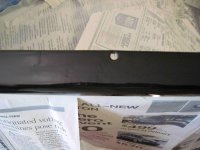
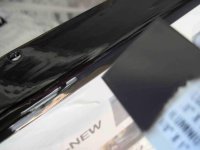
Photos of the taping in prep for the paint event.


Blue Tape LR2.jpg


Blue Tape LR4.jpg


Blue Tape LR3.jpg
 
So after prepping, I'll prime and then brush paint the enamel on all the exposed aluminum areas. Afterwards I'll assess if I need spray paint to give me a uniform cover and look.


Looking forward to seeing the refinished or at least primed gunwales.

Progress?
 
Progress is slow, but in a relentless way; in the way water keeps heading for where its is going.

The next humidity conditions ripe for painting are on Tuesday, so I'm continuing to scrape, sand, tape, alcohol wipe and look in detail all while awaiting a good day to paint.

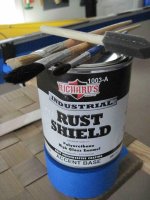
Here is the paint from the paint store

Gunnel Paint.jpg


Further inspection reveals the need for some repair, epoxy I believe it will be.


Bow Voids.JPG
 
Progress is slow, but in a relentless way; in the way water keeps heading for where its is going.

Moving with the speed of water? Frozen water, perhaps. Glacial.

So, happy you finally bought an RO sander? Handiest sanding tool ever for boatwork.


Further inspection reveals the need for some repair, epoxy I believe it will be.

If you have any kind of epoxy thickener those voids in the deck plate would be a good application. Maybe with a dab of dark pigment to mask the repair.
 
Further inspection reveals the need for some repair, epoxy I believe it will be.


A little Glflex, covered with peel ply, cured followed by filing and sanding. A slight hint of the golden gflex color remains, but a much improved look from the pock marked start of the repair.

Stern repair.jpg


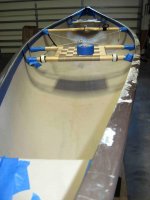
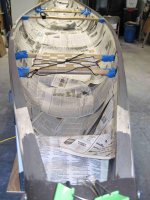
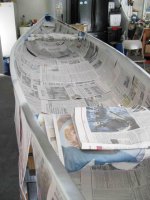
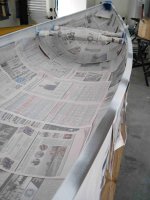
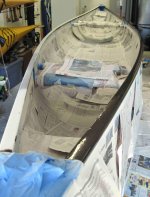
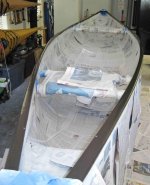
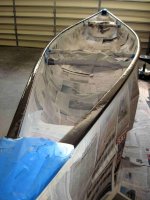
Time to start covering the canoe for a spray paint event; the aluminum primer is a spray product. Here is the inside papered up.

Inside taped.jpg
 
Time to start covering the canoe for a spray paint event; the aluminum primer is a spray product. Here is the inside papered up.

The repaired deck plate looks great.

Spray paint or primer on an upright canoe can be startlingly aerosolized. Obviously cover the seats and thwarts too. And make sure there are no ^ raised folds or crinkles where the drifting aerosolized spray can creep in under/between the sheets of paper.
 
While taping up I came to revisit my decision to tape around the center carry yoke thwart. I've taken the handles out, so this piece is the only one remaining that prevents me from having a totally clear gunwale top. Long term paint maintenance suggests a unifrom painted surface with no voids for water penetration. So out came the carry yoke.

A window of 4-5 hours of less than 65% humidity came available this afternoon. So time to spray the aluminum primer paint. Gave it two light coats, spaced about 5 minutes apart. Now let that dry and cure - 48 hours for a full dry cure.

Next in line is the tinted enamel top coat. That will be brushed or rolled, still mulling that over but leaning to rolling the top, flat surface of the gunnel. Opinions?

Here are the port and starboard gunwales, primed.


Left Side.JPG


++++++++++++++++++++++++++++++++++++++++++++++++++++++

Rightside.JPG
 
I didn't catch this from the beginning, well done on the deck plate repair.

Well you already have it taped off, why not load up the sprayer and give it to her? Seems like brushing then "waiting to see the outcome" would be a waste of time since the hardest part of spraying is already done. Just my2C.

Jason
 
I’m surprised that you didn’t primer the intact sections of powder coat on the gunwales while you were at it. I have no idea how well paint sticks to bare powder coating.
 
Well you already have it taped off, why not load up the sprayer and give it to her? Seems like brushing then "waiting to see the outcome" would be a waste of time since the hardest part of spraying is already done. Just my2C.

Jason

Well I've taken to call the boat work in my garage "Slacker BoatWorks" as, lacking the fine craftsmanship of many on this board, I prefer to take the easy way out. I don't have a spraying system, don't want to invest in one, and brushing or rolling seems the easy way out of using this paint.

Now, I do have spray cans of semi-gloss enamel that are close in color to the brushed on enamel coat I just put on. I may use that after the paint dries and I test a sample of the spray paint and how closely it matches the brushed on color.

A spray finish will look the best so that is my target. Knowing that the gunwale paint will chip over time as the canoe gets put to use, I'd like to ensure the color under the chip is fairly close to the spray coat. More on that later.

Photos from today's work. A second coat will be applied soon.


One side done

One Side Done.jpg


Transition from powder coat to paint. Faintly seen on the left is the original powder coat under the first enamel coat.

Transition.jpg


First coat applied

IMG_2540 (2).JPG


IMG_2539 (2).JPG
 

Attachments

  • Transition.jpg
    Transition.jpg
    272.1 KB · Views: 0
Results of the finish spray paint test. This paint color is called Anodized Bronze and, while perhaps in the brown family, doesn't seem to be a good enough match to cover the brushed on enamel.

Spray Anondized Brown.jpg


So I added a second coat, but this time rolled the larger flat surfaces of the gunnels this time. The roller left a fine nap texture to the paint, photos to follow once dry and there is sunshine outside. There is plenty of the brush on enamel paint left, so any future chips can easily be touched up. Not adding another color greatly simplifies maintenance. I think I'll use the spray paint of the decks however. The contrast may be attractive.
 
Looking pretty sharp Willie.

I was unenthusiastic about the Otter at first, with the original owner’s seat “repairs”, rotted brightwork ends, delaminating gunwales and corroded pop rivets. It was a sow’s ear mess.

Nice work. You should post some before and after photos when you are done and a summary of the work.

Still needs a SlackerBoatworks shop logo or Gogetch.
 
It is always nice to see an abused canoe canoe come bake to life. You have done a nice job. Please keep us informed as to how this goes over time and use. Very interested as this opens up new ways to save abused canoes and have fun along the way. Thank you for sharing.
 
Back
Top