G
Guest
Guest
This will be long, but I do not often get the chance to fully document outfitting a virgin canoe. The day was long, but also immensely fun. Scott did much of the measuring and drilling and etc work himself, so I had opportunity to remember to take photos.
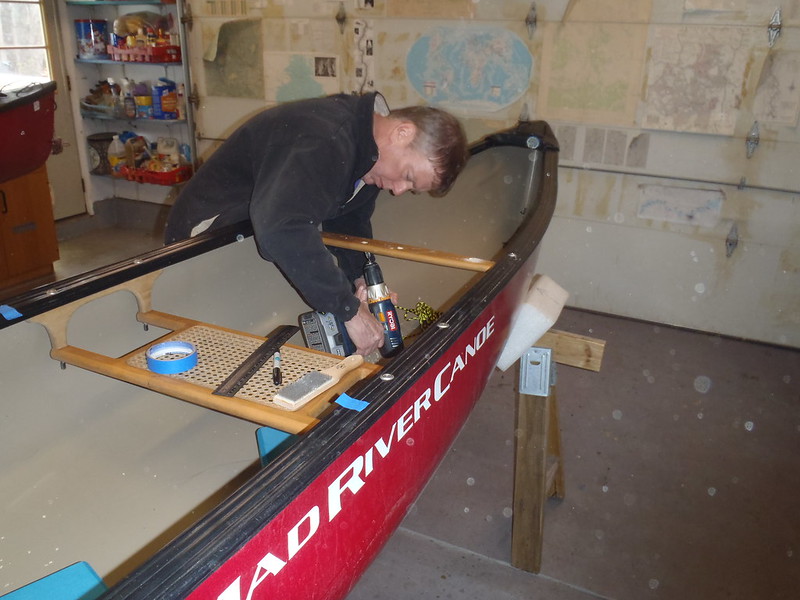
Scott brought his new used Mad River Freedom Solo to the shop Monday morning for a one day outfitting marathon. His idea of morning is different than mine. I was up at 4am.
Is 11am really still morning? I am not sure Scott appreciates how slowly I work, or how much sequential timed outfitting we have to do. He may have thought we were just installing a foot brace and admiring our work for the afternoon. He was wrong.
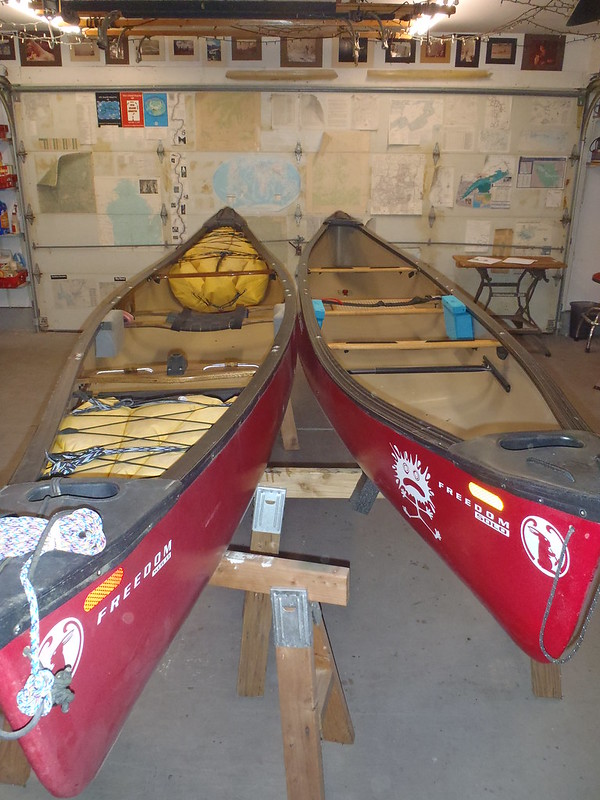
I had seen photos of the canoe, but in person it was immediately unusual. Unusually pristine, with barely a scratch on it inside or out.
I knew from photos that it was a Freedom Solo with IQ2 gunwales. That gunwales system has pluses and minuses. The stout vinyl gunwale structure with an aluminum insert can be a plus. Some of the IQ accessories are wonderfully functional. Some are not. More on that later.
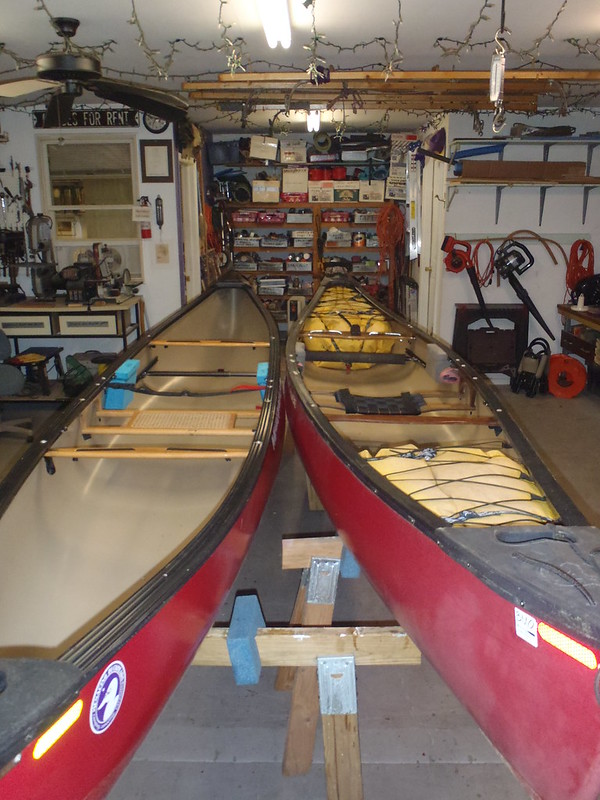
At first glance the sheerline looked different from my Freedom Solo, which was parked fully outfitted in the shop for comparison. Scotts FS has a bit more tumblehome, and is little narrower. A Freedom Solo should be 30 inches wide at the center sheerline. Scotts is only 27 and a half.
 PC180173 by Mike McCrea, on Flickr
 PC180174 by Mike McCrea, on Flickr
WTF? Lets look at the HIN. Starts with WEM? It is by HIN a 2008 hull, and it is a Mad River Canoe. The HIN should start with MAD. I have never seen a WEM, who the hell is that?
http://www.uscgboating.org/content/manufacturers-identification.php
Confluence Watersports SC. First MRC canoe I have seen with WEM.
We did a bunch of measuring. The length is the same as my 2005 non IQ Freedom Solo. The waterline width, measured inside the hull at widest point was only a half inch narrower on Scotts canoe. We set the boats on the level shop floor side by side and compared rocker. Identical. So the 2 and a half inch gunwale tuck did nothing except induce more tumblehome, which is probably a beneficial thing at Scotts height and reach.
It does not look like the gunwales were tucked in by the previous owner, if so he did a helluva clean job with it. The gunwale tuck may well have been a factory issue. IQ style gunwales have a lot of complex structure, with inwale and outwale boltrope slots and aluminum inserts. When later drilling through those IQ gunwales from the inwale side for pad eyes there were two vinyl layers and one aluminum insert. Lots of beef.
Those incredibly stiff and stout IQ gunwales may not bend easily enough on a sub 15 foot canoe. I have not seen that narrowing peculiarity on longer IQ tandems.
Before we did any outfitting we weighed the Scotts Freedom Solo. 57 lbs. Scott, while we have the FS balanced and hung from the scale on the ceiling what should we do next? Mark the balance point for a strap yoke.
 PC170120 by Mike McCrea, on Flickr
We have one day to complete all of the outfitting work, the canoe goes back on the car tomorrow. I had a task list written out in best sequential order. We put my FS on a pad on the shop floor and checked some outfitting fit for Scotts physique. Time to get to work.
Install Wenonah adjustable foot brace. Four pop rivet easy peazy.
 PC170124 by Mike McCrea, on Flickr
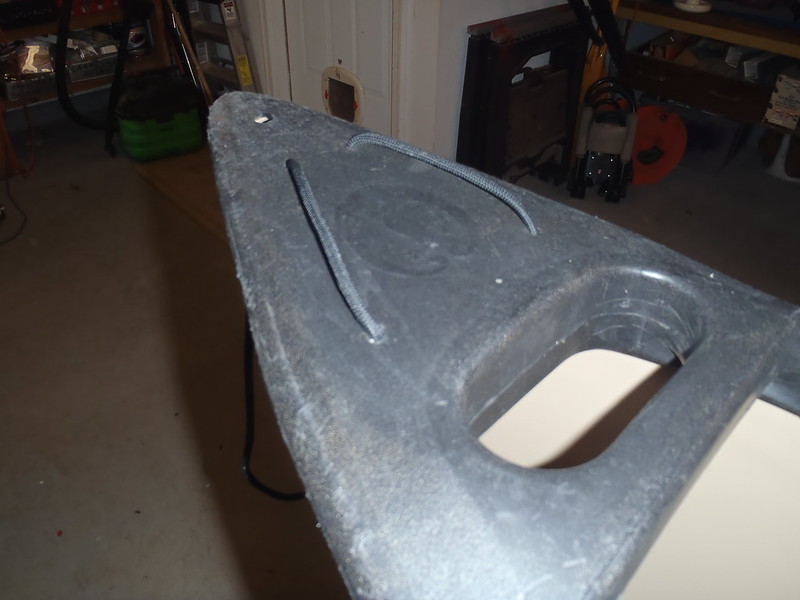
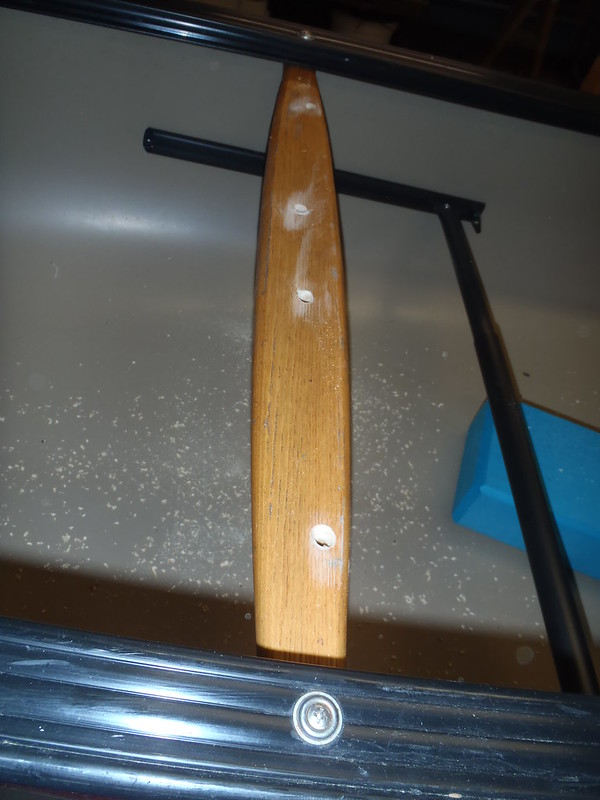
Drill deck plates for drain hole and painter keeper bungee holes. There was already a drain hole drilled at the tip of the deck plate. A one eighth inch drain hole. A dead mosquito could clog that up. We drilled a big honking hole up there, which serves two purposes, uncloggable drain hole and easy place to pass the cord tied to the tip of a float bag through from underneath, so the bag can be pulled fully forward and the end of the bag secured.
 PC180126 by Mike McCrea, on Flickr
Bungee cord painter keeper was a four hole job. Two holes spaced near the tip, two more widely spaced holes at the fat end. One length bungee cord with a stopper knot. Bungee poked out through one of the holes at the tip, run down atop the deck plate and through a wide end hole, diagonally back under the deck plate and out a hole at the stem, down the top of the deck again, back through the last wide end hole, pulled taut and stopper knotted.
Runs of bungee available on top, kinda / \ , so the painter can be held in the middle of two bungee cords, one run of bungee underneath like / . That underneath bungee run is handy at times.
 PC180150 by Mike McCrea, on Flickr
Scott was already drilling his own holes. Maybe because I did one, handed him the drill and said OK, you do the rest. Once he finished drilling holes and running bungee I gave him a blank look and asked OK, what next?
That would be a recurring theme throughout the day, sometimes adopting a pre-school teacher voice and saying OK now Scottie, the other canoe is right over there, can YOU spot the next outfitting task.
While we were making holes and leaving debris in the hull we installed a Mohawk Strap Yoke at the already marked balance point. A couple of machine screw holes drilled in the gunwale and we were on a search through the various stainless steel parts bins for 4 each machine screws with matching flange washers, washers, and nylocks.
It took a lot of searching to find the 4 small matching flange washers. At which point Scott finally asked why we needed four of each when there were only two ends of the strap yoke. Smart arse, you should have corrected me 20 minutes ago.
Strap yoke installation took only minutes. We slid a 2 inch ladder lock on the webbing center to hold the loose end of the strap secure from flapping around on the roof racks. Been whappitywhappity there, do not want.
 PC180134 by Mike McCrea, on Flickr
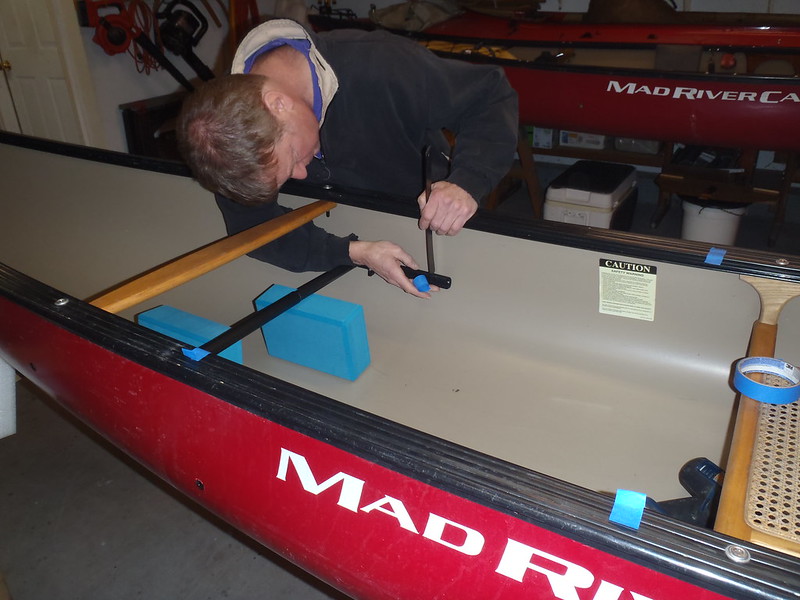
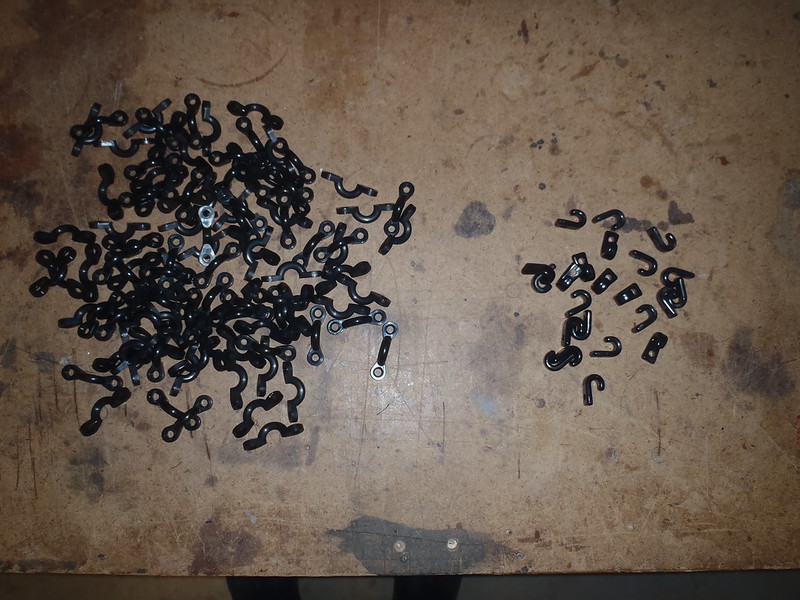
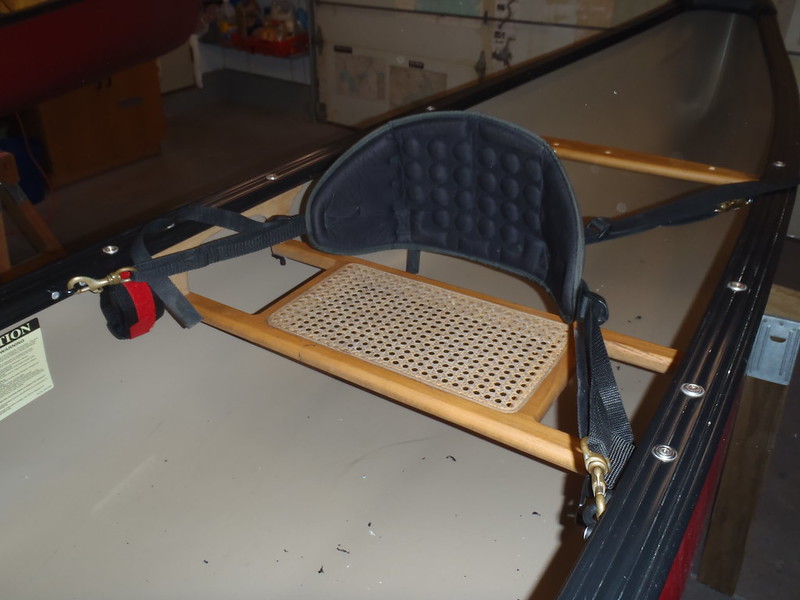
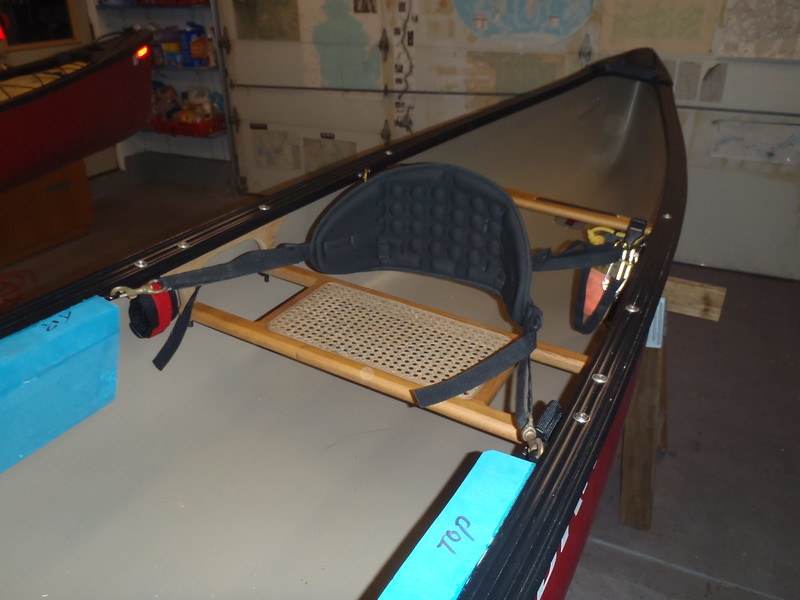
Ok Scott, whats next? Nylon pad eyes for a back band, providing oppositional force to the foot brace. dang, this may be an omen of things to come. I had exactly 4 nylon pad eyes left, and only eight half inch long pop rivets. While we were working on the canoe my TopKayaker order was delivered, including a 100 pack of pad eyes and more J hooks.
 PC190187 by Mike McCrea, on Flickr
Perfect fit. I love those Surf to Summit Performance back bands, especially using the brass swivel snaps. Snap, snap, snap, snap and the back band is on. One trick to removing and installing them, loosen only the back or front set of straps for slack when removing the back band. When you go to put it back in just pull those straps back tight and the back band is once again in perfect position.
 PC180135 by Mike McCrea, on Flickr
I was going to send a back band home with Scott, but Surf to Summit has them on sale and his order will soon be on the way. He may need some pad eyes so he can use it on his other canoes. I have some.
Next we wanted to install webbing loops on the shank ends of both thwarts. Scott and I were already working in efficient shop mode. I would measure one, drill one, unscrew one or affix one outfitting bit for demonstration and hand him the tools and materials with a Here ya go. Meanwhile I would put away tools on the bench from the last task and getting the next tools ready.
With the thread protectors and nylocks off we could simply slip webbing loops over the machine screw shank end. Or not, the left edge of both thwarts shows a little discoloration. We took the thwarts off for inspection. That butt end, only the left side of both thwarts, had a layer of black gunk dirt and bacteria.
 PC180129 by Mike McCrea, on Flickr
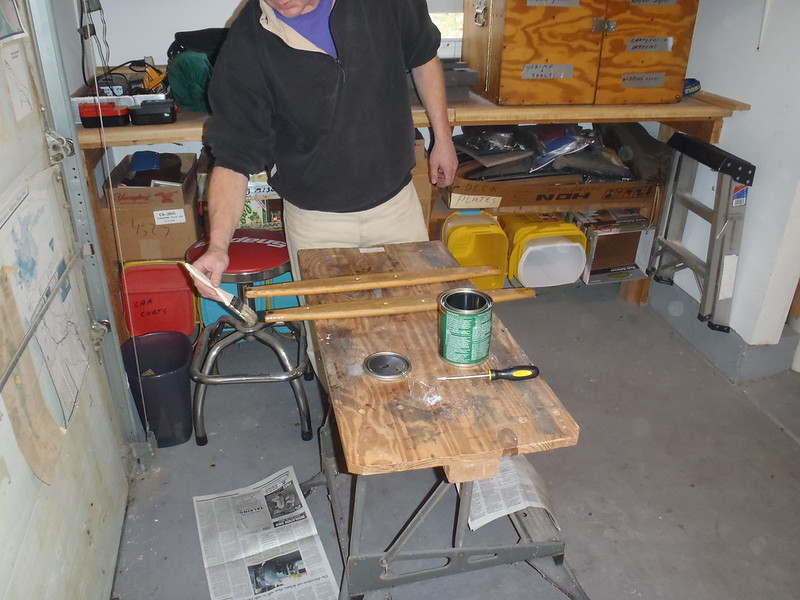
We cleaned off the gunk and refinished both ends of both thwarts using a 1 x 30 tabletop belt sander, the handiest little shop tool ever. With all of the bacterial black removed and the butt ends sanded smooth we painted a coat of spar urethane on the exposed wood.
 PC180130 by Mike McCrea, on Flickr
We should have swabbed some spar urethane in the machine screw holes on the thwarts, but I forgot about that step and Scott was no freaking help at reminding me. Maybe he will at least remember to do that to the seat and truss hangers when he takes them out to refinish.
While that first coat of spar urethane was drying Scott vacuumed the drilling debris out of the hull and selected the premade size and shape webbing loops he wanted in each location. We still had some urethane second coat wait time, so we cogitated the size, shape and placement of minicel knee bumpers.
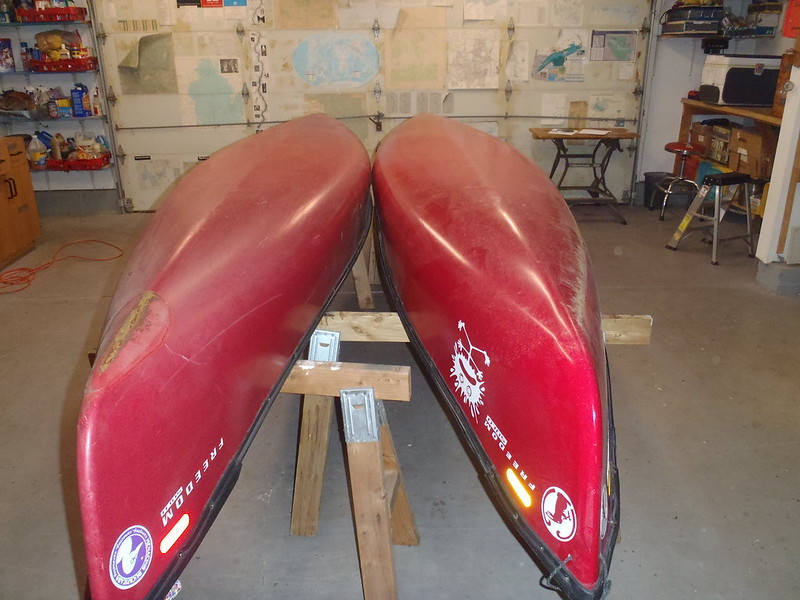
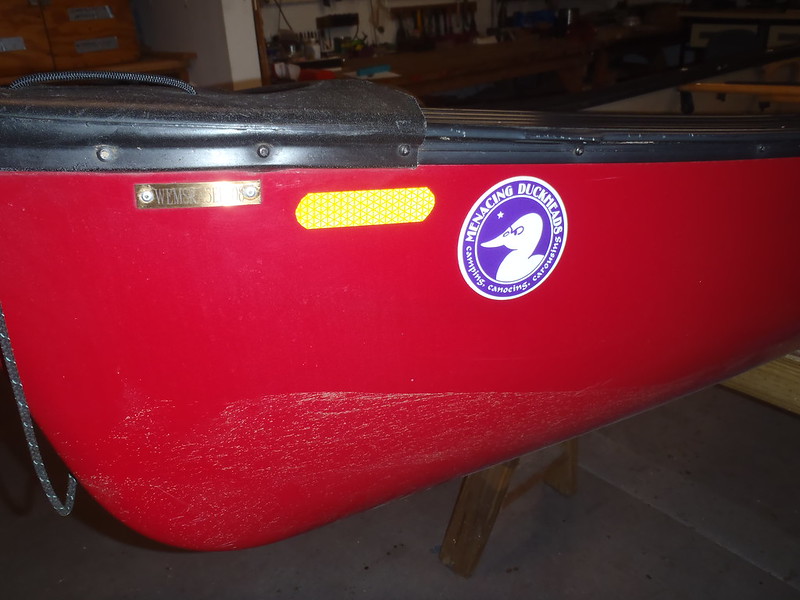
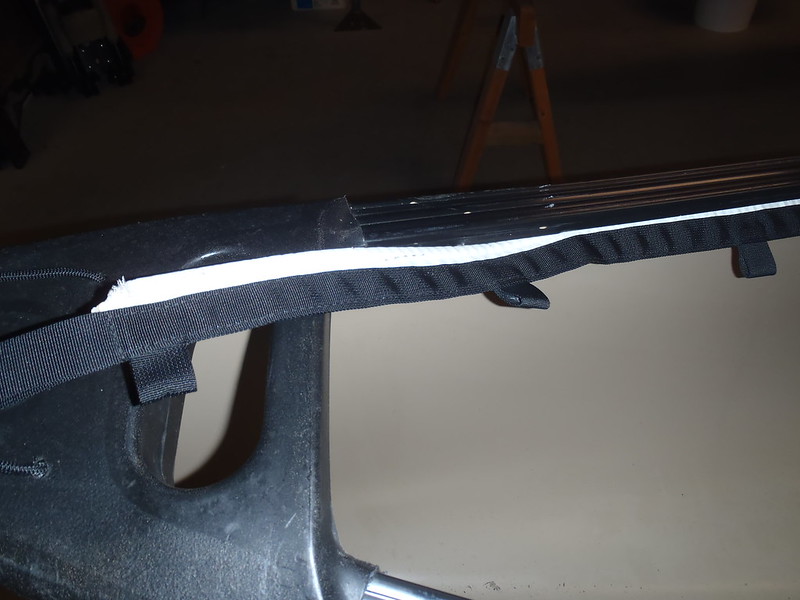
Second coat of varnish, killed some time, had a beer and alcohol cleaned several place on the hull. Scott, why did I just alcohol clean those spots on the hull stems? Look at the other Freedom Solo, what is on those stems?
 PC180131 by Mike McCrea, on Flickr
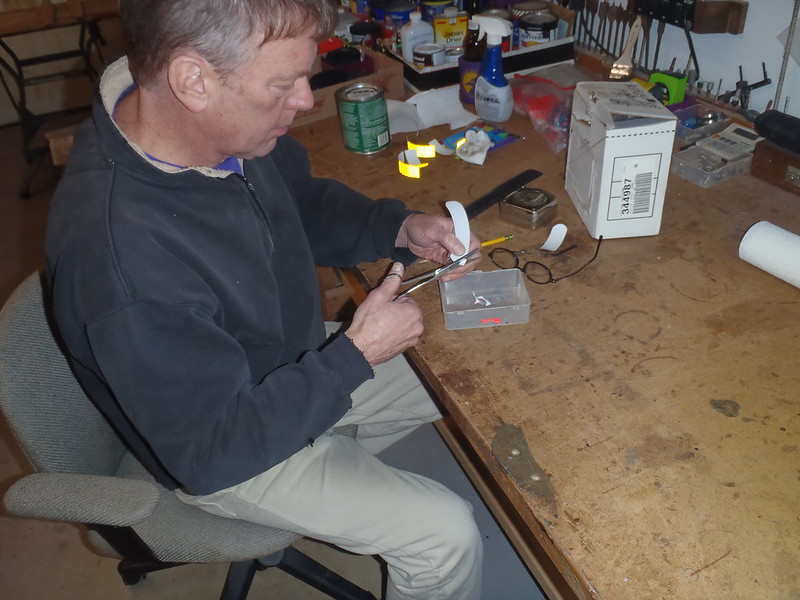
High intensity reflective tape. And a Duckhead sticker. With the reflective tape cut to length and ends rounded I watched Scott try to peel the backing from the adhesive. I took a walk, wrote an email, had a beer and he was still trying to peel off the backing. I bet him I could peel and apply three strips of tape before he managed to get the backing off a single one. Won that bet.
 PC180152 by Mike McCrea, on Flickr
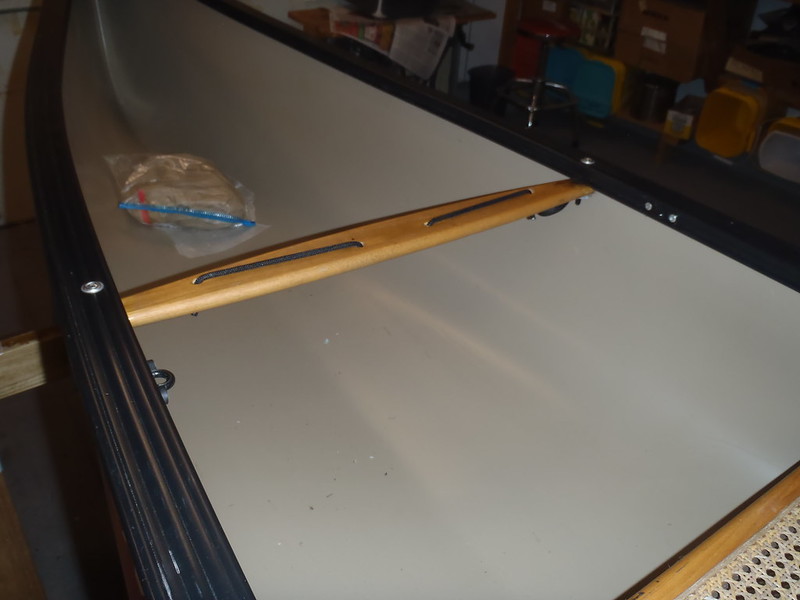
That spar urethane is dry enough, we reinstalled the thwarts and added Scotts chosen webbing loops to the machine screw shank ends.
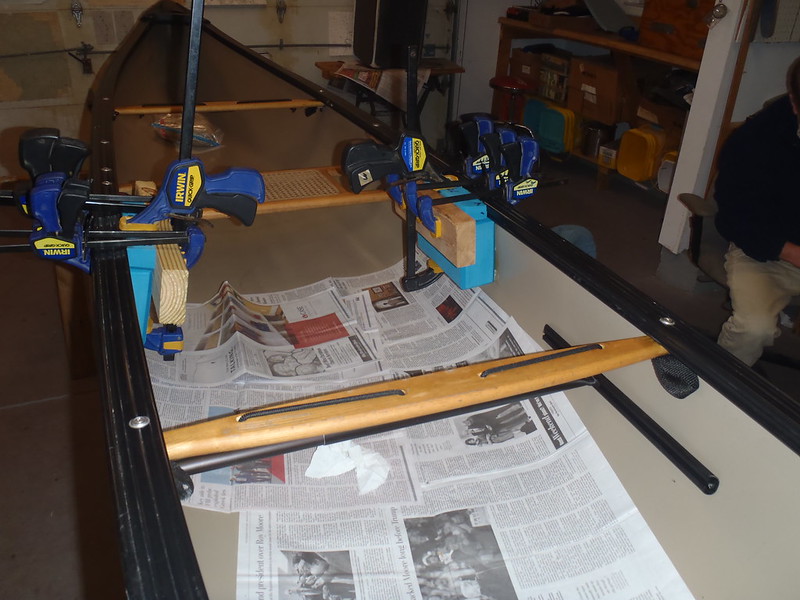
Time to drill those thwarts for bungee runs. Four holes in each thwart, offset along the grain and a little larger than bungee diameter. Holes drilled and beveled out top and bottom for the direction the bungee is stretching to prevent wear. Lightly sanded.
 PC180127 by Mike McCrea, on Flickr
 PC180128 by Mike McCrea, on Flickr
Scott, here is some newspaper, cue tip swabs and the can of spar urethane. What is your next task?
Put the newspaper inside the hull for drip prevention and swab the newly drilled bungee holes with urethane. First coat applied, sealing those holes. No, no, no, do not sit down, we have a lot left to do. No you can not have another beer. But I can.
Lets think more about the size, shape and placement of the minicel knee bumpers. We used blue Walmart Yoga blocks for the mimicel knee bumpers. We should have used regular minicel, the OEM beveled edge on those minicel blocks was a PITA.
But the minicel blocks are close to Scotts preferred knee spread in depth away from gunwales, and I had several of them. Three timed to dry coats of contact cement on the minicel, two on the hull, heat gun activation, instant adhesion and clamped in place.
One full yoga block contact cemented to the hull under each inwale and clamped in place. Once those 2 blocks have had clamped set up time we can cut the filler piece to keep Scotts bony knees off the hard inwale edge. He is becoming such a comfort wuss.
 PC180139 by Mike McCrea, on Flickr
OK, Scott, what is next? I had the pre printed sequential outfitting task list in my office, so I could sneak in for a peek at the list before asking. Hum, how about vacuuming the thwart bungee hole debris from the hull again?
Next, float bags and lacing. I needed some time alone in the shop to think about that, and sent Scott inside to work on a project while I contemplated a float bag and lacing solution.
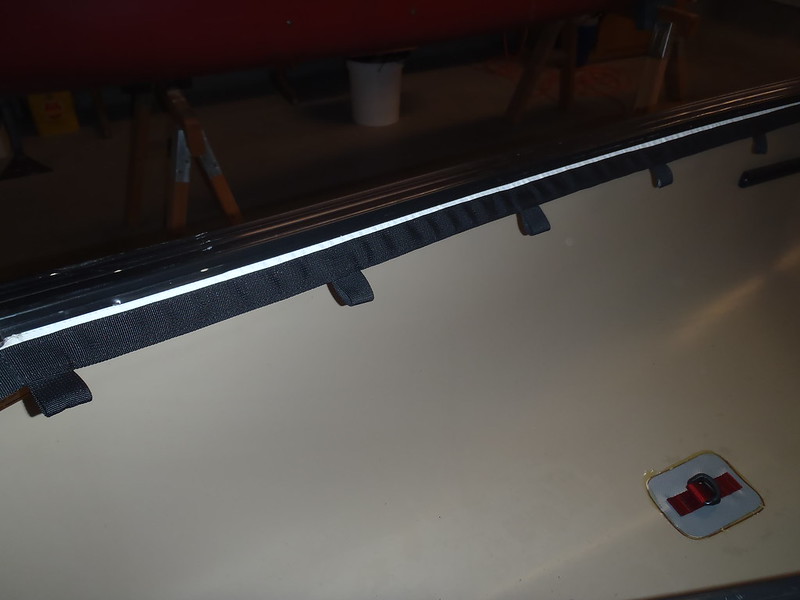
I was not actually contemplating. I have a bunch of IQ gunwale accessory stuff. The best of that is the IQ Lash In System, a webbing loop daisy chain strips that slip into the IQ inwale channel. I also had a zippered IQ overbag that holds a floatation bag. And zippered bow spray cover.
I had hoped to allow Scott back into the shop and present him with a fully IQ outfitted Freedom solo. Not happening. The overbag, although it fits, is a complex zipper directional nightmare to install properly. The bow spray cover should install easily, but it is for a tandem and does not fit. The Lash In System is a thing of simplistic elegance and easy to slip into place.
 PC180168 by Mike McCrea, on Flickr
Or should have been. The IQ stuff attaches by means of a Boltrope sewn inside a length of webbing, the round Boltrope should slide easily inside IQ channels on the inwales and outwales via a widened feeder slot.
 PC180169 by Mike McCrea, on Flickr
Except that a couple of the feeder slots on Scotts boat are too tight. No worries, I have an OEM Spreader Tool designed for widening the feeder slots. Nope, that IQ spreader tool is in North Carolina, with Willie.
Willie, I mentioned your name. Several times, at least once with praise.
Willie found a local seamstress who made him copies of that Lash In System. Improved copies in fact, custom length with the lash loops closer together. For 10 bucks each. I have bunches of quality line right sized for the boltrope.
 PC180170 by Mike McCrea, on Flickr
Willie sent me a link for the material he used for the sewn sleeve.
https://www.sailrite.com/Odyssey-Turquoise-64-Fabric
One yard of fabric 64 inches wide is enough to make dozens of DIY IQ Lash In Systems. With enough left over if those work agreeably for use as boltrope sleeves to make a flat fitted bow spray cover with paddle pocket and a couple Velcro paddle retaining straps. We pulled out a custom Cooke Custom Sewing partial bow cover for an overboat look see.
With a / \ of boltrope in each outwale slot that spraycover would be danged watertight. Scott liked what he envisioned, and I foresee a sewing project or seamstress in his future.
Hey Scott, what material does Cooke Custom Sewing use for canoe spray covers? While you think about that and I go look it up. And have a beer.
CCS uses 400 Denier urethane coated nylon packcloth. I would use nylon rather than no stretch no sag poly, just so there is some slop the fit. Boltrope outwale channel to boltrope outwale channel is a too dang precise a measurement to get just right with no stretch allowance. Just hem in that raised splash and spray drainage baffle, maybe as simple as a length of foam pipe insulation insert for a raised baffle at the open end.
Back to work. I had a couple old groady solo canoe end float bags. We put those in the Freedom Solo, stuffed into the bow, and marked the location for Nothwater Double D rings. I asked Scott what we should do next and he replied
Alcohol wipe the pad locations
Clean the bottom of the vinyl pads with alcohol
Put the D ring pads in place and trace around the perimeter
Mix up a just right sized batch of Gflex
Paint the Gflex on the bottom of the vinyl pads
Lay the pads in place inside the traced outline
Cover with wax paper
Lay ZipLock sand bag weights on the wax paper to help hold the pad down
Take the sandbags and wax paper off every 15 minutes and press down any loose edges or air bubbles
Have a beer
Keep checking the vinyl pads every 15 minutes.
Remind Mike that the next step is to cut and contact cement the inwale edge filler piece on the knee bumpers so that my delicate knees never touch that hard inwale edge.
 PC180140 by Mike McCrea, on Flickr
Scott is an arse sometimes, but a quick learner.
 PC180144 by Mike McCrea, on Flickr
Some measuring and marking and band saw cutting of the third yoga block eventually produced the correct sized filler piece of minicel. Scott went home with a couple pieces of Dragonskin to do some custom carving, a wee bit at a time, until he channels his inner Goldilocks this one is juuust right.
 PC180158 by Mike McCrea, on Flickr
Scott, keep checking the edges of those Dring vinyl pads for lift or bubbles. I will have one of those IPAs you brought. You should try one, they are good. While you are not having one of these delicious beers, tell me what is next. Are we running out of things to do yet? Are we running out of beer? If the answer to the second question is no lets keep going.
Check those vinyl pads again. Pads down firm and Gflex stiff enough? Good, I will mix a tiny batch of Gflex in disposable plastic shot glass and hand you that. And a tiny disposable paint brush, 30 each for 97 cents. You still owe me three cents.
Wait, I sent you home with several plastic shot glasses and a couple tiny brushes. Thirty cents!
Why? Painting a little bead of Gflex around the perimeter of the D ring pads will soften the transition and help keep dirt, sand and water away from the edge of the vinyl pad.
Where are we on the sequential To Do list? Time to put the thwart bungee through the spar urethane coated holes and look at some Velcro paddle keeps.
 PC180151 by Mike McCrea, on Flickr
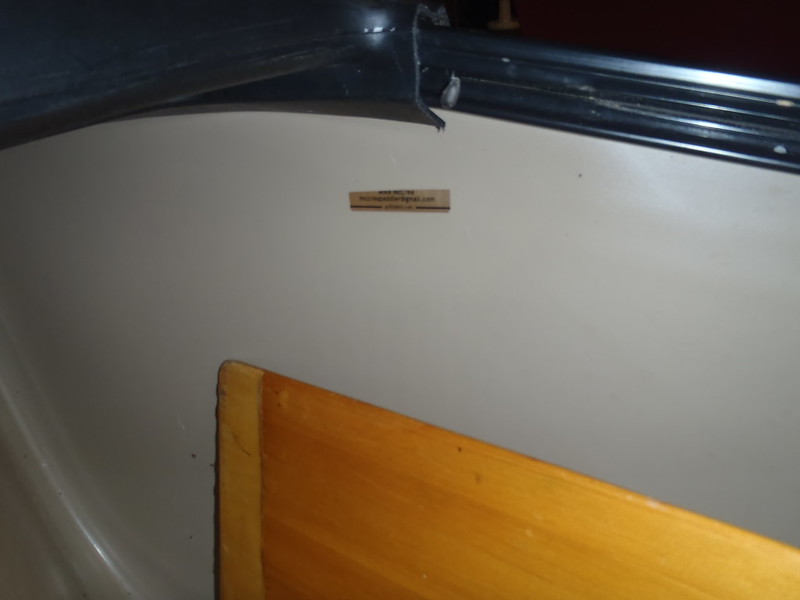
How about some contact information written inside the hull? While Scott was not looking I put a Golf Club label with my name and email up inside the stem. And covered it with clear enamel spray for permanence. If he lost the Freedom Solo it becomes my canoe. It has my contact info in it, and I have a record of the HIN.
 PC180165 by Mike McCrea, on Flickr
That worked. I have finally figured out how to coerce shop visitors to write their contact info on the hull. Not just so that an honest person might return a lost boat. If the canoe gets pinned or washes up somewhere without you that contact info would be helpful for lost boat finders to report to the proper authorities.
Is there anything left on the To Do list? Oh, yeah, lay a bead of Plumbers Goop around the perimeter of the minicel knee bumper to hull connection, to prevent water and grit infiltration. We can only do the top and sides today, Scott can lip it upside down and do the bottoms at home. I sent him off with a tube of Plumbers Goop to do the rest.
I have 300 yards of wide webbing. Your choice of black, red or green, take 20 feet or so home, I do not think I am running out anytime soon.
 PC190180 by Mike McCrea, on Flickr
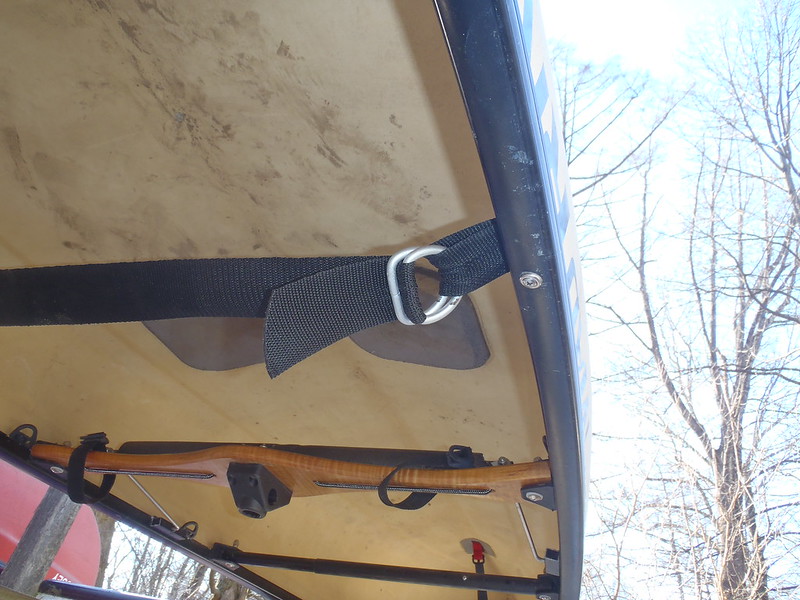
And take a couple big stainless steel D-rings, and some 1 inch double sided Velcro. Pretty dang easy to DIY a strap yoke with some webbing, a length of Velcro Strap Bundle and two SS Drings. You forgot to remind me to make fold over tabs on the strap yoke Velcro.
 PC190183 by Mike McCrea, on Flickr
The quick release buckles Mohawk now provides are nothing like the quality of their old fastex buckles, and are prone to inopportune failure with heavier boats. I know the D rings with the webbing looped in and out are not failing. I use those SS D rings on 80 pound canoe with no worries.
 PC190184 by Mike McCrea, on Flickr
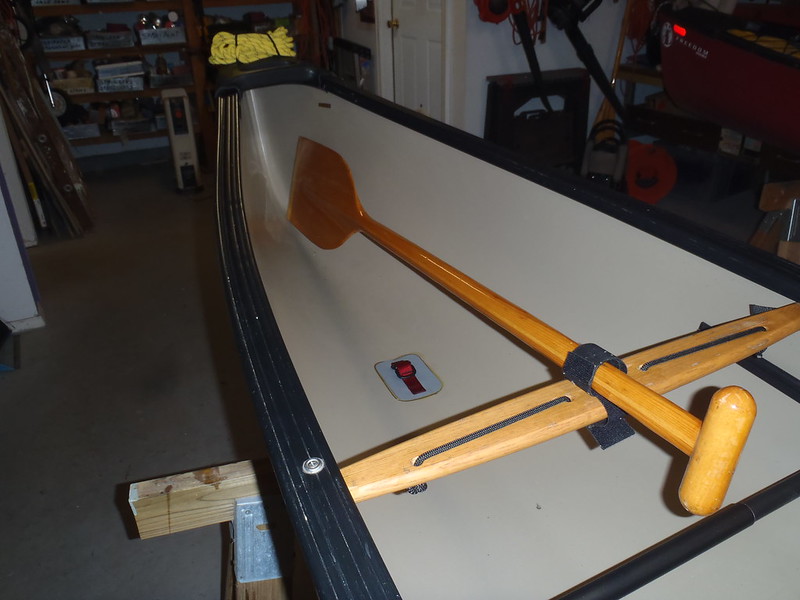
We need to hot cut the Velcro paddle shaft keepers to proper length and binder clip folded them over for Scott to Gflex tabs. He has Gflex at home, and now disposable shot glasses and tiny paint brushes.
Velcro around thwart paddle keepers, courtesy of that guy Willie. The Velcro on each strap is way too long, and they have no easy grab foldover tab. Cut to size and easy pull end tabs folded.
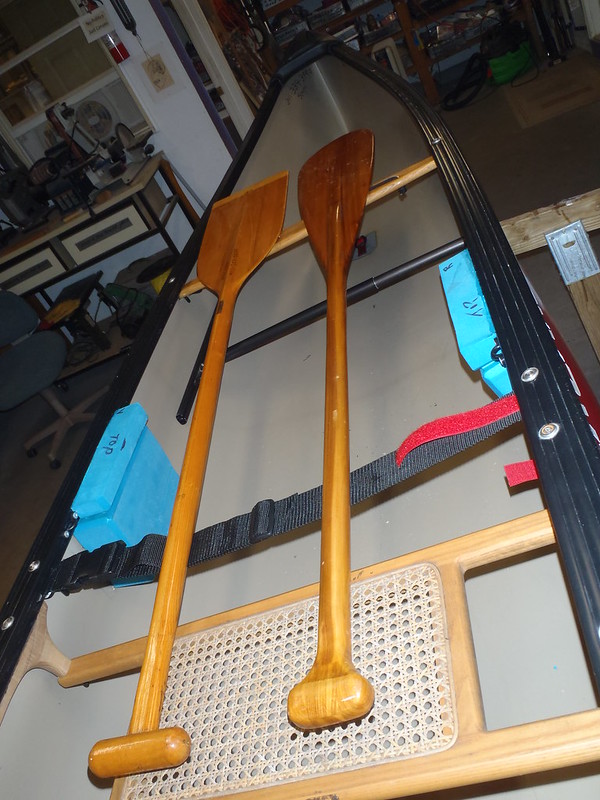
While we were sizing and hot cutting those absurdly long Velcro paddle shaft holders we found a couple of paddles to use as length and size models. Two straight shaft wood sticks from our never used collection that desperately needed a home on the water.
A wood beaver tail with modified pear grip, made by dear friend Norbert Thompson. I felt guilty every time I was in a canoe without that NT special. Now it will get used as intended.
 PC180167 by Mike McCrea, on Flickr
And, for Scotts whitewater ambitions in the Scamp, a classic, vintage Clement, with a massive blade and tee grip, the choice of whitewater paddlers throughout the northcountry in the 1960s. Long backstory on those. Got them with a used RX Explorer. I had no use for them and gave one to Jsaults, who had fond memories from his early whitewater days. Now the other to Scott.
I will not miss either paddle, and now they will be used.
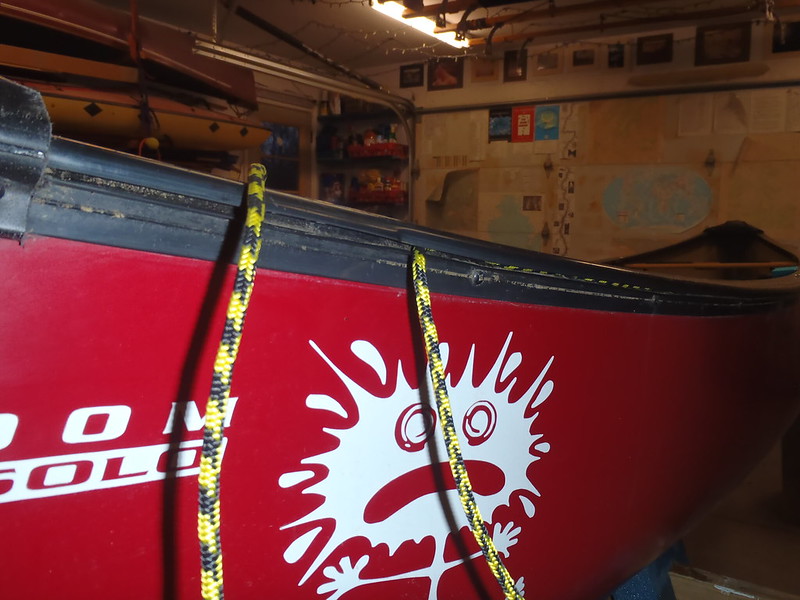
We have only been at this for 8 hours now. Scott, are you tired yet? No? OK, whats next. You need some new bow and stern loops, the stuff that is on the Freedom Solo is one step above parachute cord.
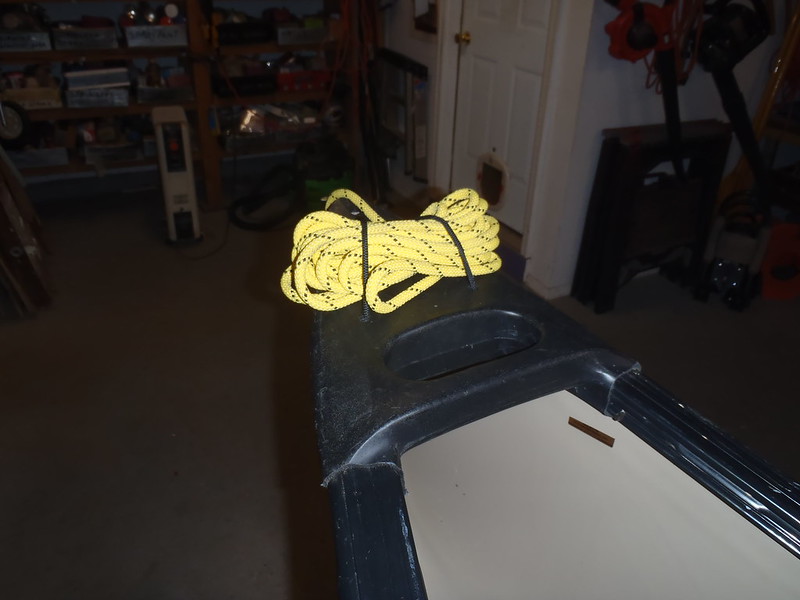
What else? Quality bow and stern painters. Bluewater floating rescue rope, hand and knot kindly. It was well worth buying a 300 ft roll as shop stock when it was on sale.
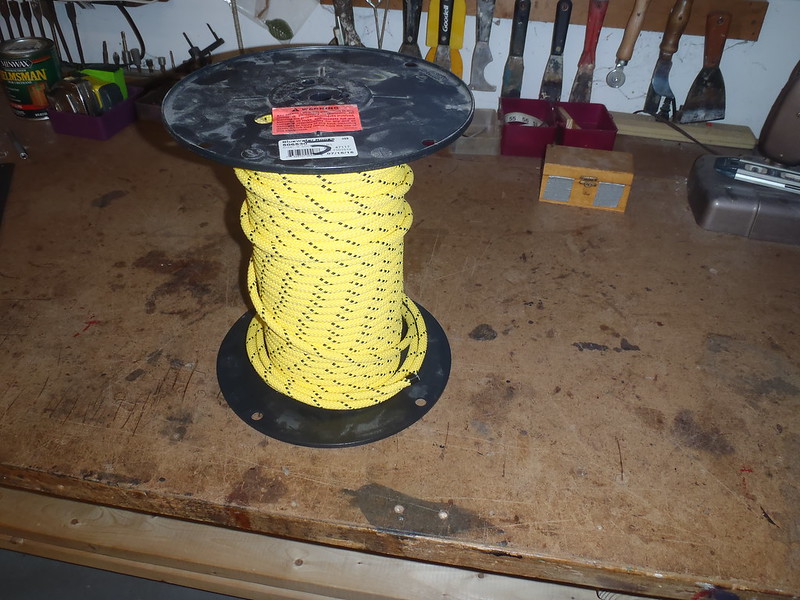 PC190188 by Mike McCrea, on Flickr
Ends taped and cut using a Handicut tool and lightly flamed.
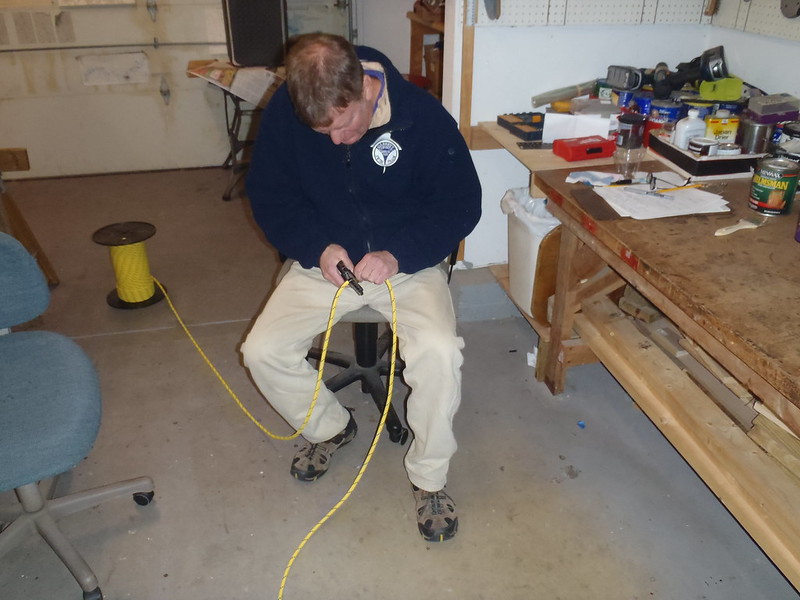 PC180137 by Mike McCrea, on Flickr
Scott uses 5 FREAKING CAM STRAPS to hold the canoe to his roof racks. Good lord man, next visit we cut some quality rope and you learn to tie a Truckers hitch. Screw spending 20 minutes cam strap finagling, that is the last thing I want to spend time doing at a launch or landing.
You need a throw bag. Something like this.
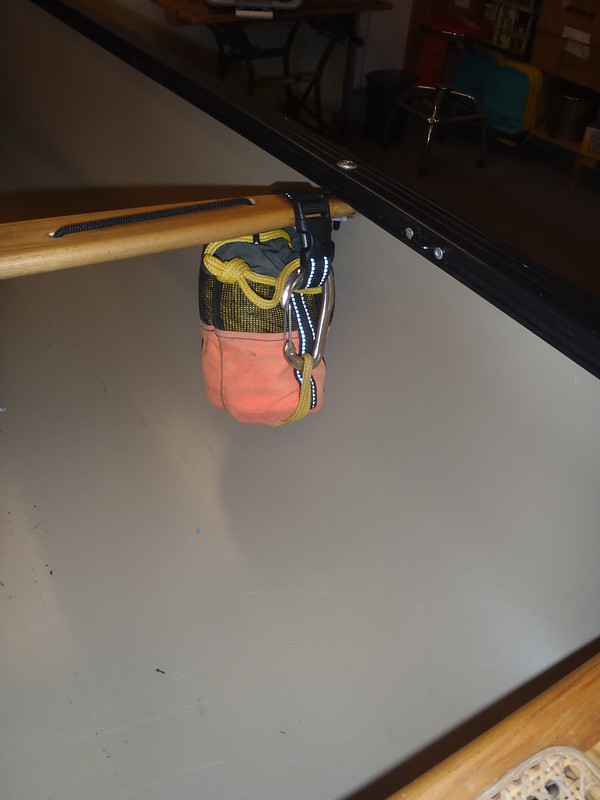 PC180155 by Mike McCrea, on Flickr
Here is a spare DIY throw bag you can have. The grommeted bag I made is not bad, but the line is overly thick Home Depot crap. Replace that crap with some quality rope when you get home. Quarter inch, or better five sixteenths, floating rope will work.
Practice with it in the yard, including unstuffed second throws. Maybe make another DIY throw bag. Easy as a small stuff bag, grommet kit, decent rope. Remember, you carry a throw bag for your friends, and they should carry one for you.
We are running out of outfitting needs. Here is a thick chunk of old sleeping pad foam for when you kneel.
After nine hours nonstop I think we are done. The canoe can stay in the warm shop overnight until you leave in the morning to allow for additional contact cement, Gflex and spar urethane cure time
I have known Scott for going on 50 years, but this was the first time we have done boat work. We operated well together, and had fun. Plus he abided by the posted rules.
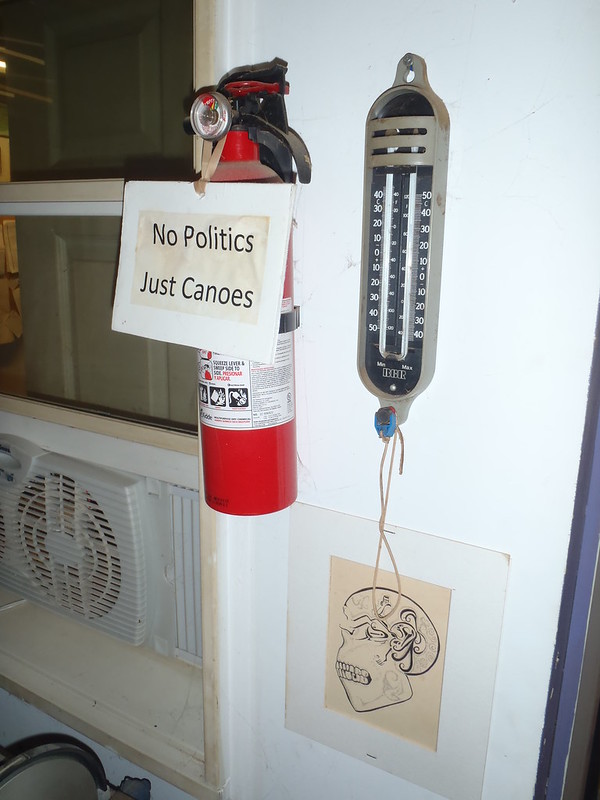 PC180149 by Mike McCrea, on Flickr
Another competent and efficient shop partner is always a good thing. Scott seemed mildly pleased with what we accomplished and now that he has experience I may just sit and watch when he brings the Scamp down for outfitting.
 PC180176 by Mike McCrea, on Flickr
Scott brought his new used Mad River Freedom Solo to the shop Monday morning for a one day outfitting marathon. His idea of morning is different than mine. I was up at 4am.
Is 11am really still morning? I am not sure Scott appreciates how slowly I work, or how much sequential timed outfitting we have to do. He may have thought we were just installing a foot brace and admiring our work for the afternoon. He was wrong.
I had seen photos of the canoe, but in person it was immediately unusual. Unusually pristine, with barely a scratch on it inside or out.
I knew from photos that it was a Freedom Solo with IQ2 gunwales. That gunwales system has pluses and minuses. The stout vinyl gunwale structure with an aluminum insert can be a plus. Some of the IQ accessories are wonderfully functional. Some are not. More on that later.
At first glance the sheerline looked different from my Freedom Solo, which was parked fully outfitted in the shop for comparison. Scotts FS has a bit more tumblehome, and is little narrower. A Freedom Solo should be 30 inches wide at the center sheerline. Scotts is only 27 and a half.
PC180173 by Mike McCrea, on FlickrPC180174 by Mike McCrea, on FlickrWTF? Lets look at the HIN. Starts with WEM? It is by HIN a 2008 hull, and it is a Mad River Canoe. The HIN should start with MAD. I have never seen a WEM, who the hell is that?
http://www.uscgboating.org/content/manufacturers-identification.php
Confluence Watersports SC. First MRC canoe I have seen with WEM.
We did a bunch of measuring. The length is the same as my 2005 non IQ Freedom Solo. The waterline width, measured inside the hull at widest point was only a half inch narrower on Scotts canoe. We set the boats on the level shop floor side by side and compared rocker. Identical. So the 2 and a half inch gunwale tuck did nothing except induce more tumblehome, which is probably a beneficial thing at Scotts height and reach.
It does not look like the gunwales were tucked in by the previous owner, if so he did a helluva clean job with it. The gunwale tuck may well have been a factory issue. IQ style gunwales have a lot of complex structure, with inwale and outwale boltrope slots and aluminum inserts. When later drilling through those IQ gunwales from the inwale side for pad eyes there were two vinyl layers and one aluminum insert. Lots of beef.
Those incredibly stiff and stout IQ gunwales may not bend easily enough on a sub 15 foot canoe. I have not seen that narrowing peculiarity on longer IQ tandems.
Before we did any outfitting we weighed the Scotts Freedom Solo. 57 lbs. Scott, while we have the FS balanced and hung from the scale on the ceiling what should we do next? Mark the balance point for a strap yoke.
PC170120 by Mike McCrea, on FlickrWe have one day to complete all of the outfitting work, the canoe goes back on the car tomorrow. I had a task list written out in best sequential order. We put my FS on a pad on the shop floor and checked some outfitting fit for Scotts physique. Time to get to work.
Install Wenonah adjustable foot brace. Four pop rivet easy peazy.
PC170124 by Mike McCrea, on FlickrDrill deck plates for drain hole and painter keeper bungee holes. There was already a drain hole drilled at the tip of the deck plate. A one eighth inch drain hole. A dead mosquito could clog that up. We drilled a big honking hole up there, which serves two purposes, uncloggable drain hole and easy place to pass the cord tied to the tip of a float bag through from underneath, so the bag can be pulled fully forward and the end of the bag secured.
PC180126 by Mike McCrea, on FlickrBungee cord painter keeper was a four hole job. Two holes spaced near the tip, two more widely spaced holes at the fat end. One length bungee cord with a stopper knot. Bungee poked out through one of the holes at the tip, run down atop the deck plate and through a wide end hole, diagonally back under the deck plate and out a hole at the stem, down the top of the deck again, back through the last wide end hole, pulled taut and stopper knotted.
Runs of bungee available on top, kinda / \ , so the painter can be held in the middle of two bungee cords, one run of bungee underneath like / . That underneath bungee run is handy at times.
PC180150 by Mike McCrea, on FlickrScott was already drilling his own holes. Maybe because I did one, handed him the drill and said OK, you do the rest. Once he finished drilling holes and running bungee I gave him a blank look and asked OK, what next?
That would be a recurring theme throughout the day, sometimes adopting a pre-school teacher voice and saying OK now Scottie, the other canoe is right over there, can YOU spot the next outfitting task.
While we were making holes and leaving debris in the hull we installed a Mohawk Strap Yoke at the already marked balance point. A couple of machine screw holes drilled in the gunwale and we were on a search through the various stainless steel parts bins for 4 each machine screws with matching flange washers, washers, and nylocks.
It took a lot of searching to find the 4 small matching flange washers. At which point Scott finally asked why we needed four of each when there were only two ends of the strap yoke. Smart arse, you should have corrected me 20 minutes ago.
Strap yoke installation took only minutes. We slid a 2 inch ladder lock on the webbing center to hold the loose end of the strap secure from flapping around on the roof racks. Been whappitywhappity there, do not want.
PC180134 by Mike McCrea, on FlickrOk Scott, whats next? Nylon pad eyes for a back band, providing oppositional force to the foot brace. dang, this may be an omen of things to come. I had exactly 4 nylon pad eyes left, and only eight half inch long pop rivets. While we were working on the canoe my TopKayaker order was delivered, including a 100 pack of pad eyes and more J hooks.
PC190187 by Mike McCrea, on FlickrPerfect fit. I love those Surf to Summit Performance back bands, especially using the brass swivel snaps. Snap, snap, snap, snap and the back band is on. One trick to removing and installing them, loosen only the back or front set of straps for slack when removing the back band. When you go to put it back in just pull those straps back tight and the back band is once again in perfect position.
PC180135 by Mike McCrea, on FlickrI was going to send a back band home with Scott, but Surf to Summit has them on sale and his order will soon be on the way. He may need some pad eyes so he can use it on his other canoes. I have some.
Next we wanted to install webbing loops on the shank ends of both thwarts. Scott and I were already working in efficient shop mode. I would measure one, drill one, unscrew one or affix one outfitting bit for demonstration and hand him the tools and materials with a Here ya go. Meanwhile I would put away tools on the bench from the last task and getting the next tools ready.
With the thread protectors and nylocks off we could simply slip webbing loops over the machine screw shank end. Or not, the left edge of both thwarts shows a little discoloration. We took the thwarts off for inspection. That butt end, only the left side of both thwarts, had a layer of black gunk dirt and bacteria.
PC180129 by Mike McCrea, on FlickrWe cleaned off the gunk and refinished both ends of both thwarts using a 1 x 30 tabletop belt sander, the handiest little shop tool ever. With all of the bacterial black removed and the butt ends sanded smooth we painted a coat of spar urethane on the exposed wood.
PC180130 by Mike McCrea, on FlickrWe should have swabbed some spar urethane in the machine screw holes on the thwarts, but I forgot about that step and Scott was no freaking help at reminding me. Maybe he will at least remember to do that to the seat and truss hangers when he takes them out to refinish.
While that first coat of spar urethane was drying Scott vacuumed the drilling debris out of the hull and selected the premade size and shape webbing loops he wanted in each location. We still had some urethane second coat wait time, so we cogitated the size, shape and placement of minicel knee bumpers.
Second coat of varnish, killed some time, had a beer and alcohol cleaned several place on the hull. Scott, why did I just alcohol clean those spots on the hull stems? Look at the other Freedom Solo, what is on those stems?
PC180131 by Mike McCrea, on FlickrHigh intensity reflective tape. And a Duckhead sticker. With the reflective tape cut to length and ends rounded I watched Scott try to peel the backing from the adhesive. I took a walk, wrote an email, had a beer and he was still trying to peel off the backing. I bet him I could peel and apply three strips of tape before he managed to get the backing off a single one. Won that bet.
PC180152 by Mike McCrea, on FlickrThat spar urethane is dry enough, we reinstalled the thwarts and added Scotts chosen webbing loops to the machine screw shank ends.
Time to drill those thwarts for bungee runs. Four holes in each thwart, offset along the grain and a little larger than bungee diameter. Holes drilled and beveled out top and bottom for the direction the bungee is stretching to prevent wear. Lightly sanded.
PC180127 by Mike McCrea, on FlickrPC180128 by Mike McCrea, on FlickrScott, here is some newspaper, cue tip swabs and the can of spar urethane. What is your next task?
Put the newspaper inside the hull for drip prevention and swab the newly drilled bungee holes with urethane. First coat applied, sealing those holes. No, no, no, do not sit down, we have a lot left to do. No you can not have another beer. But I can.
Lets think more about the size, shape and placement of the minicel knee bumpers. We used blue Walmart Yoga blocks for the mimicel knee bumpers. We should have used regular minicel, the OEM beveled edge on those minicel blocks was a PITA.
But the minicel blocks are close to Scotts preferred knee spread in depth away from gunwales, and I had several of them. Three timed to dry coats of contact cement on the minicel, two on the hull, heat gun activation, instant adhesion and clamped in place.
One full yoga block contact cemented to the hull under each inwale and clamped in place. Once those 2 blocks have had clamped set up time we can cut the filler piece to keep Scotts bony knees off the hard inwale edge. He is becoming such a comfort wuss.
PC180139 by Mike McCrea, on FlickrOK, Scott, what is next? I had the pre printed sequential outfitting task list in my office, so I could sneak in for a peek at the list before asking. Hum, how about vacuuming the thwart bungee hole debris from the hull again?
Next, float bags and lacing. I needed some time alone in the shop to think about that, and sent Scott inside to work on a project while I contemplated a float bag and lacing solution.
I was not actually contemplating. I have a bunch of IQ gunwale accessory stuff. The best of that is the IQ Lash In System, a webbing loop daisy chain strips that slip into the IQ inwale channel. I also had a zippered IQ overbag that holds a floatation bag. And zippered bow spray cover.
I had hoped to allow Scott back into the shop and present him with a fully IQ outfitted Freedom solo. Not happening. The overbag, although it fits, is a complex zipper directional nightmare to install properly. The bow spray cover should install easily, but it is for a tandem and does not fit. The Lash In System is a thing of simplistic elegance and easy to slip into place.
PC180168 by Mike McCrea, on FlickrOr should have been. The IQ stuff attaches by means of a Boltrope sewn inside a length of webbing, the round Boltrope should slide easily inside IQ channels on the inwales and outwales via a widened feeder slot.
PC180169 by Mike McCrea, on FlickrExcept that a couple of the feeder slots on Scotts boat are too tight. No worries, I have an OEM Spreader Tool designed for widening the feeder slots. Nope, that IQ spreader tool is in North Carolina, with Willie.
Willie, I mentioned your name. Several times, at least once with praise.
Willie found a local seamstress who made him copies of that Lash In System. Improved copies in fact, custom length with the lash loops closer together. For 10 bucks each. I have bunches of quality line right sized for the boltrope.
PC180170 by Mike McCrea, on FlickrWillie sent me a link for the material he used for the sewn sleeve.
https://www.sailrite.com/Odyssey-Turquoise-64-Fabric
One yard of fabric 64 inches wide is enough to make dozens of DIY IQ Lash In Systems. With enough left over if those work agreeably for use as boltrope sleeves to make a flat fitted bow spray cover with paddle pocket and a couple Velcro paddle retaining straps. We pulled out a custom Cooke Custom Sewing partial bow cover for an overboat look see.
With a / \ of boltrope in each outwale slot that spraycover would be danged watertight. Scott liked what he envisioned, and I foresee a sewing project or seamstress in his future.
Hey Scott, what material does Cooke Custom Sewing use for canoe spray covers? While you think about that and I go look it up. And have a beer.
CCS uses 400 Denier urethane coated nylon packcloth. I would use nylon rather than no stretch no sag poly, just so there is some slop the fit. Boltrope outwale channel to boltrope outwale channel is a too dang precise a measurement to get just right with no stretch allowance. Just hem in that raised splash and spray drainage baffle, maybe as simple as a length of foam pipe insulation insert for a raised baffle at the open end.
Back to work. I had a couple old groady solo canoe end float bags. We put those in the Freedom Solo, stuffed into the bow, and marked the location for Nothwater Double D rings. I asked Scott what we should do next and he replied
Alcohol wipe the pad locations
Clean the bottom of the vinyl pads with alcohol
Put the D ring pads in place and trace around the perimeter
Mix up a just right sized batch of Gflex
Paint the Gflex on the bottom of the vinyl pads
Lay the pads in place inside the traced outline
Cover with wax paper
Lay ZipLock sand bag weights on the wax paper to help hold the pad down
Take the sandbags and wax paper off every 15 minutes and press down any loose edges or air bubbles
Have a beer
Keep checking the vinyl pads every 15 minutes.
Remind Mike that the next step is to cut and contact cement the inwale edge filler piece on the knee bumpers so that my delicate knees never touch that hard inwale edge.
PC180140 by Mike McCrea, on FlickrScott is an arse sometimes, but a quick learner.
PC180144 by Mike McCrea, on FlickrSome measuring and marking and band saw cutting of the third yoga block eventually produced the correct sized filler piece of minicel. Scott went home with a couple pieces of Dragonskin to do some custom carving, a wee bit at a time, until he channels his inner Goldilocks this one is juuust right.
PC180158 by Mike McCrea, on FlickrScott, keep checking the edges of those Dring vinyl pads for lift or bubbles. I will have one of those IPAs you brought. You should try one, they are good. While you are not having one of these delicious beers, tell me what is next. Are we running out of things to do yet? Are we running out of beer? If the answer to the second question is no lets keep going.
Check those vinyl pads again. Pads down firm and Gflex stiff enough? Good, I will mix a tiny batch of Gflex in disposable plastic shot glass and hand you that. And a tiny disposable paint brush, 30 each for 97 cents. You still owe me three cents.
Wait, I sent you home with several plastic shot glasses and a couple tiny brushes. Thirty cents!
Why? Painting a little bead of Gflex around the perimeter of the D ring pads will soften the transition and help keep dirt, sand and water away from the edge of the vinyl pad.
Where are we on the sequential To Do list? Time to put the thwart bungee through the spar urethane coated holes and look at some Velcro paddle keeps.
PC180151 by Mike McCrea, on FlickrHow about some contact information written inside the hull? While Scott was not looking I put a Golf Club label with my name and email up inside the stem. And covered it with clear enamel spray for permanence. If he lost the Freedom Solo it becomes my canoe. It has my contact info in it, and I have a record of the HIN.
PC180165 by Mike McCrea, on FlickrThat worked. I have finally figured out how to coerce shop visitors to write their contact info on the hull. Not just so that an honest person might return a lost boat. If the canoe gets pinned or washes up somewhere without you that contact info would be helpful for lost boat finders to report to the proper authorities.
Is there anything left on the To Do list? Oh, yeah, lay a bead of Plumbers Goop around the perimeter of the minicel knee bumper to hull connection, to prevent water and grit infiltration. We can only do the top and sides today, Scott can lip it upside down and do the bottoms at home. I sent him off with a tube of Plumbers Goop to do the rest.
I have 300 yards of wide webbing. Your choice of black, red or green, take 20 feet or so home, I do not think I am running out anytime soon.
PC190180 by Mike McCrea, on FlickrAnd take a couple big stainless steel D-rings, and some 1 inch double sided Velcro. Pretty dang easy to DIY a strap yoke with some webbing, a length of Velcro Strap Bundle and two SS Drings. You forgot to remind me to make fold over tabs on the strap yoke Velcro.
PC190183 by Mike McCrea, on FlickrThe quick release buckles Mohawk now provides are nothing like the quality of their old fastex buckles, and are prone to inopportune failure with heavier boats. I know the D rings with the webbing looped in and out are not failing. I use those SS D rings on 80 pound canoe with no worries.
PC190184 by Mike McCrea, on FlickrWe need to hot cut the Velcro paddle shaft keepers to proper length and binder clip folded them over for Scott to Gflex tabs. He has Gflex at home, and now disposable shot glasses and tiny paint brushes.
Velcro around thwart paddle keepers, courtesy of that guy Willie. The Velcro on each strap is way too long, and they have no easy grab foldover tab. Cut to size and easy pull end tabs folded.
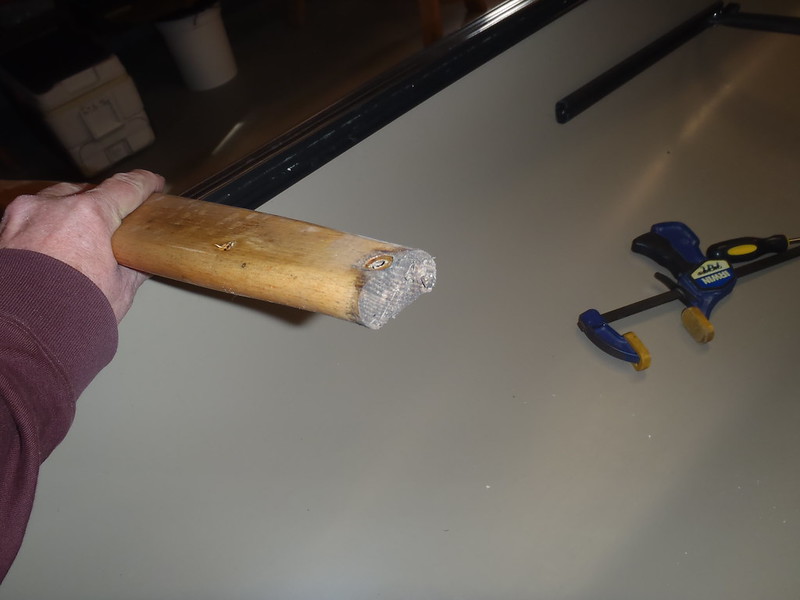
While we were sizing and hot cutting those absurdly long Velcro paddle shaft holders we found a couple of paddles to use as length and size models. Two straight shaft wood sticks from our never used collection that desperately needed a home on the water.
A wood beaver tail with modified pear grip, made by dear friend Norbert Thompson. I felt guilty every time I was in a canoe without that NT special. Now it will get used as intended.
PC180167 by Mike McCrea, on FlickrAnd, for Scotts whitewater ambitions in the Scamp, a classic, vintage Clement, with a massive blade and tee grip, the choice of whitewater paddlers throughout the northcountry in the 1960s. Long backstory on those. Got them with a used RX Explorer. I had no use for them and gave one to Jsaults, who had fond memories from his early whitewater days. Now the other to Scott.
I will not miss either paddle, and now they will be used.
We have only been at this for 8 hours now. Scott, are you tired yet? No? OK, whats next. You need some new bow and stern loops, the stuff that is on the Freedom Solo is one step above parachute cord.
What else? Quality bow and stern painters. Bluewater floating rescue rope, hand and knot kindly. It was well worth buying a 300 ft roll as shop stock when it was on sale.
PC190188 by Mike McCrea, on FlickrEnds taped and cut using a Handicut tool and lightly flamed.
PC180137 by Mike McCrea, on FlickrScott uses 5 FREAKING CAM STRAPS to hold the canoe to his roof racks. Good lord man, next visit we cut some quality rope and you learn to tie a Truckers hitch. Screw spending 20 minutes cam strap finagling, that is the last thing I want to spend time doing at a launch or landing.
You need a throw bag. Something like this.
PC180155 by Mike McCrea, on FlickrHere is a spare DIY throw bag you can have. The grommeted bag I made is not bad, but the line is overly thick Home Depot crap. Replace that crap with some quality rope when you get home. Quarter inch, or better five sixteenths, floating rope will work.
Practice with it in the yard, including unstuffed second throws. Maybe make another DIY throw bag. Easy as a small stuff bag, grommet kit, decent rope. Remember, you carry a throw bag for your friends, and they should carry one for you.
We are running out of outfitting needs. Here is a thick chunk of old sleeping pad foam for when you kneel.
After nine hours nonstop I think we are done. The canoe can stay in the warm shop overnight until you leave in the morning to allow for additional contact cement, Gflex and spar urethane cure time
I have known Scott for going on 50 years, but this was the first time we have done boat work. We operated well together, and had fun. Plus he abided by the posted rules.
PC180149 by Mike McCrea, on FlickrAnother competent and efficient shop partner is always a good thing. Scott seemed mildly pleased with what we accomplished and now that he has experience I may just sit and watch when he brings the Scamp down for outfitting.
PC180176 by Mike McCrea, on Flickr