- Joined
- Jul 6, 2021
- Messages
- 643
- Reaction score
- 1,184
ALSG, henceforth Alan, contacted me last week pondering a shop visit to install some outfitting on YAER (Yet Another Explorer Rebuild)
https://www.canoetripping.net/threads/yaer-yet-another-explorer-rebuild.127182/
And pick up a slab of ethafoam to make custom sawhorse hull stabilizers. I now had more sheets of that stuff that I would ever use (thanks Jane, keep ‘em coming)
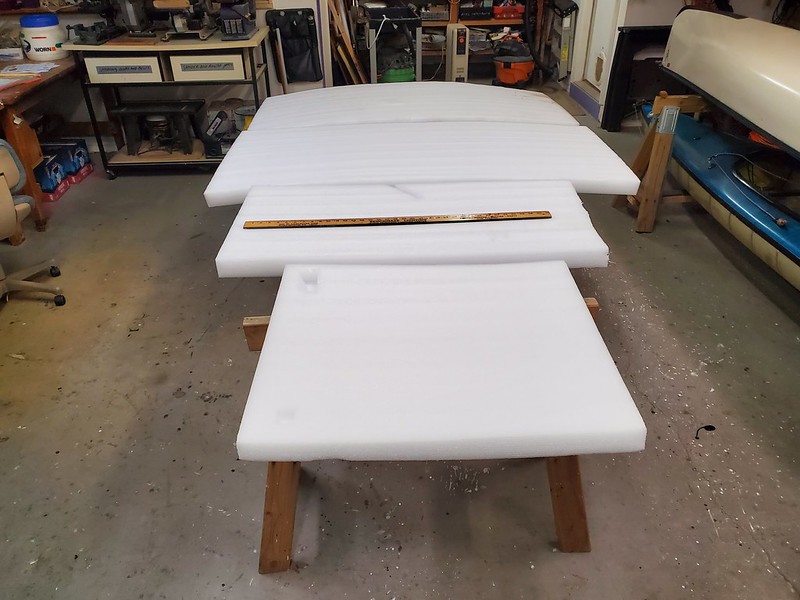 20220306_094422 by Mike McCrea, on Flickr
Mere minutes later the same morning Chip e-mailed. He could use some of that packaging ethafoam; the Kinetic Sculpture race team needed ethafoam to use as seats in this year’s race contraption.
https://www.kineticbaltimore.com/
The theme of this year’s Kinetic Sculpture Race is “Time Travel”. The team and ground crew will be dressing as Doc Brown from Back to the Future.
Chip wondered if I knew of a source for lab coats. Gee Chip, lemme think, 35 years X 5 days a week in a lab coat, combined with a frugal Scots who doesn’t throw much old stuff away? Yeah, I got a box full of old lab coats, come on by.
Alan arrived first and we quickly donned costumes to surprise Chip. And then, YAER hanging from the shop scale, DougD called. I handed the phone to Alan before saying hello for some consternation. This was already turning out to be a whacky fine day in the shop.
For continuing funsies I hid when Chip arrived and walked into the shop. Nonplused Chip looked at lab coated Alan, standing alongside YAER and remarked “You are not McCrea”.
Our first order of shop business was to weigh YAER. Sapele wood, gorgeous inlaid decks, glossy epoxied and varnished yoke and thwarts, maybe the prettiest Explorer ever re-built. YAER weighed 73lbs on the shop scale, not too shabby for a wood gunwaled RX Explorer that originally weighed about the same.
Pondering the outfitting of YAER for whitewater paddling we established a best sequence order of business after the weigh-in. First, put the canoe on a pad of the shop floor, have Alan climb in and kneel to figure out the best location of minicel knee pads. Alan, bowing to my (not) vast and superior WW knee pad knowledge, pencil marked the locations.
 P4020003 by Mike McCrea, on Flickr
After further consideration it was decided that the knee pads should be installed in the other orientation, curved edge forward. I became increasingly familiar with this ALSG facial expression, “What do you mean they are backwards and you want me to do it again?”
 P4020004 by Mike McCrea, on Flickr
In a continuing saga Alan, still kneeling in the canoe, had lost his pencil. Or maybe I had already put it away.
Next order of business was to inflate the float bags and mark locations for Northwater Double-D rings. Alan’s float bags are Mohawks, but unlike any Mohawk bags we own, or have seen. Made of seriously thick, heavy duty material they have a Boston valve instead of a purge valve and tube with a Roberts valve.
That is an interesting inflation solution, most often seen on large air-volume rafts and inflatable beds, maybe overkill for a float bag, and inconvenient for adding air to a deflating bag on cold river days; Alan needs to make a screw-on adaptor with a length of tubing; that would be much easier than leaning over swapping lip spit with the Boston valve to puff a few breaths into a cold deflated bag.
Chip arrived, and after a spell of Who-Dat? pondering Alan in the shop, I dressed him in a special burlesque lab coat.
 P4020005 by Mike McCrea, on Flickr
That customized lab coat, I’m thinking grey denoting buxom ground crew, is more revealing without the layer of shirts underneath. Chip promised to get naked underneath before his next stop, a meeting of a Kinetic Sculpture Team, bringing them a box of old lab coats.
OK, I later asked. Chip did wear it, un-garbed beneath and nipples exposed into the team meeting, which included a half dozen people Chip had never before met. I guess they now know what shenanigans to expect. Gotta love Chip; I suggested he drive there, unshirted, windows open, stiff nippled in the chill breeze, and hope to get pulled over for speeding.
Moving on the float bag lacing, end cage and D-ring locations Alan found his pencil, and Chip, who has paddled more WW than Alan and I combined, including previous lifetimes, was a font of recommendations for lacing and caging. Most of which we later ignored.
 P4020006 by Mike McCrea, on Flickr
YAER, which Alan now realizes would have been better monikered simply YAR , Yet Another Rebuild:
“Yar, or yare, is a nautical term that means ready or prepared for action; quick to move. Lots of accidents can happen on a ship if it's not well maintained, if the rigging is a mess, and if items are not fastened. To say that a sailing vessel is yare is a compliment”
The next Explorer rebuild and soloization with be YAR. Please let it be a derelict kevlar hull. Please let me find one before Alan does.
YAER, even with the expendable E, is a dang pretty canoe. With a massive, trim shift paddler weight seat, reminiscent of the late JSault’s work.
 P4030008 by Mike McCrea, on Flickr
There were some minor touches needing attention. The ends of the brightwork machine screws were left long-ishexposed, which would not bode well for float bag durability, so we elected to install SS cap nuts on the ends.
Once those were all screwed in place the, uh, shop foreman suggested that it would be helpful to install webbing loops under the washers and now plural nuts, so Alan took everything back off. Webbing loops in place it was decided that the ones on the carry handles were superfluous, so Alan took everything back off. Whereupon it was decided that those carry handle webbing loops would serve a float bag lacing purpose, whereupon Alan took everything back off once again. I may have had my first supervisory beer at that point.
An hour later we had successfully installed, de-installed and reinstalled 8 webbing loops, and I began to see a touch of despair in Alan’s expectations. Chip, while finding this lack of progress amusing, had places to go and people to shock, and Alan and I buckled down to get crap done.
I should here note that I will continue to use the Papal “we”, but I didn’t do 5 minutes work all day. I just got Alan started with the needed parts, pieces and materials, and hid his pencil.
D-rings in with G/flex and minicel knee pads installed with contact cement. Properly installed; three timed to dry coats on contact cement on the minicel, two inside the perimeter tracing on the hull, heat gunned and “Here ya go Alan, don’t screw up the alignment with these, you only get one instant stuck chance”
Pretty work for a nervous novice. Ya done good.
 P4030009 by Mike McCrea, on Flickr
With the G/flexed D-rings we moved on to lacing the float bag cord. First measure and mark for drilled holes every 6 inches. Rather than put a Sharpie dot on beautiful YAER Alan ran painter’s tape under the inwales, marked the drill holes and removed the tape. And then discovered that he had neglected to actually drill the holes on one side.
I had a beer and watched him re-tape, mark and drill. Sure glad I never did do nothin’ like that.
Holes finally drilled we laced the cross cord cage. Several times. “So, if we start with a stopper knot on the inside and lace ||||. . . . .no, wait, that won’t work”.
“Maybe if we skip every other hole and lace the top cage XXX. No, wait, that doesn’t work well either”
Much like installing and removing the cap nuts there was considerable time spent lacing and oops-no unlacing. Alan, whose knot knowledge far exceeds my granny knot/square knot/half hitch/trucker’s hitch repertoire, elected to tie Ubaangee butterfly knots along the lacing cord for additional lacing points. I watched, and had another beer.
It’s not a full-on Mike Yee float bag cage, but not bad for a couple guys who really didn’t have a clue.
 P4030014 by Mike McCrea, on Flickr
The end cage should have cord between the Ubaangee butterfly knots and the D-ring, for form a more Mike Yee-ish W end cage, but we were running short on cord.
YAER needed stem loops. Some Bluewater line, a comfy bicycle handlebar to grasp when self-rescue swimming the canoe to an eddy. Those toggled stem loops need to be short, so they aren’t dragging in the water, but long enough that knuckles clear the deck caps when raised above. And, too hard to tie inside the hull with large deck plates, those are easiest installed knotted on the outside, with the knot slid inside some hand comfy tubing.
That knot can’t be too bulbous, and Alan knew just the never-coming=-loose knot; a double Bolivian Fisherman’s knot. Tied, untied and re-tied a half dozen times - too long, too long, still too long - until the loop length was perfect. I had another beer and resumed my watchful supervisory duties.
 P4030013 by Mike McCrea, on Flickr
That’ll do Alan, that’ll do. Not much left to do on YAER. Although I did almost no actual work on the canoe it was in my shop, so it needed a Duckhead sticker. And pieces of High Intensity waterproof tape on the stems.
 P4030012 by Mike McCrea, on Flickr
Thus Duckhead stickered YAER needed a two-holer console and a red roof rack overhang flag to complete the non-permanent outfitting, and Alan needed some Duckhead swag and a bit of Dragonskin to custom carve knee cups in the minicel, some Dynel sleeve and rolled 4’ peel ply for a paddling friend’s MRC .
After a mere six hours of watching someone else do all the work Alan and YAER headed home.
 P4030017 by Mike McCrea, on Flickr
Unlike some other shop visitors (you know who you are) the benches were clean and clear, the door knobs were un-epoxied, and everything was put away in its proper place when Alan departed, no “Oh lord, look at this mess” the next morning.
I may have a new most-favored status shop partner. When I get Joel or DougD back in the shop I want Alan there as well. A “shop supervisor”, one guy working, one guy helping - with the right trio doing repairs and outfitting can proceed with impressive efficiency.
Alan’s to-do list:
After deciding on the final height and cant angle, make better seat better drops with shorter carriage bolts for the seat hanger. With cap nuts or thread protectors
Make an air bag Poky-Thingie. I’ll let Alan explain.
Make an end cage W with more cord from the Ubaangee Butterfly Knots down to the D-ring.
Practice tying those Ubaangee Butterfly and Bolivian Fisheman’s knots. Or bring beer next time.
DIY a tubed inflation adapter for the Boston valve, to add puffs of air to the floatbags when deflated needed.
Dragonskin some knee cup depressions after tracing the knee area after a couple of WW kneeling trips. You’ll probably need to bring a pencil; I suggest drill a pencil hole in the minicel console. Wait, no, not there. . . .
Maybe some pieces of pool noodle for kneeling ankle supports?
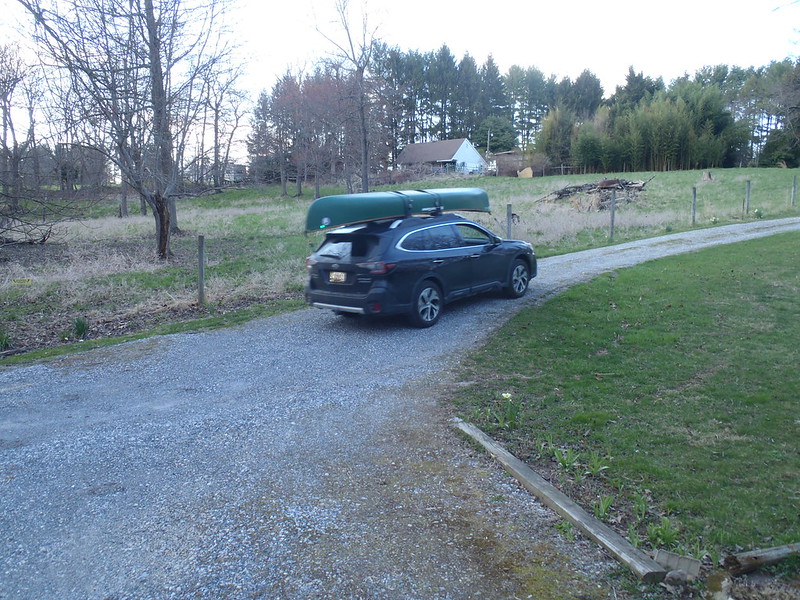
Make full cross-bar width minicel supports, with gunwale indents, for the Suby racks, so it is easier to grunt and groan that 73+ lb Explorer onto the car solo. That was awkward even with two people.
Paddle YAER, make improvements, and tell the tale.
And come back soon. We need to make a trip to BMO. I need a bucket seat, you may want thigh straps with sidewall D-rings, and, once you visit BMO there will be things you didn’t even know you needed. You drive, I’ll navigate, and buy I’ll dinner on the way home.
https://www.canoetripping.net/threads/yaer-yet-another-explorer-rebuild.127182/
And pick up a slab of ethafoam to make custom sawhorse hull stabilizers. I now had more sheets of that stuff that I would ever use (thanks Jane, keep ‘em coming)
20220306_094422 by Mike McCrea, on FlickrMere minutes later the same morning Chip e-mailed. He could use some of that packaging ethafoam; the Kinetic Sculpture race team needed ethafoam to use as seats in this year’s race contraption.
https://www.kineticbaltimore.com/
The theme of this year’s Kinetic Sculpture Race is “Time Travel”. The team and ground crew will be dressing as Doc Brown from Back to the Future.
Chip wondered if I knew of a source for lab coats. Gee Chip, lemme think, 35 years X 5 days a week in a lab coat, combined with a frugal Scots who doesn’t throw much old stuff away? Yeah, I got a box full of old lab coats, come on by.
Alan arrived first and we quickly donned costumes to surprise Chip. And then, YAER hanging from the shop scale, DougD called. I handed the phone to Alan before saying hello for some consternation. This was already turning out to be a whacky fine day in the shop.
For continuing funsies I hid when Chip arrived and walked into the shop. Nonplused Chip looked at lab coated Alan, standing alongside YAER and remarked “You are not McCrea”.
Our first order of shop business was to weigh YAER. Sapele wood, gorgeous inlaid decks, glossy epoxied and varnished yoke and thwarts, maybe the prettiest Explorer ever re-built. YAER weighed 73lbs on the shop scale, not too shabby for a wood gunwaled RX Explorer that originally weighed about the same.
Pondering the outfitting of YAER for whitewater paddling we established a best sequence order of business after the weigh-in. First, put the canoe on a pad of the shop floor, have Alan climb in and kneel to figure out the best location of minicel knee pads. Alan, bowing to my (not) vast and superior WW knee pad knowledge, pencil marked the locations.
P4020003 by Mike McCrea, on FlickrAfter further consideration it was decided that the knee pads should be installed in the other orientation, curved edge forward. I became increasingly familiar with this ALSG facial expression, “What do you mean they are backwards and you want me to do it again?”
P4020004 by Mike McCrea, on FlickrIn a continuing saga Alan, still kneeling in the canoe, had lost his pencil. Or maybe I had already put it away.
Next order of business was to inflate the float bags and mark locations for Northwater Double-D rings. Alan’s float bags are Mohawks, but unlike any Mohawk bags we own, or have seen. Made of seriously thick, heavy duty material they have a Boston valve instead of a purge valve and tube with a Roberts valve.
That is an interesting inflation solution, most often seen on large air-volume rafts and inflatable beds, maybe overkill for a float bag, and inconvenient for adding air to a deflating bag on cold river days; Alan needs to make a screw-on adaptor with a length of tubing; that would be much easier than leaning over swapping lip spit with the Boston valve to puff a few breaths into a cold deflated bag.
Chip arrived, and after a spell of Who-Dat? pondering Alan in the shop, I dressed him in a special burlesque lab coat.
P4020005 by Mike McCrea, on FlickrThat customized lab coat, I’m thinking grey denoting buxom ground crew, is more revealing without the layer of shirts underneath. Chip promised to get naked underneath before his next stop, a meeting of a Kinetic Sculpture Team, bringing them a box of old lab coats.
OK, I later asked. Chip did wear it, un-garbed beneath and nipples exposed into the team meeting, which included a half dozen people Chip had never before met. I guess they now know what shenanigans to expect. Gotta love Chip; I suggested he drive there, unshirted, windows open, stiff nippled in the chill breeze, and hope to get pulled over for speeding.
Moving on the float bag lacing, end cage and D-ring locations Alan found his pencil, and Chip, who has paddled more WW than Alan and I combined, including previous lifetimes, was a font of recommendations for lacing and caging. Most of which we later ignored.
P4020006 by Mike McCrea, on FlickrYAER, which Alan now realizes would have been better monikered simply YAR , Yet Another Rebuild:
“Yar, or yare, is a nautical term that means ready or prepared for action; quick to move. Lots of accidents can happen on a ship if it's not well maintained, if the rigging is a mess, and if items are not fastened. To say that a sailing vessel is yare is a compliment”
The next Explorer rebuild and soloization with be YAR. Please let it be a derelict kevlar hull. Please let me find one before Alan does.
YAER, even with the expendable E, is a dang pretty canoe. With a massive, trim shift paddler weight seat, reminiscent of the late JSault’s work.
P4030008 by Mike McCrea, on FlickrThere were some minor touches needing attention. The ends of the brightwork machine screws were left long-ishexposed, which would not bode well for float bag durability, so we elected to install SS cap nuts on the ends.
Once those were all screwed in place the, uh, shop foreman suggested that it would be helpful to install webbing loops under the washers and now plural nuts, so Alan took everything back off. Webbing loops in place it was decided that the ones on the carry handles were superfluous, so Alan took everything back off. Whereupon it was decided that those carry handle webbing loops would serve a float bag lacing purpose, whereupon Alan took everything back off once again. I may have had my first supervisory beer at that point.
An hour later we had successfully installed, de-installed and reinstalled 8 webbing loops, and I began to see a touch of despair in Alan’s expectations. Chip, while finding this lack of progress amusing, had places to go and people to shock, and Alan and I buckled down to get crap done.
I should here note that I will continue to use the Papal “we”, but I didn’t do 5 minutes work all day. I just got Alan started with the needed parts, pieces and materials, and hid his pencil.
D-rings in with G/flex and minicel knee pads installed with contact cement. Properly installed; three timed to dry coats on contact cement on the minicel, two inside the perimeter tracing on the hull, heat gunned and “Here ya go Alan, don’t screw up the alignment with these, you only get one instant stuck chance”
Pretty work for a nervous novice. Ya done good.
P4030009 by Mike McCrea, on FlickrWith the G/flexed D-rings we moved on to lacing the float bag cord. First measure and mark for drilled holes every 6 inches. Rather than put a Sharpie dot on beautiful YAER Alan ran painter’s tape under the inwales, marked the drill holes and removed the tape. And then discovered that he had neglected to actually drill the holes on one side.
I had a beer and watched him re-tape, mark and drill. Sure glad I never did do nothin’ like that.
Holes finally drilled we laced the cross cord cage. Several times. “So, if we start with a stopper knot on the inside and lace ||||. . . . .no, wait, that won’t work”.
“Maybe if we skip every other hole and lace the top cage XXX. No, wait, that doesn’t work well either”
Much like installing and removing the cap nuts there was considerable time spent lacing and oops-no unlacing. Alan, whose knot knowledge far exceeds my granny knot/square knot/half hitch/trucker’s hitch repertoire, elected to tie Ubaangee butterfly knots along the lacing cord for additional lacing points. I watched, and had another beer.
It’s not a full-on Mike Yee float bag cage, but not bad for a couple guys who really didn’t have a clue.
P4030014 by Mike McCrea, on FlickrThe end cage should have cord between the Ubaangee butterfly knots and the D-ring, for form a more Mike Yee-ish W end cage, but we were running short on cord.
YAER needed stem loops. Some Bluewater line, a comfy bicycle handlebar to grasp when self-rescue swimming the canoe to an eddy. Those toggled stem loops need to be short, so they aren’t dragging in the water, but long enough that knuckles clear the deck caps when raised above. And, too hard to tie inside the hull with large deck plates, those are easiest installed knotted on the outside, with the knot slid inside some hand comfy tubing.
That knot can’t be too bulbous, and Alan knew just the never-coming=-loose knot; a double Bolivian Fisherman’s knot. Tied, untied and re-tied a half dozen times - too long, too long, still too long - until the loop length was perfect. I had another beer and resumed my watchful supervisory duties.
P4030013 by Mike McCrea, on FlickrThat’ll do Alan, that’ll do. Not much left to do on YAER. Although I did almost no actual work on the canoe it was in my shop, so it needed a Duckhead sticker. And pieces of High Intensity waterproof tape on the stems.
P4030012 by Mike McCrea, on FlickrThus Duckhead stickered YAER needed a two-holer console and a red roof rack overhang flag to complete the non-permanent outfitting, and Alan needed some Duckhead swag and a bit of Dragonskin to custom carve knee cups in the minicel, some Dynel sleeve and rolled 4’ peel ply for a paddling friend’s MRC .
After a mere six hours of watching someone else do all the work Alan and YAER headed home.
P4030017 by Mike McCrea, on FlickrUnlike some other shop visitors (you know who you are) the benches were clean and clear, the door knobs were un-epoxied, and everything was put away in its proper place when Alan departed, no “Oh lord, look at this mess” the next morning.
I may have a new most-favored status shop partner. When I get Joel or DougD back in the shop I want Alan there as well. A “shop supervisor”, one guy working, one guy helping - with the right trio doing repairs and outfitting can proceed with impressive efficiency.
Alan’s to-do list:
After deciding on the final height and cant angle, make better seat better drops with shorter carriage bolts for the seat hanger. With cap nuts or thread protectors
Make an air bag Poky-Thingie. I’ll let Alan explain.
Make an end cage W with more cord from the Ubaangee Butterfly Knots down to the D-ring.
Practice tying those Ubaangee Butterfly and Bolivian Fisheman’s knots. Or bring beer next time.
DIY a tubed inflation adapter for the Boston valve, to add puffs of air to the floatbags when deflated needed.
Dragonskin some knee cup depressions after tracing the knee area after a couple of WW kneeling trips. You’ll probably need to bring a pencil; I suggest drill a pencil hole in the minicel console. Wait, no, not there. . . .
Maybe some pieces of pool noodle for kneeling ankle supports?
Make full cross-bar width minicel supports, with gunwale indents, for the Suby racks, so it is easier to grunt and groan that 73+ lb Explorer onto the car solo. That was awkward even with two people.
Paddle YAER, make improvements, and tell the tale.
And come back soon. We need to make a trip to BMO. I need a bucket seat, you may want thigh straps with sidewall D-rings, and, once you visit BMO there will be things you didn’t even know you needed. You drive, I’ll navigate, and buy I’ll dinner on the way home.


") It worked so well, I immediately made my own (from a hangar Mike donated since I don't own wire hangars!).
It worked so well, I immediately made my own (from a hangar Mike donated since I don't own wire hangars!). 