• Happy Weed Appreciation Day! 🌱🌿🌻

Bell Yellowstone Solo Rebuild

I love custom outfitting. There are dozens of little steps, and a best sequential order that requires some contemplation and planning. I started with the outfitting that doesn’t require a paddler’s custom physiology test sit.

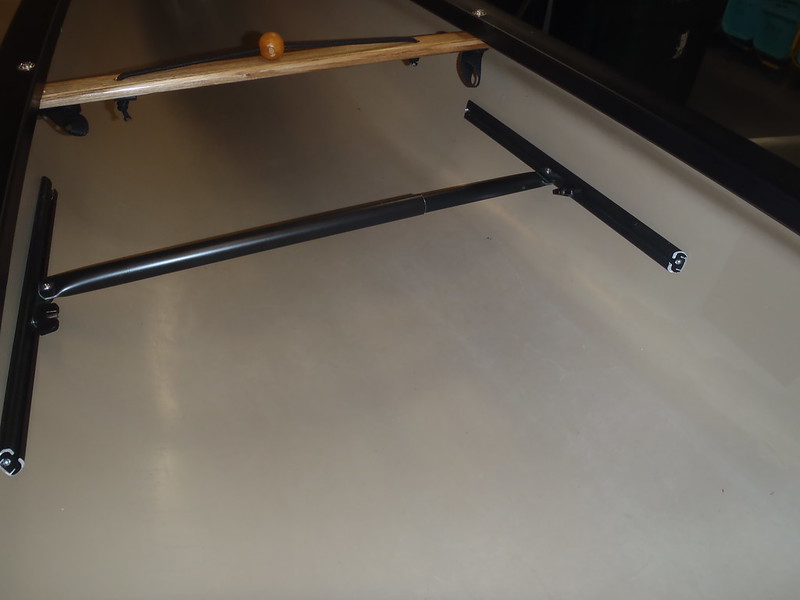
A Wenonah adjustable foot brace first, taking measurements from my wife and younger son’s foot brace positions in their preferred canoes. Averaging those measurement positioned the foot brace bar 5” high and 28 1/2” distant from the front edge of the seat with the bar in the middle of the track. With 6 inches of adjustment fore or aft that should accommodate either of their legs, or anyone else. Ball of foot height is in the right vicinity, +/-.

PB230004 by Mike McCrea, on Flickr

The foot brace bar still needs (er, ok, I wants) a length of split foam pipe insulation for sandy summer waters barefoot comfort, but I have no quality split foam pipe insulation with the correct inner diameter. Next hardware store trip.

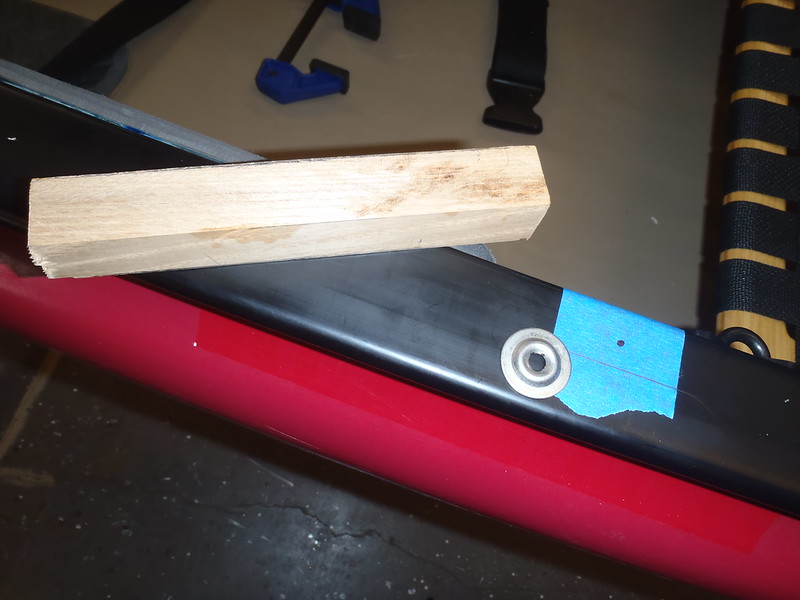
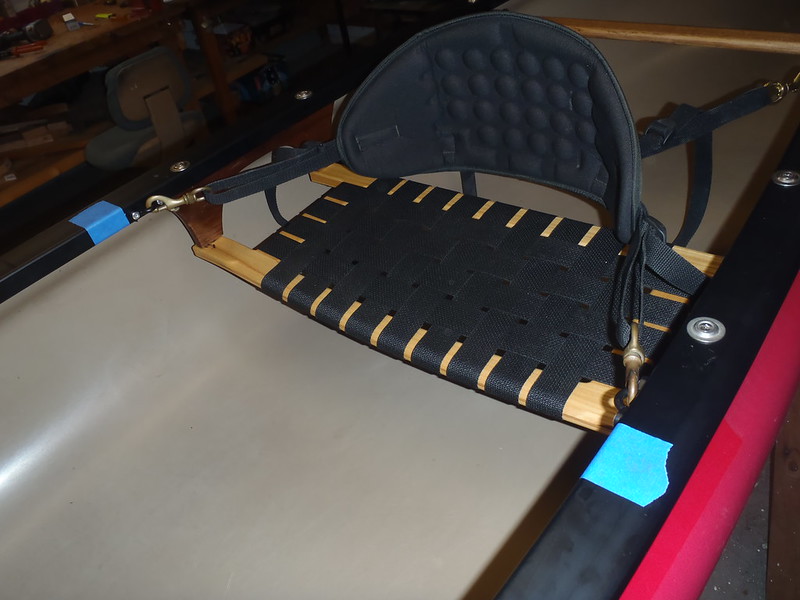
A Surf-to-Summit Performance back band doesn’t need a test sitter either, I know how and where it best shapes curved behind the aft seat rail. The webbing loops on the stern thwart are perfectly located to attach the rear swivel clips. Nylon pad eyes pop riveted to the side of the inwale work well for the front straps. The weight bearing experiments showed that a single pad eye, pop riveted into no-insert vinyl gunwale, held 163lbs. Even I don’t press against a back band with 326lbs of combined force.

PB230005 by Mike McCrea, on Flickr

PB230006 by Mike McCrea, on Flickr

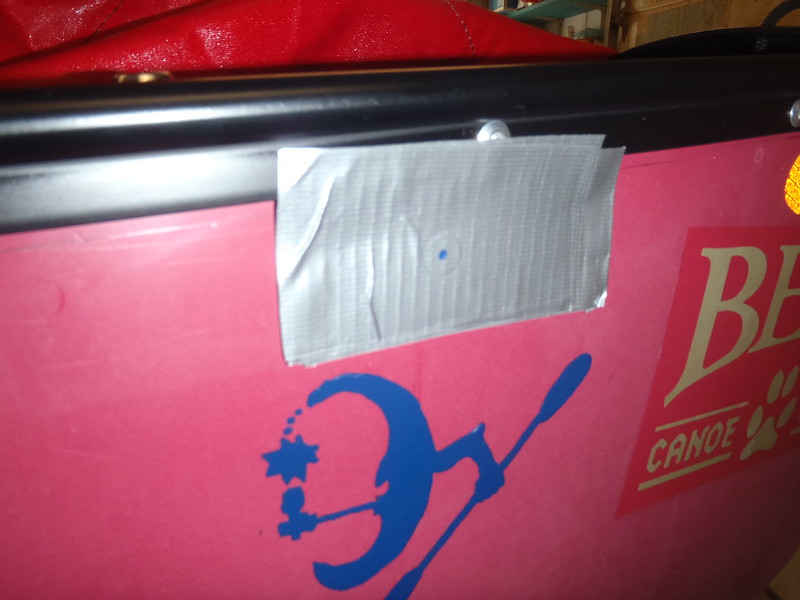
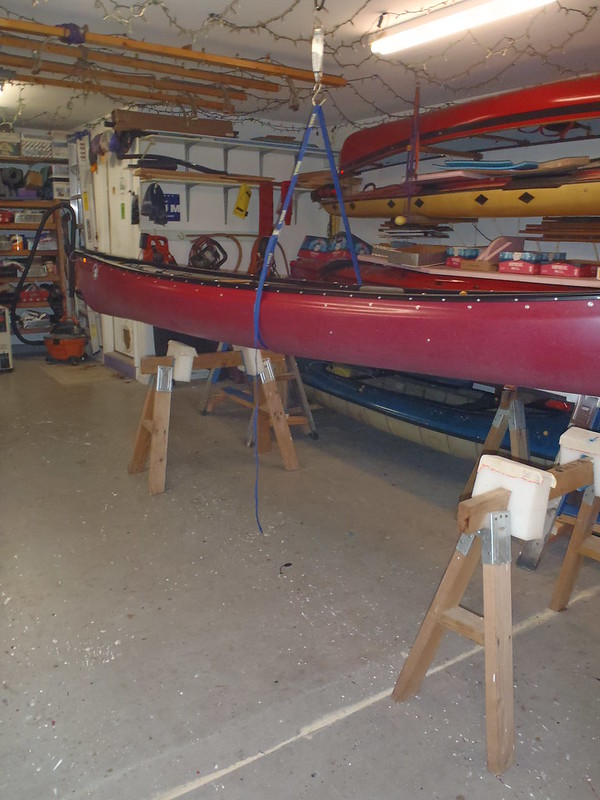
The painter’s tape marks the current balance point for the strap yoke, which will be the last thing installed, after a final weight and re-balance check.

With the foot brace and back band installed the canoe moved to the floor on a thick pad and my test subject had a seat, got his knees, legs and feet comfy with foot brace adjusted and padding temporarily held in place, and I marked the locations/dimensions for knee bumpers and heel pads.

Cushy minicel for the knee bumpers. With the inwale edges only 24” apart at knee location it won’t need much narrowing to press knees against inwale. A 1 ¼” wide piece of minicel at knee location brought the “hull” edges flush with the inner lip of the inwale.

The shouldered tumblehome sides made contact cementing the initial minicel base trickier than usual. Instead of a large fill slab I cut two pieces 1 ¼” x 1” X 10” long. The shouldered tumblehome curve doesn’t start for the first inch below the bottom of the inwale, so I’ll have a flat, flush 1” surface there to contact cement the minicel “base” layer.

That inwale sized base layer got topper pieces of half inch thick minicel, cut 10” x 2”, glued on flush with the top edge of the inwale so the ouchie right angle edge is cushioned. I rounded the corners and beveled the edges of the “topper” pieces with the 1” tabletop sander, so there is less exposure to sheer forces when getting in or out.

PB230007 by Mike McCrea, on Flickr

Exercise flooring for the heel pads. Those are not as much for comfort as for non-slippery heel purchase in place of a slick wet vinyl floor (or in UL composite hulls so you don’t wear down heel scuffs). The embossed side is much more boot heel durable than minicel. Same rounded corners and beveled edges, again to limit heel-peeling sheer forces, and allow easy bilge water flow between the pads.

The usual timed multi-coats of contact cement, heat gun, press, clamp or weight.

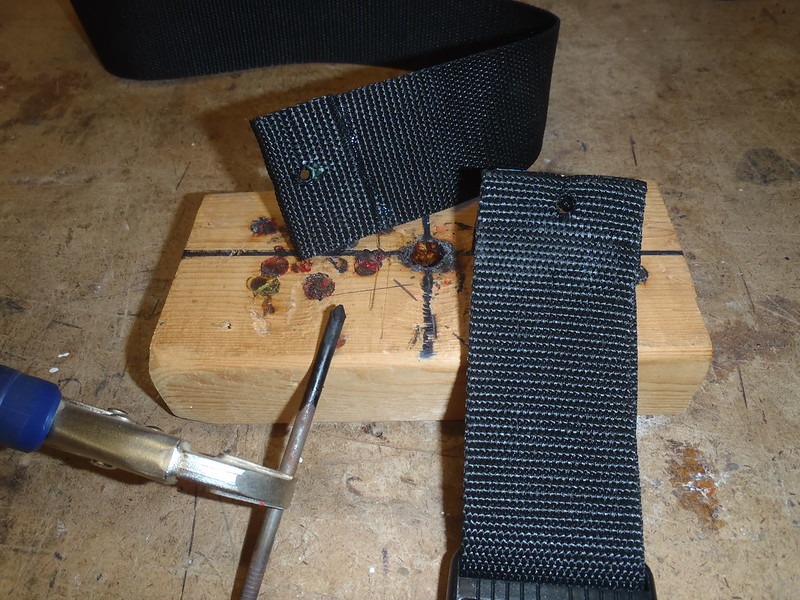
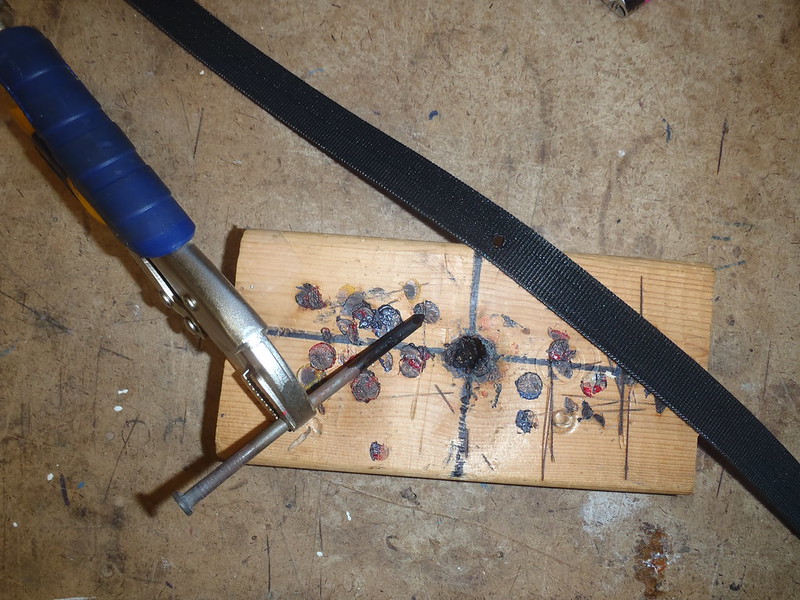
While the contact cement and foam was setting up I installed Northwater double-D rings, for single strap ladder-locked D convenience, or for two straps pulling in opposite directions.

I need some extra G/flex mixed for the ongoing mystery dowel project anyway. Vinyl pads coated with G/flex, laid inside a marked pencil trace, wax paper, sand bag weights. Nothing to see here, and I can move along. And come back occasionally to check the vinyl pads, hard roller compress them to push out any bubbles or lift, and re-lay the sandbags.

PB240010 by Mike McCrea, on Flickr

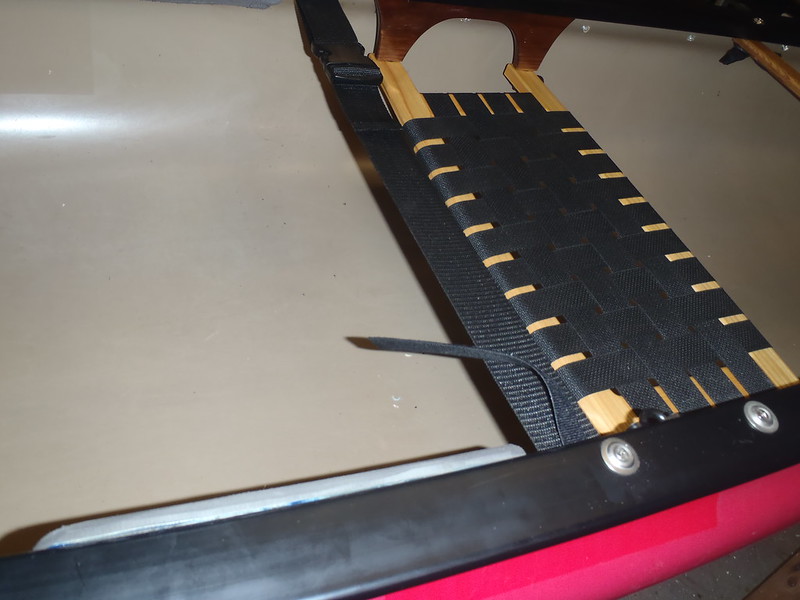
Bags and clamps off the foam and D-rings look good. Once the contact cement had a firm post-clamp grip a few minutes of Dragonskin shaped the bottom of those knee bumpers so that in addition to pressing knees against the inwale sides, you can thigh brace them locked underneath the foam bumpers when needed.

PB240017 by Mike McCrea, on Flickr

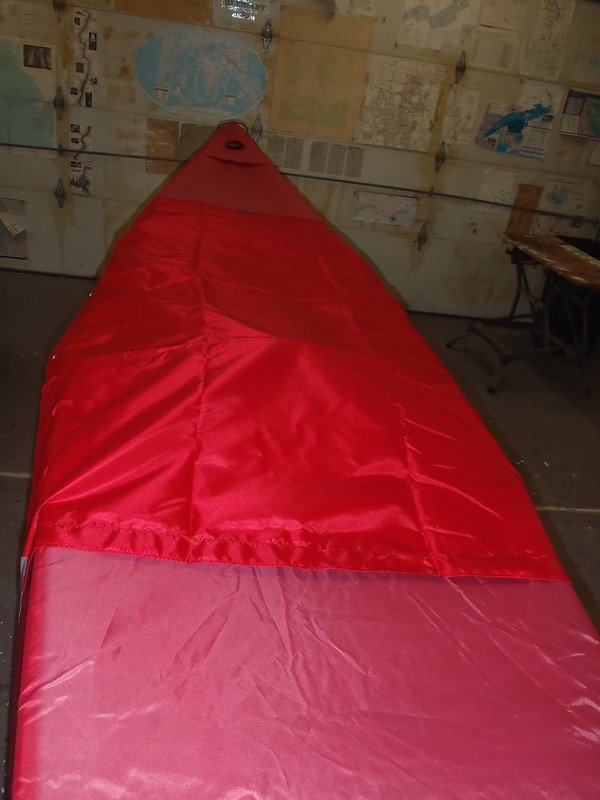
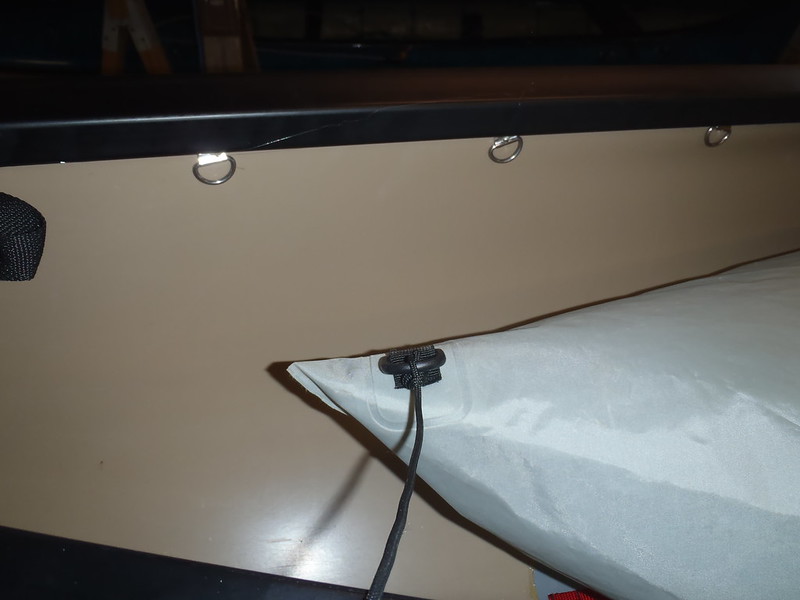
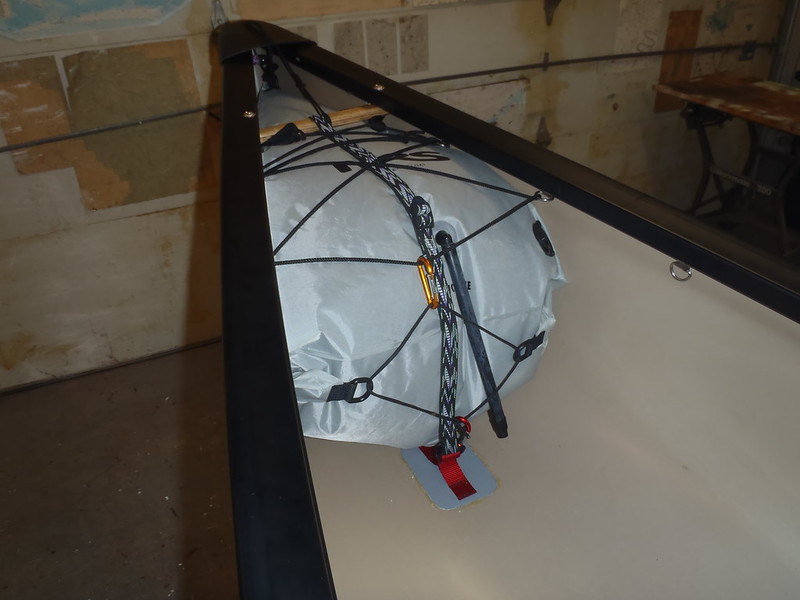
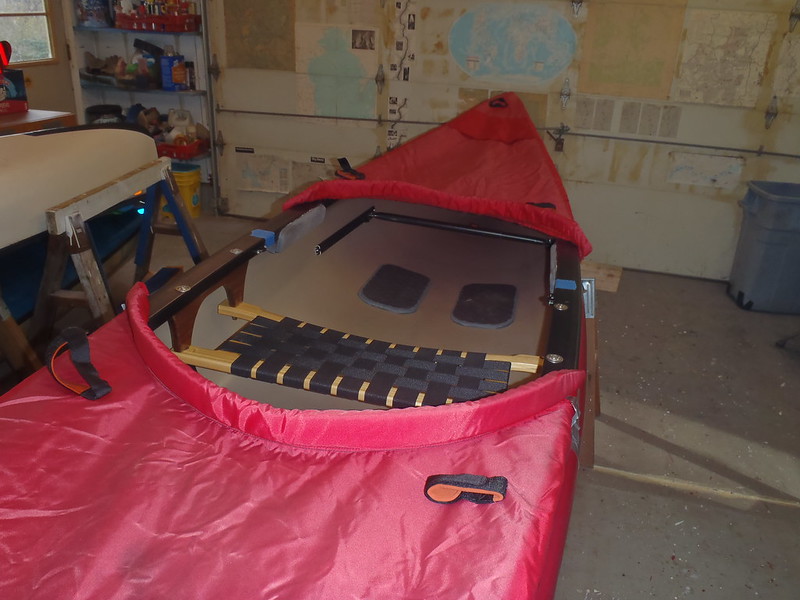
Before I moved on to the last couple things I had a wild hair, and tried the Cooke Custom Covers from the Wenonah Wilderness on the Yellowstone Solo. Oh lordy, they are a perfect fit*, and those partial covers are red, keeping in the color scheme.

PB240011 by Mike McCrea, on Flickr

*They fit because the Wilderness covers were designed for tripping/sailing, the bow cover ends in front of the utility sail thwart, and the stern cover end a foot + behind the back of the seat to provide easier gear access.

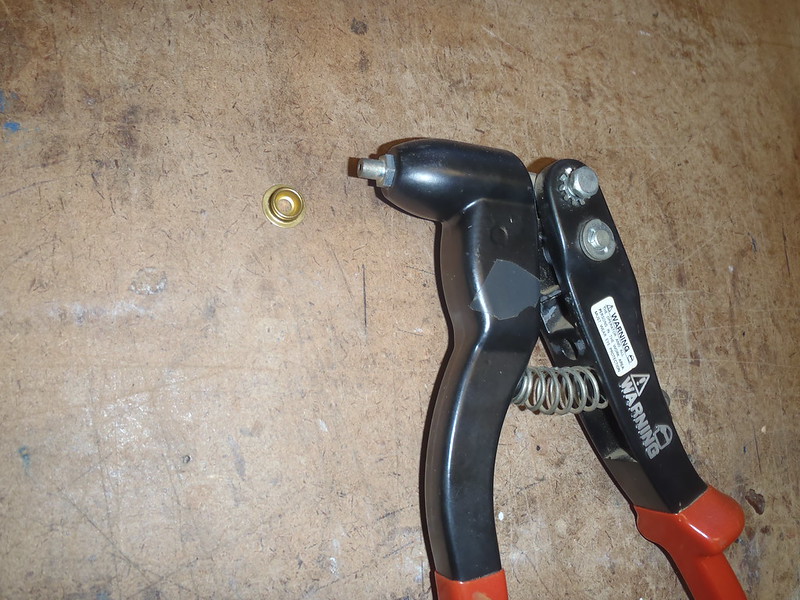
I’ve put on a bunch of Cooke covers and know the installation is easy simple. 36 snap rivets, one every 8 inches along the covers, don’t weigh much, so yet another too-hard-to-resist thing added to the outfitting list. Those covers need to go on before I do any lacing points for float bags or gear; I can back up some of the pop rivets inside the hull with miniature SS D-ring tie downs instead of using just washers.

I’m confident in the strength of that stud/rivet/D-ring combination; I know how much weight it took to fail a single stud through Royalex affixed with a 1/8” pop rivet and mini D-ring backing. 124.5 lbs before the rivet broke. A few mini-D’s will do nicely.

https://www.canoetripping.net/threads/canoe-outfitting-attachment-weight-bearing-experiment.107260/
 
The foot brace is pop riveted. We have a Wenonah adjustable foot brace in almost every open canoe, and have had one in almost every canoe in our past. Some of my frou-frou outfitting may add no resale value, I believe an adjustable foot brace usually does. If it were always the same person, wearing the same-ish footwear, a non-adjustable foot brace could easily be DIY’ed.

But I never know who, family or friends, who may be paddling which canoe, so that easy adjustability is paramount for my outfitting. Even me-me-me I really like the incremental adjustment with that foot brace bar; there is a noticeable comfort distance between wearing thick, stacked heel Mukluks in winter vs barefoot tootsies or thin water shoes in summer. Or maybe I’m just comfort fussy given a choice.

The installation of those foot braces is so freaking easy; find the leg length position with the bar slid into the center of the track, at the height-off-floor for your ball of foot contact. I set a little platform, shallow box or stack of 2x4’s, in the hull below where the foot brace bar is positioned best positioned, so it is held balanced at the desired height and distance.

Level one side and drill a 3/16” hole through the hole in the track. Pop rivet* that one from the outside. Level the other side of that track, drill and pop rivet. One side is done. Same on the other side, but you can take measurements from the gunwale down to the track and from fixed point fore or aft of the track, to assure everything matches evenly side to side.

In functional bang for buck and short-work installation ease those Wenonah adjustable foot braces are hard to beat.

As far as durability I have a lot of faith in 3/16” pop rivets, and in those tracks. I ran a broken out mill dam drop on the Yellow Breaches and slammed an unseen rock head on; I couldn’t have hit it more squarely if I’d tried. The canoe stopped instantly.

I, with my feet on the brace and knees on minicel bumpers, did not. I shot forward with considerably velocity and surprising abruptness, ending up prone and crumpled, stuffed under the front thwart. The foot brace bar, which had never before moved a centimeter even in some extremis pressure, had slid all the way to the end of the track before I movable-object ejected to assumed the prone position.

The foot brace was fine, the pop rivets were fine, heck, even the bow skid plate was fine. I was less than fine, and had a helluva time extricating myself from under the thwart, especially after the canoe 180’ed off the rock and spun free floating, backwards and a little stunned.

Confessionally, I had done a stupid YEEEHAAA! at the bottom of that drop, and more stupidly paddle twirl, a split second before I hit the rock and vanished from sight below sheerline. So very glad to have shared that smackdown with a group of friends watching. No one else hit that rock, so I’m claiming success as a “Not this line” probe.

A fixed pop riveted foot bar, like the old school, drilled-L-bracket and wing nut versions, might very well have ripped away from the hull. Or, epoxied in place fixed foot block, broken my ankles. I dunno; I like that slider track infinite adjustability.

As a back banded, knee bumpered sitter I want the oppositional force of a foot brace to help “lock” me in place with a multi-point stance. YMMV.

*For use with composite canoes Wenonah has 3/16” pop rivets with a ½”wide flange head, to help spread the load. I’ve put those on RX canoes, and used regular pop rivets there as well. On Royalex I see no difference between them even long term.
I’ve got a repair project underway with my ‘94 Prism. The port L-bracket pulled out of the hull while struggling with a frozen Foot bar. I tried drilling out the holes to 1/4” but could not get the 1/4” rivets to do right. And the bar is still frozen, despite soaking in kroil and heating the outer tube with a propane torch. So I plan to install the new style sliding assembly. That should let me locate 3/16” rivets lower on the ribs and I’ll fill the old holes with epoxy.

P.S. - this is me thinking about drilling through a canoe hull:

ABC5C36F-A6BE-4C49-B5DB-33C465BEE94A.gif
 
...
A fixed pop riveted foot bar, like the old school, drilled-L-bracket and wing nut versions, might very well have ripped away from the hull. Or, epoxied in place fixed foot block, broken my ankles. I dunno; I like that slider track infinite adjustability.
...

I have several of those Wenonah sliding foot braces, and I'm often annoyed when they slip. Several times I've dumped in whitewater and got back in the boat to find my footbrace askew. It makes a convenient excuse ("See, if that dang footbrace had done its job my last hope brace would have worked!"). On dry land I can get the knobs tight enough that they rarely slip, but it's hard to really torque them when doing an in-boat adjustment.

I've never thought of it as an emergency release mechanism, but I suppose it accomplishes that. One good thing about telescoping footbraces (including those Wenonahs and some others) is that they're less likely to punch a hole in the hull if the boat is caught in a broach position with pressure on the upstream chine.
 
One good thing about telescoping footbraces

Another good thing about them is that, being hollow, I keep some machine screws, washers, nuts, and wing nuts in a plastic bag stuffed inside the foot braces -- spare parts for the up-down, fore-aft adjustable seat on my Hemlock SRT.
 
Friends with those Wenonah adjustable foot braces have complained about the bar slipping. One resolved it by buying a second set of twist knob tighteners from Wenonah and using two per rail. Another added a rubber washer backing up the SS washer.

I have not encountered slippage on that bar. Perhaps, with knees braced against minicel bumpers and heels on exercise foam pads, not as slippy slidey as a bare floor, I simply have less force pushing against the bar.
 
It is rewarding to make them strong and replace some beat up parts. Outfitting is an art.
I don't like the felt clunky stem protectors. I just add a couple of layers of fiberglass tape and epoxy.
Painting an old canoe can make it look new.
 
The spray decks in the photo above were simply taped in place to verify that they unexpectedly and delightfully fit on the Yellowstone Solo. They do indeed fit perfectly.

Fall or winter hereabouts is the ideal time to install nylon spray covers. The humidity level in the shop is 35%, plenty dry. If you install nylon covers in higher humidity , above 60% or so, the fabric will be relaxed, and they well be a PITA to snap on when shrunken drum tight in low humidity conditions. If they are too tight I just dunk the stuff bag of covers in the river and let them relax drenched in the bag while I pack the canoe. That always works.

First order of business, I left the covers draped loosely over the hull so the nylon had ample opportunity to retract, and set out the parts and tools needed. Studs, 1/8” dia pop rivets (needed different mandrel lengths), washers and, for the float bag/gear lacing multi-purpose, mini SS D-rings to back up the through hull pop rivets.

PB250026 by Mike McCrea, on Flickr

Those mini D-rings hold more weight and have a larger aperture than plastic cable clips, ½” vs ¼”, so easier to lace and unlace, and I can use larger diameter line than 3mm cord. Mini-D’s for float bag/gear lacing it is. With the 14 machine screw webbing loops already installed I only needed four pairs per stem.

PB250031 by Mike McCrea, on Flickr

The last and most critical piece, a pop rivet tool with a nose piece that fits inside the stud.

PB250028 by Mike McCrea, on Flickr

Before taping the covers firm-ish-ly in place I marked the locations of the thwarts, to make sure none were in the way of the stud rivets and D-rings/washers.

This installation methodology is specific to partial spray decks; full covers, even multi-piece versions, install a little differently. One CCS recommendation is to run a length of duct tape 1” below the outwale and use that to press the spray cover sockets against, leaving a circular indent to drill for the pop riveted studs on the hull.

That uses a lot of duct tape, which become awkwardly foot-entangling as it is sequentially pulled free to dangle on the floor. It is a lot easier to make the indent using several layers of duct tape, so I use a multi-ply duct tape square, slide it under the cover assuring both sides are even, push the socket against that thicker tape square, mark the center with a Sharpie and drill through that dot.

PB250032 by Mike McCrea, on Flickr

(And then remove the duct tape before seating the stud oops overf the duct tape square. Not that someone as skilled and thoughtful as I would ever forget to do so. At couple times over the years. Don’t even ask how many times I have pressed the socket into the duct tape and then removed the tape before drill the hole. Dang it, more a couple times, once on this very canoe)

Starting at the bow end (again, this if for partial covers) press the socket closest to the stem on one side into the tape to leave a circular impression, flip the cover back, drill a centered hole and seat the pop riveted stud, holding the D-ring or washer tight inside.

Move to the other side, do the opposite stud and, while you are over there you can do the next one down the line before moving to the other side and doing another one-at-a-time two. Once again, moving repeatedly from one side of the canoe to the other with a bunch of tools and materials, bless the wheeled shop cart for keeping everything near at hand.

PB250037 by Mike McCrea, on Flickr

Important - Always snap the cover sockets to the studs you have already pop riveted in place before marking and drilling the next hole, this helps keep the next studs exactly aligned with the corresponding socket. Check the side overlap distances occasionally; those can be corrected as you pop rivet studs along the line.

When the duct tape square becomes overloaded with drilled socket impressions just lay a fresh square of duct tape on top. A caution; some folks complain about their thumbs aching after putting a snap cover on. In the initial installation of a spray cover, done with best fitted always-snapped practices, all (in this case) 36 sockets get stud snapped and unsnapped repeatedly. It is a long thumb day; fortunately there can be break times, and IPA’s are proven analgesic.

With this style partial cover the last studs one each side at the open ends get pulled down and seated a little lower, so the drainage baffle is tautly raised.

PB250039 by Mike McCrea, on Flickr

Even the drainage lip is perfect. With bow and stern spray decks snapped in place, the Yellowstone Solo is more beautiful, functional and comfortable than ever.

PB260041 by Mike McCrea, on Flickr

PB260044 by Mike McCrea, on Flickr

I could install studs for the center storage cover on, but that’s more of a tripper canoe in-camp feature. When day paddling the partial covers are for wind, and shedding waves, rain or paddle drips or, under hot summer sun on cold waters, keeping the sun off the ice chest and some cool in the canoe.

PB260046 by Mike McCrea, on Flickr

I hear my late friend Brian’s ghost moaning “Whyyyy diddd youuu nottt dooo thisss forrrr meee?” Brother, I’m thinking of you every day as I work on the canoe. You would look so good back in the improved Yellowstone Solo.

EK_0003 by Mike McCrea, on Flickr

Covers back off, the studs are nicely just below bottom of the outwale.

PB260001 by Mike McCrea, on Flickr

I now have the carry handle webbing loops and four SS miniature D-rings backing up the stud rivets on each side of the stems for float bag or gear lacing, although the NRS 3-D stem bags will need only the first three mini-D’s. Those are spaced, backing up the snap studs, 8” apart, not my preferred 5 or 6 inches for float bag lacing, but at most the Yellowstone Solo will see mild class II, and doesn’t need full on Mike Yee style WW bag lacing.

Before the float bags and lacing go in I used the hot glue trick to put a dollop of hot glue atop each of the pop rivet mandrels, protecting float bags or dry bags from puncture.

PB260005 by Mike McCrea, on Flickr

NOTE: I am not a hot glue guru; I have a bag of mixed hot glue sticks in different shades of milky white. Some stuck tenaciously to the exposed mandrel ends, but the last glue stick I stuck doesn’t have much stick in that application.

I do like a blob of tenacious hot glue for that protective cover application; guess I should find some that adhere well and stick them not-for-general-use in one of the outfitting boxes.
 
To clarify the use of Dynel, or in this case Dynel sleeve, as skid plate material, the artist formerly known as “Guest” did a month long series of impact and abrasion experiments using single and double layered materials including kevlar felt, woven kevlar/Twaron, E-glass, S-glass, carbon fiber and Dynel.

The first of those several skid plate material experiments:

https://www.canoetripping.net/threads/the-half-arsed-skid-plate-experiment-begins.90805/

Dynel fabric was far and away the most abrasion resistant, and a double layer, Dynel on top, almost any other fabric underneath, was the most impact resistant.

In a previous real world experiment we repaired the worn stems & bottoms of two kevlar sea kayaks that see five months a year of near constant use Everglades abrasion on worm rock, lime stone and oyster bar encounters, patching different areas using fiberglass tape (8.7oz E-glass tape), S-glass fabric (6oz IIRC) and 5oz Dynel fabric.

Quoting from the Sweet Composite pages, S-glass (versus E-glass) “has a higher-strength fiber which gives about 40% higher tensile strength, 20% higher modulus, and greater abrasion resistance”.

In a single season’s hard use the E-glass tape on those boats (almost all glass tape is E-glass) was shredded to bits. The S-glass fabric fared a bit better, but was still worn or wearing through. The Dynel was hardly scratched; those months of actual abusive use proved a lot more than a month of silly shop experiment data.

If installing a skid plate I will always use Dynel fabric or dual-layer Dynel sleeve, alone or as the outer layer. In this case the Dynel sleeve covered the Yellowstone Solo’s stem scrapes past any worn area, and provided two layers of fabric at once.

If I ever need to expand that skid plate area I’ll lay a larger piece of Dynel fabric, cut to size and shape, over the top, using the same G/flex, pigment & graphite powder epoxy mix under peel ply roller compression.

I know some paddlers detest skid plates, and some have miraculously never needed them. I don’t, and I do.

Having installed or repaired at least 30 skid plates and am happy with my current (but still improving) materials and methodology, and will go with Dynel every time. And I will only use E-glass tape as a last resort impact layer beneath Dynel.

And if I could find a source for rolls of selvage edge S-glass tape I’d gift someone rolls of don’t even want it in the shop anymore 2”, 3” and 4” E-glass tapes.
 
I enjoy reading your rebuild write ups, nice to see someone keeping boats out of the landfill and "plastic" boats are as much part of our heritage as wood and canvas.

You've complained about getting riveter's wrist before, have you tried a Lazy Tong riveter?

The other alternative would be these stick on snap pads-3M snaps
You could even stick them inside the hull and fasten gear down!
 
I had never seen or heard of Lazy Tong riveters before. If I was routinely seating multi-dozens of 3/16” pop rivets I might give that a try, or buy an electric pop rivet tool, or one for the air compressor.

https://www.faithfulltools.com/p/FAIHDRLT/Heavy-Duty-Lazy-Tong-Riveter

If I am faced with installing another set of vinyl or aluminum gunwales I’ll keep it in mind. Installing dozens of 1/8” pop rivets for spray cover studs is easy-squeezy, the 1/8” size doesn’t require excessive hand pressure

Installing a couple of 3/16” pop rivets for pad eyes or grommet straps is not excessively hand achey. Installing 30 or 40 long mandrel pop rivets in gunwales is hard work.
 
One last batch of epoxy needs. Well, it is not the last batch ever, but I think the last wee batch for this canoe. The mystery dowel dookickies need a transition bead at one end, as does the D-ring pad perimeter, and the DIY strap yoke would benefit from doubled webbing under the inwales, with a stiffening insert to help spread the load.

The DIY strap yoke consists of a two inch side-release buckle, a good one - ITW Nexus – short and long lengths of 2” heavy duty poly webbing, a couple stiffening pieces of old Royalex with edges rounded to tuck inside the webbing end fold over (thanks again DougD, still finding uses for those RX piees), and a bit of epoxy to hold the webbing folds together for later drilling.

PB250020 by Mike McCrea, on Flickr

For those various epoxy applications I used G/flex 655 thickened epoxy, mixing enough to glue the strap yoke webbing folds to the RX stiffeners, fill in the dowel transitions and run a bead around the edges of both vinyl D-ring pads with the leftovers. Sure I hope I like where I put those D-rings; water/dirt/grit infiltration and edge lift protected, they are taking vinyl skin with them if coming out now.

PB250024 by Mike McCrea, on Flickr

The G/flexed strap yoke pieces can sit overnight, wax papered and binder clamped, before getting drilled in situ, then webbing hot-nail webbing sealed prior to installation.

PB250022 by Mike McCrea, on Flickr

Weight-wise the last of the permanent outfitting has been installed, and the balance point for the strap yoked didn’t change. I used the same little block of inwale depth wood to scribe a line, and since the strap yoke is also weight bearing I used the wider flange washers again.

PB260008 by Mike McCrea, on Flickr

Drilled in-situ with the strap yoke ends clamped below the inwale, I took the pieces back to seal the raggy drilled webbing holes, plunging a hot nail through the drilled ends to melt seal the webbing.

PB260010 by Mike McCrea, on Flickr

I love the smell of melting webbing in the morning. The smell, you know that melting webbing smell. The shop, the whole shop. Smelled like victory. (Usually “quoted” incorrectly)

Victorious I put everything away, and then remembered that I needed to melt a 3/16” hole in the center of a piece of double-sided Velcro. I continue to suffer from premature put-away-itis.

PB260011 by Mike McCrea, on Flickr

Male buckle end with the usual stainless hardware overkill below the inwale. The longer strap female buckle end gets the double-sided Velcro strap slid on the machine screw end first.

Attached the strap yoke is always there, always available and clips together in a few seconds; no knobs, no threads, no parts to drop.

PB260013 by Mike McCrea, on Flickr

When not in use the short end dangles free, and the long end rolls up, held secure under the inwale with the double-sided Velcro. I left the top Velcro flap a little long; I’ll fold over and G/flex together a half inch tab at the end so I don’t have to pick it apart with my fingernails.

PB260014 by Mike McCrea, on Flickr

PB260015 by Mike McCrea, on Flickr

Now that the last of the drilled mess has been made I can vacuum the detritus from the hull (again) and have a look at floatation bags.
 
Reflecting on Woodpuppy’s “Stop blowing holes in my ship” nightmares, I’m done drilling holes in the boat, so I counted. I didn’t need to drill through-stem holes for hand-kindly painter loops, but would not have hesitated had there been none already there. Like a foot brace, back band and knee bumpers there are some things I want on every canoe.

The drilled hole total wasn’t as high as it might have been. I had a number of drilled holes pulling double duty; webbing tie down loops on the machine screw ends, mini D-rings backing up spray cover studs, etc.

128 holes drilled in total:

70 holes for the new gunwales

3 holes in each deck cap for drainage and painter bungee

12 through the gunwales for the thwarts, carry handles and seat/trusses

4 for the foot brace

36 for the spray cover studs

Actually 129. One pop rivet hole in the deck cap needed to be re-positioned for a tighter fit. One out of 128; not a bad batting average for a minor league player.

OK, a few of the other holes were ever so slightly imperfectly centered, but they were all pretty dang close to spot on; I spend considerable time measuring, marking, positioning and re-measuring, especially before drilling the “Pay attention, don’t eff this up dammit” Conk brightwork.

If there is a place to be absa-dang-tively certain the holes are properly positioned it is for the machine screw locations through the brightwork. Weight bearing, and drilled near the butt ends are where rot would eventually start if unattended. I want some beef left around the holes there, enough to fit a decently sized, stress-relieving SS washer underneath. And multi-coats of sealant on the brightwork’s open grain ends. Some in the drilled holes too.

Between gunwales and brightwork hardware most factory-stock canoes need at least 70 or 80 holes drilled, more if longer or multi-thwarted. Doing that as a shop monkey manufacturing job, even canoe after canoe, repetitively practiced and experienced, I am not surprised to find the occasional been a long day or newbie’s effort miss drill.

“Time is money. Hurry up; you can’t take half the day just to install the brightwork. And one coat of sealant is enough on the ends of the thwarts and yoke”.

The nice thing about rebuilding a keeper, same for full-on builds I’m sure, is that you can take your time, craft everything just where and how you want it, and get it as perfect as possible.

That’s part of why the flipper business holds no allure for me; I want to do my better-each-time work on every hull, which means they will either be keepers, or boats for dear paddling friend’s.
 
Impeccably and nanoscopically designed, executed, photographed and written-up as usual, Mike.

Again as usual, for outfitting details, you have gone not just for the jugular but for the capillaries. However, with genuflected respect, not all the capillaries. Reading this statement of philosophy . . .

The nice thing about rebuilding a keeper . . . is that you can . . . get it as perfect as possible.

. . . . I want to do my better-each-time work on every hull . . . for dear paddling friend’s.

. . . I wonder what has been done for dear paddling friends who are kneelers. Particularly with respect to the Yellowstone hull.

After all, the Yellowstone was designed by Bell primarily as a kneeling canoe, designated as part of their "River Touring" series of hulls, described in their 2004 catalog as "allow[ing] you to paddle confidently into the realm of moving rivers and mild whitewater . . . ." Moreover, the original Conk Seat was designed primarily for kneeling posture and comfort.

Would kneeling pads not be relevant outfitting capillaries . . . adding even more versatility to the revivified canoe . . . adding even a smidge more flotation . . . but without adding any significant weight, and certainly no more holes.

Signed, your billion and two kneeling paddling friends.
 
No permanent provision has been made for my two out of a billion friends who are kneelers; they can paddle their own canoe.

While the Yellowstone Solo is a fine “moving river and mild whitewater” canoe it was outfitted to fit my wife or younger son, neither of whom are regular kneelers, and the YS is unlikely to see anything above day tripping on mild class II.

The Conk seat, as mentioned previously, is comfortable and efficient for sitters who use a back band and oppositional force foot brace. If one of my two remaining friends wants to borrow and use it as a kneeler we have a couple removable kneeling pads, including a large, no longer made CCS T-pad, in case they want to try their Freestyle dance moves.

The seat is at the same depth as the OEM seat, the only difference being the original seat was a flat bench with 1” canted trusses, and the Conk seat is hung on level trusses with 1” of deflection along the front rail.

I am saving the short walnut truss drops for a friend in Connecticut, in hopes that he someday refurbishes his collection of unusable derelict canoes.

PB180013 by Mike McCrea, on Flickr

With this nanoscopic tutorial I am sure he could manage those rebuilds with a few simple tools.
 
From late friend Brian’s gear collection I have an immaculate, never used Voyager-brand floatation bag. I knew at a glance it would not have fit his skinny Wenonah Voyager. Too wide, it doesn’t fit very well in the Yellowstone Solo either. A mutual friend of Brian does paddle a WW canoe; I’ll give him the bag as a memento of their friendship.

PB220001 by Mike McCrea, on Flickr

The NRS 3-D end floats I installed in Sexy Thang do fit agreeably in the YS, and I had positioned the Northwater D-rings for those bags. I can use the webbing loops on the carry handles and other tricks, but needed a few more lacing points on each side, and by using the mini-D’s to back up the riveted studs I didn’t need to drill any new holes.

PB220002 by Mike McCrea, on Flickr

The NRS bags have a webbing loop near the stem tips, which is a boon for float installation and security. A length of paracord from that webbing loop, up and out through the deck cap drain holes, wrapped a couple times around the carry handle and hitched, so the tip of the float bag is held far forward in the stem.

PB260016 by Mike McCrea, on Flickr

Blindly poking paracord at that drain hole, up in the wee-est tip of the stem is an exercise in floppy fumble fingered frustration. Fortunately there is a tool specifically made for that purpose. On-sale from the fabulous McCrea Workshop & Testing Lab, The Long Pokeythingie. Only $14.95, order yours today and we’ll double the offer.

PB260019 by Mike McCrea, on Flickr

Piece of coat hanger wire, make a loop on one end small enough to pass out through the drain hole, run a length of the cord through the loop, poke away ‘til the wire finds the hole, pull the wire out and the line comes with it.

Float bag ends secured far in the stems I did some lacing. Since I had the wide, easy to lace through mini D-rings I used some thicker cord, softly woven no-stretch poly tarp line that came with some tarp. Black tarp line? I think not.

Same end cords and minibeeners (which need to be replaced with smaller ones) from the Sexy Thang installation, stretched down to the D-ring and up to the lacing forms, a rudimentary end cage. Then, what the heck, keep adding stuff Mikey, an overbag webbing strap from D-ring to carry handle.

PB270021 by Mike McCrea, on Flickr

I still have the second of the Northwater Double-Ds available, for a strap pulling in the opposite direction, and a couple of unoccupied mini D-rings. Easy enough to strap down/lace in some gear with the stem float bags in place.

PB270024 by Mike McCrea, on Flickr

Knowing that, for our home river or other nearby non-highway speed trips, I prefer inflating and installing the float bags in before leaving home for a quick escape at the launch, I might as well do a final weigh-in with them in place. Bell speced at 44lbs with wood gunwales, a hair under 45lbs as a vinyl gunwaled un-outfitted canoe. Fully outfitted, with spray covers studs & rivets, strap yoke and float bags, mini D-rings, lacing straps left in place, hanging balanced under the shop scale. . . . .

PB270028 by Mike McCrea, on Flickr

. . . . . .48lbs, 4oz

Yippie, I kept it under 50lbs fully outfitted and fully equipped.
Beautiful my friend! Wish I could paddle it right now.
 
Back
Top