G
Guest
Guest
Raffle Dry Bag & Scrap Material
(Some of this is because I know Chip is trying to puzzle out DIY dry bags. Most of it is because, ya know, I tend to blather on a length, especially about simple shop projects)
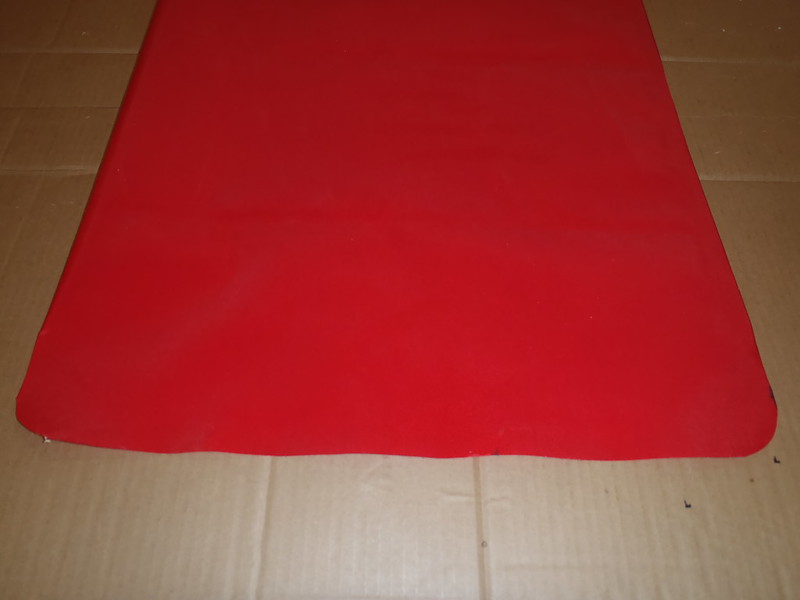
I made the usual template before marking and cutting the fabric for Waterdog’s raffle prize dry bag, requested at 14” diameter x 22” tall when fully open, marking and cutting out a visgueen template. First a simple full size rectangle, then cutting out the requisite top flaps and notches.
 P3300007 by Mike McCrea, on Flickr
With a template for those dimensions cut from 58” wide heat sealable fabric I had a “scrap” piece 24” x 16” left over, and after cutting out the short side of the dry bag top flaps had another long narrow piece, 2 ½” x 21”. I have ideas for those pieces.
 P3290004 by Mike McCrea, on Flickr
Waterdog’s dry bag with cut out fabric in progress, 1” “flap” with interior hem notch ironed over on the inside. That little flap gets ironed down with the fabric fully open, before ironing the bottom and side of the bag.
 P3290001 by Mike McCrea, on Flickr
The material is then folded over at the centerline and ironed together on the bottom and side edges. I dog ear ironed triangles on the bottom corner for future grommet installation and rounded off the tips.
 P3290003 by Mike McCrea, on Flickr
Time for the webbing and peculiar long side flap. Note the 1” square corner notch, cut out so the flap will iron down inside the bag without overlapping the 1” heat sealed side hem. I cut a little 1/8” slice from the other corner, so it is easier to fold inside and iron.
 P3290002 by Mike McCrea, on Flickr
For no-sew* immovable webbing I add a streak of E-8000 adhesive sealant to one side of the webbing and to the folded over side of the long flap, so there is adhesive on both sides of the webbing. Lay the webbing in place adhesive-side down, fold over the also-adhesived flap (smeared along a marked placement 1” length stripe), stick a board on top and clamp that down. Couple hours at least, but left clamped tight over night works better with E-6000.
 P3290005 by Mike McCrea, on Flickr
The E-6000 adhesive sealant ($3 at any Walmart) is kind of unnecessary if you sew the webbing in place at the ends, although it does help stiffen the webbing, making it easier to flat foldover and roll down. I threw a couple crude stitches through the webbing just for funsies. It is nylon webbing and easy to pass needle through.
A brief comedic pause; I told a friend this tale and his response was “Oh, I know you’ll never admit that to anyone else”. I love to prove Doug wrong.
I do not like sewing, and I suck at it. Just threading the needle is a challenge. I sewed the side release buckles on one bag, took a call, went back to the shop and began sewing the buckles on another bag. Only punctured my fingers thrice so far and only bled once. When I finished sewing the webbing together on that side I looked down and what to my wondering eyes should appear - the half of the release buckle I meant ladder lock weave the webbing through before sewing the ends together, still resting untouched and unattached on the bench. “Gee wilikers” I said, or something less family friendly.
Two hints with that glued webbing methodology beyond idiotic mistakes; do a test fold and mark where the length of webbing will be placed inside the long flap fold; pre-glued webbing glue side down, then pre-glued flap folded over and clamped. That webbing is inset further in the flap than you might think; do a test fold and placement mark.
And, whether you glue or sew the webbing in place, always, always cut the webbing a few inches longer on each side than you think you need. The webbing running back and forth through the ladder locks uses up more length than you might estimate. The ladder lock itself takes up some length. 12” wider than the bag width at a minimum, 6” of free webbing outside is usually about right. I’d rather cut an inch or two of excess webbing off later than, oops, come up too short.
While that webbing adhesive is setting up it’s an ideal time for a beer, and some thought about what to do with the scraps.
I used red fabric for Waterdog’s bag. Red is easier to see if floating downriver after an oops than darker colors. Yellow or orange would be even better, but leftover red scrap, even skinny strips, have other uses.
Those long skinny scraps simply get folded in half and ironed over, with a grommet seated through one en,d and become canoe overhang red flags. Easy peezey no template needed. Little piece of corner rounded High Intensity reflective tape on each side and length of Lawson Glowire cord and that flag is very visible, even when walking around the truck at night. Maybe, clonk, especially when walking around the back of the truck at night.
 P3310027 by Mike McCrea, on Flickr
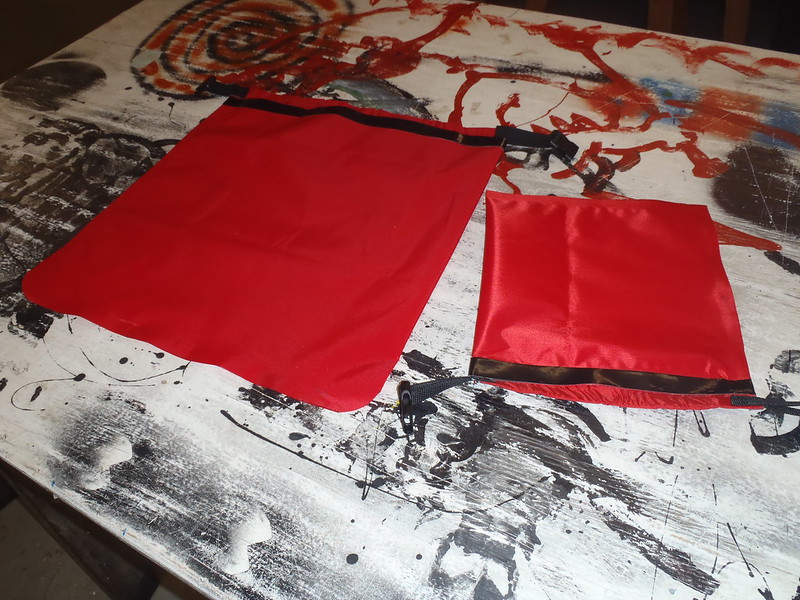
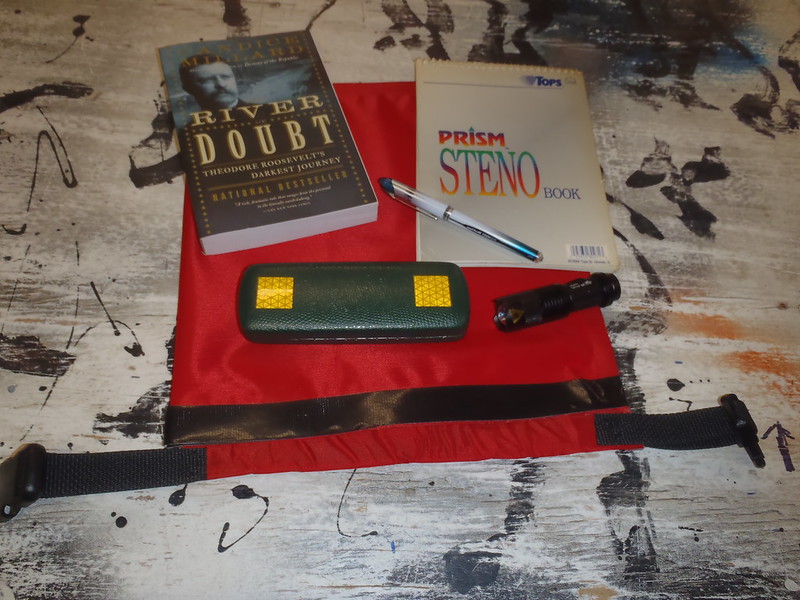
The 24 x 16 piece is kinda small for a dry bag when folded and ironed over. It might make a slender envelope-flat dry bag for extra maps, journal & pen, or book and glasses.
I made a (got-lazy freehand) template for that big scrap piece, cut out the fabric and ironed it up to see what condition my condition was in. NOTE: My condition was uneven; Freehand meant I didn’t bother to use a square. Yeah, don’t do that, take the extra 10 seconds to square up all of the folded together edges
FWIW if you have slightly uneven edges along the ironed hems it is easy to trim them using a razor blade along a straight edge. No one will ever know you were not even, or level on the level.
https://www.google.com/search?sourc...4wLjGYAQCgAQGqAQdnd3Mtd2l6sAEA&sclient=psy-ab
That brief musical interlude concluded the morning’s dry bag efforts. I love John Prine, he has a voice even I can sing along with.
(Some of this is because I know Chip is trying to puzzle out DIY dry bags. Most of it is because, ya know, I tend to blather on a length, especially about simple shop projects)
I made the usual template before marking and cutting the fabric for Waterdog’s raffle prize dry bag, requested at 14” diameter x 22” tall when fully open, marking and cutting out a visgueen template. First a simple full size rectangle, then cutting out the requisite top flaps and notches.
P3300007 by Mike McCrea, on FlickrWith a template for those dimensions cut from 58” wide heat sealable fabric I had a “scrap” piece 24” x 16” left over, and after cutting out the short side of the dry bag top flaps had another long narrow piece, 2 ½” x 21”. I have ideas for those pieces.
P3290004 by Mike McCrea, on FlickrWaterdog’s dry bag with cut out fabric in progress, 1” “flap” with interior hem notch ironed over on the inside. That little flap gets ironed down with the fabric fully open, before ironing the bottom and side of the bag.
P3290001 by Mike McCrea, on FlickrThe material is then folded over at the centerline and ironed together on the bottom and side edges. I dog ear ironed triangles on the bottom corner for future grommet installation and rounded off the tips.
P3290003 by Mike McCrea, on FlickrTime for the webbing and peculiar long side flap. Note the 1” square corner notch, cut out so the flap will iron down inside the bag without overlapping the 1” heat sealed side hem. I cut a little 1/8” slice from the other corner, so it is easier to fold inside and iron.
P3290002 by Mike McCrea, on FlickrFor no-sew* immovable webbing I add a streak of E-8000 adhesive sealant to one side of the webbing and to the folded over side of the long flap, so there is adhesive on both sides of the webbing. Lay the webbing in place adhesive-side down, fold over the also-adhesived flap (smeared along a marked placement 1” length stripe), stick a board on top and clamp that down. Couple hours at least, but left clamped tight over night works better with E-6000.
P3290005 by Mike McCrea, on FlickrThe E-6000 adhesive sealant ($3 at any Walmart) is kind of unnecessary if you sew the webbing in place at the ends, although it does help stiffen the webbing, making it easier to flat foldover and roll down. I threw a couple crude stitches through the webbing just for funsies. It is nylon webbing and easy to pass needle through.
A brief comedic pause; I told a friend this tale and his response was “Oh, I know you’ll never admit that to anyone else”. I love to prove Doug wrong.
I do not like sewing, and I suck at it. Just threading the needle is a challenge. I sewed the side release buckles on one bag, took a call, went back to the shop and began sewing the buckles on another bag. Only punctured my fingers thrice so far and only bled once. When I finished sewing the webbing together on that side I looked down and what to my wondering eyes should appear - the half of the release buckle I meant ladder lock weave the webbing through before sewing the ends together, still resting untouched and unattached on the bench. “Gee wilikers” I said, or something less family friendly.
Two hints with that glued webbing methodology beyond idiotic mistakes; do a test fold and mark where the length of webbing will be placed inside the long flap fold; pre-glued webbing glue side down, then pre-glued flap folded over and clamped. That webbing is inset further in the flap than you might think; do a test fold and placement mark.
And, whether you glue or sew the webbing in place, always, always cut the webbing a few inches longer on each side than you think you need. The webbing running back and forth through the ladder locks uses up more length than you might estimate. The ladder lock itself takes up some length. 12” wider than the bag width at a minimum, 6” of free webbing outside is usually about right. I’d rather cut an inch or two of excess webbing off later than, oops, come up too short.
While that webbing adhesive is setting up it’s an ideal time for a beer, and some thought about what to do with the scraps.
I used red fabric for Waterdog’s bag. Red is easier to see if floating downriver after an oops than darker colors. Yellow or orange would be even better, but leftover red scrap, even skinny strips, have other uses.
Those long skinny scraps simply get folded in half and ironed over, with a grommet seated through one en,d and become canoe overhang red flags. Easy peezey no template needed. Little piece of corner rounded High Intensity reflective tape on each side and length of Lawson Glowire cord and that flag is very visible, even when walking around the truck at night. Maybe, clonk, especially when walking around the back of the truck at night.
P3310027 by Mike McCrea, on FlickrThe 24 x 16 piece is kinda small for a dry bag when folded and ironed over. It might make a slender envelope-flat dry bag for extra maps, journal & pen, or book and glasses.
I made a (got-lazy freehand) template for that big scrap piece, cut out the fabric and ironed it up to see what condition my condition was in. NOTE: My condition was uneven; Freehand meant I didn’t bother to use a square. Yeah, don’t do that, take the extra 10 seconds to square up all of the folded together edges
FWIW if you have slightly uneven edges along the ironed hems it is easy to trim them using a razor blade along a straight edge. No one will ever know you were not even, or level on the level.
https://www.google.com/search?sourc...4wLjGYAQCgAQGqAQdnd3Mtd2l6sAEA&sclient=psy-ab
That brief musical interlude concluded the morning’s dry bag efforts. I love John Prine, he has a voice even I can sing along with.