• Happy May Ray Day! 🌞😎🌻🩳🇩

Carbon Copy Kite

Thanks stripperguy. I guess my question is this: Wouldn't it be easier to see if the carbon is thoroughly wetted out if you wetted only one layer at a time?

Obviously, this would take more time and more mixing, and doing two layers at once seems to work fine. Just curious.

Fitz
 
If you've got the help you can do one layer at a time. That's how I've done it, and three people is great for rolling out a new layer over wet cloth. With one person rolling out fabric over a wet layer it gets very hard to get the weave lined up right and wrinkle free. If wetting out two layers at a time you just have to be cautious that you can't see the sub layer and adjust accordingly, give the epoxy plenty of time to soak in, etc.
 
Thanks stripperguy. I guess my question is this: Wouldn't it be easier to see if the carbon is thoroughly wetted out if you wetted only one layer at a time?

Obviously, this would take more time and more mixing, and doing two layers at once seems to work fine. Just curious.

Fitz

It would deficately be easier to see when the carbon is fully wetted out, doing a single layer at a time.
But I am generally working alone, so that second layer can't go on until the previous one is tack free...

On a slightly related note, I have been trying extremely hard to grow a third arm, it's just not going well.
 
From there it was a simple matter to place the foam back in the shell, lining it up as it was before. And....wait for it....yup, I paid the price for my haste!
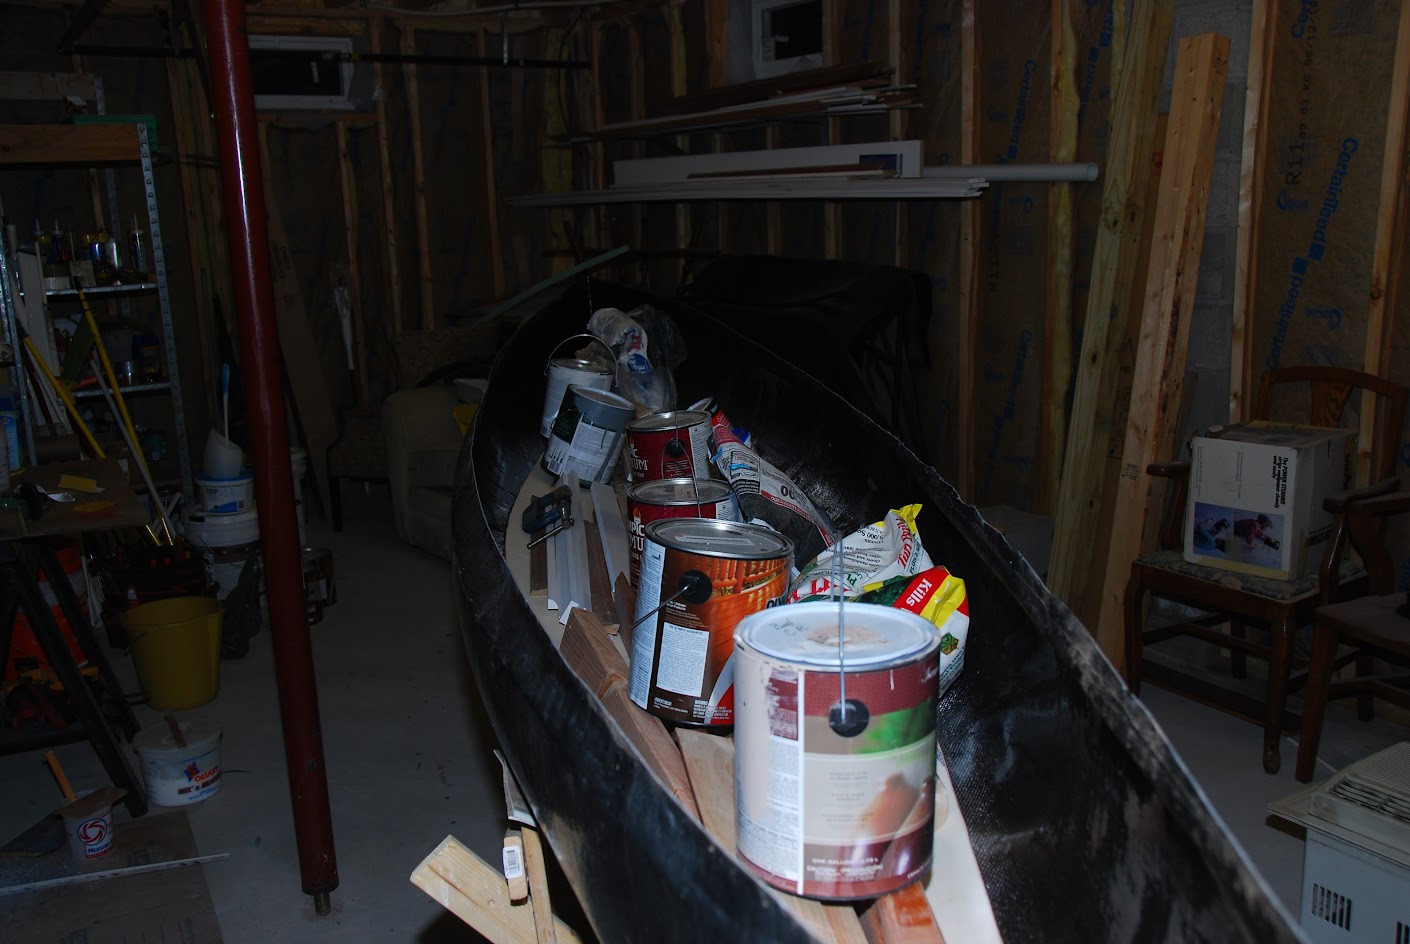
While the Divinycell laid in the shell nicely, it didn't fully conform to all of the contours. For the next 30 minutes, I was scrambling around, looking for every piece of compliant (and not so compliant) ballast that I could find. Window casing, baseboard, short 2 x 4's, paint cans, 6 ft level, bags of grout, bags of plaster, more paint cans, yup, I even have a bag of Weed n Feed in there...It wasn't pretty.

zBut5E5mua0nIn-1gv9huNgnVcfM9u4s2ZseTgIcJSy475unluDCtl3i1Roza6ZL1fefQXhSfdm5cg2xynbkHZL6YR8obkSHVgc8btE-RMb8eopHaACU1dBT9rz5hf-nCX5Sn5ame7cROPOMGF2fE7mTjm_U-bkt_T9Xd7_maWd_PTUNw2-CA1NWeOarTN6Cbpcibr4R7ByyFo4Z6xCeqYAkD_3zbKA2HQtvq2GQOECmJn_O_qwjspgM9U2f9jJiC-SPlI5lzmEcLEzsXXWSe4lA2OYQXWGMW8U8ljmhSK3LgbjjlW9dMKdpJdDa5n9XJo6EK-Tf50yM9cSUtrrFjTE-hRz4UihNYdI8m49luTywY3QTq3tSLMPEttVD3SGa33Ir7hgVxG1aBJwLBMngzT6bAhI0DgspiOHp9aUoX87ovJO2-uksffhz0aC_jFW2mD3Zmy3gdEv8l9f8d6QmJbj1zstllvwPJN3wnuJCns6HIOBtVcPsd1j0hFfxVnhKBektNxkq0RhHpsZdl0RLLWsWFtZJXB7Z6anzp1D_U6IG138V-NBXdzOsH1OeK5oT5wWetBw76F8V1K50ca7qe-dpVAmDg5ZXyO5q1Ur35VpvhgDHYG80LhcnQHD5m26JtShoNojcxn0epc49FIFpH8F9e5GEGkKZMkp1kHfpPGk=w1410-h944-no

Sand bags, my friend, sand bags.

Not real sandbags. I have a shop bin with a dozen or so two gallon zip lock bags filled with sand. Double bagged for leakage protection in fact; shop sand bag weights are a good use of old Ziplocks. And another dozen half gallon sized. Probably 60+ lbs of sand.

The nice thing about sandbags is that they conform nicely to curves and odd shapes/places. BTW, not actually “filled” with sand, more like ¾ full, which works better for laying down into shape conformation.

The other nice thing is that they are always there, under the bench, reusable time after time. If the bag gets worn I just triple bag it with another leftover Ziplock.

At least you didn’t have to stack the drill press vice, tabletop sanders and tool boxes in the boat. Not that I have ever resorted to such a thing myself.

50+ lbs of sand may not be enough. I have seen the likes of that photo above in my shop many times. DougD probably has a photo of heavy shop contents piled atop the seat in his Optima.

My favorite quick weight to add, often atop the sandbags, are the ubiquitous 13oz coffee cans filled with the screws, nuts, bolts and washers I use most often. A coffee can filled with screws weighs 4lbs and I keep 16 of them mostly full with hardware. That’s another 64 lbs or quick weight.

BTW, plastic 2 liter soda bottle trays are perfectly sized to hold eight of those metal coffee cans, and have sturdy holes molded in for a balanced rope or strap carry handle.

When I travel for maintenance work I often bring a couple of those 2 liter trays along with my tools. 16 easy to identify cans of hardware.

A sample of the contents screws, nuts or fasteners is hot glued to the lid, so I can grab the can I want at a glance. That is also a boon in my own the shop, and it is easy to see when I need to replenish my supply of drywall or self-tapping screws. I love drywall screws and self tappers.
 
Sad, sad news...

I used my scrap pieces of carbon cloth yesterday to laminate the inside of the Divinycell foam stiffener.
And when I say scraps, I mean scraps. The smallest pieces were about 4 x 6 inches, although most of it was the off cut excess that tapered from 10 inches to a few inches for a length of 5 or 6 feet. It looks kind of patchy, and I'm sure I paid the price in extra weight for my refusal to buy more carbon cloth. So I had plenty of spots that ended up with double overlaps (that's 3 layers) and of course extra resin to saturate all those joints.

I do not like this particular weave of carbon, way too stiff and it takes forever to wet out. I am not satisfied with the quality of my wet out, I have a handful of small bulges.

Anyway, I checked on the shell a few minutes ago.

It is stiff!

I do wish I had performed some load-deflections tests on the shell before adding the foam, and after adding the foam and compare to now, with the single layer of carbon fiber. I dare say I could likely walk in the shell with a good bit of it unsupported. Very much like my stiffest wood strip hulls.

Now for the truly disappointing news. Weight so far = 22.5 lbs. And I still have gunnels, thwarts, seat pedestal and seat to add.

Based on how stiff (relatively) the shell feels and the resin saturated carbon binge, I think I'll will only add a small bit of glass, nearest the seat pedestal.

I apologize for the lack of photos, I'll post some later tonight after the added glass is in.

This has been a baptism by fire for me...lots of lessons learned.
The next boat (you knew there would be a next boat) will nothing like my last boat.
I will use a more supple and compliant weave of carbon cloth.
I will build a glass/carbon/foam/carbon/glass laminate.
I will build in a set of female forms, starting with the foam and working in, then wrap the outside after freeing the shell from the forms.
 
I think your canoe officially has a name - Patches

Frugality and using what you have on hand are good. This winter I've been in a "screw the aesthetics" mood in the shop. Kind of liberating and certainly a time saver.

From the pics it looks like you didn't bevel the edges of the foam. How did the carbon conform to that edge?

Sorry about the weight. Amazing how it just keeps creeping up. Gives me a renewed appreciation for the work manufacturers go to to keep the weights down so low.

Alan
 
Helium ! I'm going to add Helium to my flotation tanks !!! Yep Helium could be the answer to making an ultralight canoe ! ! Inject it into the Divnycel !

Well a thought anyway !

Jim
 
I think your canoe officially has a name - Patches

Frugality and using what you have on hand are good. This winter I've been in a "screw the aesthetics" mood in the shop. Kind of liberating and certainly a time saver.

From the pics it looks like you didn't bevel the edges of the foam. How did the carbon conform to that edge?

Sorry about the weight. Amazing how it just keeps creeping up. Gives me a renewed appreciation for the work manufacturers go to to keep the weights down so low.

Alan

Alan,
I did bevel the foam, took it right down to the carbon inside surface, maybe ending up with a 1/4 wide land. And still, that carbon refused to conform!!
It bridged across...I suppose I should have put a radius on the breakover edge as well, but even that may not have been enough.
That carbon cloth is just not my friend!!

And the weight? I always set my goals aggressively, to reach the moon you have to aim for the stars, right? This is a practice boat. As I said upthread, the next will be a full foam core with carbon-glass overlays, but not the 5.9 oz carbon, and probably not 6 oz glass. Even before this one is finished, I'm planning the next!

As far as the aesthetics, I have always been a form follows function sort of guy. Performance first, aesthetics last. So this build will fit that philosophy perfectly.
I do appreciate the leg work that you and Jim have put in, you've pointed me in the right direction for sure, and helped me avoid major fubar's.
 
I had a few spots where the carbon cloth shifted position when I was butchering the wet out...
So I cut a few more patches to cover those spots, with the intention that I would next add some glass to the inside.
Well, I looked at everything this morning, and it sure feels pretty stiff. I leaned into the shell, putting as much of my weight in the center as possible. The shell is resting in the cradle, supported by vinyl flooring (hey, I use what's laying around) roughly 8 feet apart. Since I couldn't put that much load on the shell with just my hands, I grabbed a ladder, and put my right foot in. Then I took my right foot out, and I shook it all about...Wait, no that was something else.
I gradually increased the load on the shell until I had all I've got (155 lb fully dressed) on one foot in the center of the shell. Hard to tell, but I think there may have been 1/16" deflection. About as stiff as my stiffest strippers!!
So, needless to say, I won't be adding any glass. Even without gunnels or thwarts, I'm sure I could paddle the thing today, if only I could transport it somehow.

For the sake of review, from outside to inside it goes:
2 layers 6 oz E-glass
2 layers 5.9 oz carbon cloth
1/8" Divinycell H80 foam bottom only
1 layer 5.9 oz carbon in multiple pieces and multiple overlaps

And that is more than enough stiffness for this shallow arched hull shape. Probably OK for flatter sections too, might be overkill for shallow Vee hulls

Edit to add photographic proof. BTW, the shell is clearly stiffer than the furring strip cradle!

View attachment dyM4NKe5F2DDzZ_1QbJ9iSYFV3L4cwjqPl0GhHL6zR60npBrQvB3IO-w0sUoESNjr3Wvtk9GbwmGkOTNz3d1RUkFC-cbu-iunI_p
 
Last edited:
Sounds like you've got yourself a tough boat.

I think most commercial ultra lightweight hulls have only two full layers, sometimes three. From outside to in would be something like full carbon, full kevlar, foam bottom and ribs, and partial kevlar to cover the foam with some other partials thrown in the mix. I suppose a full carbon hull would just replace the kevlar with carbon.

If you're ever somewhere that sells lightweight kevlar hulls feel how flimsy they are above the water line where there's no foam. With gunwales removed they're usually pretty floppy.

Alan
 
I think a better test would be to have the hull upside down and then stand on it.... But we don't have to know.... haha
 
Guys,
Not to take anything away from the commercial builders, but MDB has a Swift, I forget which one, a 12.5 foot pack boat. The sides are paper thin and the bottom doesn't seem all that sturdy either. Hers was around $2,200 (she wasn't convinced I could do a composite for her light enough, HA!), which was a bargain compared to some of the other Swifts, Placids, Coldens, Bells and so on that I've seen.
As far as I'm concerned, I'll never buy any commercial composite hull, unless it's some $200 beater. For the cost of a new fancy boat, I can build 5 or 6 of the same strength and lighter weight, or the same weight and greater strength.

So, once again, even though this is a practice build, the lessons learned (for me anyway) are far more valuable than the boat created.
 
I'd never suggest you buy a commercial hull. Nor do I mean to take anything away from yours. Just pointing out what I believe is their general layup schedule and that they're much flimsier than any layup schedule I'd come up with on my own. But they seem to hold up pretty well and if you want to get in that weight range I think that's what has to be done.

Pretty gutsy move standing inside the hull with no gunwales or thwarts. Should be plenty tough. Can't wait to see the gunwales go on.

Alan
 
That's a brave test ! Give the resin more time, and it should gain more stiffness.

I'm not going to test mine, until I get it in the water. But I feel mine should easily pass the test.

I pretty much decided, after building my first stripper, that I wouldn't be buying a new commercially built canoe. Why buy, when it was soo much fun building one !
Bet you can't wait to put it to water !
Looks great !

Jim
 
Thanks, guys.
Alan, I know the examples you were citing too well, never took it as anything but. I was just telling MDB yesterday, that the major canoe manufacturers know their materials and processes, but only to the extent that they affect their ability to sell boats at a profit. I come from a world of R & D, where engineering principles and the laws of physics are strictly enforced. Efficiently designed laminations are easy enough to create with the right combination of education, experience and attitude. If you and I lived closer together, we could collaborate more effectively... As it is, I am thoroughly enjoying this hobby.

As far as a gutsy move? No, everything has been calculated and modeled in advance, I'm not nearly as brave as it might seem!!

Jim, I'm of the same mindset, have been for a very long time!
 
Looks good SG! Have you locked down the gunner and thwart construction?

Jason

Jason,
Gunnels and thwarts will be carbon over Divinycell foam, same as my wood strip Kite.
The gunnels are a slotted cap, to be epoxied on and then shaped in place. It's the only way I can reliably straighten out my wiggly sheer line.
Gunnels will have a wrap of bias woven carbon fiber 4" tape from Soller http://www.sollercomposites.com/NewSoller/Tapes.html
Maybe also have selective reinforcement with some 9 oz glass tape, but only in the regions where the gunnels would rest on my roof racks.

Thwarts will have 2 layers of carbon sleeving over foam. They will also be epoxied in place, with additional carbon sleeving at the joints for reinforcement.

View attachment 6s4yn5BWuat2HlbImFa4MgkbHL68rQ2peCX9rIQQ7Q_eT-M6_DtpTss61OW4QcYBDagza6egkZr-nwTT_96KowTELWcf25BqrBfx
 
Wow, it's been like 2 weeks since I updated this...
MDB and I put food on the table with our rental properties, getting two units ready at once for April 1 occupancy kind of slows me down!

I cut the Divinycell foam gunnels to be 3/4" x 3/4", with a narrow slit 1/2" deep to fit over the sheer. I used Allen's cut the corner off a baggie trick to fill that narrow slit with Cabosil thickened epoxy. I gotta say, it's a great technique.
Epoxied the gunnels in place with a healthy overhang at each stem.
Then I sanded the foam gunnels to true up the profiles and allow an easy transition for the bias woven carbon fiber tape. Really just a bevel.

View attachment fyUGxQBX6D_aiGea7eVoGaAIk_KsV4ebm72ufLPlIiEoMqN2--wxhwuWCCmn21lq4_pWiZvAA32BAJjcohWzZrRJ4nGxofyOck6j


I used that cool flex board to sand that bevel. I carefully placed the hook and loop 40 grit paper slightly offset, so there was no danger of digging into the hull as I sanded. In the photo below, see how the paper is offset to the left?

View attachment QlXT2WGDbxZ6IDVvlrLs6Zc-x3jep6HTN2hnYAOlCan1uw-8b8LDM4ovYBMJz2b3nw5-MRe4WPppwrYw4brZUYFhsvUMGSo0aKPj

Well, despite my precautions, I somehow got the flex board flipped around for a time. The result in the photo below.

View attachment lmegUOGr8WNjHQRXbwyVbAnsRlNwiR8Ocf2o3EjemhODZjKlzgpj0vSzQXWquT1trbW-tJAApMBj_T11QPm7yFY0bJnN3WjYO5om

Yup, sanded clean through!! No big deal, that area will have carbon fiber wrapped on the foam and both inside and outside of the shell.
So maybe tomorrow, I'll clean up all the clingy residue and wet out the gunnel wrap.
I have a trip scheduled for the end of April. Depending on how many casualties we have, we may have an odd man out. That odd man would be me, so I have to stop fiddling around and get this thing ready to float.
 
Back
Top