G
Guest
Guest
I really do not like that the only place to attach the painter lines is tied around the molded deck plate carry handles.
Those plastic deck plates are held in place by a few (poorly installed) pop rivets. I do not expect to ever have to Z-drag the Fishfinder free from a pin, but I sure as hell don’t want to be using pop riveted deck plates to do so.
A couple of Carlon conduit connectors, G/flexed in holes drilled in each stem, will provide beefy flanged fittings bow and stern for all of $2. Positioned non-lining high on the stems I won’t even need no-leak tubing inserts.
Easy as buying four conduit connectors, which, BTW, come in different sizes/inner diameters, and drilling four holes. Well, I bought extra, so I had spares in stock for the next canoe.
https://www.lowes.com/pd/CARLON-1-2-in-Conduit-Connector-Schedule-40-PVC-Compatible-Schedule-80-PVC-Compatible-Conduit-Fitting/1000999110?cm_mmc=shp-_-c-_-prd-_-elc-_-google-_-lia-_-206-_-pvcconduitfittings-_-1000999110-_-0&placeholder=null&ds_rl=1286981&ds_a_cid=11274110 0&gclid=Cj0KCQiA88X_BRDUARIsACVMYD_g_M5vznKTZ0dQ6A 3MXT9oVuEABSBSJFf9V7fZy2Ojj2TUb3TRhWgaAoYDEALw_wcB &gclsrc=aw.ds
Before drilling holes in the stems, a few modifications to the conduit connectors, using the 1” belt sander.
 P1070004 by Mike McCrea, on Flickr
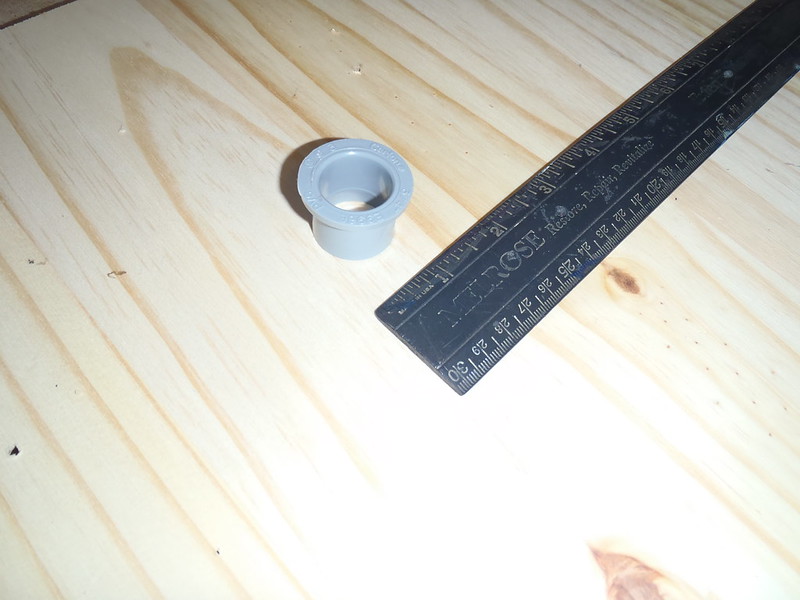
The conduit connectors I bought had thick walled necks and were 1 1/16” OD, which was an odd size hole to drill. I sanded them a bit thinner all around, down to 7/8”, still plenty of neck wall thickness left. I woulda coulda stopped at 1” OD, but, uh, got to 7/8” PDQ on the sander. I’ll be a bit more sanding cautious next time.
 P1090006 by Mike McCrea, on Flickr
While I had the belt sander out I sanded off the Carlon 1/2" E996D PVC & etc lettering that was molded on the outside of the flange, beveled flange down a touch so it didn’t present a right angle edge on the outside of the hull, and shortened the length of the neck. Again, cautious seconds on the 1” belt sander.
To be assured that I had a tight fit I drilled a 7/8” test hole in a piece of Royalex scrap (thanks again Doug; amazing how handy that RX scrap has proven). No special tool or bit needed; a 7/8” spade bit, an old one at that, made a clean hole and, once test seated, it was hard to pry the flanges free. That’ll do.
 P1090007 by Mike McCrea, on Flickr
 P1090008 by Mike McCrea, on Flickr
 P1090009 by Mike McCrea, on Flickr
Nice tight fit in the Royalex. Still a little too much neck sticking through, but I’ll sand them down to more like ¼” protrusion. I don’t need much neck showing to paint a bead of G/flex on the inside, and since the two necks will stick through close together, angled \ /, I’d prefer they not be unnecessarily long inside the stems, lest angled tension from the painter loop on those angles break the G/flex seals.
Eh, that’s all good, but I don’t like the grey color. A pfftttt of black spray paint took care of that.
 P1090012 by Mike McCrea, on Flickr
Had I installed these lower, as lining holes on a float tank-less hull, I could have sleeved some tubing on the flange necks inside the stems.
 P1090011 by Mike McCrea, on Flickr
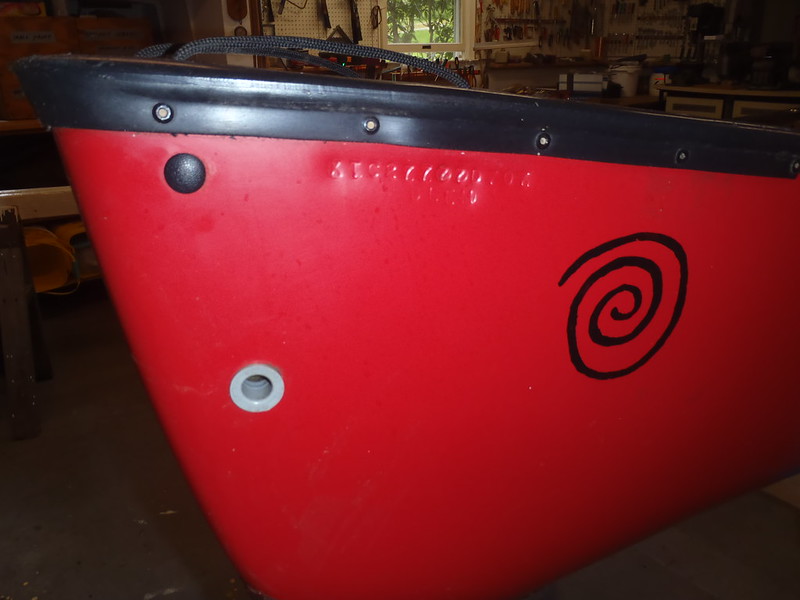 P5260015 by Mike McCrea, on Flickr
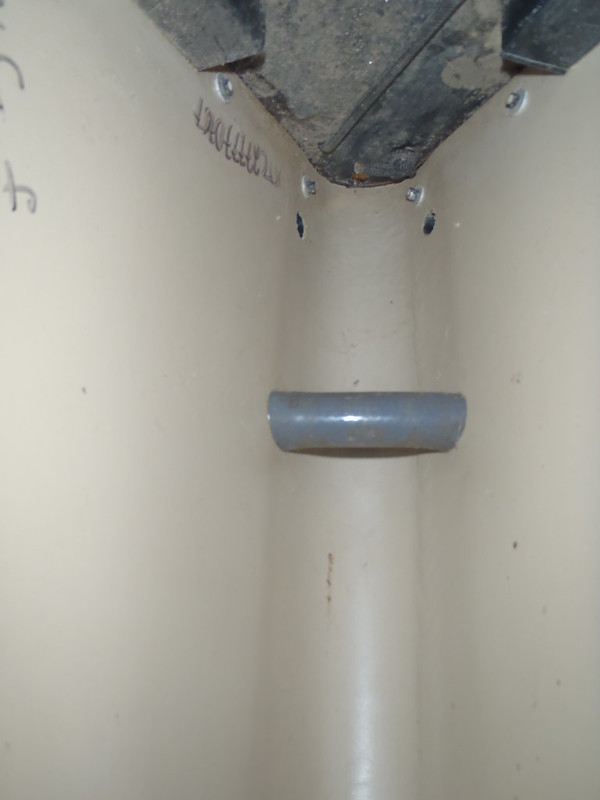 P5260016 by Mike McCrea, on Flickr
Or, on a canoe with float tanks, used the larger diameter conduit connectors and sleeved the tubing inside the necks. FWIW the inner diameter on the larger conduit connectors is a hair under 7/8”, the smaller diameter more like 5/8”. For all I know there may be larger ones yet.
But these are simply through hull attachments for higher mounted painter lines, and without the tubing sleeve I can (er, could) knot the line inside the hull, leaving a clean, no-knot loop on the outside.
Time to drill some holes in the stems.
 P1110013 by Mike McCrea, on Flickr
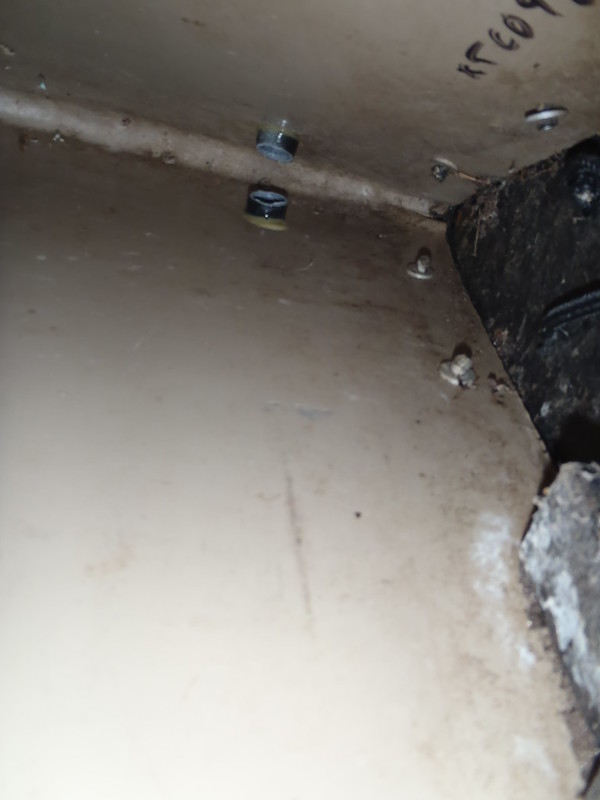
I installed the conduit flanges with some G/flex painted on the exposed foam core in the drilled holes, some G/flex around the flange lip and a bead of G/flex thicken with Colloidal Silica around the protruding flange necks inside the hull. Those puppies ain’t budging.
 P1120018 by Mike McCrea, on Flickr
Knotting the line inside the stems, while do-able, is awkward; that’s a tight space to be knotting line; with both hands are up in the stem you can try aiming a headlamp to see what you’re doing, but hands-in-the-way, it’s blind knotting time.
Beyond avoiding that awkwardness I’d prefer a more comfortable hand-toggle on the stem loops than just naked rope, especially if dragging a semi-loaded or post-capsized boat out of the waves, or even just when doing a double carry with a companion. And I’d prefer not to use the pop riveted deck plate “carry handles” for any of that action.
I was stumped for what I had on hand that would work suitably as stem loop toggles. I had some clear Tygon tubing in the right diameter, and likewise some reinforced translucent tubing, but know from experience that those become disgusting with (visible) bacterial growth inside the tubes.
 P1120020 by Mike McCrea, on Flickr
Nasty looking:
 P1220469 by Mike McCrea, on Flickr
I want something opaque, so at least I can’t see the Petri dish, and it may be that the moisture inducing greenhouse-effect aids in the bacterial growth; the one clear dry bag we own is always dripping moisture down the inside when left out on warm sunny days, even unopened when the contents are dry. That’s the last clear vinyl dry bag I’ll ever buy; decent concept, poor real world application.
I had some leftover pieces of garden hose, reinforced tubing and odd (more blue!) handle sleeves, but the only pieces long enough lacked sufficient inner diameter (3/4” minimum) to tie the knot and slide it inside the tubing, in this case using 6.5mm BlueWater rope. I probably have used 5/16” BlueWater Rescue rope; maybe next time on a canoe that merits beefier stem loops.
 P1120022 by Mike McCrea, on Flickr
I must have some handle thingamajig I can use. Ah ha, the box of bicycle parts. Handlebar grips; obviously hand comfy, unlike tubing or hose not slippery when wet, and the inner diameter is just over ¾”. Perfect.
 P1120024 by Mike McCrea, on Flickr
Grip ends run through the band saw to cut off the flange and closed ends, leaving perfect 5” handhold lengths.
 P1130027 by Mike McCrea, on Flickr
Stem loops knotted, cut, sealed and pulled inside the handlebar grips.
 P1130029 by Mike McCrea, on Flickr
I kinda wish the toggles were thicker/stiffer, like the grey & black Bell handlebar grip in the photo, but we only had one of those in the bike box. Even so I’m done with using old hose or tubing for stem loop toggles; handlebar grips just make far more sense.
One caution with a stem loop, toggle gripped or not; make them long enough that your knuckles clear the stem of the deck plate.
 P1130031 by Mike McCrea, on Flickr
If you have no place other than deck plates or carry thwarts to tie off painter lines all it takes is $2 in conduit connectors and some epoxy. Outfitting doesn’t get any cheaper or easier.
(And yes, it took longer to write that up and photograph it than it took to sand, cut, epoxy and install the flanges and carry toggles. I got time.)