• Happy "Killer Rabbit" Attacks President Carter in His Paddle Boat (1979)! 🚣🏼‍♂️🐇

Project Boat - Old Town Pathfinder

G

Guest

Guest
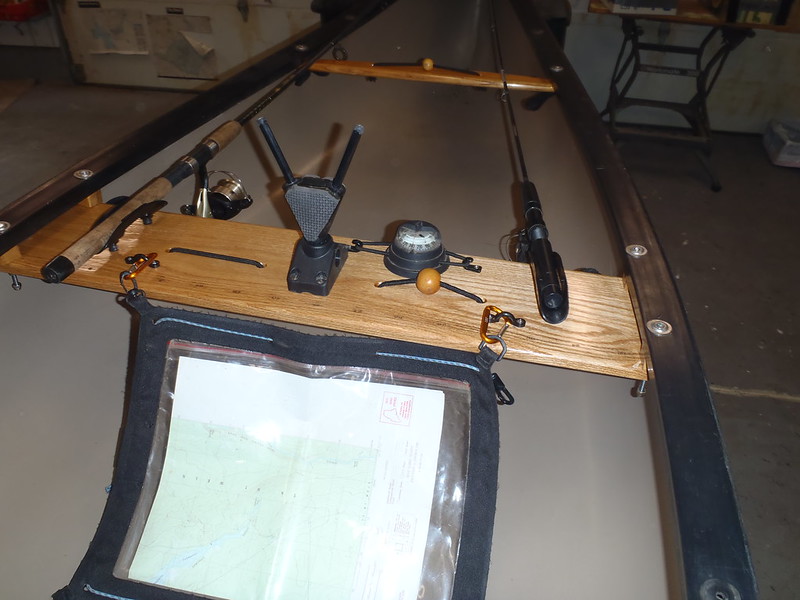
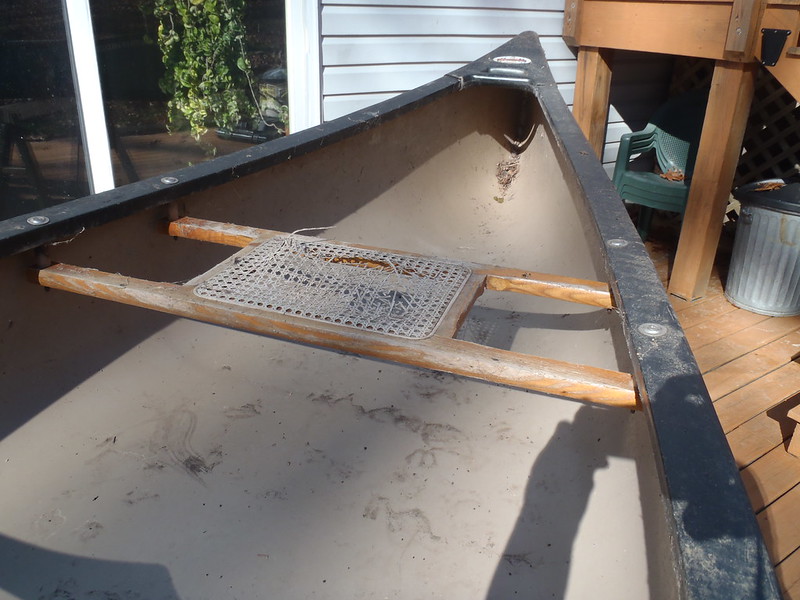
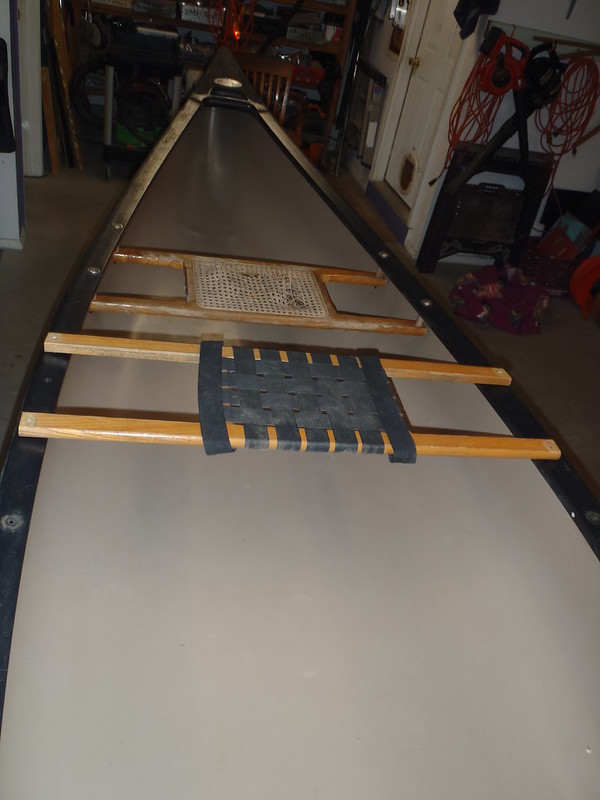
I had some ideas for refurbishing the Pathfinder, starting with turning it into a dedicated, center seat solo and ending with some custom outfitting as a potential fishing canoe.

Actually, with the Pathfinder in the shop, starting with some improvements to the existing kevlar felt skid plates.

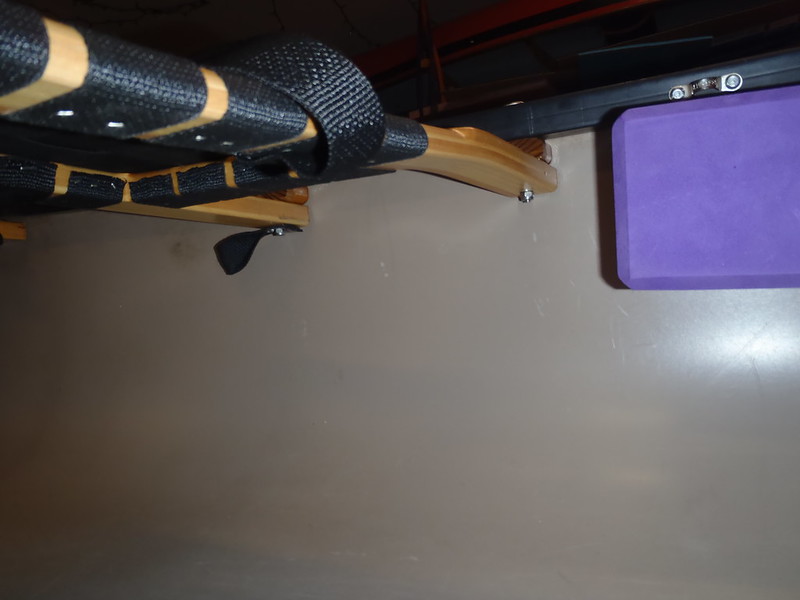
The skid plates on the Pathfinder truly were hideous. While the actual kevlar felt is well attached, no doubt using a (now $300) Old Town kit with good urethane resin, the felt was not perimeter taped, so the resin outline is sloppy, in some places extending an inch beyond the edge of the fabric.

PB270009 by Mike McCrea, on Flickr

PB270010 by Mike McCrea, on Flickr

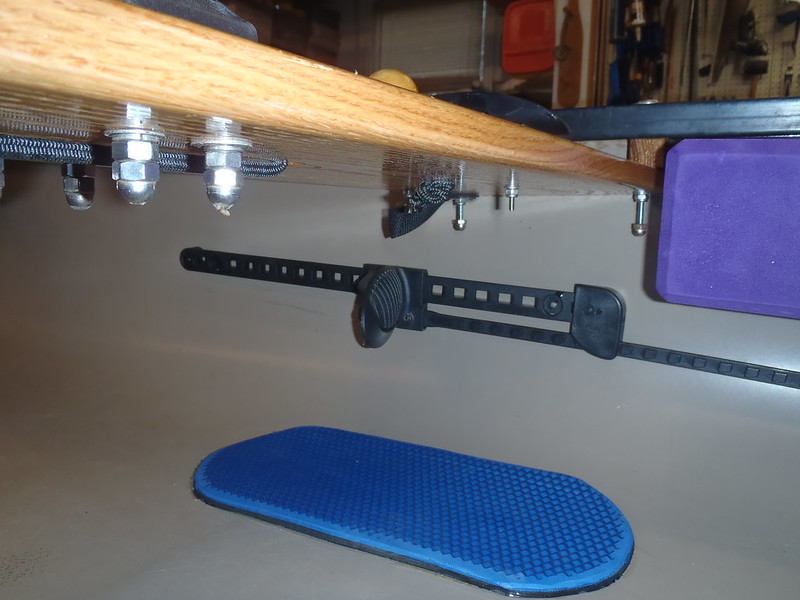
Additionally, the wide ends of the skid plate resin were long, uneven and in places thin of resin, lifting or fingernail lift-able, and needed to be removed before any prettification efforts commenced.

PB290004 by Mike McCrea, on Flickr

I was able to remove the already lifted or lift-able edges by cutting them nearer the fabric with a razor blade, but removing some of the large drips and gobs of urethane resin along the sides required a hammer, chisel, and razor blade, and I gave up on that effort after eliminating the worst of them (and, oopsie, chiseling small divots of vinyl off the RX)

PB290008 by Mike McCrea, on Flickr

No way in heck and I going to try to chisel, grind, scrape or sand that entire skid plate off. I have heard, perhaps apocryphally, of people doing so, including claims that “It just popped right off”, leading me to believe that it was not very well attached to begin with. What I have never seen are how-to photos or any honest account of how challenging it was, or what a mess it left behind to be filled and faired smooth (before Dynel application, one would hope).

I am not going that route with the Pathfinder; that ancient kevlar felt is still very well attached. But I can at least make them less fugly. The usual steps:

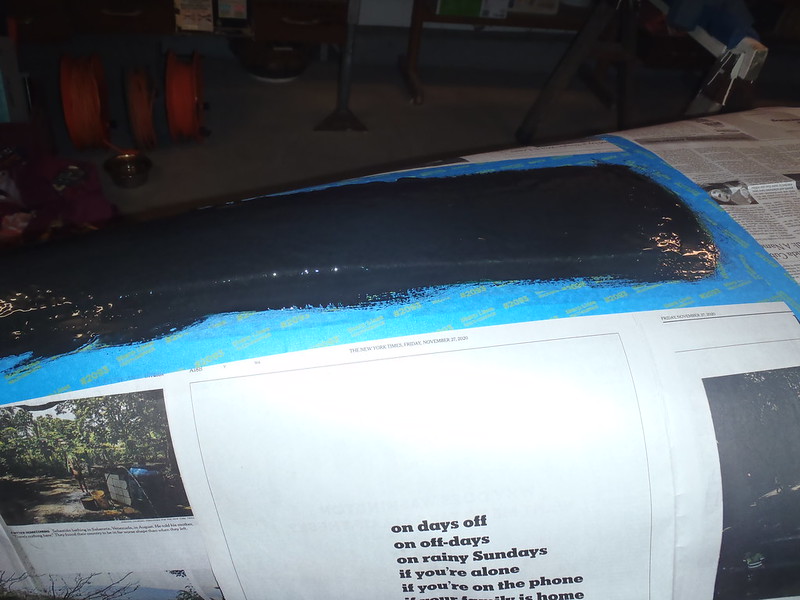
Tape an edge line. Further away from the felt than I would like because of the wobbly edged urethane resin, but c’est la vie.

PB290009 by Mike McCrea, on Flickr

Paper mask to catch the drips, and tape again.

PB290013 by Mike McCrea, on Flickr

One note about taping over tape to secure the newspaper, which I do so that epoxy or paint drips don’t creep behind the paper mask; tape does not adhere as well to tape as it does to the hull, areas always lift a bit, and it pays to press it back down a final time immediately before brushing or rolling. And have some acetone ready when you pull the tape/mask, just in case.

The usual skid plate top coat mix, 50/50 West 105/206 and G/flex, graphite powder and black pigment, a thickened concoction which helped smooth out the worn-smoother-but still-pebbly-after-20-years kevlar felt surface.

One beneficial thing about that slurry mix, beyond making the skid plates slippery, at max 10% by volume (or less) the graphite powder nicely thickens the epoxy mix, and it better stays where put without dripping wastefully down onto the paper.

PB300017 by Mike McCrea, on Flickr

While painting that epoxy mix on I laid a thicker bead around the perimeter of the kevlar felt, to soften the kevlar felt transition edge and (hopefully) lessen any gurgle.

FWIW, volumetrically, one each pump of 105/206 resin/harder and an equal amount of G/flex. That was more than enough, but I had wisely set aside something brush on the excess. Less than 1lb of weight added, well worth it for better adhered, sharper lined, blacker, slipperier, more aesthetically pleasing skid plates.

I gave that four hours to begin to set up and pulled the tape and paper. The epoxy mix surface, as usual, looked pitch black, but a day later, after the epoxy cured, it looked off-color, greenish to my color blind eye, although my son told me it was actually more of a dark grey. I had not seen that action before; maybe I used too little graphite powder or black pigment in the epoxy mix.

PB300025 by Mike McCrea, on Flickr

With straight epoxy or even a mix of G/flex there is always a little epoxy bleed crept under the tape, but thickened a bit with Graphite powder the edge lines are fairly uncrept straight. I gave that epoxy mix a week to full cure, sanded the surface, retaped and top coated with black EZ-Poxy paint.

PC090003 by Mike McCrea, on Flickr

Much more attractive, and more slippery functional.

Note that the 100+ sap drips are gone. In order to remove the jokes-on-me bandaids I had stuck over the sap drips for Glenn’s amusement I had to spray the bandaids with 91% alcohol and scrape the adhesive residue off with a straight razor. In doing so I realized that the alcohol also softened the sap drips, and that I could remove them with the razor as well, although they required multiple mistings with a spray bottle of alcohol.

PB280011 by Mike McCrea, on Flickr

In a weekly share-ideas phone conversation with a boat tinkerer friend he suggested soaking a cotton ball with alcohol and letting it rest on a sap drip for a minute, move it to the next drip and scrape away at the alcohol saturated one. Some of the thicker sap drips required multiple cotton ball soakings, moving the cotton ball back and forth between sap drip A and B. Maybe more effort than it was really worth, but the hull bottom is now clean.

FWIW, I ran out of 91% alcohol and tried 70% alcohol. Still worked, but not as well. What the heck, I tried white vinegar; that did bupkis. I expect acetone of Goof-off would be even speedier, but I didn’t want to leave an acetone soaked cotton ball resting on the vinyl skin. Guess I need to buy a bottle of Everclear.

Whadda ya think Glenn, is the bottom now less fugly? Almost acceptable?

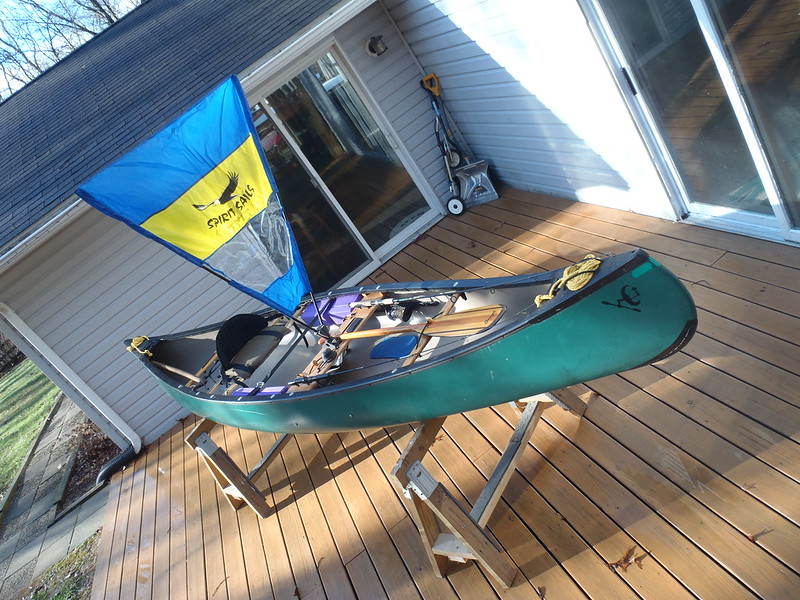
I can now turn the Pathfinder right side up and commence with some soloization and outfitting cogitation, again trying to use what I have available in the shop.
 
Back upright the first order of business was to remove the tandem seats and locate the position for a center seat. My original plan was to install the center seat I removed from the soloized Explorer when I swapped in a custom wide-butt Conk seat.

Resting that ex-Explorer center seat across the gunwales, meh, it’ll fit, but the 13” wide frame area looked like a postage stamp on that wide hull, and my arse hasn’t been 13” wide since I was a toddler.

PC110002 by Mike McCrea, on Flickr

Maybe I’m just spoiled by wide webbed seats. I had planned to reserve the remaining Conk seat for my mythical unicorn rebuild of a lightweight composite canoe, but, ya know, I can just set it atop the gunwales for a look see.

PC110004 by Mike McCrea, on Flickr

Well, there’s no turning back now, the Conk seat is better built, better designed and lighter weight. That is 1lb+ off the weight versus using the old Explorer seat, and removing two OT seats will lose a bit more weight.

The Pathfinder continues to lose minor weight. Despite hose blasting every nook and cranny multiple times when I first scrubbed it clean every time I turn it over more dirt and crud falls out from below the deck plates.

PC110003 by Mike McCrea, on Flickr

Some of the permanent outfitting ideas are going to add more weight than usual, but hopefully provide enhanced function and durability.

I marked the seat location and cut it to fit, 10 ½” back of center, I know my sweet spot is 7 – 8 inches back of center on narrower hulls, more like 10 or 11 inches on wider boats.

The existing drops, OT’s flimsy drilled dowels, were very short and, not unexpectedly, bare of varnish and completely trashed.

PC120006 by Mike McCrea, on Flickr

From all outward/installed appearance those drops looked OK, the decay was all on the unseen hull-edge side. Something to consider inspecting if you have an Old Town with that style dowel drops; wouldn’t even need to take the seat out to check, just loosen the machine screws and spin the dowel drops around for a look at the backside.

I opted for slightly shorter drops than the OEM tandem drops, just ½” deep, the Pathfinder will always be a wide, uber-stable flat bottom canoe and with the Conk contour I’d like a relatively high seat. For drops I turned to some shop stock, ½” x 1 ½” ash “rails”. Years ago I had ripped, routed, sanded and varnished a half dozen long lengths of that as seat making stock, before I realized I sucked at making DIY seats.

I’ve used that finished ash for lots of other things from board battens to carry handles to extra skinny thwarts. Plenty left to make four short seat drops.

PC120008 by Mike McCrea, on Flickr

I liked the walnut stain on the pieces of cut-off Conk rails in the FreeFIRE, tying in with the butternut on the Conk seat, so beveled the exposed ends of those little drops and stained them the same way.

I will, as usual, dry fit everything, then take it all back out, multiple coat varnish the butt ends and holes (I type “varnish”, but I really mean Spar Urethane) and then reinstall it all.

And install it all using the proper sized machine screws. Old Town’s OEM machine screws were unnecessarily over-long on both seats and the yoke. No reason for that. Also, there was not a single washer on the bottom of anything, just machine screws and bare Nylocks. I guess OT ran out of washers and right length machine screws that day.

No yoke in the soloized tandem, it will eventually get a strap yoke once everything is re-installed, after I hang it for final weight and find the balance point. But I do want thwarts, plural. We have extra thwarts in all of our soloized canoes, even added to some design dedicated solos, to stiffen the sheerline, especially behind the seat on soloized center seat tandems.

I recall someone complaining about a canoe feeling “too stiff”. I don’t get it, it’s not an inflatable, or a 50’s Triumph TR3 that would bend and flex with every bump in the road. I like a stiff canoe, hull flexing is hard on the joints; the seat frame and drops and machine screws. And for other reasons.

One son pinned our extra-thwart Freedom Solo on a trip with friends. When he came home he sheepishly said “I scratched the canoe”. I went out, looked at the canoe on his car and said “You didn’t scratch it, you pinned it. What’s the story?”

He pinned it amidships in a small rapid. Kudos to him and his friends for getting it free and the “scratches” were minor RX wrinkles on both sides. I am convinced that, had the Freedom Solo lacked that extra thwart (two actually, one regular thwart, one utility thwart) it would have folded like a cheap suit. And probably have been dang near impossible to drag free.

So, a couple thwarts. I have a few new, never installed, already sanded and varnished ready to go 3’ long ash thwarts, but those seem a waste in the shorter fore and aft locations selected. And I have a couple of old, shorter ash thwarts removed from past rehabs. Those will do.

PC130011 by Mike McCrea, on Flickr

With a naked hull, while installing the new Conk seat and used thwarts, I drew the sheerline in a touch at each station with some long bar clamps. With no cross members attached the once slab-sided RX hull had some flexibility, even with aluminum insert vinyl gunwales.

PC130012 by Mike McCrea, on Flickr

The Pathfinder, once 36” max width is now closer to 34” at midships sheerline, drawn in one inch on each side, inducing just a hint of tumblehome. From past experience, contrary to apocryphal “wisdom”, that small width reduction over 15 feet of hull has zero effect on the bottom shape or rocker; no hog backing, and those 3’ long, now reinforced kevlar felt skid plates sure as heck weren’t bending and changing the rocker.

Two inches narrower at center, tapering less to bow and stern across 178 inches of hull length, is a really minor variance.

In boat work and outfitting it pays to know when to call it quits for the day and turn to more mindless tasks. I need to cut and design the outfitting layout for a utility thwart, oversized to accommodate some possible fishing gear accessories. The addition of the fishing accessories will require some extra planning, so that everything on the utility thwart works as planned, and I’ve never pondered a fishing thwart before.

Once that utility thwart design has been cogitated, cut, routed, drilled with multiple holes and dry fit installed I can take everything back out, do some finish sanding and lay multiple coats spar urethane. Then reinstall it all with the correct length machine screws. And washers.
 
Whadda ya think Glenn, is the bottom now less fugly? Almost acceptable?

Whatever I say after this sentence, Mike, I am sincerely impressed by how much better the bottom now looks -- very acceptable -- and also by the time consuming work you obviously put into the tedious prettification effort.

But every canoeing sap in North America knows that Mike McCrea can handle his alcohol better than his razor, and that he's the antithesis of a chiseler. So I'm not surprised.

That exquisite Conk seat sits athwart the jilted FreeLunch like a proverbial diamond in the rough. It begs to fulfill its destiny: to be knelt upon. I request permission to do so in the Sparkleberry Swamp as soon as I can scrape up the map of it I owe you.

Deagh obair!

dang, that’s a lot of puns and word play in a few sentences. I am actually wicked good with a straight razor, as I will demonstrate later in this rebuild, just not on facial hair.

The FreeLunch (I have another name in mind) would be a wonderful swamper, 14’ 10”, uber stable when a hidden cypress knee suddenly appears under one side of the hull and the flat bottom will float across a dewy lawn. The Conk seat may never be knelt upon ‘til you or someone else paddles the canoe.

Tapadh leat.

Again with the use-what-I-have, the only board I had on hand in the length I need and width I wanted was red oak, and so heavy as heck. Was it worth an hour’s drive to the lumberyard for something lighter? No.

I wanted the utility thwart wider than my now-usual 5 ½”, this will not only be a utility sail thwart, but also a customized fishing thwart. The Spirit Sail base mount is nothing more than a rebadged Scotty Rod base.

I did in fact order one new item for the fishing canoe outfitting, a Scotty rod holder that fits in that mount. Call it kismet, but when I looked on-line the Baitcaster/Spinning rod holder was on sale for $11. Meant to be I guess.

https://www.amazon.com/Scotty-279-BK-Baitcaster-Spinning-without/dp/B004O0DR48/ref=sr_1_6?crid=1H56Y6UPUFNAW&dchild=1&keywords=sc otty+rod+holder+mount&qid=1607957710&sprefix=scott y+rod%2Caps%2C574&sr=8-6

Beyond the sail/rod base mount and rod holder, a couple of items from the canoe miscellanea box will further outfit that fishing utility thwart, a pair of “paddle holder clips”. Bought for the Sea Wimp during the original rebuild, installed and taken off the minute I got home; they were too obtrusive tall on the side of the cockpit and didn’t actually hold the paddle in place worth a dang in that orientation. These things, just no as side hull paddle holders.

https://www.dickssportinggoods.com/p/field-stream-kayak-paddle-holder-clip-18fnsufskykpddlhlpas/18fnsufskykpddlhlpas?sku=18809675&camp=CSE:DSG_92700048853078357_lia_pla-826931730375&segment=&gclid=CjwKCAiAt9z-BRBCEiwA_bWv-KMRwpVpvJCq_nwnwNkkebruGnNrfZo0r7Lg3rSwrIkPKBCEZKT 5AhoC8eIQAvD_BwE&gclsrc=aw.ds

But they’ll work just fine to hold a couple rod handles resting securely horizontal on the utility thwart.

And all the usual suspects that I have come to appreciate on that handy thwart; couple of deck hooks for a compass, couple of pad eyes to attach a map case or etc, holes marked over/under/over run of bungee cord.

PC130016 by Mike McCrea, on Flickr

There is a lot of empty space, as planned, on that utility sail/fishing thwart. I know I want a short, sacrificial wedge of /_\ minicel as a place to stick hooks and lures. That thwart is 32” wide, and I thought about embedding a 30” piece of yardstick for measuring the catch, but had another idea; stamped numbers every 2 inches, 2, 4, 6, 8. . . . .26, 28, 30.

I stamped the numbers, swiped dabbed some walnut stain in them and RO sanded off the excess, so the numbers stand out dark. Despite my best test efforts the 6 ended up sideways; I’ll know what I meant.

The SOT fishermen I see all have electronica galore, fish finders and depth finders and who knows what, side-scan sonar maybe. I’m not into electronics on the water, but there is plenty of room for that crap on the uber-wide utility thwart should that ever change.

Now everything can come out and off, except the bar clamps holding the drawn in sheerline, and I can drill the rest of the accessory holes (yeesh, 22 holes total) in the utility thwart, strip sand the old grungy varnish from the used thwarts and spend a few days laying fresh coats of spar urethane work all the brightwork and holes, including pipe cleanered inside the drilled holes; total of 22 drilled holes in the new brightwork.

The pieces and the parts
Were all hung with care
In hopes that Saint Urethane
Soon would be there

PC140017 by Mike McCrea, on Flickr

The short drops for the seat and utility thwart are all numbered, corresponding to numbers on the machine screw holes in the brightwork. Stuff goes back in much easier after it has been dry fitted, but even easier if you put the right piece in the right place in the right orientation.

Not that I’ve ever . . . . . .
 
Whoopsie, I got the first coat of urethane on the brightwork, including pipe cleanered inside the holes, and realized that I had neglected to drill and chamfer holes in the two thwarts for bungee cord. Rectifying that oversight, with a bunch of wait time for light sanding and recoating the bright work, I could turn to some other simple outfitting tasks.

While I have the drill and bungee out I can add proper deck plate painter line bungee keepers, and drill out the teensy drain holes on the tips, once drilled so small (1/8”) that a single speck of leaf litter or spider egg sack would clog them completely. There is a reason crud continues to fall out from below the deck plates, water, mud and debris had never drained out properly.

PC150022 by Mike McCrea, on Flickr

I didn’t really need the Old Town deck badge; the Old Town lettering on the hull will be coming off as well. Soloized, utility thwarted, etc it really won’t be a Pathfinder anymore, and I figure I have renaming rights.

The usual bungee on deck plate pattern, a contiguous (sideways) Z of bungee, two topside runs / \ with a diagonal run underneath.

Much better; snatch the painter line from between the keepers, or just pull the bitter end, and the painter can’t end up trapped beneath a bungee. Screw single line bungee keepers, where I have a 50/50 chance of pulling in out the correct side when in a hurry.

PC150023 by Mike McCrea, on Flickr

The contiguous Z of bungee gives me the diagonal under the deck plate, should I want to tuck the painter lines away below decks, think densely woody swamp trip. And, when the (good quality ¼” woven sheath stuff) eventually does stretch out a bit I can simply pull it tighter and re-knot one end.

PC150025 by Mike McCrea, on Flickr

Guess I need to run a sponge under those begrimed deck plates next time I was the Pathfinder. It has waited 25 years, it can wait ‘til Spring. dang useless 1/8” “drain” holes.

Now that’s a drain hole, ½” dia, gonna take a mighty big spider sack to plug that hole closed.

PC160027 by Mike McCrea, on Flickr
 
Four coats of spar urethane, five on the butt ends, seemed enough, time to “dress” all of the brightwork before re-installation. Both thwarts have chamfered holes for a run of bungee. The bow thwart gets a drilled ball spacer, to make it easier to slide a paddle blade between the thwart and bungee.

Double overhand stopper knot at one end, cinched tight, bungee up through the hole, through the ball spacer, down the hole and knotted at the other end.

A simple trick of getting the desired amount of tension on the bungee before knotting the far end; pull the bungee to a bit more than the desired tension and clamp the underside of the bungee. I use a pair of hemostats but vice grips will work. Stopper knot that end and, before cinching the knot tight, remove the hemostats/vice grips, check the tension and adjust the knot if necessary. Tighten the stopper knot, cut the bungee, flame the end and done.

PC200029 by Mike McCrea, on Flickr

I used machine screws with enough length to add webbing loop tie downs, plural, two at each end, angled fore and aft, before the washers, nylocks and cap nuts went on. Nice to have new hardware in an old boat.

PC200032 by Mike McCrea, on Flickr

Same for the stern thwart, except I have no more small balls that will rest below the sheerline. Time soon for a run to the craft store for hardwood balls, and another drilling & varnish production run. What I did have was a box of drilled dowel Old Town seat drops, which I had varnished when I did the last batch of Craft Store balls. One of those will do for the stern thwart.

About the balls and drilled dowels on bungee, yes, nice to push things under without digging beneath the bungee cord, but also a lot easier to lift the bungee with gloved fingers when winter paddling.

Same two webbing loops per side and both standard thwarts are in.

PC200034 by Mike McCrea, on Flickr

Dressing the oversized utility thwart was more involved. First, and I know I’m not going to like the result, I weighed the naked thwart.

4lbs, 5oz. Sometimes this “use what ya got” strategy is plumb stupid; a run to the lumberyard for a piece of poplar, or butternut if I could find it, would have saved a couple of pounds right there. But the beastly heavy oak is all cut, drilled and varnished, with the accessory pieces strategically positioned; I’ll dress it and install it. And perhaps someday replace it.

I might as well weigh that utility thwart all dressed up. 5lbs, 5oz; all of those accessory pieces, including the machine screws, washers and cap nuts, weigh only 1lb. I will find a lighter piece of wood and knock half the weight off that oversized thwart.

An additional reason to replace that thwart; I needed 3 ½” machine screws, had 4”, had 3” and sequentially shorter, no 3 ½”. I needed to make a run anyway to my favorite hardware store, purveyor of fine stainless steel in every size.

Every size except 3 ½”.

(Sadly I know where there is a truckload of butternut, untouched in a shop for the last 25 years. Shortly before my father passed away my patternmaker NY uncle ferried a truckload of butternut to Baltimore, and I hauled it from there to Georgia. My dad was appreciative, albeit slightly pissed. Uncle Dave had an 8’ truck bed and I had a 6’ truck bed; to make it fit I cut 2’ off each piece. It the 6’ pieces were stacked flush with the bedrails, with the 2’ long pieces piled in the Extra-cab back seat. But that butternut stash is 750 miles away; if I’m not driving to a local lumberyard I’m sure as heck not driving to Jonesboro. Maybe someday)

With the drops and thwart holes correspondingly numbered 1/1, 2/2, 3/3, 4/4 for location and orientation everything went back in easy peezy. Dressed and installed it is quite the heavily accessorized thwart.

PC200035 by Mike McCrea, on Flickr

That the Sprit Sail base is nothing more than a re-badged Scotty rod holder base mount finally pays off; sail or fish, or maybe both and troll.

PC200038 by Mike McCrea, on Flickr

Nearly the last machine screw installation, the Conk seat. Awesome as that seat is I still want my usual pad keeper straps, so one final bit of dressage, a couple of loose webbing straps and SS staples.

The seat also needed 3 ½” machine screws. Dammit. At least I had a goodly stash of 4” hardware, and next time I find 3 ½” stainless machine screws I’ll buy more than those 8 that I need for the Pathfinder.

The seat went back in as easy as the utility thwart, with all the drops and holes number matched. Webbing loops on the rear machine screws only. 12 webbing loop tie downs (so far), all on the shank ends of machine screws; there is no stouter tie down point than the shank ends of machine screws, and I drilled no extra holes for those 12 tie down points.

With all of the cross members in place I can turn to some comfort outfitting next; back band, knee bumpers, heel pads, foot brace. And a strap yoke. Before any of that goes in I need to find the approximate balance point, in the usual method, hung from a single cam strap off the Taylor scale, which will simultaneously reveal a near final weight.

58 lbs when I got it, with OEM tandem outfitting and kevlar felt skid plates, now 61lbs. I can live with that, but I’d love to knock a couple pounds off that oak utility thwart.
 
While I turn to some comfort and efficiency outfitting I can prepare a strap yoke for installation. I have a roll of 2” Strapworks heavyweight poly webbing, and, per suggestions from Glenn and Willie, had ordered a 2” stainless adjustable webbing slider.

https://www.amazon.com/VGEBY1-Stainless-Adjustable-Tri-Glides-Replacement/dp/B07NY3ZS68/ref=sr_1_2?dchild=1&keywords=stainless+adjustable+ webbing+slider.&qid=1608666767&sr=8-2

If I like that adjustable webbing slider as a strap yoke connection on the Pathfinder I will order two more and replace the problematic double D-rings on the soloized Explorer and Penobscot.

You might think, that’s it, what prep work? Mohawk’s manufactured webbing yoke incorporates a piece of aluminum stock, center drilled with a slight vee bend, visible here, peeking out between a wrap of webbing.

https://www.mohawkcanoes.com/collections/seats-yokes-and-thwarts/products/webbing-yoke

$35? I think not. That aluminum piece spreads the load, and prevents the machine screw hole in the webbing from wearing wide. Easy enough to fabricate.

PC220001 by Mike McCrea, on Flickr

If memory serves the webbing is somehow glued to the aluminum, and I will do the same, painting a coat of G/flex on the webbing, folding it around the aluminum and using binder clips (and wax paper) to hold it tight until the G/flex cures.

PC220003 by Mike McCrea, on Flickr

Once the adhesive had cured melting the machine screw holes through the webbing will be the usual 20-penny nail heated on a propane touch. I did not pre-cut the long cross-hull piece of webbing to length; I’ll install the long end still on the roll, run it across to the webbing slider, back a ways and then cut it.

G/flex did the trick and the usual 20-penny nail heated with a torch melted perfect 3/16” holes in the webbing, through the existing hole in the aluminum stock. One more nail hole to melt, through a length of double sided Velcro, to hold the rolled webbing in place under the inwale when the strap yoke is not stretched across the hull.

PC230005 by Mike McCrea, on Flickr

I can’t put the strap yoke in place quite yet. I’d like a foot brace to pair with the contour Conk seat and eventual back band, don’t have a foot brace bar left in shop stock. What I do have is something that came out of Joel’s canoe trailer storage box years ago, a pair of new-in-bag, never used Slide-Lock foot braces.

https://www.amazon.com/Harmony-Gear-8023040-Slidelock-Footbrace/dp/B003N85AG0

I’ve used those in Wilderness rec kayaks and like the ease of on-the-fly adjustability with the slide lock lever, but I have foot brace bars in all of our open canoes, not side mounted pedals. Although, some of our decked canoe conversions are 30+ inches wide and a pedal works just fine. Time for a test sit in the Pathfinder.

Not bad at all. The pedal are stick out 4 ½” from the sides of the hull, and my feet felt comfortable braced in that position. It will at least be better than sticking my head between Glenn’s legs to adjust his foot braces for him while kneeling in the Sparkleberry muck. Time to drill four holes in the sides of the hull.

Uh, time to read those Slide-Lock installation instructions again. And again, exactly which of the five holes on the backside of the slider rail to use is not clear. The diagram sorta points to the appropriate holes, but is shown from the front view, with the arrow disappearing mysteriously and none-too specifically behind the depiction of the foot brace rail.

I eventually figured out that some (not all) the various holes are for replacing existing foot pedals with Slide Locks, different spacings to accommodate different existing holes. Fer christ’s sake, why not just say so? And why not provide a diagram of the backside of the rail?

As easy as installing a Wenonah adjustable foot brace, just bolts instead of pop rivets. Eh, the unopened Slide Lock kit I had contained no small rubber O-rings as specified; I may not have needed them on a foam core RX hull, but I had some spares in the box of foot brace hardware and belt & suspenders used them.

Another quickee test sit and those Slide Lock foot braces will do OK, with lots of easy pedal distance adjustability for shorter or taller paddlers. The jury is still out on actual on-water paddling use; if I find them unsuitable I take them out and install my preferred solution, a Wenonah adjustable foot brace bar.

PC230008 by Mike McCrea, on Flickr

With nearly the last of the permanent outfitting installed – I still want knee bumpers, heel pads and vinyl pad D-rings fore and aft, but that stuff is largely a balance point wash – I strap hung the Pathfinder once again to find the exact balance point.

The balance point did move a bit with the addition of the foot braces forward of center. In the most serendipitous of ways; it is now centered exactly on the old yoke holes in the gunwales.

Time to put the strap yoke in. The slight vee bend in the aluminum stock goes in point down \/, so when the washers (two, one small, one larger fender washer) and nut are tightened it flattens out a bit, “clamping” the webbing against the underside of the inwale.

PC230014 by Mike McCrea, on Flickr

(There is a reason the adjustable webbing slider dangles that far down, but I’ll get to that later).

The long webbing part goes in the same way, aluminum point down \/, but before the webbing goes on the length of double side Velcro with the 20-penny nail hole slides on first, then the webbing with aluminum stiffener, washers, nut and cap nut.

PC230012 by Mike McCrea, on Flickr

I did not have a 2” tri-glide, which I like having installed on the long side of the webbing strap, so the bitter end of webbing can be secured through the glide and isn’t crazy flapping at highway speeds. I have plenty of time to pick one up.

PC230015 by Mike McCrea, on Flickr

About that, it is too awkward to unfasten and coil stow the webbing yoke once the canoe goes on the roof racks, only to have to refasten it at the launch when it’s time to take the canoe off. I’m not sure I’d trust the Velcro to hold the rolled portion in place at 70mph, and sure don’t want the jinglejangle whappitywhap of the loose slide buckle (side release buckle, paired D-rings, etc) beating against the side of the hull as I motor down the highway.

The only issue I have encountered with a strap yoke across the hull in transport is the bitter end of the webbing, unsecured with a tri-glide, flapping and fraying with hours of highway speed wind.

Finally, strap yoke wise, as much as it pains me to admit when Willie is right, that 2” SS slide buckle is the bomb; pull the webbing tight, hop around in the yard under strap yoke with no slippage, pull the knurled pin back no-strain two fingered and the buckle releases its grip.

Thanks Willie; I will be buying a couple more to replace the problematic-to-free double D-rings on the soloized Explorer and Penobscot.
 
With the foot brace and strap yoke in place I could turn to some comfort foam (EVA yoga block knee bumpers and exercise flooring heel pads) and contact cement work.

To better ascertain the leg angles, knee and foot positions I pop riveted four pad eyes in place and clipped on the back band. I had used my last two nylon pad eyes on the utility/fishing thwart (ordered more, love those little doohickies), but I have a dozen stainless pad eyes, and they’ll do. Use what ya got.

Easy peezy, drill four pairs of holes, seat eight pop rivets. Not a surprise to me at this point, but every time the rivet tool snapped more dirt fell out from between the inwale and hull. The Pathfinder is the never ending queen of dirt.

(I’d love to see the Prijon kayak that was buried cockpit down, below the piled atop Pathfinder and Camper; it was dirt embedded sunk to the seam line and would probably require shovel excavation to free from its earthly bonds)

I knew going in that, given the location of the seat and strap yoke, the knee bumper placement was going to be problematic, my pressed-knee location is very close to the strap yoke. I have dealt with this before on the soloized Malecite, and there is really only one workable solution, split knee bumpers both fore and aft of the strap yoke.

It looks funky with the strap yoke gap, but even if my knee bracing falls exactly in the strap void it works comfortably. I had picked up a couple Yoga blocks as shop stock a few months ago at WallyWorld; they were blue, and smelled of grape flavor, and had some flower design imprinted on two sides.

PC230017 by Mike McCrea, on Flickr

That’s a bit frou-frou, even for me. Turns out that design is barely a micron thick, and a quick pass over the 4” table top belt sander removed the flowery frou-frou.

Luckily the local WallyWorld still had a couple matching blue flowery yoga blocks, and I pick up two more. Contact cemented fore and aft of the strap yoke those knee bumpers should accommodate any length of leg, and, ya know, finding the silver lining, provide a lot of additional floatation.

For grippy heel pads I used exercise flooring, not the most cushiony stuff, but a great place to anchor water shoe or boot heels below the foot pedals, less slippery slidey than bare vinyl, and the embossed side of exercise flooring is much tougher than minicel when attacked by boot heels.

The last time I bought exercise flooring the only thing available was two-tone, grey on one side, bright arsed blue on the other. I can work with the blue, but that exercise flooring is tread embossed on both sides.

PC230019 by Mike McCrea, on Flickr

PC230020 by Mike McCrea, on Flickr

All of the previous exercise flooring (WallyWorld, Harbor Freight, etc) had been grey, and embossed one side only. That two-sided tread pattern didn’t bode well for contact cement adhesion and preventing grit infiltration. Blue side up, to go with the blue on the knee bumpers will work (kinda wish I had used blue webbing pad keeper straps now), but the diamond pattern on the grey side had go for better, more flush contact cement adhesion.

A couple pieces cut to width and length, 6” wide x 14” long; the pedals slide adjust a total of 14”, and with help from a test sitter I calculated that the heel position is approximately 4 – 5 inches aft of toes (ball of foot actually) on the pedal location, maybe a bit less for shorter footed folk.

I rounded the ends of those heel pads so there were no prone-to-peel-up right angles, ran the diamond pattern on the grey side across the 4” tabletop sander (several times, that embossment side is seriously tough stuff) and beveled down the edges all around, again to lessen the right angle catch-and-peel action when shuffling boot heels into place.

PC240021 by Mike McCrea, on Flickr


While the band saw was out I cut 2” off the bottom of the yoga blocks, 6” deep knee bumpers were overkill, and came awfully close to the slide adjustment lever on the foot braces. Who knows, maybe someday I’ll have a use for 2x4x6 blocks of EVA foam. (That became a prescient statement)


PC240023 by Mike McCrea, on Flickr


Time for the easy part, some contact cement work, heat gun, clamps and sandbag weights.
 
Last edited:
Your thoughts and pictures on the DIY webbing yoke in particular are super helpful for future reference.
 
Your thoughts and pictures on the DIY webbing yoke in particular are super helpful for future reference.

Dave, I had hopes there would be a useful nugget or two hidden in there somewhere.

On past DIY strap yokes I’ve just flattened the edges of large fender washers on two sides with a grinder and wrapped the webbing around that. This time I thought I’d more fully recreate Mohawk’s aluminum “bridge” design. I’ll know how the strap yoke ends with fender washers fared when I take them out of the Explorer and Pathfinder to replace the double D-rings with a slider bar. As is often the case with shop fabrication while I was making the bent aluminum vee’s I made an extra set.

The result of the contact cement work on the knee bumpers was less than exemplary, and provides a cautionary tale. I don’t want to even talk about it, but in the interest of full disclosure will confess, with a preliminary excuse/statement – Do not do boat work if sick or feeling poorly. I had wrecked my back moving a bunch of 60lb sandbags and was laid for up a day.

Which should have been two days, but I was jonsing to get that comfort foam contact cemented in place and left to cure for a day while I returned to laying around doing nothing.

Mindless work that, even if feeling less than 100%, and I am the Master of Contact Cement work. Aching and groaning as I bent over the hull I installed the knee bumpers and heel pads, heat gunned, knee bumpers clamped, heel pads sand bag weighted and called it an early day.

PC240027 by Mike McCrea, on Flickr

Taking the clamps and boards off the next morning I found the pads - three timed to nearly dry coats of contact cement, heat gun, clamps or weights as usual - very well adhered.

And the knee bumpers adhered in the wrong orientation; I had contact cemented the bottom side, where I had band sawn off a 2” slab, to the hull, not the intended inwale side. The knee bumpers were short of my desired knee spread, and one was a bit cattywampus off kilter.

All because I did not mark the foam for which sides got the contact cement, and did an achy back, hurts-to-bend-over job of setting them instant-stuck in place. The colloquial word for fornication was said when I discovered those errors.

I was not scraping those well adhered knee bumpers off, buying four new yoga blocks and starting over, I just contact cemented the 2” slabs over those knee bumpers and called it good enough. Not my best work, but it’ll have to do, all because I didn’t wait another day, or mark the surface-to-be-contact cemented. Some lessons I need to learn repeatedly.

PC260029 by Mike McCrea, on Flickr

The inside edges of the knee bumpers are now 23 apart, which is about my usual leg spread for knee bracing comfort span, and just right for that high mounted seat.

However, in another miscalculation oopsie, a test sit with the back band, foot braces and knee bumpers in place showed that I did not need the split knee bumpers; my legs are making contact only on the front foam blocks, albeit only an inch forward of the strap yoke gap. BTW, “legs”, not “knees”; with the high mounted seat in a 12 ½” deep at center hull what makes contact with the “knee” bumpers is my upper calf muscle (Fibularis longus?).

Still more comfortable that a hard vinyl gunwale edge, and I may yet Dragonskin out a bit of calf contour. In any case spreading my legs 31 ½” wide to contact those inwales would not be comfortable; the breeze would be wafting straight up my kilt.

I’m still not taking the aft knee bumpers out; they might be better positioned for a munchkin sized paddler (I’m thinking Joel, who is excited to try this rebuild as an angler canoe, and stand-and-pole boat on the River of Grass shallows). Or perhaps serve as a handy side-shelf to rest a fish while removing the hook, provided you don’t mind fish odor knees.

While I was back at the contact cement work I glued a 1” x 5” /_\ wedge of minicel on the utility fishing thwart, to serve as a sacrificial place to embed hooks and lures. I detest loose hooks and lures in the canoe and had experimented with that concept a few years ago, found that it worked well, and had intentionally left space on the (already getting crowded) utility fishing thwart for that minicel hook holder. At least I installed that foam piece correctly.

PC260035 by Mike McCrea, on Flickr

While I had the heat gun out I removed some vinyl lettering. The “PATH” part of the Pathfinder logo and all of the midships Old Town script. The XTC on the HIN still proves that it is an Old Town, and it is a Pathfinder no more.

PC260034 by Mike McCrea, on Flickr

I had some leftover mailbox letters to amend the canoe’s new name, actually all of the letters, I used only the house numbers on our mailbox. Not Glenn’s suggestion of the FreeLunch, and this may perhaps prove to be a skunked-again boastful jinx, but I couldn’t resist.

PC260038 by Mike McCrea, on Flickr
 
To make this topic more retrievable for future readers searching for information about a fishing canoe, I suggest renaming the topic to use more relevant key words -- e.g., converting and outfitting 15' solo canoe for fishing.
 
To make this topic more retrievable for future readers searching for information about a fishing canoe, I suggest renaming the topic to use more relevant key words -- e.g., converting and outfitting 15' solo canoe for fishing.

Glenn, I would not want to mislead anyone into thinking that I know what I am doing in outfitting a canoe for fishing purposes. I do not, I just thought it would be fun to try, using mostly miscellaneous parts and pieces I had available.

My past from-boat fishing mostly involved a motorized johnboat on the upper Conowingo Pool and a larger motorboat on Lake Champlain in my youth. And in adulthood bankside fishing for trout on alpine lakes out west.

If, in the end, I pursue my current intentions, the local fishing use will end up being the most expensive part of the project. I’ll need a Maryland non-tidal fishing license ($20.50) and might as well drop the coin on a Bay and Tidal license ($15), even though my intended fishing destination would primarily be Prettyboy Reservoir, since the launch is mere minutes from my home.

https://en.wikipedia.org/wiki/Prettyboy_Reservoir

An annual boating permit for Prettyboy, with applications accepted beginning the third week of February, is $60. I’ll have almost as much money in the license and permit as in the canoe.

It has been a fun project thus far. I’ve used up some odd parts and pieces from shop stock, and as usual learned a few things. Had I simply installed two new seats and a yoke as originally considered I’d have been done in a day or two.

I still have a few minor finishing touches yet to go.
 
The Fishfinder is becoming a repository for parts and pieces I would not select for other outfitting and rebuilds. Leftover thwarts, weird paddle clips, SS pad eyes and blue foam comfort pads.

And one piece too nice for the Fishfinder, the Conk seat. But that seat just looked so nice and fit so well that once I laid it in place atop the gunwales there was no turning back. I’d wager I own the only soloized Pathfinder in existence equipped with a Conk seat.

PC300017 by Mike McCrea, on Flickr

I wanted a couple of vinyl pad D-rings, one towards the bow, one towards the stern. But not my precious Northwater nylon double-D’s. I had a couple vinyl pads with single SS D-rings, good enough. Still not feeling 100% I took special care, and managed not to glue them in with the D-rings facing down under the wax paper and sandbag weights.

PC290004 by Mike McCrea, on Flickr

The Fishfinder needed another decorative flourish or two. Some (green) High Intensity reflective tape bow and stern, and, with my steady handed artistic son home for the holidays, the usual Shop Gogetch on both sides of the bow. Which was originally the stern; I soloized the symmetrical Fishfinder backwards, to take advantage of some old seat hole locations for desired thwart locations.

There was another slight miscue in stenciling the shop Gogetch on the hull for fill-in-the-blank painting. I picked out the size Gogetch copy I wanted, taped a piece of carbon paper to the backside, taped the stencil in place on the hull and carefully traced the outline of the Gogetch with a pencil.

Raising one side of the paper to make sure I hadn’t missed scribing any areas I found that I had not missed any areas, I had missed every area. I had taped the carbon paper on wrong side down.

Remember “Some lessons I need to learn repeatedly”? Yeah, not the first time I have taped the carbon paper on wrong. Another bad word was said. I retaped the carbon paper facing in the corrected direction and retraced the outline.

PC270001 by Mike McCrea, on Flickr

But, I now had a reverse Gogetch image on the backside of the paper copy, so both Gogetch are facing the (newly oriented) bow.

PC300007 by Mike McCrea, on Flickr

PC300008 by Mike McCrea, on Flickr

(The blotchy white smutch near the HIN is residue from alcohol sap removal; at some point I need to wash the entire hull again)

About Gogetch orientation; Joel wanted a depiction of Mishipeshu on the bow of a canoe we were working on for him. I found a nice Mishipeshu drawing, photocopied it, carbon paper traced copies on both side of his canoe and hand painted them.

Hand paint them with one Mishipeshu facing the stern; Joel went off like I had deliberately drown him is a deep lake and I had to remove it. BTW, removing things painted on a hull is quick and easy, just lay some quality duct tape over the painted area and rip that crap off like you are yanking a band aid off your hairy arm; most of the paint will come off cleanly, just like your arm hair, but less ouchie.

Because of the seat/strap yoke/utility thwart spacing I will also be carrying the Fishfinder and putting it on the roof racks backwards. Er, original bow forwards, but under the strap yoke facing the new stern. Whatever, when I get it to the water I will presumably get in the canoe facing in the right direction.

Not much left to do on the basic rebuild and outfitting, still need some right sized 3 ½” machine screws for the seat and fishing thwart, and need to hacksaw off some excess thread from the paddle/fishing rod clips; those were designed to be screwed in place through small, raised, threaded posts, and I opted to use bolts, nuts and washers, again longer than I wanted/needed.

As usual I ran a bead of E-6000 adhesive sealant around the perimeter of the D-rings, heel pads and knee bumpers, to help prevent any water/dirt/grit infiltration under the vinyl pads or comfort foam parts.

I had four open holes in the gunwales from old seat frame hardware (the other four now accommodating new fore and aft thwarts).

PC300009 by Mike McCrea, on Flickr

Some teeny plugs, black G/flexed in place and those old holes vanished in the black vinyl gunwales. Black G/flex because the plugs I have are white.

PC300011 by Mike McCrea, on Flickr

A little bead of black pigmented G/flex in the holes, tapped the plugs in place and covered them with a coat of black G/flex.

The Dirt Queen Fishfinder continued to live up to its proud gunwales-in-the-earth heritage; a few gentle taps with a ball peen hammer to seat the plugs and dirt continued to fall out from between the inwales and hull.

PC300016 by Mike McCrea, on Flickr

The odd thing is I have whapped the lengths of both gunwales and deck plates with a rubber mallet ‘til no dirt fell out, but subsequent shakes, taps and pop rivet snaps continue to produce a cascade of gunwale dirt.

Next spring I’m using the power washer between the inwales and hull, and betting that action produces mud soup in the bilge. The forlorn Camper may not be as gunwale dirt clad, it was partially resting on the Pathfinder. On the other hand, as top boat, it had many more sap drips.
 
The too-long shank ends of the machine screws on the seats and utility fishing thwart had to go. Cap-nutted or not I abhor shank ends sticking down where my feet or legs go. Or anywhere else, but especially where my feet go; the thought of hooking a boot lace on a protruding machine screw during a capsize weirds me out.

I don’t like it when manufacturers use too-long machine screws, and refuse to rebuild a canoe that way in my shop. Gotta be gone.

P1010001 by Mike McCrea, on Flickr

Note that one of those too-long machine screws is already visibly bent. Those were all new machine screws, and I’m not sure how I managed to wank that one just by moving the canoe around in the shop, but all the more reason not to use too-long machine screws.

I thought about double nutting the shank ends, cutting the excess in situ with a hacksaw and then ratcheting off the second nut to help re-cut threads and adding a short thread protector. That seemed like a lot of ugly work, and I had a second look through the boxes (plural) of stainless steel hardware and found just the lengths I needed, although the seat hanger machine screws are now flat heads, not Phillips.

P1020019 by Mike McCrea, on Flickr

Tada, seat hardware re-installed and just about right.

P1010003 by Mike McCrea, on Flickr

I don’t mind the nuts and cap nuts sticking down a ways on the ¼” machine screws holding the sail/rod holder mount, those at least are in the center of the utility thwart, but the excessively long screws right where my feet and legs are positioned were a no-no.

P1010002 by Mike McCrea, on Flickr

Still a little long, but I wanted cap nuts on that near-footsie hardware, so good enough. I did have to hacksaw off the paddle clip/rod holder threads near the Nylock, and de-burr the ends with a file, but well worth it not to have machine screw ends hanging down a half-inch too deep where my feet and legs go.

P1010007 by Mike McCrea, on Flickr

God bless having boxes (and boxes) of stainless steel hardware, which I guess I need to sort through and size-segregate sometime this winter, so I do not again install the too-long only to later find the just-right.

Dang, the Fishfinder is pretty much finished. From this forlorn, rotted brightwork, dirt encrusted derelict:

PB140065 by Mike McCrea, on Flickr

PB140072 by Mike McCrea, on Flickr

To new life as a day paddling, sailing, fishing canoe.

P1010009 by Mike McCrea, on Flickr

P1010015 by Mike McCrea, on Flickr

P1010018 by Mike McCrea, on Flickr

Not counting shop stock stuff like epoxy, bungee and sundry stainless, and the wonderful Conk seat, most of the outfitting parts and pieces were unused miscellanea, or stuff like the sail, back band, compass and map case that transfer from canoe to canoe. Total costs in newly purchased items for this rebuild:
$100 for the Pathfinder
$11 for the Scotty Rod Holder
$5.40 for 2 more Yoga Blocks (not needed as it turned out)
$9.50 for the webbing yoke slide buckle
$125.90

Spending a couple weeks (and counting) diddling around in the shop on a rebuild:
Priceless

I think I’m going to enjoy the Fishfinder, and be reminded of memorable two-family trips with Kathy, Ben, Sam & Quinn.
 
Pretty dramatic before and after photos! Very nice repurpose/rehab. I've enjoyed following along. Thanks!
 
Pretty dramatic before and after photos! Very nice repurpose/rehab. I've enjoyed following along.

Rick, if you have followed past rehabs you know I am loath to stop “improving” a rebuild, and often see elements that bother me.

I really do not like that the only place to attach the painter lines is tied around the molded deck plate carry handles.

Those plastic deck plates are held in place by a few (poorly installed) pop rivets. I do not expect to ever have to Z-drag the Fishfinder free from a pin, but I sure as heck don’t want to be using pop riveted deck plates to do so.

A couple of Carlon conduit connectors, G/flexed in holes drilled in each stem, will provide beefy flanged fittings bow and stern for all of $2. Positioned non-lining high on the stems I won’t even need no-leak tubing inserts.

https://www.lowes.com/pd/CARLON-1-2-in-Conduit-Connector-Schedule-40-PVC-Compatible-Schedule-80-PVC-Compatible-Conduit-Fitting/1000999110?cm_mmc=shp-_-c-_-prd-_-elc-_-google-_-lia-_-206-_-pvcconduitfittings-_-1000999110-_-0&placeholder=null&ds_rl=1286981&ds_a_cid=11274110 0&gclid=Cj0KCQiA88X_BRDUARIsACVMYD_g_M5vznKTZ0dQ6A 3MXT9oVuEABSBSJFf9V7fZy2Ojj2TUb3TRhWgaAoYDEALw_wcB &gclsrc=aw.ds

That’s a simple, quickie outfitting task. It’s still winter, and I still need shop projects to keep me occupied and thinking.

I could start searching the wasteland of Craigslist again for my unicorn composite canoe to rebuild, but I recently received another 8 yards of discounted ($8.50 a 58” wide yard) heat sealable blue/purple Packcloth, from a Canoe Tripping gentleman who shall remain forum nameless.

The Fishfinder is not just an Angler Special, but, I hope, also a small stream/swamp/marsh day boat. It can be windy out on the marsh, or rainy in the swamp, or even when out fishing on the open reservoir, and drift casting on the reservoir I’d rather not blow along too speedily.

By my edumacated calculations I need 56” x 40” for a bow cover, and 39” x 36” for the stern, so just over two yards of 58” wide heat sealable Packcloth

Does the Fishfinder need partial spray decks? Not really. Is it getting partial spray decks? For less than $20 in fabric and snaps, you betcha.

But...but...but I really want to see a picture of you fishing out of it!

You may have to wait a couple months ‘til the reservoir reopens and the ice goes out.

I am tempted to go to the fish market, buy a whole salmon, stick a lure in its mouth, hold it up and take a selfie for you.
 
"Well, there’s no turning back now, the Conk seat is better built, better designed and lighter weight. That is 1lb+ off the weight versus using the old Explorer seat, and removing two OT seats will lose a bit more weight."

Mike, what is the dimension of the Conk seat from the back of the straight rear rail to front of the contoured rail? I've bought some seats and made some, but I think you are right and buying a Conk might be the smarter move for my Raven build.
 
what is the dimension of the Conk seat from the back of the straight rear rail to front of the contoured rail?.

10 ¼”

The hole spacing for machine screw drops is 8 ½” center-to-center and the webbed frame area is 20” wide.
 
Back
Top