• Happy National Audubon Day! 🐣🐦🦅🕊️

Dirt Magnet Canoe Question II

Maybe it's still my eyes or the camera playing tricks on me but those dark spots really look like holes in the weave. Not that there might not be dirt trapped in there as well but it looks like more than just the exposed texture of the weave. When I think of saturated cloth with exposed weave I think of a stripper just after it's been wetted out. The weave of the cloth is very obvious and pronounced but the depression between the weaves is filled in solid. Dirt would be harder to remove than normal but should be doable.

Starved cloth may or may not show the texture of the weave but in the depression between the weaves it shows a small hole rather than a solid depression. In either case more epoxy is probably the best course of action but in the case of starved cloth with pinholes in the weave in can be difficult to fill those with regular epoxy. The epoxy can be too thick to flow into the void and allow the air to escape. Often times I'll brush/roll the epoxy on and everything will look fine and then next time I turn around it burped a little air bubble and pushed the epoxy out of the hole. Then it's too thick to flow back in by itself.

I've had good luck using an ultra thin epoxy that wasn't much thicker than vinylester resin. It seemed to soak right into those little holes. I've also had good luck using thickened epoxy applied with a squeegee so that you're really forcing it down into those holes. Both those seemed to work better than straight epoxy.

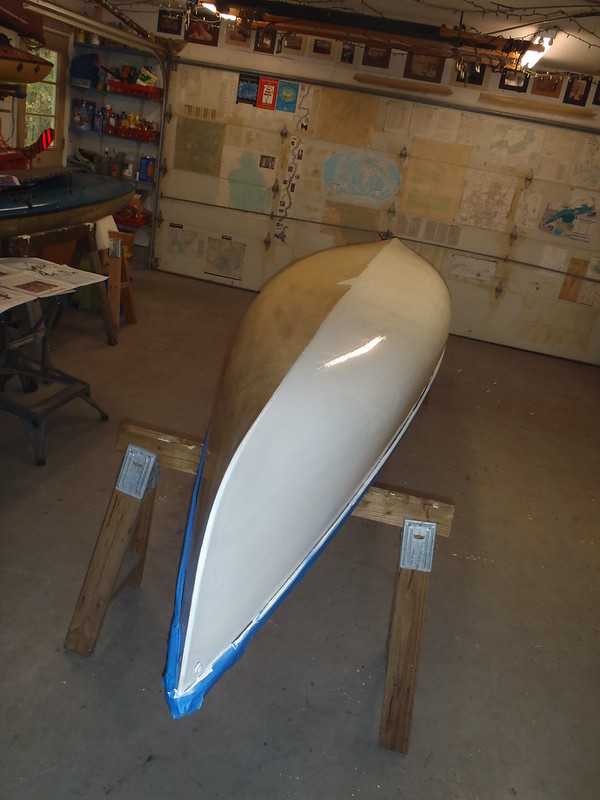
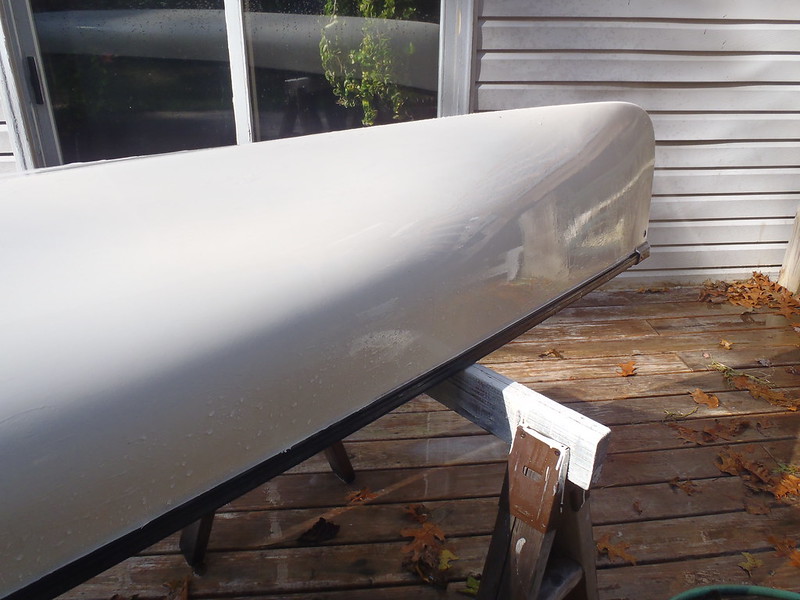
This has fully wetted out cloth with exposed weave. More epoxy and sanding is the easy way to fill it:
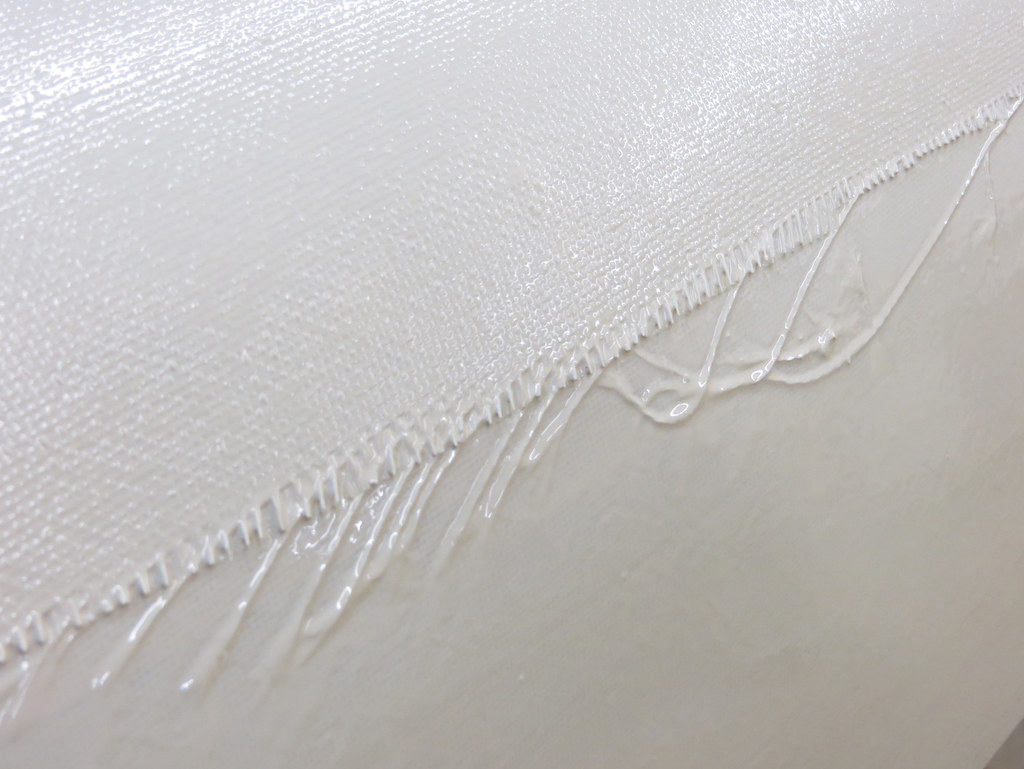
20150309_004 by Alan, on Flickr

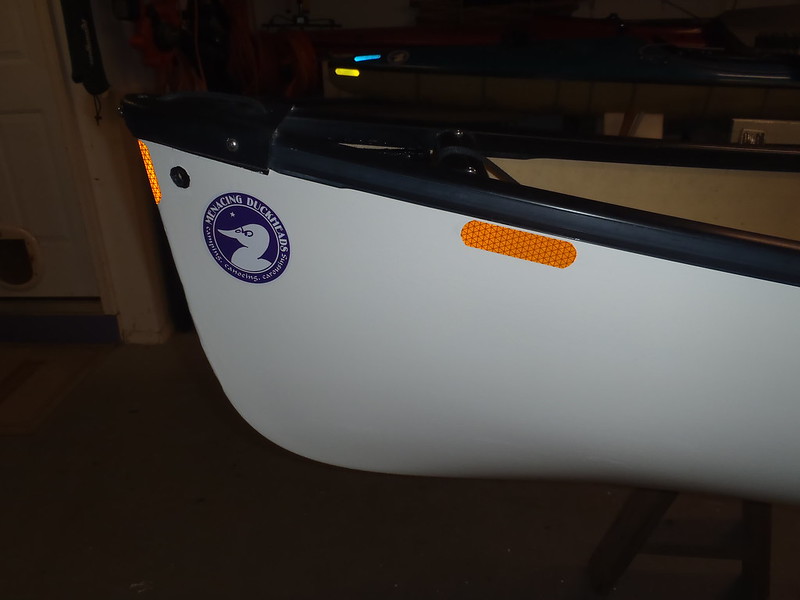
This cloth was badly starved. It did a good job sucking up a very thin epoxy. Regular epoxy probably wouldn't have worked so well:
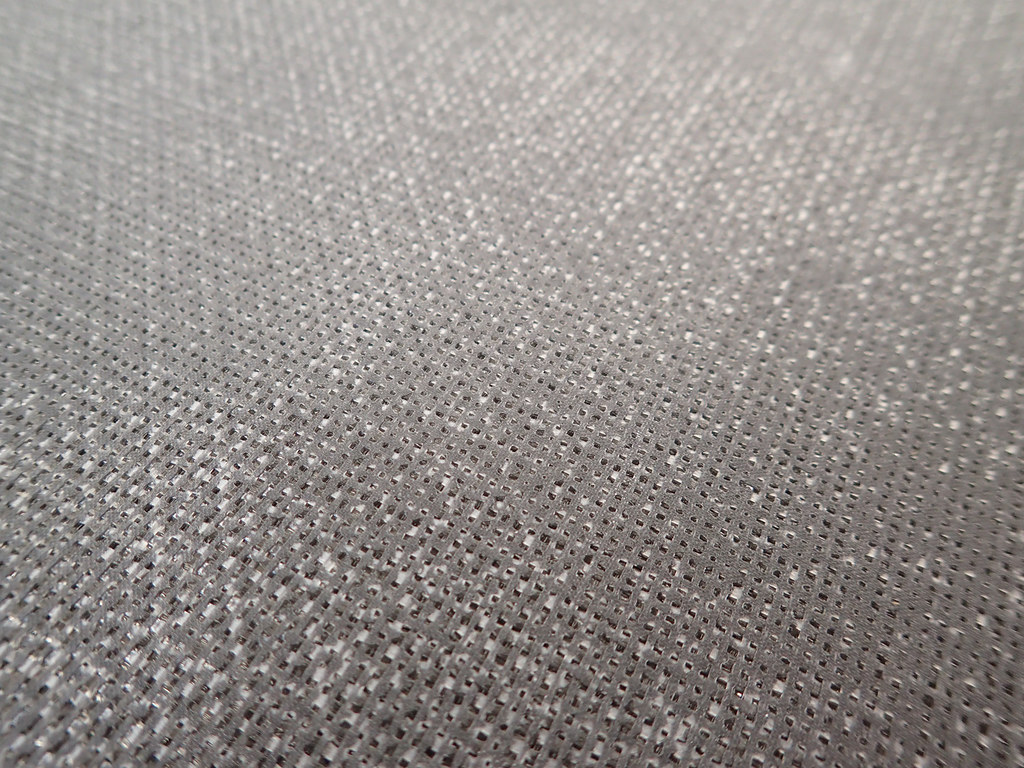
20160104_009 by Alan, on Flickr

Alan
 
After looking at those pics, It appears the gel coat has vanished, or was very thin to begin with. Does the surface feel smooth ?

Mike ? Has this hull spent it's life in the Sun ?

Applying resin to fill the weave might, or might not adhere.

I'd pressure wash big time ! and go with a good bottom paint.

My 2 $ worth !

Jim
 
When I glass the interiors of my Strippers, I like to fill the weave completely ! It makes it easier to clean.

Jim
 
Malecite Update

I acetone cleaned the hull and rolled on/tipped out a thin-ish coat of epoxy resin. The hull seemed to drink resin, 20+ ounces (I kinda lost count pumping out 5 oz batches)

The resin coat looks pretty good, a drip or two where I went back over the green epoxy to better cover areas where the weave was still apparent; with the first coat on it was hard to see where I had started and stopped rolling epoxy in patchy areas and I didn’t manage to tip everything out. Wabi sabi good enough, the epoxy coat filled 90% of the exposed weave and the paint coats will easily fill the rest.

One curious note. The hull is now a different color than the original off-white skin coat. It now looks very much like a clear coated kevlar hull.

I wish I had waited to buy the EZ Poxy. I bought a quart of Hatteras Off-White, which was close to the (then) skin coat color. Something like EZ Poxy’s “Fighting Lady” yellow would now be a closer match for when the paint inevitably scrapes through.

https://www.google.com/search?q=eas...KHa6cDA4Q9QEwAnoECAAQBg#imgrc=xml4U7FlX2ZROM:

I’m going to give the resin a week to fully cure and outgas (I have other projects on my plate in any case) before rolling/tipping the first coat of EZ Poxy.

I have a decision to make before painting. I’ll wash the hull to remove any possible amine blush or shop contaminates, and then either wet sand or scuff the entire surface.

220 or finer wet sandpaper, or ScotchBrite pads? Any recommendations?
 
If the scuffing is just for paint adhesion I'd use 220 grit.

If hand sanding I'd wet sand to eliminate dust but personally I'd use a ROS with vacuum attached.

Alan
 
If the scuffing is just for paint adhesion I'd use 220 grit.

If hand sanding I'd wet sand to eliminate dust but personally I'd use a ROS with vacuum attached.

Wet sanding it is. I meant to pick up more 220 wet while I was at the hardware store, but I had a cart full of long lumber and longer molding and didn’t want to navigate that unwieldy landing craft across 100 yards of store just for sandpaper. I have lots of 320 wet left, I’ll use that.

There are times and places where I choose the RO sander over anything else, but for some finish boat applications I’d rather spend the time and elbow grease to wet sand by hand.

There are a lot of rounded surfaces on a canoe, and it is easier than to use something (wet sandpaper wrapped around sponge) that conforms to the shape better than a flat RO pad. I like that the sponge helps keep the sandpaper wet.

Hand sanding mostly because it is a single coat of epoxy on a starved boat, which was rolled on thin and tipped out thinner, barely filling the exposed weave. I have inadvertently cut all the way though a thin layer of epoxy with the RO using 220, especially when incautiously sanding on rounded edges. Same with coats of varnish or spar urethane on wood, even on flat pieces I’ve zzzzzz’ed right through to bare wood with too little RO effort.

I hit the couple drips from missed tip outs on the patchy green coat of epoxy with RO and 220. Once I managed to find them again; I had already moved the canoe outside for wet sanding and the three little epoxy sags that were once highlighted under the shop fluorescent glare like the Vegas strip were really hard to locate once outside on a cloudy day.

I found them mostly by feel. Three little runs, all parallel within a couple inches of each other, running down the rounded chine of course. Marked with a Sharpie and now RO 220 gone. And I only cut through the epoxy coat in a pea sized area.

That’s enough RO sanding assistance. I’m not sure my EZPoxy paint job will come out as good as my epoxy work, but no there was sense laying paint atop those sags.

Wet sanded by hand and sponge did not take long, and the entire hull is now no-sheen dull. That 320 wet sanding did highlight any remaining runs and sags in the epoxy coat, but they feel smooth to the touch. Wabi sabi good enough.

Let it dry for a day, tape it up again and roll/tip on the first coat of EZPoxy.
 
There are a lot of rounded surfaces on a canoe, and it is easier than to use something (wet sandpaper wrapped around sponge) that conforms to the shape better than a flat RO pad

Interface pads are great for that. It's a 3/8-1/2" thick piece of foam that goes between the backing pad and paper so it will conform to curved surfaces. They're also great for rounding over sharp edges.

I'm sure this one doesn't fit your sander but will give you the idea: https://www.amazon.com/5-Inch-Spong...=1540562734&sr=8-6&tag=googhydr-20&ref=sr_1_6

Alan
 
Thanks, ordered a 2-pack

I figured there must be something like that, but not in the hardware stores I frequent.
 
Dirt Magnet Canoe results

Progress on the dirt magnet canoe migrated over to the EZPoxy thread since most of the work was painting and wet sanding. And painting and wet sanding and painting and wet sanding.

Final score: I washed and scrubbed five times to get rid of the weave embedded dirt. Wiped the hull down with acetone. One coat of West Systems 105/206 rolled on and tipped out. The hull seemed quite thirsty and I’m glad I opted to do a coat of epoxy first. Plus that epoxy coat filled most of the exposed weave.

One coat of Pettitt EZPoxy rolled and tipped, doing half the hull at a time.

PA261301 by Mike McCrea, on Flickr

Let cure and wet sand with 320. Rinse and wipe down. Second coat of EZPoxy, wet sand, rinse and repeat. Third coat of EZPoxy.

PA311313 by Mike McCrea, on Flickr

The usual shop decorations; Hi Intensity reflective tape on the bow and stern. Duckhead stickers and shop Gogetch alternating sides bow and stern. I enlisted #2 son to hand paint the shop Gogetch, he has a finer hand with small paint brushes than I.

PB051320 by Mike McCrea, on Flickr

PB041319 by Mike McCrea, on Flickr

The shop Gogetch is an homage to the Passamaquoddy canoe builders of old, incorporating Old Peter Polchies’ stone pipe, Joe Ellis’ crescent moon and star, the mark of Old Paul Solomon and a bit of Noel Polchies paddle (pages 84 & 85 of The Bark and Skin Boats of North America).

PB051323 by Mike McCrea, on Flickr

The bright white Malecite looks less stark with my personal flourishes.

there is good reason to make the canoe or outfitting one-of-a-kind easily identifiable. And to keep some digital photos thereof.

The canoe was likely already one of a kind easily identifiable, a skin coated UL Kevlar Malecite with IQ gunwales. The peculiar outfitting makes it even more so.

Extended and recessed deck plates with bungees, to easier hold the painters stored below the sheerline

PB081333 by Mike McCrea, on Flickr

PB081332 by Mike McCrea, on Flickr

Modified IQ system seat, modified IQ foot brace, DIY’ed IQ utility/sail thwart, oversized knee bumpers, heel pads

PB081337 by Mike McCrea, on Flickr

Strap yoke with SS double D rings. The seat is height adjustable, and (slightly) fore and aft adjustable, but my best position put my knees directly on the strap yoke, hence the need for split knee bumpers.

PB081345 by Mike McCrea, on Flickr

Even the IQ accessories (some modified) are sized to fit the Malecite. Zippered bow spray shield with arched stays.

PB081339 by Mike McCrea, on Flickr

Waterproof side storage bag

PB081334 by Mike McCrea, on Flickr

Zipper-open overbag to hold and protect floatation bags

PB081342 by Mike McCrea, on Flickr

As soon as we get a break in the weather (and we have a functioning kitchen and bathroom again, eeeeshh) I want to feel that old familiar Malecite glide, uncorrupted by 16 feet of exposed weave drag. Methinks she’ll quickly return to being one of my favorite big boy solos.

My thanks to all who helped steer me right in the refurbishment.

..
 
Back
Top