• Happy Marine Mammal Rescue Day! 🐳🐬🦭🦦

Barracuda Build

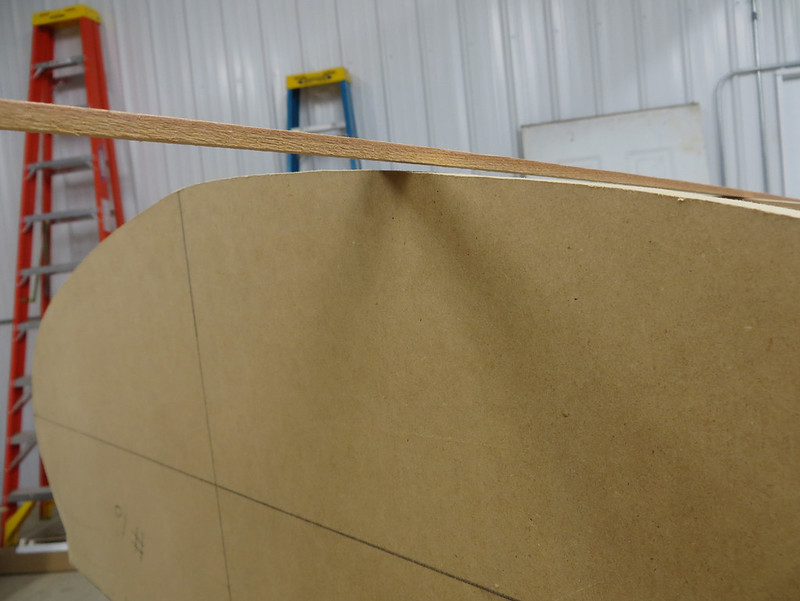
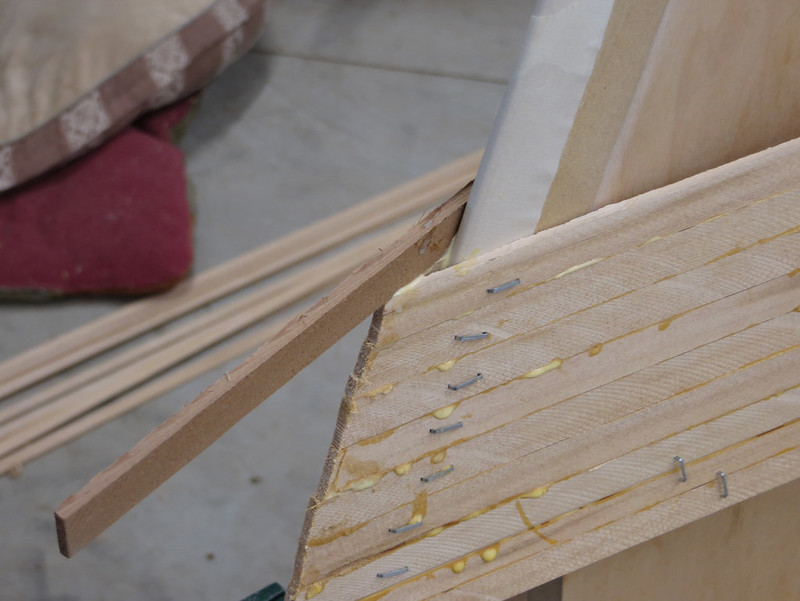
All done. 63 strips total. By the time I got to the last board I really had it figured out and then it was time to quit.
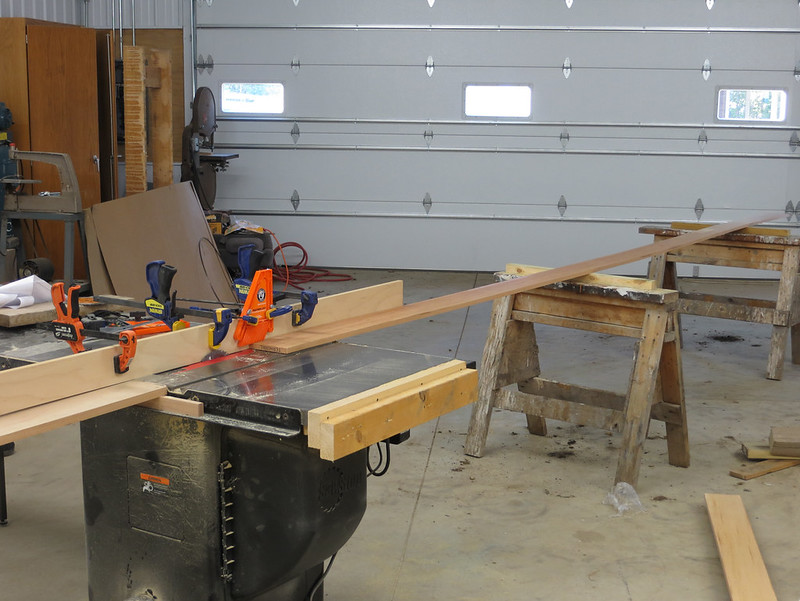
Initial setup:


20140703_001 by Alan Gage, on Flickr


20140703_002 by Alan Gage, on Flickr

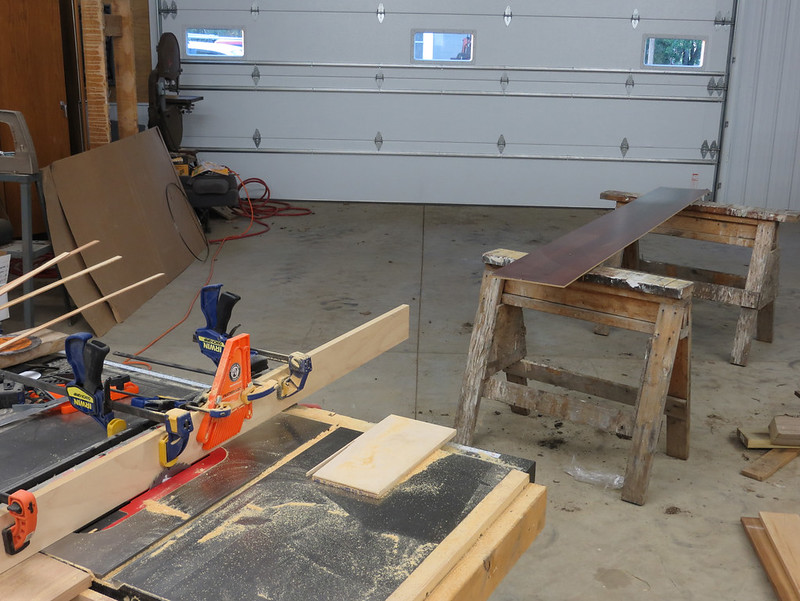
It didn't work too bad but it really bounced when the board came off the farthest sawhorse and then it drooped for a while, which lifted the board at the table saw and kept it from sliding nice and smooth. After the first board was done I laid a 2x6 between the sawhorses as a runway and topped it with a scrap piece of 1/4 melamine (slippery). This gave a nice smooth feed and made it very easy to adjust the tail left or right as needed while feeding. I don't know that the extended fence was really necessary.


20140703_003 by Alan Gage, on Flickr


20140703_004 by Alan Gage, on Flickr

I found the best position was to stand at the table with my left hand a little behind the blade and using it to push the board tight against the fence. I didn't have to move it, just kept it in position and let the board slide past. A glove kept slivers and friction burns to a minimum. The right hand would reach behind me to grab the edge of the board and pull it through a couple feet before reaching back for another grip. My eyes could stay on the blade and fence the whole time to be sure it was staying tight against the fence. Like I said, by the time I got to the last board I had the system down and things were going very smoothly. A feather board would have accomplished the same thing but I didn't have one I could clamp to the table. And it would need to be reset every couple strips as the board got narrower.


20140703_005 by Alan Gage, on Flickr

Tomorrow morning I drive 4 hours round trip to pick up a new (to me) canoe. Then I take said canoe for a paddle if it's not raining. Then I bead and cove.

Alan
 
Last edited:
5/32 is the thickness of planking on a w/c canoe. By the time you fair the finished boat inside and out you will have really thin wood. Nice and light I would imagine. A w/c canoe is light until the canvas goes on.
 
This thread rocks! I love the laser work :) Great photos. Thank you for taking the time to share.
 
5/32 is the thickness of planking on a w/c canoe. By the time you fair the finished boat inside and out you will have really thin wood. Nice and light I would imagine. A w/c canoe is light until the canvas goes on.

Yes. I'm hoping not too thin. This will not be a tripping boat, however, and will never carry more than me and my dog (if she fits). Just fitness paddling and the occasional race. It should have a pretty easy life. I didn't realize they were so thin on w/c.

Too windy to paddle the new boat today and I have lots of other important things to do.....so I worked on the boat instead. Got the bead cut on the strips. Took about an hour (after setup). By the time you factor in setting the routered strip aside and grabbing a new one I just couldn't get it to much under 1 minute per strip. I imagine the cove will be the same. Going to hang with some friends who are in town for a while and finish tonight.

I'm afraid I'm going to be short on strips (maybe should have used that band saw afterall :)). I was thinking I needed 57 for the entire boat but rereading the plans last night I see it's actually 62. So I have exactly enough if I don't screw up. But the boards I got were machined to 11/16 rather than 3/4. And by the time I get done with my bead and cove they'll be just under 5/8. The plans call for narrower than normal strips but it looks like I might be running short. I'll try to get as much stripping done as I can before I leave on my trip (3 days and I still haven't gotten anything ready!) so that if I'm short I can order in another board and it will be here when I get back. I really don't want to go through the whole ripping and coving process twice.

Alan
 
Alan,
Wow, you're really ripping along (pun intended).
If I were to build another Kite, I would cut my strips to be 5/32. That would have saved me nearly 5 lbs on my build. I know you like to build 'em light too.
I can't wait to see some cedar on those forms! I have come to absolutely love that smell!

So where is this 3 day trip of which you speak?
 
So where is this 3 day trip of which you speak?

Not a 3 day trip...leaving for a trip in 3 days. Picking up a friend in Seattle next Saturday and then we're heading to the Olympic Peninsula for a few days. Drop her back off at Seattle on Tuesday and I'm on my own after that for who knows how long. Will probably be gone a couple weeks. So many things I want to do but I'll never get to all of them. Guess they'll still be there next time. The Bell Northstar I just picked up should be a good tandem on the peninsula as well as allowing me some solo paddling on my own for the rest of the trip.

Sadie the wonder dog will be joining me of course.

Alan
 
Alan, what layup is your NorthStar? Does it have a kneeling thwart? I have a skincoat and put a seat in it where the kneeling thwart would go and it's been on two Boundary Waters trips paddled solo. With the leading edge of the seat 18" behind center, and the bow seat removed, a 60-lb. pack balances my 170 lbs. nicely with room for adjustment. Wishing you many happy miles of paddling.
 
Thanks for the info. It's the black gold layup with a kneeling thwart. I weigh about 165 and figured it will take my 30 lb dog plus some other weight up front to trim it out. I won't be making a habit of paddling it solo as I've got a few dedicated solos already but it will be nice to have something that can be solo'd in a pinch when I only have one boat along. Weather's looking a little iffy tomorrow but I'm very curious to see how it feels.

Alan
 
Finished cutting the coves last night. Went fine. Good job to have done. Setup was pretty easy. Just left everything in place from ripping the strips and set the router table in the mix so I could use the same in/outfeed. A lot of the strips wanted to curl during the process so they didn't always stay on track on the outfeed side. A couple strategically placed boards at an angled took care of that.


20140704_005 by Alan Gage, on Flickr


20140704_004 by Alan Gage, on Flickr

After that was done I finished off the forms. Started by plumbing them vertically to the strong back. As I was doing this I realized that a few posts back when I said it shouldn't matter if the strong back was level, as long as the forms lined up, wasn't quite true if you're plumbing them the way I am here:


20140705_006 by Alan Gage, on Flickr

Reason being that in this scenario I'm relying on the strongback to be level. If it's not my forms won't be plumb. I double checked though and my strongback was level so I kept using this method. Otherwise a level would work too. The strip running along the top of the forms is stapled to each one as they're brought plumb to hold them in place.

I did the best I could to fair the forms but it's really hard to hold a strip in place and site down it at the same time. How do the rest of you do it? I did manage to find this one before I started:


20140704_001 by Alan Gage, on Flickr

And the fix (sanded down after the glue dried and staples were removed:


20140704_002 by Alan Gage, on Flickr

And we're finally ready to strip!


20140705_007 by Alan Gage, on Flickr

It was a slow start. It calls for 1" shear strips but I don't have any 1" stock. I have some old 7/8" cedar from when I trimmed my house but it's full of knots and after ripping some strips decided that wasn't going to work. So instead I cut down some of my strips to 1/2" and used two on each side for the shear strips. After putting down the shear strip and sighting down it I could see a couple ugly dips and had to figure out how to fix that without removing the strips. All I did was pull the staples from the offending forms and then tore of a chunk of tape, folding it over on itself until it was the right thickness. Slipped it between the form and the strip and shot another staple.

Then it was a tight corner on the next strip as the tumblehome started, which involved beveling the strip. But then after that it was smooth sailing. The stripping is by far the funnest part of the build, too bad it doesn't last longer.


20140705_017 by Alan Gage, on Flickr


20140705_024 by Alan Gage, on Flickr


20140705_025 by Alan Gage, on Flickr

I'm actually a few strips farther along than the pictures show. It was a great day. So exciting to see its shape!

Alan
 
I'm doing stemless construction and am using the method I got from Northest Canoe in St. Paul.

You start by laying a strip and letting it run long:


20140705_011 by Alan Gage, on Flickr

Then using a small pull cut it off at the correct angle so that the opposing strip will lay right against the cut you just made. Sounds hard but it's pretty easy. The beveled stem makes a nice guide and point the end of the saw at the edge of the first form. This should get the angle pretty darn close.


20140705_012 by Alan Gage, on Flickr


20140705_013 by Alan Gage, on Flickr

Now that that's done lay the opposing strip on the other side of the boat and let it run long. It should lay in nicely against your fresh cut.


20140705_014 by Alan Gage, on Flickr


20140705_015 by Alan Gage, on Flickr

Alternate sides as you do this so the next strip that gets laid will be on top of the one pictured just above and it will be trimmed at an angle before the opposing side is placed. After you get half a dozen or so you can trim them off.


20140705_017 by Alan Gage, on Flickr

Alan
 
I recall the barracuda stripping quite quickly too, as there was not a lot to strip. The stemless construction should be interesting to see as you hit that radical angle. I recall having some difficulty getting my stems to bend to that almost 90 degree turn, even after soaking and steaming. I'm curious to know what kind of seat configuration you are thinking about. I put in a sliding seat, put after a few minutes in the canoe, disassembled it and put the seat on the floor.
 
The strips on the stems end where you see them in the pictures above. A solid block of cedar will sit on the strips and extend to the first station so the remaining strips will just butt into it, saving having to twist them so much. I'll have some pictures showing that tonight. That's what I did on my Kite and it worked well. Can't say if it's easier/harder than the other methods since that's the only way I've done it.

Alan
 
And as for the seat I'm not really sure what I'm doing yet. It will definitely be a slider but I don't know if I'll make a pedestal or attach it to the sides of the hull. Or maybe mount it on bulkheads like many of the racing solos. That would add quite a bit of strength I'd imagine. Also kicking around the idea of an adjustable height seat as well, similar to the old Sawyer solos. Hopefully inspiration will strike.

Do you remember the height of yours?

Alan
 
Think I hung it about three or four inches from the top of the gunwales, but ended up with it an inch or two form the floor.
 
Some pictures of the solid wood sabots, or shoes, that I'm using at the stems. Worked well on the Kite and so far so good here. I do need to remake the stern one a little taller as it's angled slightly downwards and there would be too much rocker as is.


IMG_0623 by Alan Gage, on Flickr


IMG_0622 by Alan Gage, on Flickr

The stripping went a lot slower today but I found the time to get it done. All the easy ones were done yesterday and all of them today involved cutting and fitting both ends. I got to work around 2:30 and when I quit for supper at 6:00 this is what it looked like:


20140706_009 by Alan Gage, on Flickr

It was a bit difficult getting everything to lay in properly near the stems where there's quite a twist on the strips. It doesn't look too pretty here but I think it will sand down fine. Once the bottom of the hull flattened out things went much smoother, literally and figuratively.


IMG_0632 by Alan Gage, on Flickr

Figured after eating I'd bang it out in a little over an hour then I could finally start getting ready for my trip and get a decent night's sleep. Instead it took a little over 3 hours and I didn't do any trip prep.

Here we are with one piece to go:


IMG_0634 by Alan Gage, on Flickr

And finally it's done!:


IMG_0635 by Alan Gage, on Flickr


IMG_0636 by Alan Gage, on Flickr


IMG_0637 by Alan Gage, on Flickr


IMG_0638 by Alan Gage, on Flickr

I think this is where I'll have to stop until I get back from the west coast in a couple weeks. I've got too much other stuff, including my job, that I need to do in the next couple days. Can't wait to get back, pulls staples, and get it sanded down!

Alan
 
Made it back home last night. Will be getting back to the boat this afternoon. A question about about fairing the hull:

Most instructions say to use a block plane, first running parallel to the hull and then at an angle to knock down the ridges and to start giving it shape. Then using the orbital sander to finish it off. Is this a must do or can I just jump right to the orbital sander? There are some ridges I'll be knocking down with a plane but overall it looks pretty smooth to start with and I'm tempted to just go right at it with the orbital sander after knocking off some tall ridges. I'm I going to regret this later? Should I use either a block plane at an angle or long sanding board to fair the hull first?

Alan
 
depends how much sand paper you want t use, the quality of your orbital sander, etc. I almost always use a small block plane first just to save sanding time. Takes me about a half hour to roughly plane the hull, and that reduces sanding time by a couple of hours. However, if you have an industrial strength sander, it won't matter.
 
Question for you Alan... Where does the Barracuda sit on the stability canoe charts? Do you have any idea about initial and final stability? BTW- thank you for taking the time to post pics and info about your build. It's great to see how these boats go from form to final form in a very short time. I also love your workshop. Great space. I used to have a 6000 sqft shop for building custom pieces of fine furniture. So my Hiawatha build is taking place in a single car garage along with all the other "family stuff"
 
depends how much sand paper you want t use, the quality of your orbital sander, etc. I almost always use a small block plane first just to save sanding time. Takes me about a half hour to roughly plane the hull, and that reduces sanding time by a couple of hours. However, if you have an industrial strength sander, it won't matter.

You were right. I tried just planing down the worst of the edges with a plane and then jumping right to the sander. It didn't remove material nearly as fast as I thought it would. So I went over the whole hull with a plane which, like you said, didn't take very long. Now I'm moving onto the sander and hope to have it ready for fiberglassing by the end of the day. Unless I stop to unpack from my trip. Naw, not gonna happen.

Question for you Alan... Where does the Barracuda sit on the stability canoe charts? Do you have any idea about initial and final stability?

I'm really not sure what I'll have. I expect it will have low primary stability but I'm hoping for good secondary. I also own a Bell Magic and an old Jensen WWC1. I imagine it will be a deal more tender than them but that's ok. As long as it's got some secondary stability I think I can deal with it.

Alan
 
Looking ahead to fiberglassing most people seem to think it's a good idea to put a thin coat of epoxy on the hull before actually laying the glass to keep the cedar from absorbing too much and starving the glass. Sounds good to me. But I also see most people are letting that seal coat fully cure before laying the glass. Is there any reason I can't lay the glass before the seal coat is fully cured? Not only would it save time waiting for the epoxy to harden but it should also achieve a better bond and eliminate sanding the seal coat once cured and washing to remove any amine blush.
 
Back
Top